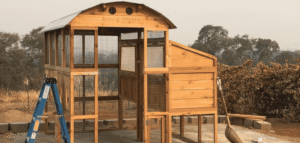
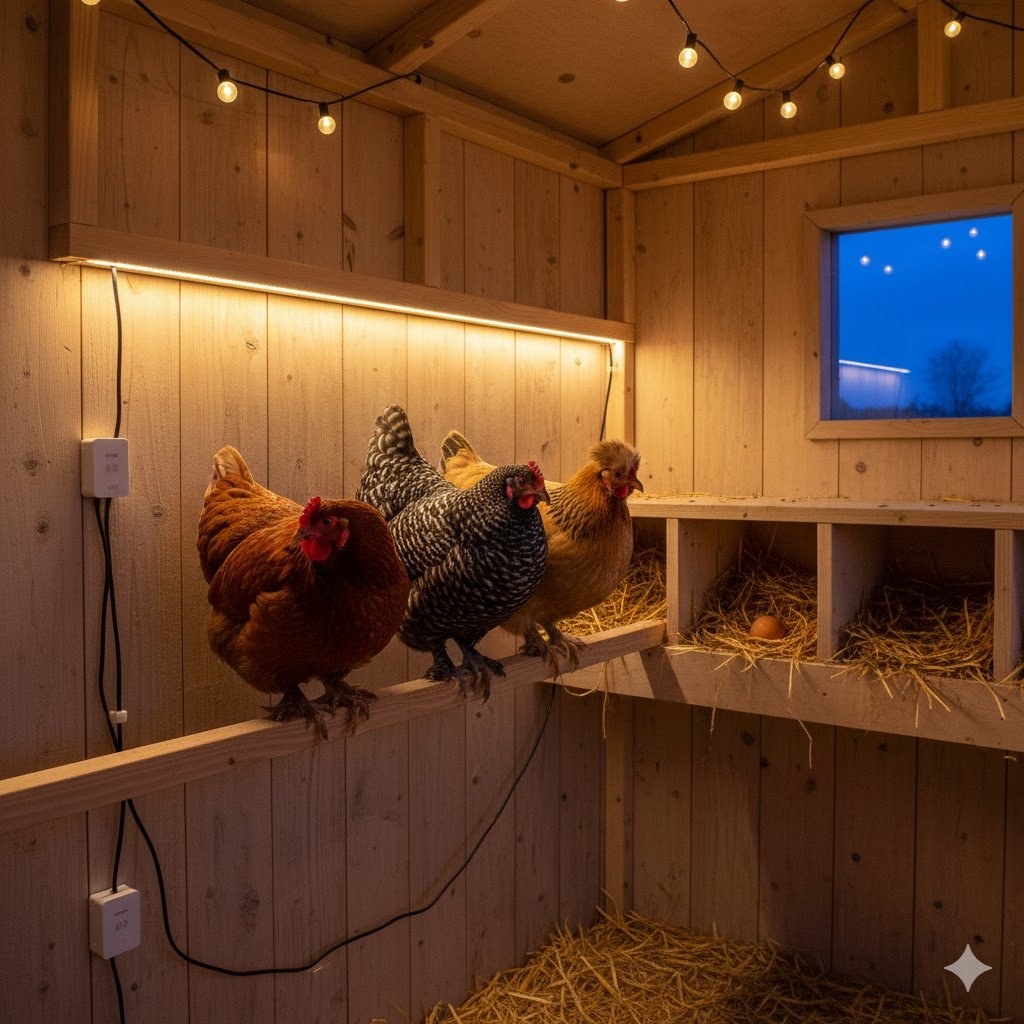
Running electricity to a chicken coop can be a real headache. Whether your coop is too far from the house, you’re trying to keep your utility bills down, or you simply want a more self-sufficient, eco-friendly setup, powering your coop can feel like a major challenge. When I installed my first solar panel for chicken coop use last spring, I discovered it was the perfect solution. It gave me the freedom to run lights, a ventilation fan, and even an automatic chicken coop door without digging trenches or calling an electrician.
Quick Answer: For a standard chicken coop with lights and a fan, you’ll need:
- 100-200W solar panel ($80 – $120)
- 50-100Ah deep cycle battery ($90 – $150)
- 10-20A MPPT charge controller ($40 – $60)
- Total investment: $260 – $405
- Installation time: 3-4 hours
In this guide, I’ll walk you through how to add solar power to your chicken coop for lights and fans, step-by-step. We’ll cover everything from figuring out how much power you need to choosing the right components and wiring it all together safely. By the end, you’ll have a clear plan to give your flock the modern comforts they deserve using clean, renewable energy.
Why Solar Power is Ideal for Chicken Coops
Switching to a solar lighting system for your poultry is one of the smartest moves you can make. The benefits extend beyond simple convenience into flock health, safety, and sustainability.
- Cost Savings: After the initial investment, the energy from the sun is free. You’ll see a direct reduction in your electricity bill, and the return on investment gets better every year. A well-designed system can pay for itself in just a few years.
- Grid Independence: Power outages won’t affect your flock. Your lights, fans, and automatic door will keep running, ensuring your chickens’ routine and safety aren’t disrupted. This is a game-changer for off-grid solar for poultry.
- Easy Installation: Compared to running a buried electrical line from your house, which can cost thousands and require permits, a solar setup for a small coop is much simpler and less invasive. Most DIYers can complete the project in a single afternoon.
- Eco-Friendly Energy: Using renewable energy for poultry reduces your carbon footprint. It’s a small but meaningful way to make your homestead more sustainable and align with a self-sufficient lifestyle.
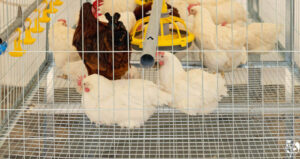
- Enhanced Biosecurity and Animal Welfare: Consistent power for fans improves air quality by reducing ammonia buildup, which prevents respiratory illnesses. Automatic doors secure the flock at night, protecting them from predators and reducing stress.
- Increased Property Value: An off-grid power setup, even a small one, can be an attractive feature for future buyers, adding value and appeal to your property.
By harnessing the sun, you’re not just powering a light bulb; you’re investing in a healthier, safer, and more resilient environment for your flock. Now, let’s determine exactly how much of that solar power you’ll need.
How Much Solar Power Do I Need for a Chicken Coop?
This is the most critical step, and getting it right ensures your system won’t fail when you need it most. An “energy audit” is just a simple inventory of your power needs.
The formula is: Device Wattage (Watts) × Daily Run Time (Hours) = Daily Energy Needed (Watt-hours)
Step 1: List Your Devices
First, list every electrical device you plan to use. Be thorough and think about all seasons.
Common Chicken Coop Equipment Wattage:
- LED Lights: 5 – 15 Watts
- Ventilation Fans: 10 – 50 Watts
- Automatic Coop Door: 3 – 10 Watts
- Water Heaters (for winter): 50 – 150 Watts
- Heat Lamps (high consumption): 100 – 250 Watts
- Security Camera: 5 – 10 Watts
- Heated Waterer Base: 25 – 60 Watts
Step 2: Create a Power Calculation Worksheet
Use a table like this to get a precise calculation. Here are three common scenarios:
Scenario 1: The Basic Setup (Lights & Fan)
| Device | Quantity | Wattage (W) | Daily Hours | Total Watt-hours (Wh) |
|---|---|---|---|---|
| LED Light | 2 | 10W | 4 | 80 Wh |
| Ventilation Fan | 1 | 30W | 6 | 180 Wh |
| Daily Total | 260 Wh |
Scenario 2: The Automated Coop (Lights, Fan, Door)
| Device | Quantity | Wattage (W) | Daily Hours | Total Watt-hours (Wh) |
|---|---|---|---|---|
| LED Light | 2 | 10W | 5 | 100 Wh |
| Ventilation Fan | 1 | 40W | 8 | 320 Wh |
| Automatic Door | 1 | 5W | 0.1 (6 min) | 0.5 Wh |
| Daily Total | 420.5 Wh |
Scenario 3: The All-Season Coop (Includes Winter Heating)
| Device | Quantity | Wattage (W) | Daily Hours | Total Watt-hours (Wh) |
|---|---|---|---|---|
| LED Light | 2 | 10W | 6 | 120 Wh |
| Heated Waterer | 1 | 60W | 12 | 720 Wh |
| Daily Total | 840 Wh |
Step 3: Add a Safety Margin
Always add a 25% buffer to your total. This accounts for cloudy days, system inefficiencies, and future additions.
LBasic Setup: 260 Wh * 1.25 = 325 Wh
- Automated Coop: 420.5 Wh * 1.25 = ~526 When
- All-Season Coop: 840 Wh * 1.25 = 1050 Wh
With this final number, you have a clear target for the energy your system needs to generate and store daily. This calculation is the foundation for selecting the right components for a reliable and effective system.
Essential Components for Your Solar Chicken Coop Setup

A solar power system has four main parts: the panel (generation), the battery (storage), the charge controller (regulation), and the wiring (distribution). Choosing quality components that are correctly sized for your needs is crucial.em has four main parts. Getting these right is key to a reliable setup.
Solar Panels: Choosing the Right Size and Type
The solar panel is the heart of your system. It converts sunlight into DC electricity.
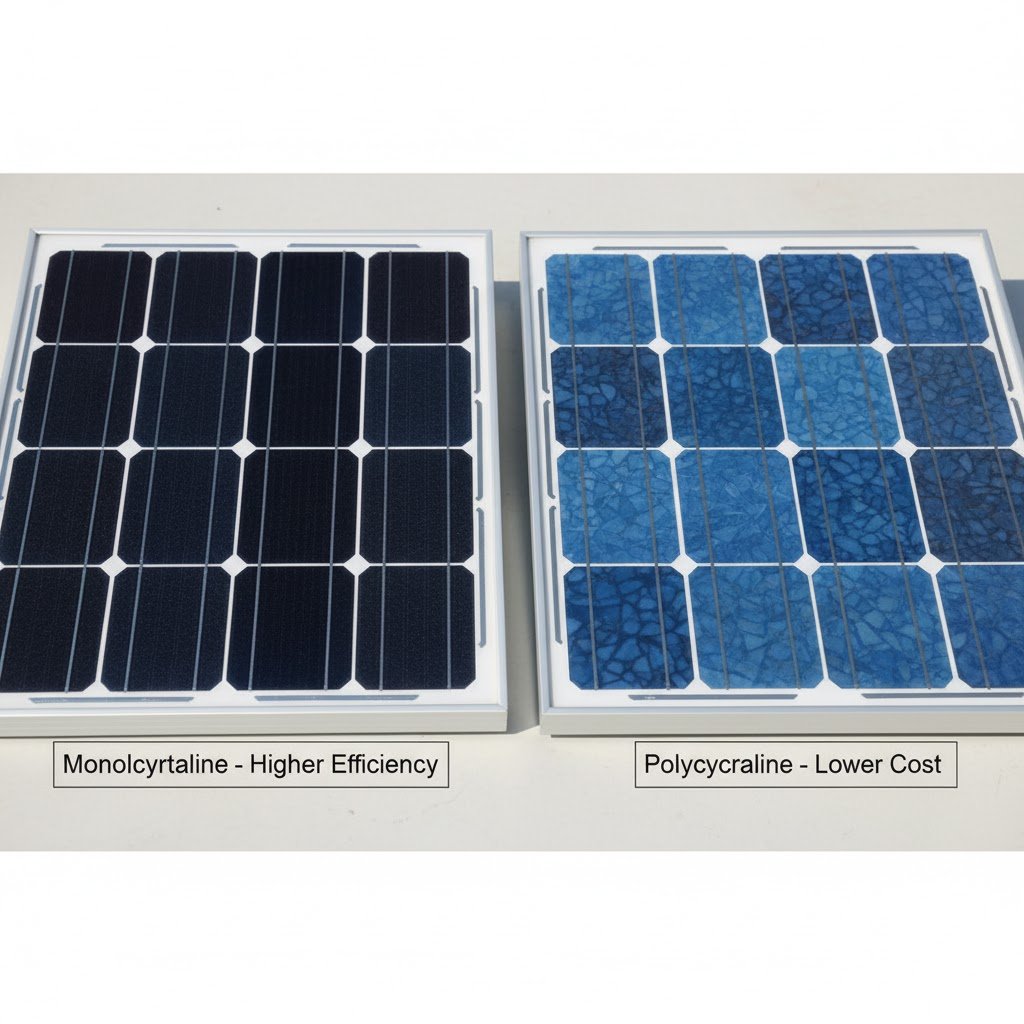
- Monocrystalline vs. Polycrystalline Panels: According to industry leaders like Renogy, monocrystalline solar panels are more efficient and perform better in low-light conditions, but they cost a bit more. Polycrystalline panels are slightly less efficient but more budget-friendly. For the reliability needed in a coop, I strongly recommend a monocrystalline panel.
| Feature | Monocrystalline Panels | Polycrystalline Panels |
|---|---|---|
| Efficiency | Higher (15-22%) | Lower (13-16%) |
| Performance | Better in low light & high heat | Less efficient in high heat |
| Appearance | Uniform black color | Bluish, speckled look |
| Cost | More expensive | More budget-friendly |
| Best For | Maximum power in limited space | Budget projects with ample space |
- Recommended Wattage: For most coops running lights and a fan, a 100W to 200W solar panel is the sweet spot. A 100W panel can generate roughly 300-400 Watt-hours on a sunny day, which covers our example calculation perfectly.
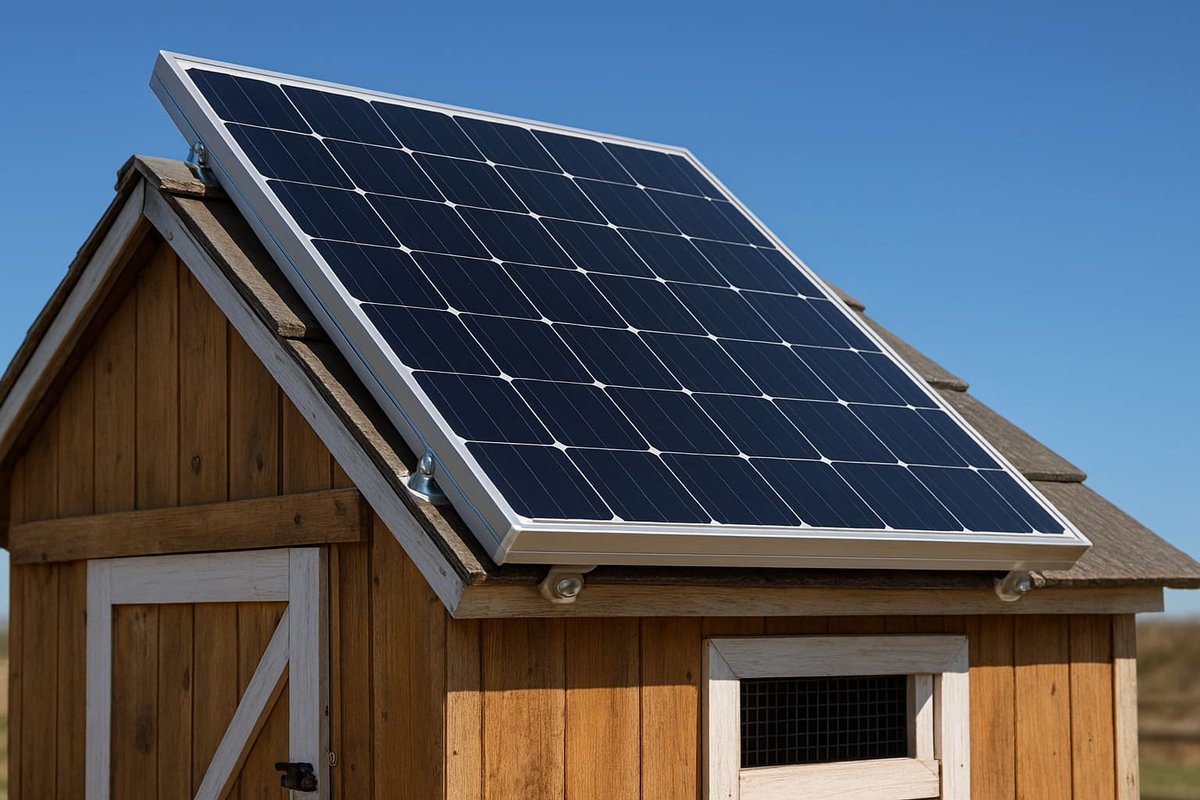
- Placement: Your panel must be a weatherproof solar panel to withstand the elements. Mount it on the coop roof or a nearby pole where it will get at least 4-6 hours of direct, unobstructed sunlight per day.
Battery Storage Systems
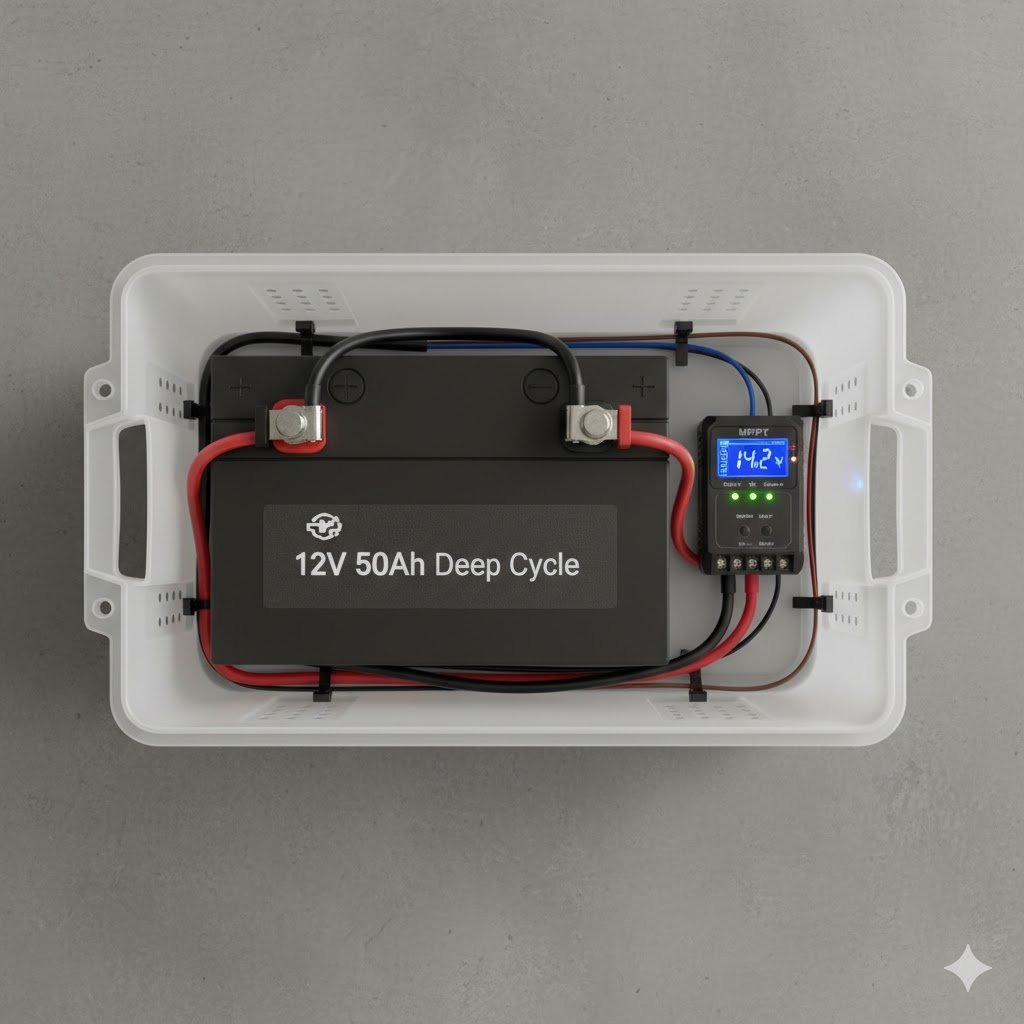
Your panel only generates power when the sun is out. A battery stores that power for use at night or on cloudy days, providing a reliable battery backup for your chicken coop.
- Battery Type: You need a deep cycle battery, which is designed to be discharged and recharged many times. Standard car batteries will not work. Good options include RV, marine, or AGM batteries. For a premium setup, a lithium battery is lightweight and has a much longer lifespan, a topic covered in depth by resources like Battery University.
| Feature | AGM (Absorbent Glass Mat) | Lithium (LiFePO4) |
|---|---|---|
| Lifespan | 3-7 years (500-1000 cycles) | 10-15+ years (3000-5000+ cycles) |
| Usable Capacity | 50% recommended | 80-100% usable |
| Weight | Heavy | Lightweight (approx. 50% lighter) |
| Upfront Cost | Lower | Higher |
| Best For | Budget-conscious setups | Long-term investment, high performance |
- Capacity (Amp-hours): Battery capacity is measured in Amp-hours (Ah). To figure out what you need, use this formula:
(Daily Watt-hours / Battery Voltage) × Days of Autonomy. For a 12V system needing 325 Wh and 2 days of backup:(325 Wh / 12V) * 2 days = 54 Ah. A 12V, 50-100Ah deep cycle battery is a great starting point for most coops.
Charge Controllers Explained
A solar charge controller is the brain of your system. It sits between the solar panel and the battery and acts like a smart valve. Its job is crucial: to regulate the voltage from the panel and prevent the battery from overcharging, which can destroy it.
- PWM vs. MPPT: PWM (Pulse Width Modulation) controllers are cheaper and fine for small systems (like a 100W panel). MPPT (Maximum Power Point Tracking) controllers are more advanced and efficient, squeezing about 15-30% more power out of your panel, especially in cold weather or low light. The extra $30 for an MPPT controller is absolutely worth it in my opinion.
| Feature | PWM (Pulse Width Modulation) | MPPT (Maximum Power Point Tracking) |
|---|---|---|
| Efficiency | 75-80% | 95-99% |
| Performance | Best for small systems in sunny climates | Significantly better in low light & cold weather |
| Panel Voltage | Must match panel voltage to battery voltage | Can use higher voltage panels than battery |
| Cost | Cheaper | More expensive |
| Best For | Small (<150W), simple systems, budget builds | Any system where efficiency is a priority |
- Sizing: The controller is rated in amps. To size it, divide your panel’s wattage by your battery voltage (
100W / 12V = 8.3A). Choose a controller rated slightly higher, so a 10A or 20A controller would be perfect.
Inverters and Wiring
- DC vs. AC Power: Solar panels and batteries produce DC (Direct Current) power. Most small coop appliances like LED lights and fans run natively on 12V DC power. If you can, use DC appliances to avoid energy loss.
- Inverter: If you need to run standard household appliances that plug into a wall outlet (which use AC – Alternating Current), you’ll need an inverter. The inverter converts DC power from the battery to AC power. This conversion wastes about 10-15% of your energy, so only use one if absolutely necessary.
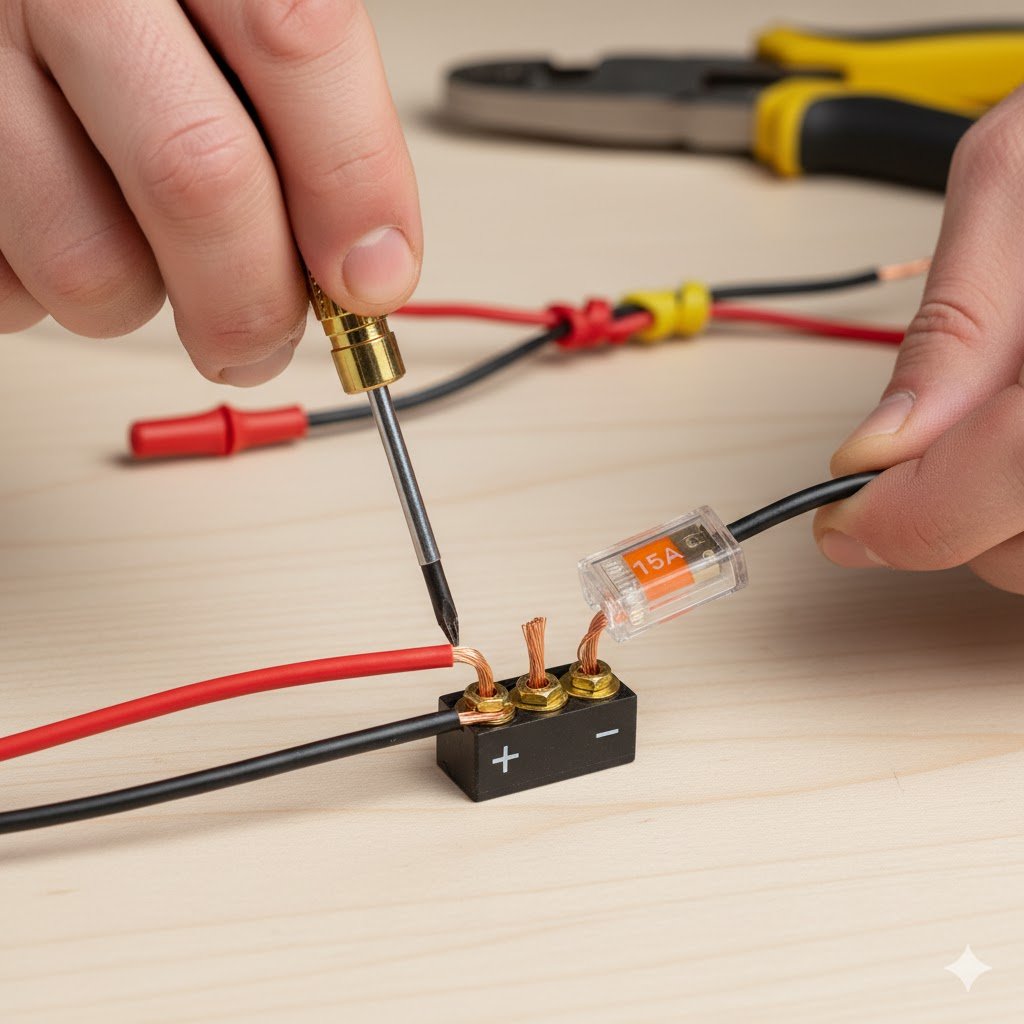
- Wiring: Use the correct wire gauge (thickness) to prevent overheating and power loss. For a small 12V system, 10- or 12-gauge UV-resistant wire is usually sufficient.
Step-by-Step Installation Guide: How to Add Electricity to a Chicken Coop
Here’s how to put all the pieces together. Important Safety Note: Working with electrical systems can be dangerous. If you’re not comfortable with basic electrical work, consult a licensed electrician. Always follow manufacturer safety guidelines and refer to local regulations, which often align with the National Electrical Code (NEC).
Step 1: Calculate Your Power Requirements
Before you buy anything, use the worksheet method from above to calculate your total daily Watt-hour needs. This will determine the size of your panel, battery, and controller. Be realistic about what you want to power.
Step 2: Position Your Solar Panel
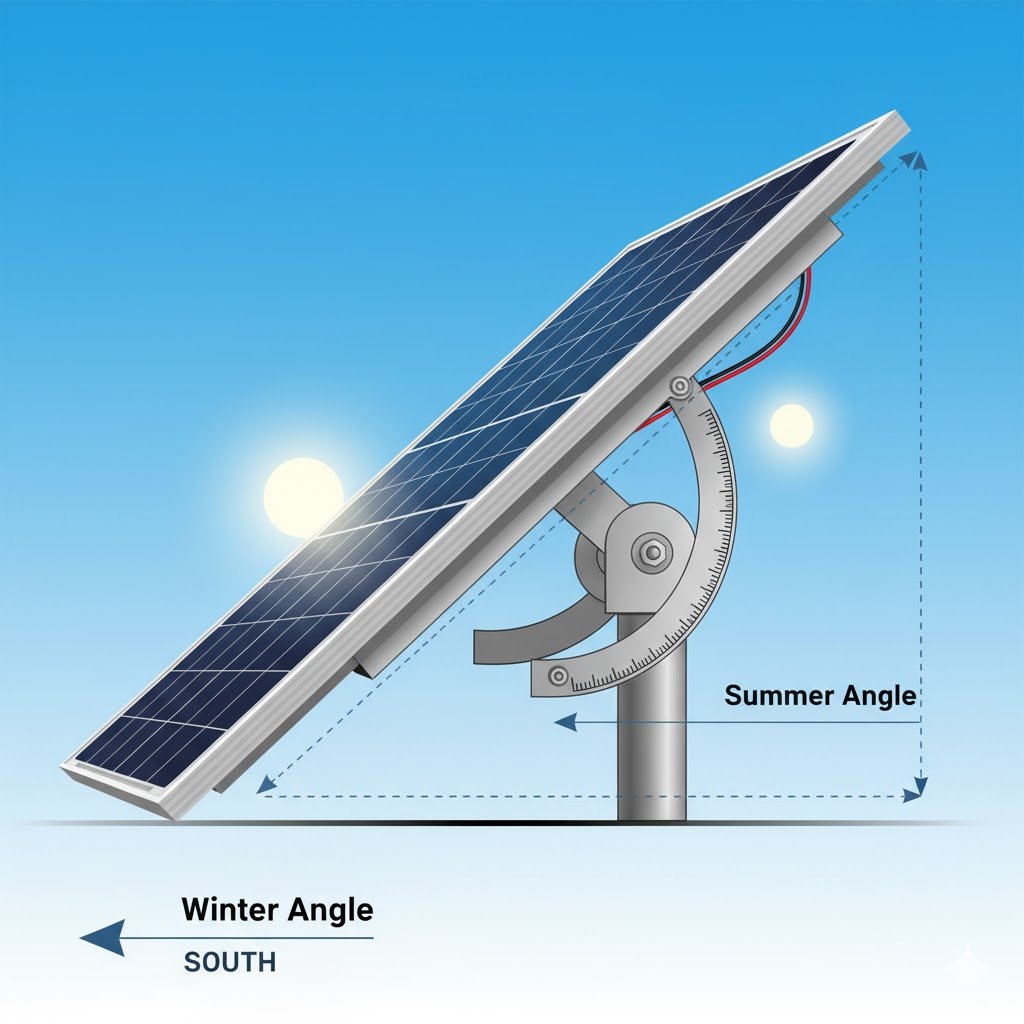
- Direction: In the northern hemisphere, your panel should face true south. In the southern hemisphere, it should face true north.
- Angle: The optimal angle is roughly equal to your latitude. Many mounts are adjustable, so you can set a steeper angle in the winter and a flatter angle in the summer to catch the most sun.
- Shade: Even a small amount of shade on the panel can drastically reduce its output. Make sure there are no tree branches or buildings blocking the sun during peak hours (9 AM – 3 PM).
- Mounting: Use sturdy, weatherproof mounting brackets. Secure the panel firmly to the coop roof, ensuring it’s sealed with silicone to prevent leaks.
Step 3: Install Battery Storage and Charge Controller
Your battery and charge controller should be protected from the elements and from your chickens.
- Housing: Place the battery and controller inside a weather-resistant container, like a battery box or a small plastic tote. I mounted mine just inside the coop wall in a ventilated box.
- Ventilation: Lead-acid batteries can release hydrogen gas when charging. Ensure the container has some ventilation to prevent gas buildup.
- Connection Sequence (Safety First!): The order you connect the wires is extremely important to avoid damaging your controller.
- Connect the battery to the charge controller.
- Connect the solar panel to the charge controller. (Keep the panel covered with a blanket while you do this to prevent it from generating power).
- Connect your devices (the “load”) to the charge controller.
- Uncover the panel. The controller should light up, indicating it’s charging the battery.
Step 4: Wire Your Coop Devices
Run wires from the “load” terminals on your charge controller to your lights and fans.
- DC Circuit: For a simple 12V DC setup, you can wire your devices directly. Use wire nuts and electrical tape to secure all connections.
- Timers: To automate your lights for consistent egg production, install an inexpensive 12V DC timer between the charge controller and the lights.
- Fuses: It’s a very good idea to install an in-line fuse between the charge controller and the battery, and between the controller and your devices, to protect against short circuits.
Step 5: Test and Optimize Your System
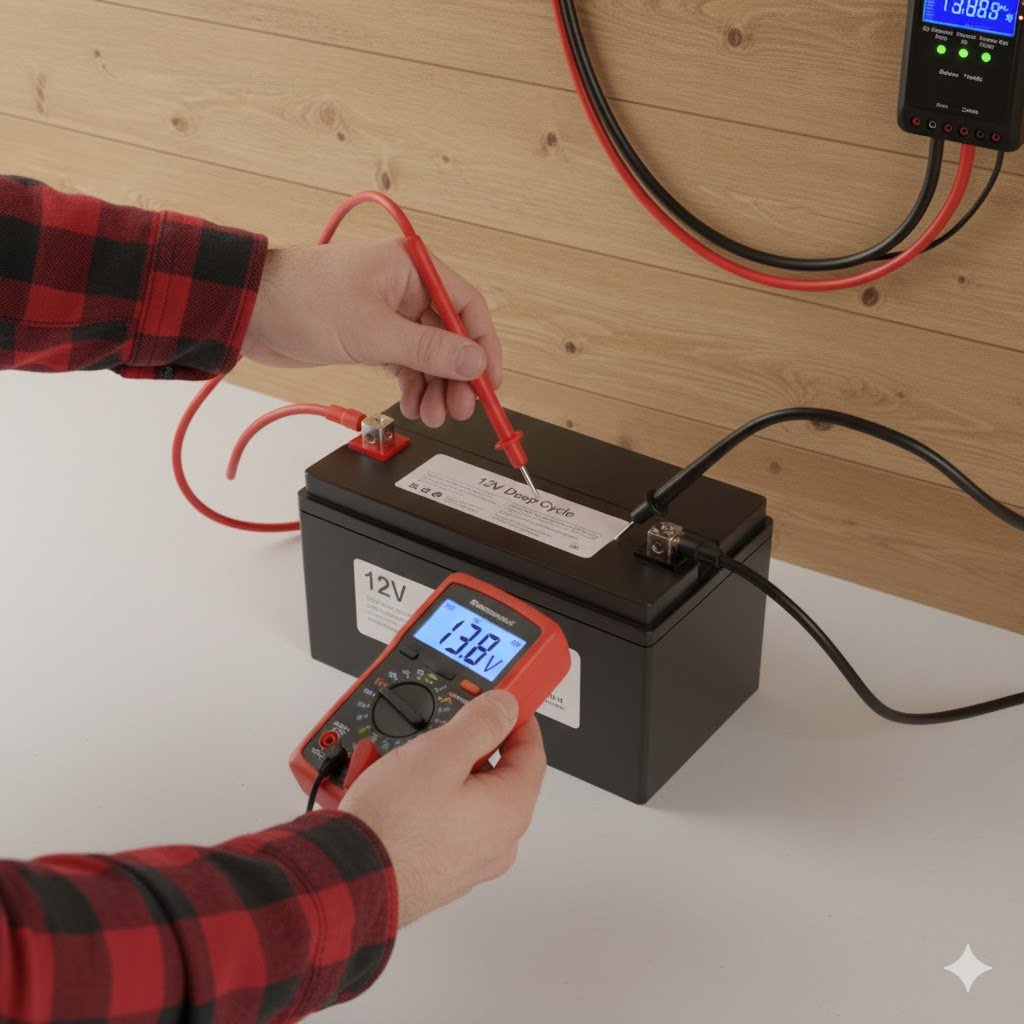
Once everything is connected, use a multimeter to test the voltage at the battery terminals to ensure it’s charging. Most charge controllers have indicator lights that show the system status. Monitor the system for a few days to make sure your battery is staying charged and your devices are running as expected.
How Much Solar Power is Needed to Run a Fan?
A dedicated solar powered fan is one of the best upgrades for proper coop ventilation. To run a typical 12V, 30W coop fan for 8 hours a day, you’d need:
- Energy: 30W × 8 hours = 240 Watt-hours per day.
- Solar Panel: A 100W panel is more than enough to generate this and charge a battery.
- Battery:
(240 Wh / 12V) = 20 Ah. A 12V, 35Ah battery would provide enough power for the fan and have some backup for a cloudy day.
This simple setup can be a lifesaver in hot climates, preventing heat stress in your flock.
Best Solar Fans for Chicken Coops: DIY and Pre-Made Options (2025)
You have several options for chicken coop solar fans, from complete kits to DIY solutions. Selecting the right one depends on your budget and whether you need nighttime operation.
Solar Fan Comparison at a Glance
| Product | Price | Panel Wattage | Battery | Best For | Rating |
|---|---|---|---|---|---|
| ECO-WORTHY 25W Kit | $60 – $80 | 25W | None | Daytime ventilation | 4/5 |
| Remo-Tech 30W Kit | $150 – $180 | 30W | Included | 24/7 operation | 5/5 |
| DIY Radiator Fan | $40 – $70 | (from main system) | (from main system) | Custom integration | 4.5/5 |
Product Reviews: Pre-Made Kits and DIY Components
- ECO-WORTHY 25W Solar-Powered Fan Kit:
- My Recommendation: Best for budget-conscious owners in sunny climates who just need to move air during the hottest part of the day.
- Pros: Extremely easy to install, affordable, perfect for daytime-only ventilation.
- Cons: No battery backup for nighttime or cloudy day operation.
- Purchase Guidance:
- Where to Buy: Available on Amazon and directly from the ECO-WORTHY website.
- Warranty: Typically includes a 1-year limited warranty on components.
- Installation Difficulty: Easy. This is a great beginner-friendly, plug-and-play kit.
- Remo-Tech 30W Solar Fan Kit with Battery:
- My Recommendation: The best all-in-one solution if you want a reliable fan that runs day and night without piecing a system together yourself.
- Pros: Complete kit with battery for 24/7 operation, powerful dual fans move a lot of air.
- Cons: Higher price point.
- Purchase Guidance:
- Where to Buy: Commonly found on Amazon and through specialized off-grid solar retailers.
- Warranty: Usually comes with a 1-year manufacturer warranty.
- Installation Difficulty: Easy to Moderate. Involves connecting the battery pack, but instructions are generally clear.
- Building Your Own with a 12V Radiator Fan:
- My Recommendation: Ideal for those who have already built the main solar system and just want to add a high-power fan to the “load” output.
- Pros: You can choose a powerful fan and integrate it directly into the larger solar system you’ve already built.
- Cons: Requires more DIY wiring and electrical knowledge.
- Purchase Guidance:
- Where to Buy: Components can be sourced from auto parts stores, electronics retailers like Digi-Key, and Amazon.
- Warranty: Varies by component manufacturer.
- Installation Difficulty: Moderate to Advanced. Requires a solid understanding of 12V DC wiring and safety.
Installing Your Solar-Powered Ventilation Fan
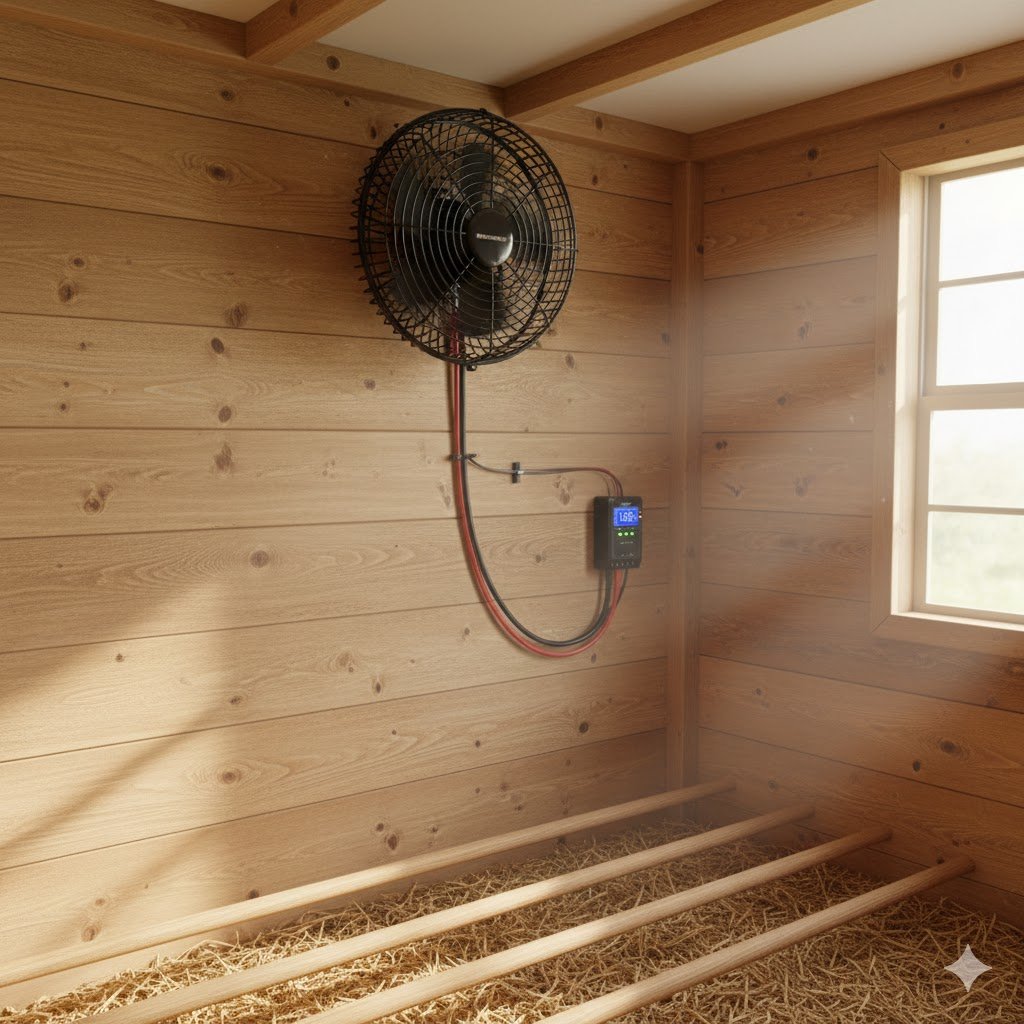
For the best airflow, place your fan high up on one wall of the coop. You want it to pull hot, stale air out. Ensure there is an opening on the opposite side of the coop, like a window or vent, to allow fresh air to be drawn in. This creates a cross-breeze that is far more effective. Wire the fan directly to your charge controller’s load terminals or to a separate switch.
How to Heat a Chicken Coop with No Electricity
This is a critical question for those in cold climates.
Solar Heater Options vs. Passive Heating Methods
While you can use a solar heater for a chicken coop, like a 100W heat lamp, its high power draw will require a much larger and more expensive solar setup (at least 300-400W of panels and a large battery bank).
For a more sustainable and cost-effective approach, focus on passive and non-electric methods first:
- Insulation: Insulate the coop walls and ceiling to trap the chickens’ body heat.
- Passive Solar Heating: Install a south-facing window to let winter sunlight warm the interior during the day.
- The Deep Litter Method: A thick layer (8-12 inches) of pine shavings on the coop floor will compost in place, generating a surprising amount of natural heat.
- Eliminate Drafts: Seal all cracks and drafts, but ensure there is still adequate ventilation high up in the coop to let moisture escape.
Supplemental heat is often not needed unless temperatures drop into the single digits Fahrenheit, especially for cold-hardy breeds.
Advanced Questions Answered
Will a Heat Lamp Charge a Solar Panel?
No, a heat lamp will not charge a solar panel. Solar panels are designed to convert a specific spectrum of light from the sun into electricity. An incandescent heat lamp produces mostly infrared light (heat) and very little of the visible light spectrum that a solar panel needs. The intensity is also far too low. You would consume 250W of power to run the lamp and generate maybe 1W of power from the panel—it’s a net loss.
How Many Solar Panels Does it Take to Run a Pump?
Running a water pump follows the same principle as everything else: check the pump’s wattage. A small 12V DC water pump for a chicken waterer might only use 15-20 Watts. If it runs for short bursts throughout the day (totaling maybe 1 hour of runtime), it would need only 20 Watt-hours. A single 50W or 100W solar panel could easily power the pump and keep a battery charged.
Cost Breakdown: Budgeting Your Solar Chicken Coop Project
Here are some realistic cost ranges for a DIY system powerful enough for lights and a fan. (Prices as of mid-2025).
- 100W Monocrystalline Solar Panel: $80 – $120
- 20A MPPT Charge Controller: $40 – $60
- 12V 50Ah Deep Cycle AGM Battery: $90 – $150
- Wiring, Mounts, Fuses, and Connectors: $50 – $75
- Total DIY Cost: $260 – $405
A pre-made kit with similar components might cost $350-$500 but saves you the time of sourcing individual parts. A lesson I learned: buy extra wire. Nobody tells you this, but you’ll almost always need a few more feet than you think.
Maintenance and Troubleshooting
Your solar system is mostly hands-off, but a little maintenance goes a long way.
- Monthly Checklist:
- Wipe down the solar panel with a soft cloth and water to remove dust and bird droppings.
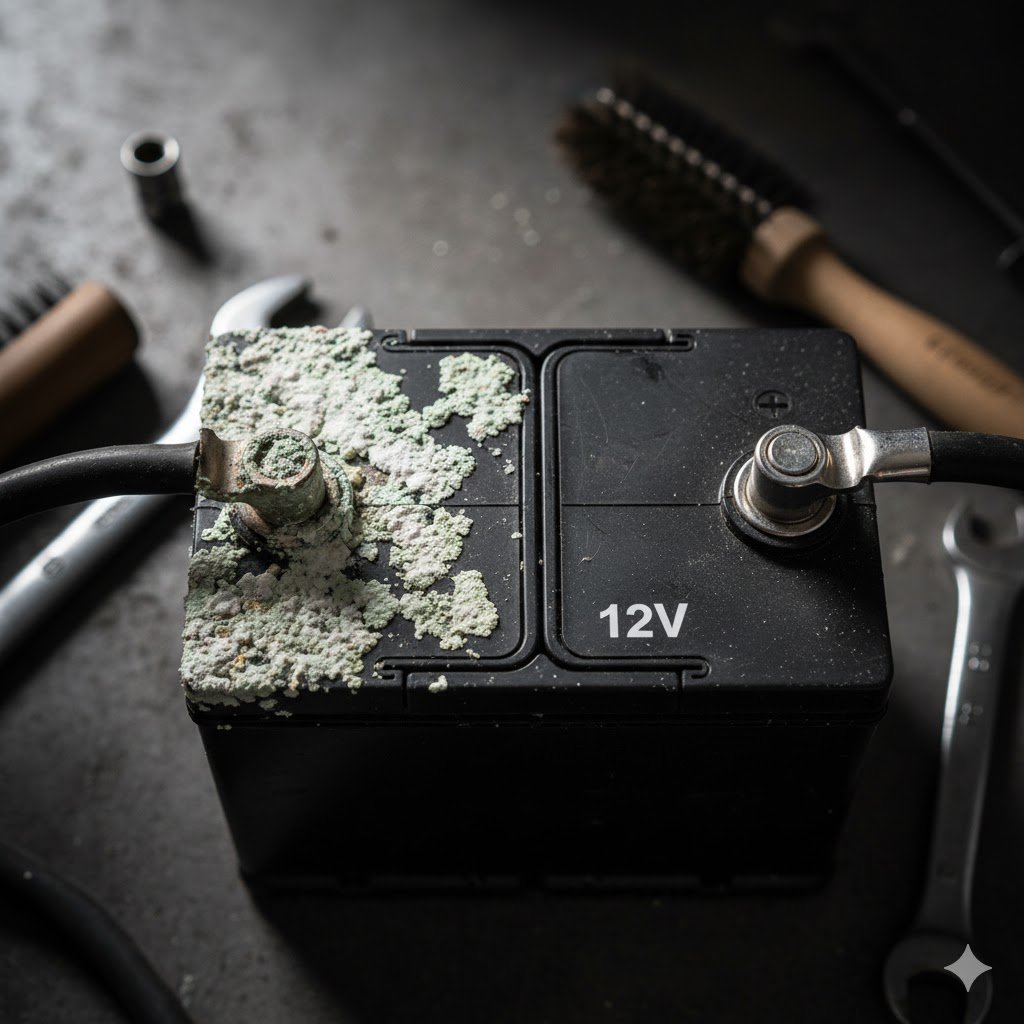
- Check all wiring connections to ensure they are tight and free of corrosion.
- Check the battery terminals for any buildup.
Common Problems and Solutions
- Problem: Panel isn’t charging on a sunny day.
- Solution: Check the simple things first: Are all wire connections tight? Is the panel clean? If everything looks good, use a multimeter to test the voltage coming directly from the panel’s wires. If you see a healthy voltage (18-22V for a 12V panel), your charge controller has likely failed. If there’s no voltage, the panel itself may be the issue.
- Problem: Lights are dim or fan runs slow (Voltage Drop).
- Solution: This usually means the wire gauge is too thin for the distance from the battery. For wire runs over 20 feet, you may need to upgrade from 12-gauge to a thicker 10-gauge wire to reduce power loss.
- Problem: Battery dies quickly and doesn’t hold a charge.
- Solution: This can be a sign of battery sulfation from being chronically undercharged. The best prevention is a correctly sized panel that can fully charge your battery. Some MPPT controllers have an “equalization” mode that can help reverse minor sulfation on lead-acid batteries.
- Problem: Fan or lights turn on and off randomly.
- Solution: This points to a loose connection. Check every single screw terminal and wire nut from the controller to the device. A single loose wire can cause intermittent power.
Seasonal Adjustments and Climate-Specific Guidance
A solar system isn’t “set it and forget it.” Optimizing it for your specific location and the time of year is key to reliable performance.
Optimizing for the Seasons
- Winter: Adjust your panel to a steeper angle (your latitude + 15 degrees) to catch the low sun. Keep it clear of snow, as even a light dusting will stop power generation. Batteries lose efficiency in the cold, so a key part of winterizing your chicken coop is to insulate your battery box.
- Summer: Lower your panel’s angle (your latitude – 15 degrees) to align with the high summer sun. This is when your ventilation needs are highest, so ensure your system can keep up. Monitor your battery and controller to make sure they aren’t overheating.
- Spring/Fall: These seasons often provide the best solar production. It’s a great time to perform maintenance. A panel angle equal to your latitude is generally perfect.
Tips for Different Climates
- Hot, Sunny Climates (e.g., Southwest US, Australia): Your priority is ventilation. You might oversize your fan but can often use a slightly smaller battery due to consistent sun. Ensure your battery and controller are in a shaded, well-ventilated location to prevent overheating. Learning what to feed chickens during a heatwave can also significantly reduce heat stress.
- Cold Climates (e.g., Canada, Northern Europe): Your priorities are a larger battery bank for longer, cloudier winter days and good insulation. Consider oversizing your solar panel (e.g., a 150W or 200W panel) to maximize charging on short winter days. Battery insulation is crucial.
- Cloudy, Rainy Regions (e.g., Pacific Northwest, UK): You must plan for multiple days without sun. This means sizing for a larger battery bank (aim for 3-4 days of autonomy) and a larger solar panel to take full advantage of any sun you do get.
- Humid or Coastal Areas: Corrosion is your enemy. Use dielectric grease on all electrical connections and terminals. Ensure all enclosures are truly weatherproof to protect your controller and battery from moisture.
Frequently Asked Questions
Can a 100W solar panel run a chicken coop?
Yes, a 100W panel is often perfect for a standard coop. It can comfortably power LED lights, a ventilation fan, and an automatic door, especially when paired with a 50-100Ah battery for storing energy.
Do chickens need light at night in their coop?
No, chickens do not need light at night. They sleep when it’s dark. A light on a timer is used in the early morning or evening hours during winter to extend “daylight” to 14-16 hours, which encourages consistent egg-laying.
Can solar panels work on cloudy days?
Yes, solar panels still produce power on cloudy days, just less of it. A monocrystalline panel might produce 10-25% of its rated power under cloud cover. This is why having a properly sized battery is essential for reliable operation.
What size inverter do I need for my coop?
You only need an inverter if you’re running AC appliances. Add up the wattage of all AC devices you might run at once and choose an inverter with a continuous wattage rating that is slightly higher. For a coop, a small 300W inverter is usually more than enough.
Is it safe to have a battery inside a chicken coop?
It is safe if done correctly. The battery should be enclosed in a protective, ventilated box to keep it away from the chickens and to allow any potential gases to escape. Never leave an exposed battery where chickens can peck at the terminals.
Conclusion
Adding a solar power system to your chicken coop is a rewarding project that provides incredible freedom and reliability. By taking the time to calculate your energy needs and and choosing the right components, you can create a safe and efficient setup that improves your flock’s health and your own peace of mind. From the constant breeze of a solar powered fan in the summer to the reliable glow of lights in the winter, it’s an investment that pays off for years to come.
I hope this guide has given you the confidence to get started. If you have any questions about your own setup, feel free to ask!

Oladepo Babatunde is the founder of ChickenStarter.com. He is a backyard chicken keeper and educator who specializes in helping beginners raise healthy flocks, particularly in warm climates. His expertise comes from years of hands-on experience building coops, treating common chicken ailments, and solving flock management issues. His own happy hens are a testament to his methods, laying 25-30 eggs weekly.