Keeping chickens in Australia is great, but our summers are no joke. When the temperature soars, that water bowl you left out in the morning can get dangerously hot by lunchtime. This is a real worry for backyard chicken owners. Hot water doesn’t just taste bad; it can lead to sick chooks. Proper chicken hydration is critical.
You’ll see them panting (called gular flutter), holding their wings away from their bodies, and just looking miserable. But how do you find the best chicken waterers actually designed to keep water cool during a blistering Aussie heat wave? It’s about more than just a bowl. We’ll explore automatic systems, simple DIY tricks, and the top products to keep your backyard flock healthy and hydrated all summer long.
What Temperature Is Too Hot for Chickens at Celsius?
It’s a question I get asked a lot. Here’s the simple answer: if the water feels warm to you, it’s way too hot for your chickens.
Chickens need a lot of water—about 500ml to 750ml every day, and even more when it’s hot. Their ideal water temperature is actually quite cool, around 10°C to 15°C. They’ll start to avoid drinking if their water temperature gets much above 20°C. This is a fast track to heat stress, which can happen when the air temperature gets over 27°C.
Dehydration is a serious poultry health issue. It can stop your hens from laying eggs and, in bad cases, can be fatal. This is why summer care for chicken hydration is one of the most important jobs for any Aussie chicken owner.
The Link Between Water, Heat, and Egg Laying
Ever wondered why your hens stop laying on hot days? It’s not just crankiness; it’s biology. An egg is about 75% water. When a chicken overheats, it starts panting to cool down. This ‘gular flutter’ causes a huge amount of water loss through evaporation.
The bird’s body must then make a choice: use its precious water to stay alive (cool down) or use it to make an egg. Staying alive wins every time. Hot water also messes with their calcium metabolism, leading to those thin, weak-shelled eggs you see in summer.
Spotting the First Signs of Heat Stress

You need to be able to spot heat stress before it becomes an emergency. Look for these early warning signs in your flock:
- Panting (Gular Flutter): Open-mouthed, rapid breathing. This is the #1 sign.
- Wings Held Out: Holding their wings away from their bodies to let heat escape.
- Lethargy: Sitting around, looking flat and tired, with no interest in foraging.
- Pale Comb and Wattles: A bright red comb is a sign of a healthy, hydrated bird. A pale, droopy comb is a sign of poor circulation and stress.
- Diarrhea: This can be a sign of heat stress, but it’s also linked to other chicken diarrhea health problems.
It’s clear that hot water is a fast track to sick, non-laying chooks. So, the next logical step is to fight back. Here are the most effective strategies, from simple daily tricks to emergency interventions.
How to Keep Chickens Cool in Summer in Australia: 5 Essential Strategies
Before you even buy a new waterer, here are five essential ways to keep chickens cool.
1. Provide Shade and Ventilation
This one’s a no-brainer, but it’s the most important. Never leave your waterer in the full sun. Tuck it away in the shadiest, breeziest part of your coop or run.
- Natural Shade: A leafy tree is the best shade you can get, as it also releases moisture (transpiration).
- Artificial Shade: Use a 90% UV-rated shade cloth. A simple tarp can block sun but traps hot air. A proper shade cloth lets the breeze through.
- Coop Ventilation: Heat rises. Ensure your coop has good roof ventilation (like a ridge vent or whirlybird) and low-set windows to pull cool air in and push hot air out. Getting this right is crucial; many owners make common coop ventilation mistakes. The right chicken coop design for hot climates will do most of the work for you.
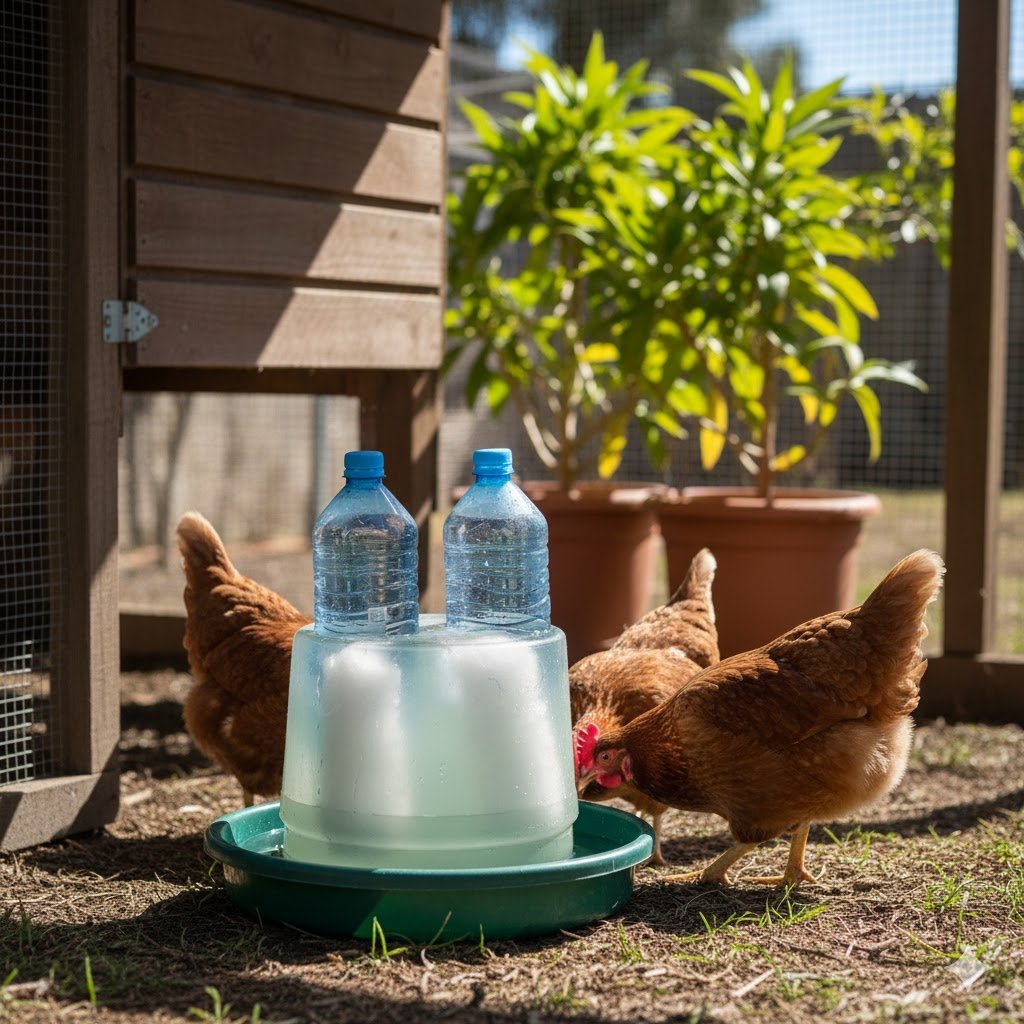
2. Use Frozen Water Blocks in Waterers
Frozen water blocks are simple and work great. Just put ice blocks in your waterer in the morning. Your chickens will drink cooler water all day. This keeps them hydrated and prevents heat stress.
- Pro-Tip: Don’t just use ice cube trays. Freeze large 1L or 2L plastic bottles. They’ll last almost all day. Old sports drink bottles with grooves have more surface area and cool the water even faster.
3. Install Multiple Water Stations
Don’t make your chooks fight for a drink. Having a few water stations means everyone gets a turn, especially the shy birds at the bottom of the pecking order. It also means if one gets tipped over or runs out, there’s a backup.
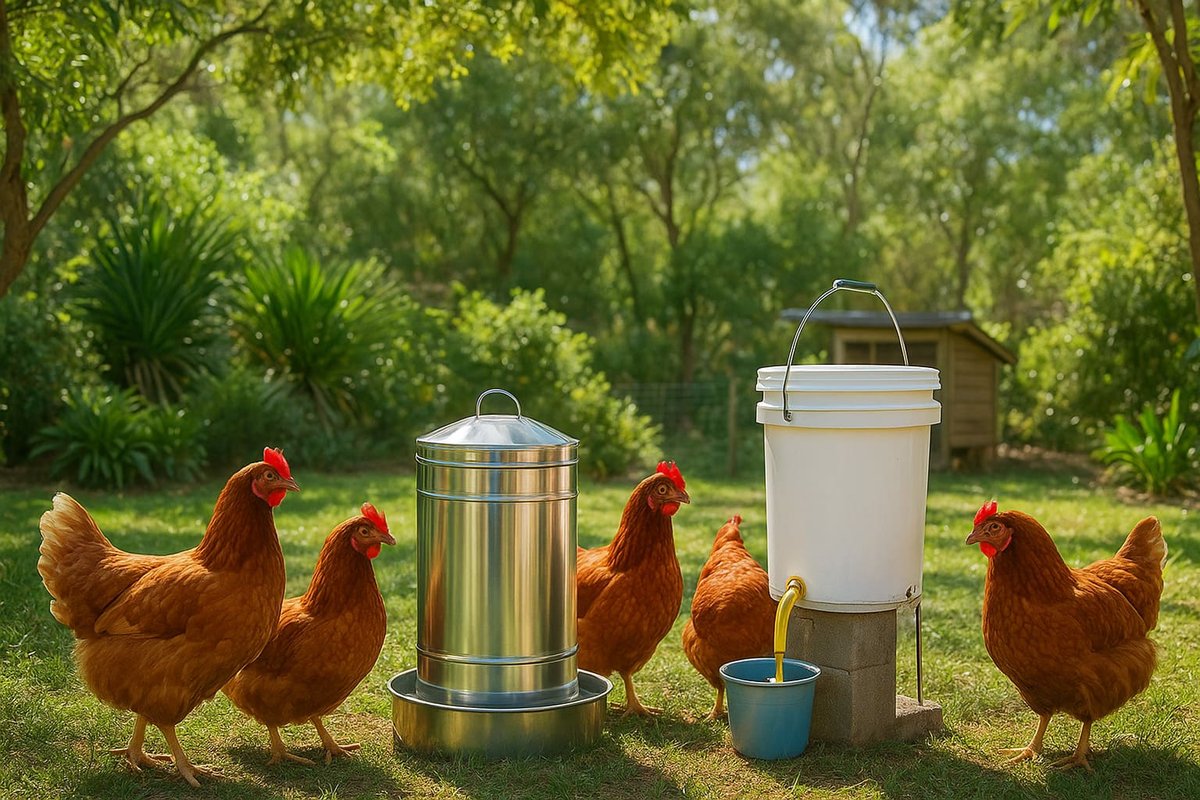
4. Choose the Right Waterer Type
We’ll get into this more in the next section. But the type of waterer you use matters. A metal water feeder (double-wall insulated) will reflect sun, while some automatic systems keep fresh, cool water flowing from the mains. Black plastic is your absolute enemy in the sun.
5. Add Electrolytes (It’s a Game Changer)
When chooks pant, they don’t just lose water; they lose essential minerals (electrolytes). You can buy pre-made poultry electrolytes, but it’s easy to make your own emergency mix.
- DIY Chicken Electrolyte Recipe: For 1 litre of water, mix:
- 1/2 teaspoon of salt
- 1/2 teaspoon of bicarb soda (baking soda)
- 2 teaspoons of sugar (or molasses)
Offer this in a separate drinker during heatwaves. The bicarb soda is especially good for helping with eggshell quality during heat stress. Offering the right foods is also important. Find out what to feed chickens during a heatwave to help them cope.
6. Emergency Cool-Down for a Panting Chook
If you find a bird that is listless, panting heavily, and can’t stand, you must act now.
- Move it to a cool, dark place (like the laundry or a shady shed).
- Get a shallow tub or kitty litter tray and fill it with a few centimetres of cool (not ice-cold) water.
- Stand the chicken in the water for 1-2 minutes. Do not wet its whole body. Chooks regulate temperature through their feet and combs, and this will cool their blood down quickly and safely.
- Offer it some electrolyte water from a small dish.
These strategies are your daily battle plan. Now, let’s look at your most important tool: the waterer itself. The right gear makes all this much, much easier.
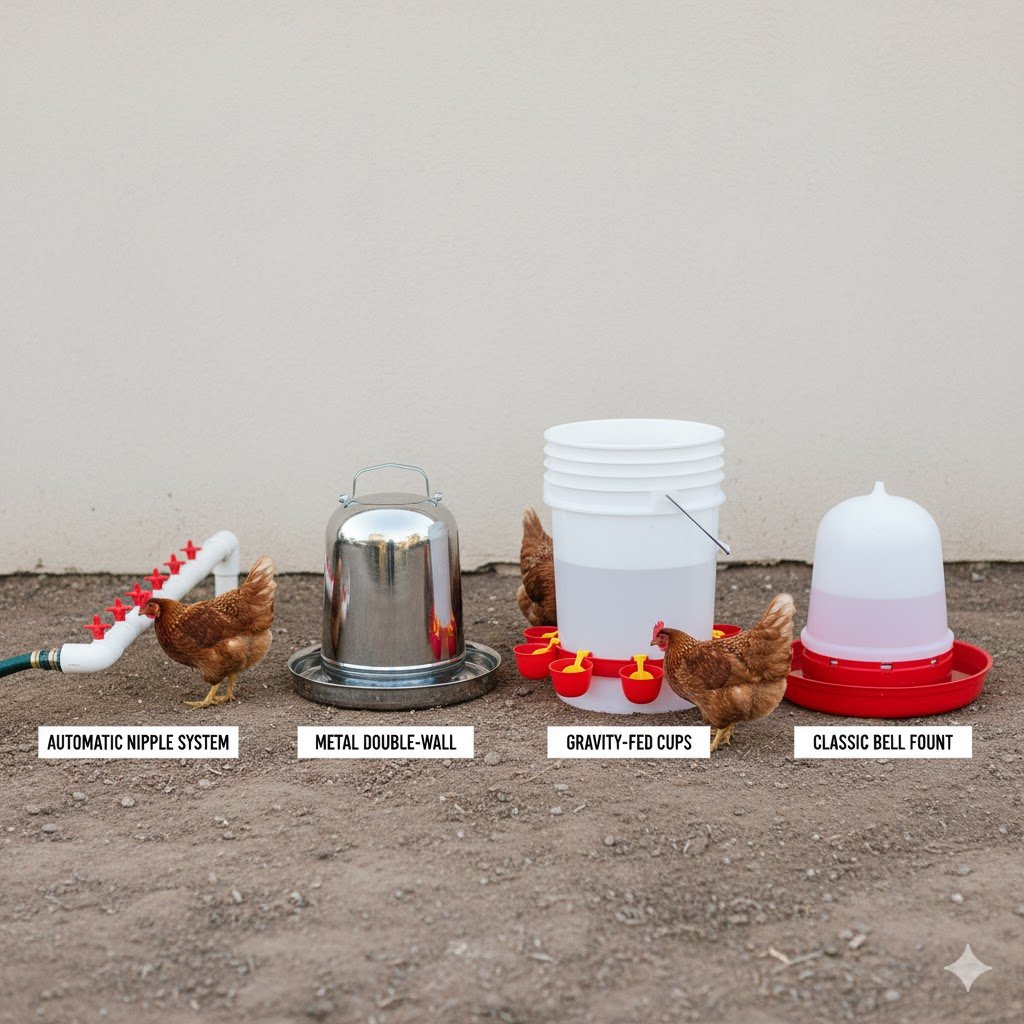
Best Chicken Water Feeders: Comparing Automatic, Nipple, and Gravity-Fed Systems
Walking into a feed store or Bunnings can be confusing. There are so many options. Let’s break down the main types so you can find the best chicken water feeders for your yard.
Automatic Chicken Waterers: Best for Large Flocks
This is the ‘set and forget’ option. These systems connect to your mains water supply, so they never run out. Because the water comes from underground pipes, it’s always fresh and, most importantly, cool. They’re the hands-down best chicken waterer for a large flock and for anyone who wants low-maintenance poultry water systems.
- Con: The float valves (the bit that stops the water) can fail, leading to a flooded coop. It’s best to check them weekly.
Nipple Waterers: Cleanest Water Option
These are often part of an automatic or gravity-fed system. Chickens peck at a small metal nipple to release water. The chicken drinker design is brilliant. No poop, no dirt, no slime. Period. The water stays in a sealed line, which also stops algae growth dead in its tracks and prevents water spillage.
Bell Waterers: Simple and Affordable
You’ll see these a lot. They’re a simple, hanging plastic waterer that refills a small tray at the bottom. They’re cheap and easy to understand, but they get dirty fast. You’ll be cleaning them every single day in the heat to stop slime. They are the worst option for water hygiene.
Gravity-Fed Systems: Low Maintenance
These are the common bucket or container waterers. You fill a big drum (say, 20 litres), and it uses gravity to fill small drinking cups or nipples. They’re a great step up from bell waterers because they keep the main water capacity clean.
- Con: The water is static. A 20L drum of water sitting in the sun will get hot. This system must be made of opaque (not see-through) plastic and kept in deep shade.
Metal Water Feeder for Chickens: Durability & Heat Control
A metal water feeder for chickens is a classic for a reason, but you must get the right one.
- The Good: A double-wall insulated galvanised waterer works like a thermos. It reflects sunlight and uses insulation to keep water cool for hours.
- The Bad: A single-wall metal waterer left in the sun can get scalding hot, making the water undrinkable.
Comparison Table: Which Waterer is for You?
| Waterer Type | Best For | Water Capacity | Cooling Ability | Maintenance |
|---|---|---|---|---|
| Automatic Nipple System | Large flocks (16+) | 20L+ (or mains) | Excellent (mains pressure) | Low |
| Metal Double-Wall | Medium flocks (6-12) | 5-10 Litres | Good (reflects heat) | Medium |
| Gravity-Fed System | Small flocks (2-6) | 4-20 Litres | Fair (water is static) | Low |
| Bell Waterer | Beginners | 1-4 Litres | Poor (gets dirty & warm) | High |
Comparing types is a great start. But let’s be honest, the one everyone’s most curious about is the automatic one. Let’s walk through exactly how to install it without any drama.
How to Set Up Automatic Chicken Waterer: Step-by-Step Guide

Setting up an automatic chicken waterer sounds hard, but it’s usually a simple weekend job. Don’t be put off! While you’re at it, you might consider other upgrades like automatic chicken coop doors to seal your coop at night.
Step 1: Choose Your Water Source
You can connect to your garden hose or mains water. Mains water is best because it’s always fresh and cool. A garden hose works, but make sure it’s a food-grade hose (not a cheap green one) so it’s not adding a bad plastic taste. If connecting to mains, it’s smart to install a “pressure regulator” (about $20) to stop high pressure from breaking the float valves.
Step 2: Install the Waterer System
This just means running the hose or pipe from your water source to the coop. The key is where you place the drinkers.
- Raise them up! Do not place waterers on the ground. Put them on a few concrete blocks or a small stand. This stops chooks from kicking dirt, bedding, and poop into the cups. Good placement is also key for protecting your flock from Australian predators, who are often drawn to water sources.
- Not under roosts: Never install a waterer directly under their nighttime roosts. Before you build, make sure you know how much space do chickens really need and check your local chicken laws by state to ensure your setup is compliant.
Most kits, like the ones from Dine-A-Chook, come with all the brackets and bits you need for installation.
Step 3: Test for Leaks
Turn the water on before you let the chickens in. Check every connection, every nipple, and every cup for drips. A leaky waterer means a wet, muddy coop, which is a recipe for disease and terrible for chicken health.
Step 4: Train Your Chickens
Your chooks might not understand nipples at first. They’re used to pecking at water.
- The Trick: Tap the nipple or cup-float with your finger to release some water. They’ll see the shiny water, peck at it, and learn fast.
- The ‘Tough Love’ Method: Once you see a few birds using it, remove all their old waterers (make sure you do this in the morning, and watch them). When they get thirsty, they’ll quickly figure it out. It usually only takes a day.
Step 5: Maintain for Summer Heat
Even automatic systems need a check-up.
- Check the cups/nipples daily to make sure they aren’t blocked with dirt.
- Check the hose! A black hose left in the full Aussie sun can deliver a burst of scalding 60°C water. Before the chooks drink in the morning, let the hose run clear for a minute onto a garden bed. If your coop is off-grid, you can learn how to add solar power to your chicken coop to run fans or small pumps.
A full automatic setup is the dream, but not everyone can do it. Don’t stress! Here are the specific products, from full-auto to simple metal, that we rate for handling the Aussie heat.
Best Chicken Waterers for Australian Heat: Top 6 Reviewed
I’ve tested a few of these myself, and others come highly recommended by fellow Aussie backyard owners. Here’s what actually works to keep water cool.
1. Dine-A-Chook Automatic Waterer: Best for Large Flocks
The Dine-A-Chook automatic waterer is Australian-made and trusted by over 50,000 backyard chicken owners. It connects directly to mains pressure, so your chickens always have fresh water. The double-cup design lets multiple chickens drink at once. They’re popular because they use genuine, German-made Lubing cups, which are the industry standard for quality.
- Capacity: 20L drums available, or connect to mains
- Best for: Flocks of 16+ chickens
- Cooling ability: Excellent—mains pressure keeps water fresh and cool
- Pros:
- Australian-made quality
- 3-year warranty on components
- Prevents algae growth
- Easy to clean
- Cons:
- Higher upfront cost
- Requires mains water connection
- Price: $150 – $300 AUD
- Where to buy: Dine-A-Chook official website, The Good Life Backyard
2. ‘Royal Rooster’ Galvanised Metal Waterer: Best for Heat Reflection
If you’re not ready for an automatic system, a metal water feeder is your next best bet. Crucially, this is a double-wall, insulated model. The galvanised steel reflects the sun, and the insulation (like a thermos) keeps the water inside cooler than dark plastic. I learned this the hard way after my first single-wall metal waterer got too hot to touch by midday.
- Capacity: 5L and 10L options
- Best for: Flocks of 6-12 chickens
- Cooling ability: Good—metal reflects heat, and the insulated wall helps.
- Pros:
- Very durable, will last for years.
- Naturally keeps water cooler.
- Easy to carry and refill.
- Cons:
- Needs to be cleaned manually.
- Can be heavy when full.
- Price: $80 – $120 AUD
- Where to buy: Royal Rooster, local feed suppliers.
3. Harris Farms Nipple Waterer Bucket: Best for Small Flocks
This is a great entry-level gravity-fed waterer. It’s basically a 20-litre bucket with three poultry drinking nipples at the bottom. It keeps water clean because the chooks drink from the bottom, and no dirt gets in. You just hang it, fill it from the top, and you’re good for days.
- Pro-Tip: Hang it so the nipples are at the back-height of your smallest chicken.
- Capacity: 20 Litres
- Best for: Flocks of 2-10 chickens
- Cooling ability: Fair. The white plastic is better than black, but the water is static. Keep it in deep shade.
- Pros:
- Keeps water very clean.
- Huge water capacity for a small flock.
- Very affordable.
- Cons:
- Water can get warm if not in shade.
- You have to train your chickens to use nipples.
- Price: $50 – $70 AUD
- Where to buy: Harris Farms, Bunnings Warehouse.
4. Premier 1 Supplies Automatic Bell Waterer: Best for Mixed Flocks
If you have a mixed flock with different-sized birds (like bantams and full-sized), or if you run ducks with your chooks, a bell waterer is a good choice. This one from Premier 1 connects to a low-pressure hose (or a gravity tank) and automatically refills the tray as birds drink.
- Capacity: Continuous fill
- Best for: Mixed flocks, large flocks
- Cooling ability: Good, as it brings in fresh water.
- Pros:
- Always full.
- Great for birds of all sizes.
- Relatively simple automatic chicken waterer setup.
- Cons:
- The open tray gets dirty and needs daily cleaning.
- Requires a low-pressure water source, not mains.
- Price: $60 – $80 AUD
- Where to buy: Premier 1 Supplies (online).
5. Omlet ‘Eglu’ Drinker: Best for Style and Small Coops
Let’s be honest, sometimes you want your setup to look good. The Omlet drinkers are designed to fit perfectly with their Eglu coops. They are tough, UV-protected plastic and have a design that’s hard to tip over or spill. It’s a simple, effective gravity-fed waterer.
- Capacity: 4 Litres
- Best for: Small flocks (2-4 chickens)
- Cooling ability: Fair. The solid, light-coloured plastic helps, but it’s small.
- Pros:
- Looks great and is very stable.
- UV-protected, which helps slow algae growth.
- Easy to clean and fill.
- Cons:
- Small capacity for the price.
- Price: $40 – $55 AUD
- Where to buy: Omlet Australia.
6. The ‘Bunnings Special’ DIY Waterer: Best Budget Choice
This is the best budget automatic chicken waterer for a large flock. You can make your own high-capacity waterer for under $30.
- Go to Bunnings and buy a food-grade 20L plastic bucket with a lid (the white ones in the paint section are perfect).
- Go online and buy a pack of poultry drinking cups or nipples (from eBay, Amazon, or a local supplier like Rent-a-Chook).
- Get a 10mm drill bit. Drill 3-4 holes around the base of the bucket.
- Screw in the cups/nipples. Most are threaded and come with a rubber washer.
- Seal them with a bit of food-grade silicone if you’re worried about leaks.
- Fill it from the top, put the lid on, and hang it. It’s cheap, clean, and has a massive water capacity.
Getting the right waterer is half the battle. The other half is the day-to-day management. Here are some extra tips and tricks to keep that water crystal clear and cool.
Chicken Water Ideas: Keeping Water Cool and Clean Year-Round
Your waterer is only half the battle. Here are some extra chicken water ideas and water maintenance tips.
DIY Cooling Methods for Chicken Water
My neighbour swears by this: he partially buries his 20L water drum in a shady, damp bit of ground. The earth acts as a natural insulator. You can also wrap your waterer in an old wet towel. As the water evaporates (called evaporative cooling), it actively chills the container.
You can also create a “cool zone.” Chickens cool themselves through their feet. Use a hose to create a damp, muddy area in a shady part of the run near (not in!) the waterer. They will love standing in it to cool down.
Preventing Algae Growth in Waterers
Algae loves sunlight and warm, dirty water. The best fix is an opaque (not see-through) waterer. If you must use a clear one, wrap it in duct tape or paint it.
A splash of apple cider vinegar (the ‘with mother’ kind) once a week can also help, as it changes the pH of the water. One warning: some experts say to avoid ACV during extreme heatwaves, as it can slightly interfere with calcium absorption. On 40°C days, stick to plain water or electrolytes.
Winter Water Heating Solutions
While we worry about heat, some parts of Australia (like in the Tassie highlands, regional Victoria, or the Snowy Mountains) can get hard freezes. A chicken water heater is a small, safe electric base that you place your waterer on to stop it from freezing solid. Not a worry for most of us, but good to know!
Your Daily Summer Battle Plan
In summer, make this a non-negotiable part of your day.
- Morning (7 AM): Dump any old water. Scrub the drinker (if it’s an open one). Refill with fresh, cold water from the tap. Add your big ice blocks. This plan is for heat, but it’s also wise to have a bushfire safety plan for your chickens if you’re in a high-risk area.
- Midday (1 PM): On a 35°C+ day, check the water. The ice may be gone. Top it up with more ice or another bottle from the freezer.
- Evening (6 PM): Check the flock for any signs of stress. Dump, scrub, and refill the waterer again so they have fresh, cool water for the morning.
Following these tips will solve 99% of your problems. But just in case you have a specific question buzzing around, here are the quick answers to the most common queries we get.
Frequently Asked Questions About Chicken Waterers and Heat
Q: How much water do chickens need daily?
A: An adult chicken drinks about 500ml to 750ml of water each day. In hot weather, this can double. Always provide fresh water at all times.
Q: What temperature is too hot for chickens at Celsius?
A: Chickens start showing heat stress above 27°C. Their water should always stay below 20°C. They prefer it around 10-15°C.
Q: How do you keep chickens cool in extreme heat?
A: Use frozen water blocks in their water, provide deep shade (shade cloth, not just a tin roof), ensure good coop ventilation, and add electrolytes to a second water source.
Q: How to keep your chicken water cold?
A: Use ice blocks, choose a double-wall metal waterer that reflects heat, place waterers in deep shade, and, if possible, connect to a mains water automatic chicken waterer for a continuous fresh supply.
Q: Best automatic chicken waterer for beginners?
A: A gravity-fed system (like the Harris Farms bucket or the DIY Bunnings one) is the best for beginners. It gives you the “automatic” benefit of nipples/cups but without the need for plumbing or pressure regulators.
Q: Can I just use a simple bowl?
A: You can, but it’s the worst possible option in summer. It will be full of dirt, poop, and algae in minutes. It will also heat up to the air temperature, and your chooks will refuse to drink it.
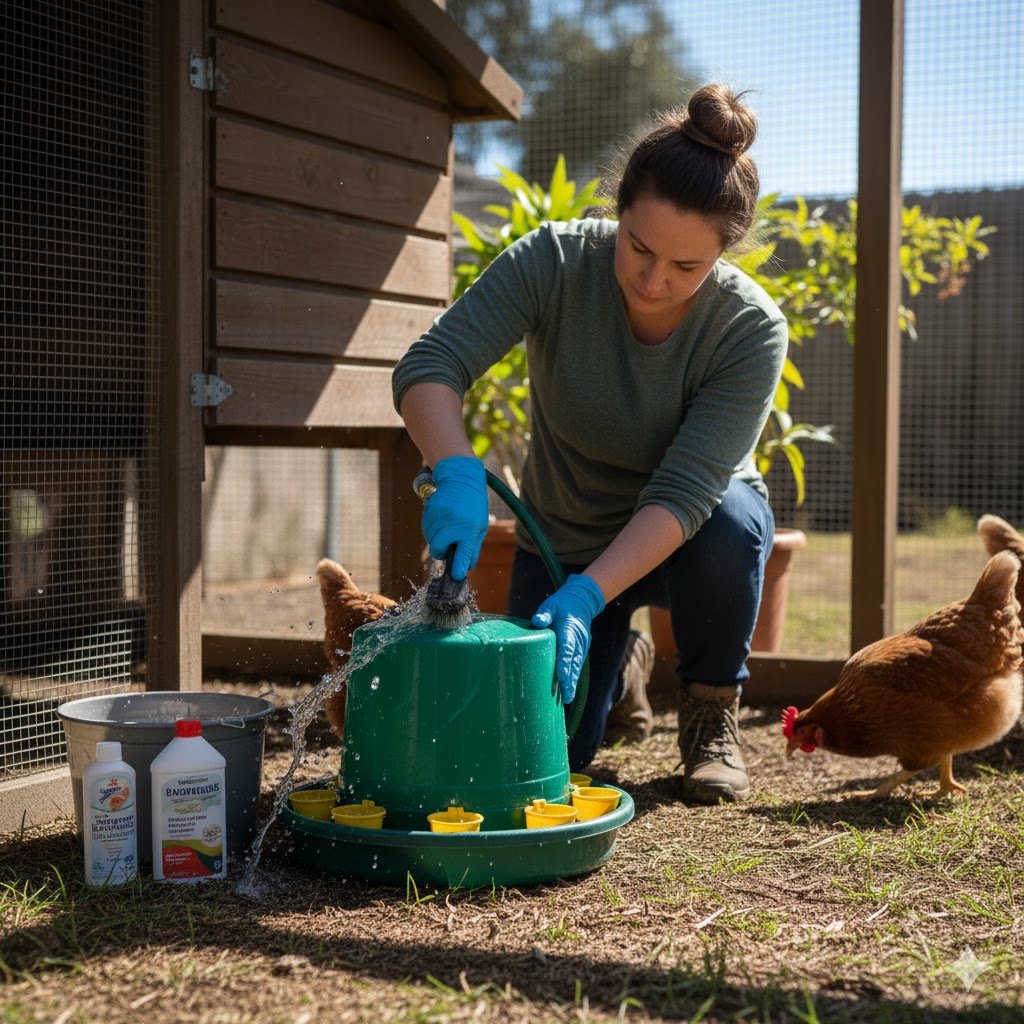
Q: How often do I really need to clean my waterer in summer?
A: If it’s an open bowl or bell waterer: daily, no excuses. The bacteria and slime (biofilm) build-up is incredibly fast in the heat. If it’s a sealed system with nipples or cups: check it daily, but a full scrub-out once a week is usually fine.
Q: My chicken is panting! What do I do right now?
A: This is an emergency. Get the bird and move it to a cool, dark place (like a shed or laundry). Get a shallow tub with 2-3cm of cool (not ice-cold) water and stand the bird in it for 1-2 minutes to cool its feet. Offer it electrolyte water in a small dish. Do not spray the bird with a hose, as this can cause shock. Having a chicken first aid kit on hand is essential for these moments.
Conclusion: Your Flock is Counting on You
At the end of the day, beating the Aussie heat isn’t about finding one single “magic” waterer. It’s about building a complete system. The best chicken waterer in the world won’t help much if it’s left in the full sun.
The real solution is to combine a smart waterer—one that’s insulated, automatic, or at least keeps the water clean—with good management. That means being relentless with shade, using those frozen water bottles, and keeping everything clean. Your chickens are tougher than you think, but they rely on you to give them the tools to survive our brutal summers. A little bit of extra effort on a hot morning can be the difference between a happy, laying flock and a coop full of stressed, sick birds.
We’ve covered a lot of ground, but every Aussie backyard is different. What’s your number one trick for keeping your chooks cool? Do you have a favourite DIY waterer setup or a story about a heatwave hero chicken? Share your experiences, ask any questions you still have, or post a photo of your setup in the comments below. Let’s help each other keep our flocks happy and healthy!

Oladepo Babatunde is the founder of ChickenStarter.com. He is a backyard chicken keeper and educator who specializes in helping beginners raise healthy flocks, particularly in warm climates. His expertise comes from years of hands-on experience building coops, treating common chicken ailments, and solving flock management issues. His own happy hens are a testament to his methods, laying 25-30 eggs weekly.