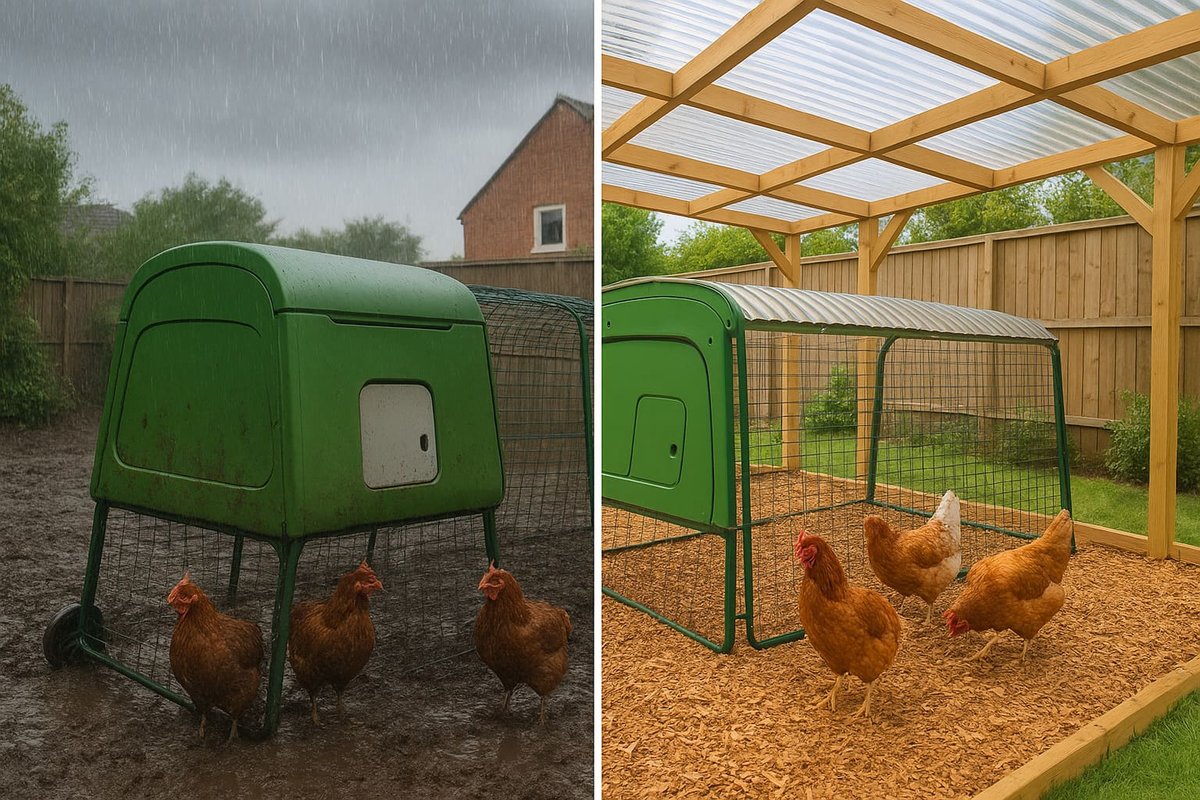
Creating a covered run to keep your flock dry in the rain requires three components: overhead covering (tarp or roofing panels), proper drainage flooring (hardwood woodchips or builder’s sand over gravel), and ground drainage management (French drains or proper grading). This three-part system keeps UK chicken runs dry even during prolonged British rain, preventing mud, disease, and protecting chicken welfare year-round.
There’s nothing more disheartening for a UK chicken keeper than looking out the window at a proper muddy mess. That soggy, smelly patch of ground where your lovely run used to be is a common sight, especially after a week of our lovely British weather. After three years of battling a soggy run in Yorkshire, I learned that just fixing the mud isn’t enough—you have to stop the rain from getting in.
The big question is, how to create a covered run to keep your flock dry in the rain? The great news is that it’s absolutely possible, and you don’t need to be a DIY expert. This guide will walk you through everything. We’ll cover quick emergency fixes for a waterlogged run, the best flooring materials that actually work in the UK, and step-by-step options for building a cover, from a simple £30 tarp to a permanent roof. This is the complete plan for keeping chickens in the UK without losing your run (or your wellies) to the mud.
Why British Rain Creates Muddy Chicken Runs
The problem isn’t just the rain itself; it’s the constant rain. Our soil, especially heavy clay, just can’t drain quickly enough. When you add chicken feet scratching and pooping into the mix, that wet ground turns into a compacted, smelly bog.
This isn’t just ugly—it’s a real and immediate health risk for your flock. I’ve seen keepers lose hens to conditions that started right here in the mud.
- Muddy Mess: This is the most obvious one. Chickens’ feet get caked in mud, which they then track into the coop and the nesting boxes. This leads to dirty, bacteria-covered eggs that are a real hygiene risk.
- Smell: Let’s be honest, a chicken run that is muddy and smelly is no fun for you or your neighbours. That “wet chicken” smell mixed with ammonia from the droppings is awful. Learning how to keep a chicken coop from smelling starts with managing the run.
- Cold Stress: Wet ground chills your chickens from the feet up. They have to burn precious energy just to stay warm, which can lead to weight loss and lower egg production.
The Health Dangers of a Wet, Muddy Run
This is so important it needs its own section. A wet run isn’t just “messy”; it’s a breeding ground for disease.
- Bumblefoot (Pododermatitis): This is a horrible infection. It starts when a chicken gets a small cut or scrape on its footpad (from a sharp stone or walking on hard, rough ground). When they stand all day in wet, mucky ground, that cut gets infected. It’s like a nasty, infected blister that swells up the whole footpad and can be fatal if the infection spreads. It’s painful, so it’s vital to know how to spot and treat bumblefoot in chickens.
- Respiratory Issues: When a run is constantly damp, the ammonia from their droppings gets trapped in the air just above the ground. This toxic gas burns their delicate lungs and eyes, leading to coughing, sneezing, and serious respiratory infections. Knowing how to treat chicken respiratory infection is useful, but prevention is key.
- Parasites: Nasty internal parasites like Coccidiosis and worms absolutely thrive in wet, damp conditions. Their eggs live in the soil and are spread through the droppings. A dry run breaks this cycle. This is just as important as getting rid of red mites in a wooden coop or knowing how to treat internal parasites (worms) in chickens.
- Mould and Mycotoxins: Wet bedding, straw, or woodchips that sit in the mud will quickly grow mould. These moulds release mycotoxins, which are incredibly toxic to chickens if they inhale them or eat them (and they will peck at everything).
It’s clear a muddy run is bad news. But what about the rain itself? Are our hens made of sugar, or are they tougher than we think?
Is It Okay for Chickens to Get Wet in the Rain?
This is a question I get asked all the time. The simple answer is: it depends on the temperature.
Chickens are surprisingly waterproof. Their outer feathers channel water away, while their fluffy down feathers underneath stay dry and trap body heat.
- Warm Rain (Above 15°C / 60°F): If it’s a summer shower, your chickens will be perfectly fine. Many of mine seem to enjoy a light rain, picking off worms that come to the surface. It’s natural behaviour.
- Cold Rain (Below 15°C / 60°F): This is the dangerous bit. If a chicken gets completely soaked in cold, windy weather, the water can get through to their down. Once that’s wet, it loses all ability to insulate. The chicken can’t trap its body heat and can suffer from hypothermia very quickly.
Most hens are sensible enough to seek shelter when it gets too heavy. My Warrens leg it back to the coop at the first sign of a downpour. The key is to make sure they have a dry, sheltered spot to go to.
What to Look For: Signs of a Cold, Wet Hen
You’ll know if a hen is in trouble. Look for these signs:
- Huddling: Sitting in a corner, fluffed up, often with other hens.
- Shivering: You can see their bodies visibly shaking.
- Lethargy: Not moving much, looking wobbly or ‘sleepy’.
- Pale Comb: Their comb and wattles might look paler than usual.
How to Safely Dry a Soaked Chicken
If you ever find a hen soaked to the skin in cold weather, you need to act fast.
- Bring her inside: A utility room or bathroom in a box or pet carrier is perfect.
- Towel Dry: Use an old, dry towel. Pat gently in the direction of the feathers. Don’t rub back and forth, as you can break their delicate new feathers.
- Use Low Heat (Optional): If your hen isn’t too stressed, a hairdryer on its lowest, warmest (not hot) setting, held at least 12 inches away, can speed things up. Keep your hand in the airflow to make sure it’s not too hot.
- Keep Her Warm: Keep her in the box with a dry towel in a warm, draft-free room until she is 100% dry. This can take a few hours. Don’t put her back outside while she’s still damp.
Knowing when to intervene is key. But prevention is always better than a cure, which brings us to the immediate problem: the swamp outside.
Emergency Fixes: How to Dry Out a Wet Chicken Run Quickly
Right, so it’s been chucking it down for a week and your run is already a bog. Before we build the permanent solution, you need a quick fix. You can’t put new, dry flooring on top of a swamp.
For a detailed breakdown of quick fixes, check out this guide on ways to fix a muddy chicken run in the UK.
Immediate Temporary Solutions
- Thick Straw Layer: Get a bale of clean straw and put down a very thick layer (at least 12 inches) over the worst of the mud. This won’t fix the mud, but it gives your hens something clean to walk on. Be warned: this is a 1-2 week fix, tops. You must remove all that wet, slimy straw as soon as it gets waterlogged, or it becomes a mouldy, smelly nightmare.
- Pallet Walkways: If you can get hold of some old wooden pallets, they make great raised walkways. Chickens are happy to use them to get from the coop to their feeder without touching the mud. Check Facebook Marketplace or local industrial estates (always ask first!).
- Temporary Tarp: Throw a tarp over the muddiest section now. This stops more rain from getting in and gives the area a chance to dry.
How to Dry Out a Wet Chicken Run
- Stop More Water: Get that temporary tarp up.
- Remove Standing Water: If you have puddles, get rid of them. An old sponge mop, a dustpan, or even a wet-and-dry shop vac can work. If you use electrics, please plug into an RCD-protected socket for safety.
- Spread it Out: Use a rake to spread the existing wet material into a thinner layer. This increases the surface area and helps it dry faster.
- Add Drainage (Temporary): Use a spade to dig a simple channel along the uphill edge of the run to direct any new water away.
- Wait: You need to wait for 2-3 dry days (if you can find them!) after you’ve covered the run before you can think about adding new flooring material.
These quick fixes will get you through a crisis, but let’s be honest, you don’t want to be doing this every time it rains. The real, permanent fix starts from the ground up.
Best Material for Chicken Run Floor
This is the most important part of sorting out your run for good. Choosing the right flooring is the key to preventing mud. This is what to put at the bottom of a chicken run to keep it clean and dry.
Top Flooring Options for UK Runs
Here’s a comparison of the best materials I’ve used.
| Material | Cost | Drainage | Lifespan | Maintenance | Best For |
|---|---|---|---|---|---|
| Hardwood Woodchips | Mid (£££) | Excellent | 1 year | Weekly rake, annual replace | All UK climates |
| Builder’s Sand | Low (££) | Excellent | 3+ years | Daily poo-pick | Dry, covered runs |
| Gravel + Woodchip | High (££££) | Outstanding | 5+ years | Woodchip top-up only | Permanent solution |
| Bark Chips | Low (££) | Poor | 6 months | Frequent | Avoid – mold risk |
| Play Sand | Low (££) | Poor | N/A | N/A | Never use – respiratory danger |
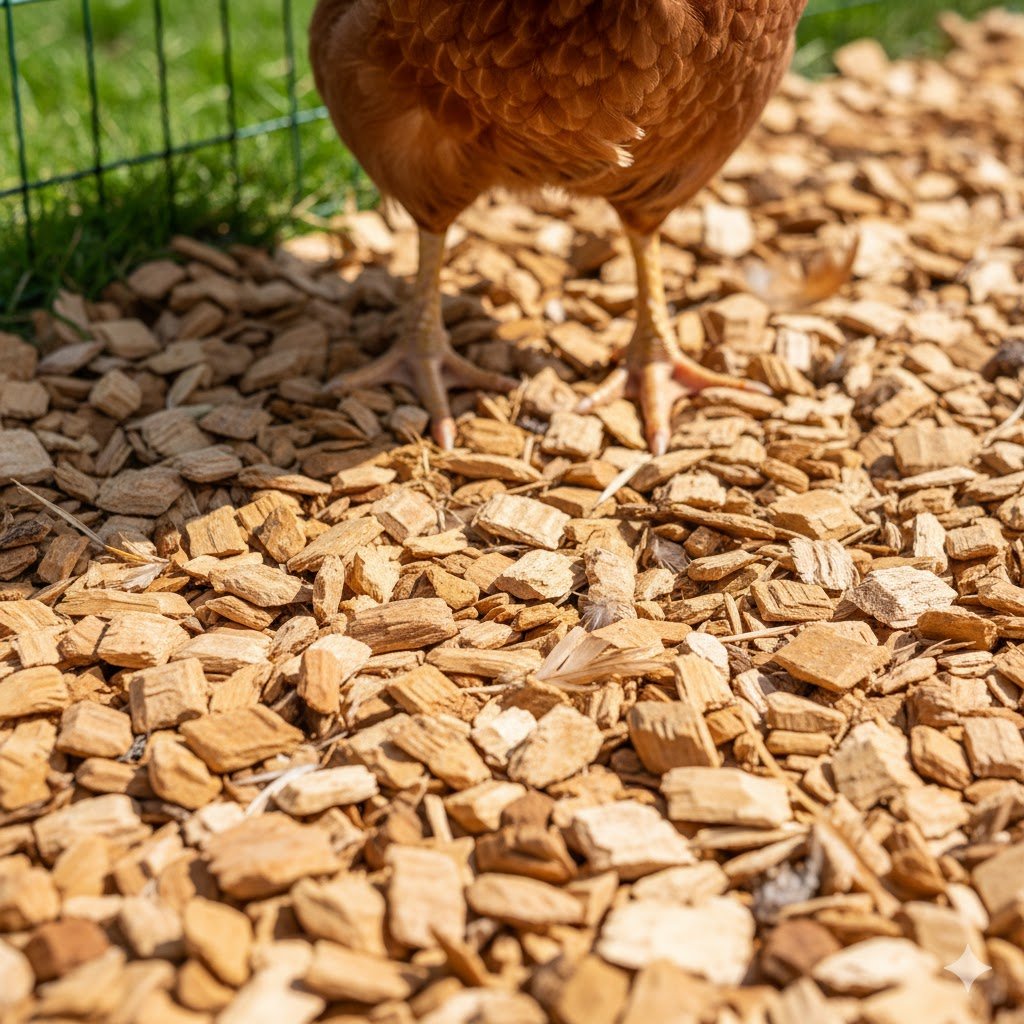
1. Hardwood Woodchips (My Top Recommendation)
This is, in my opinion, the best all-around solution for the UK climate.
- Why it works: Hardwood chips (often beech) are large, heavy, and free-draining. Rain washes through them, and they don’t turn into a slushy mess. They last for ages and are great for chickens to scratch in.
- Depth Needed: You need a good deep layer: 4-6 inches (10-15cm) to start.
- Where to source: You can buy them from specialist poultry suppliers like Flyte so Fancy or sometimes get them cheap from local tree surgeons. Make sure it’s hardwood and not bark.
- Maintenance: Rake it over weekly. You’ll need to top it up every 3-6 months and replace it fully once a year.
- Cost: Mid-range, but great value because it lasts.
2. Builder’s Sand (Construction-Grade)
This is another excellent choice and is fantastic for drainage.
- Why it works: Water drains straight through it, and it’s super easy to clean. You can use a cat litter scoop to pick out the poops daily.
- Critical Warning: You MUST use builder’s sand (also called coarse or construction-grade sand). Honestly, never use play sand. Play sand is too fine, holds water, clumps up, and the dust can cause serious respiratory problems for your flock. The British Hen Welfare Trust also warns against it.
- Installation: A 3-4 inch layer is usually enough.
- Pros: Easy to clean, chickens get natural grit.
- Cons: Can freeze solid in a harsh winter and get very hot in a summer heatwave.
- Cost: Cheap to install and lasts a long time.
3. Gravel Base + Woodchip Top (The “Permanent” Solution)
This is the solution I finally settled on, and it’s bomb-proof. It’s more work upfront but it solves the drainage problem.
- Why it works: You create a false, free-draining base that water just plummets through, with a comfy layer on top for the hens.
- Installation:
- (Optional) Lay down a geotextile membrane. This stops the gravel and soil from mixing.
- Put down a 2-3 inch layer of 10mm gravel (sometimes called pea gravel).
- Top this with a 4-inch layer of hardwood woodchips.
- Pros: The best drainage you can get. Lasts for years.
- Cons: Higher initial cost and a lot of digging and wheelbarrowing!
- Maintenance: You only need to top up the woodchip layer.
What NOT to Use (And Options to be Cautious With)
- Play Sand: As mentioned, it’s dangerous for their lungs and rubbish for drainage. Avoid at all costs.
- Bark Chips: Avoid these. They are cheaper than hardwood chips but they are like a sponge. They absorb water, turn into a black slush, and can grow nasty mould spores.
- Pine Shavings: These are great inside the coop, but in a run, they’re too lightweight. They’ll just blow away or wash away in the first heavy rain.
- Bare Dirt: This is what turns to mud in the first place!
- Rubber Chippings: You’ll see these sold for equestrian arenas and sometimes play areas. I’m not a fan for chickens. They’re expensive, can get scorching hot in summer, and I just don’t like the idea of my hens pecking at and swallowing bits of rubber. Not natural.
- Paving Slabs or Concrete: This is the ‘nuclear option’ for mud. It 100% stops mud from forming. BUT…
- It’s very hard on their feet and can contribute to bumblefoot.
- It’s expensive and permanent.
- You must lay it on a slope so water (and hosed-off poop) drains away.
- You must still put a thick 4-6 inch layer of sand or woodchip on top for comfort, or it’s a sterile, hard environment.
- If you just lay slabs on bare earth, they can become a 5-star hotel for rats underneath. Learning how to keep rats out of chicken coops is a vital skill, and this makes it harder. In my opinion, it’s too much work, too expensive, and less natural for the hens.
Choosing the right floor is 90% of the battle. Now, let’s win the war by stopping the rain from ever hitting it.
How to Create a Covered Run to Keep Your Flock Dry in the Rain
Now for the main event. Covering your run is the final piece of the puzzle. A good floor deals with water that’s there; a good roof stops it from getting there. Here’s how to plan and build your cover.
Planning Your Covered Run
- Assess Your Space: Is your run a small pre-built one, or a larger walk-in area? A 6x3ft run is easy to cover with one tarp. A 12x6ft walk-in run will need a proper frame. This is a good time to consider how much space do chickens really need.
- Full vs. Partial Coverage: I strongly recommend partial (2/3) coverage. Covering the entire run can block light and, more importantly, ventilation. We’ll cover this in detail in a moment. Leaving 1/3 open allows fresh air to circulate and gives your hens a sunny spot on nice days.
- Height: If it’s a walk-in run, you’ll need to build a frame that gives you at least 6.5ft (2m) of headroom. Trust me, banging your head every time you feed them gets old fast.
- Planning Permission: For small, temporary structures like a chicken run cover, you generally don’t need planning permission in the UK. But if you’re building a large, permanent structure, it’s always worth a quick check with your local council. Factoring in potential costs is also wise; see our guide on how much it costs to keep chickens in the UK. The UK government guidance on keeping chickens is a good place to start for welfare rules.
Covering Options for UK Weather
You have three main options, from budget-friendly to premium.
Option 1: Clear Tarpaulin Cover (Budget-Friendly)
This was my first solution, and it worked well for two years.
- Materials: A heavy-duty clear PVC tarp (get the thickest ‘gauge’ you can find), bungee cords with hooks, and some rope.
- Installation: You secure this to your existing run frame or a simple timber frame. It’s vital to make it taut (tight) so water doesn’t pool.
- Pros: Cheap (I spent about £40), lets all the light through, and is easy to remove in summer.
- Cons: Only lasts 1-2 years before the UV light makes it brittle. It can flap noisily in high winds if not secured properly.
- Best for: Quick fixes, rented properties, or testing the idea.
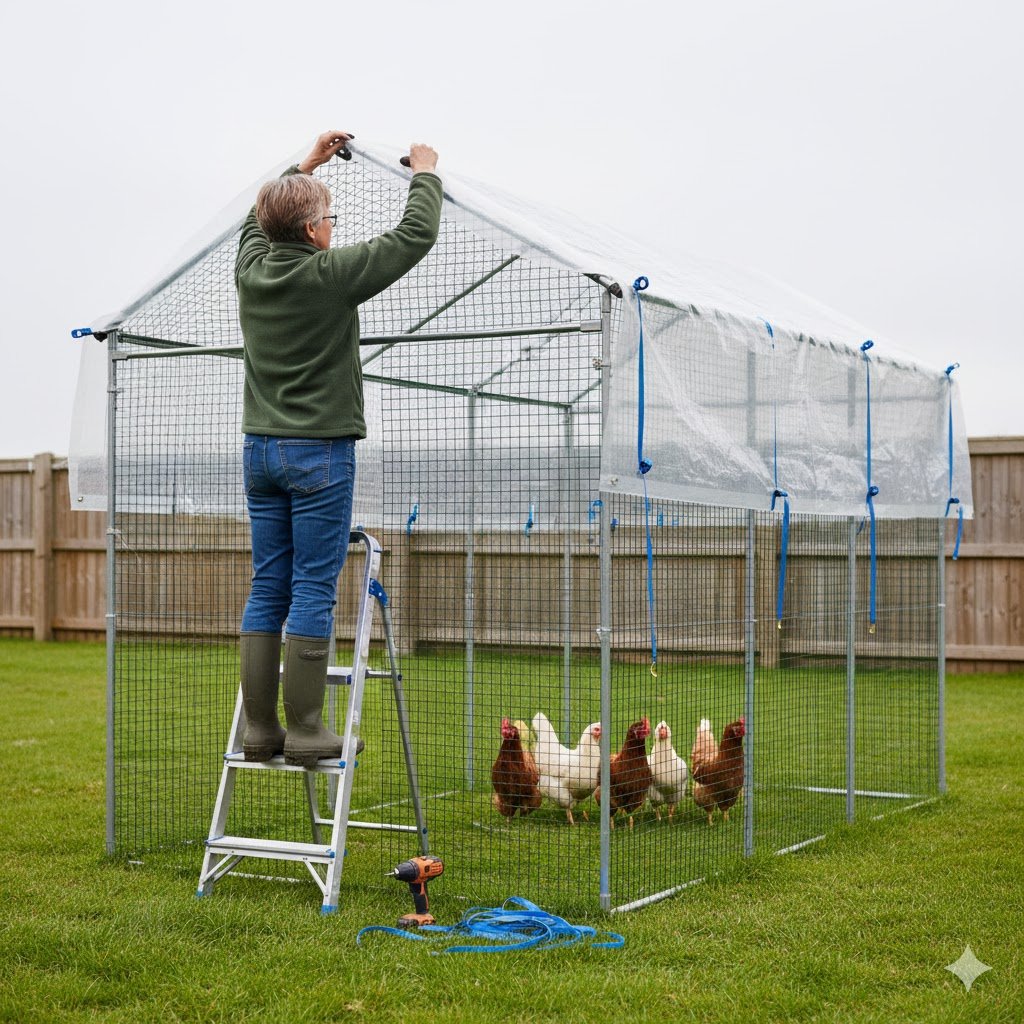
Option 2: Corrugated Roofing Panels (Permanent Solution)
This is what I have now. It’s more work but it’s a fit-and-forget solution.
- Materials: Clear corrugated PVC or polycarbonate panels. Polycarbonate is more expensive but lasts much longer and doesn’t go brittle. You’ll also need a timber frame (2x2s work well) and special waterproof fixings.
- Installation: You must build a sloped roof (a 15-20 degree angle is perfect) so the water runs off. Overlap the panels and make sure the edges overhang the run by about 6 inches.
- Pros: Lasts 10+ years, excellent rain protection, still lets in 80-90% of the light.
- Cons: More expensive (£100-£300), and requires basic DIY skills.
- Best for: Permanent runs where you own the property.
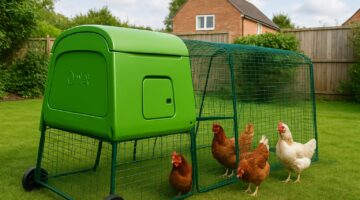
Option 3: Purpose-Built Rain Covers (Premium)
If you have a branded run, like from Omlet, you can buy covers made to fit.
- Products: The Omlet Walk In Chicken Run Rain Covers are excellent and very tough. Other brands offer similar. (This is related to our walk-in chicken run review and Omlet Eglu Cube review).
- Pros: A perfect, professional-looking fit. No DIY needed.
- Cons: The most expensive option.
- Best for: Owners of branded runs who want an easy, perfect-fit solution.
Step-by-Step Installation for a Tarp Cover
- Measure: Measure the top of your run. Buy a tarp that is at least 2ft wider and longer.
- Support: If your run top is flat, you must create a slope. The easiest way is to fix a timber (a 2×2) down the centre of the run roof, sitting 6-8 inches higher than the sides, to create a ridge.
- Stretch: Lay the tarp over the frame. Pull it as tight as you possibly can. A sagging tarp will collect water, and it will break.
- Secure: Use bungee cords every 12 inches around the perimeter, hooking them from the tarp’s eyelets to the run’s wire mesh or frame.
- Check: After the first rainfall, check for any sagging or pooling and tighten as needed.
Building a Permanent Covered Run
- Frame: Build a simple “lean-to” roof frame against a fence or your coop, or a “ridge” roof for a standalone run. Use 4×4 posts for corners and 2x4s for the roof joists.
- Pitch: Ensure you have that 15-20 degree slope.
- Panels: Lay the corrugated sheets starting from the bottom. Overlap each new sheet by one corrugation.
- Fixing: Use the special screws with waterproof washers. Screw through the ‘peak’ of the corrugation, not the ‘valley’—this stops leaks.
- Ventilation: Remember to leave the front 1/3 open or use mesh panels for airflow.
- Gutter: A small gutter system is a brilliant add-on to channel all that water away.
How to Install Simple Guttering (And Why You Should)
This is a game-changer. My permanent roof has this. It stops all the water from the roof… from dumping right next to the run and creating a new mud bath.
- Use ‘mini-shed’ guttering: You can get this from B&Q or any hardware shop.
- Attach: Fix the brackets to the wooden edge (fascia) of your new roof frame.
- Slope: Click the guttering in, making sure it has a slight ‘fall’ (slope) towards one end.
- Drain: Run the downpipe into a water butt (free water for the garden!) or into a drainage trench filled with gravel, at least 3-4 feet away from the run.
CRITICAL: Don’t Forget Ventilation!
I mentioned this, but it’s so important I’m giving it its own section. A covered run must have good airflow.
- Why? A sealed-in run (especially with solid sides) traps moisture from the chickens’ breath and droppings. This creates damp, humid air and a massive buildup of ammonia. This is a recipe for the respiratory diseases we talked about. You can read more about how much ventilation a chicken coop needs here, as the same principles apply.
- How to do it:
- Best way: Don’t cover the entire run (2/3 is best).
- Second best: If you must cover it all, ensure you have ventilation gaps. A gap of 6 inches between the top of the wall and the start of the roof is perfect. It lets fresh air in and ammonia out, but it’s too high for rain to blow in.
- Remember: All ventilation gaps must still be covered in 1/2-inch predator-proof weld mesh.
Getting the cover and flooring right is a massive achievement. But the work doesn’t stop there. A dry run still needs to be a healthy run, and that means managing the ground under the cover.
How to Stop Chicken Run Getting Muddy (Drainage Focus)
Even with a cover, you can still get mud if your run is in a “boggy” spot. The cover stops rain from the sky, but water flowing across the ground can still get in.
Drainage Solutions
- Location: Is your run at the bottom of a slope? If so, you’ll always be fighting a battle. If you can, move it to a higher, flatter part of the garden.
- Grading: If you’re building a run from scratch, ‘grade’ the earth first. This just means sloping the ground away from the run area (a 1-2% grade is plenty).
- French Drain: This sounds fancy, but it’s just a 1ft deep trench dug around the outside perimeter of your run (especially the uphill side), filled with gravel. It catches water flowing towards your run and gives it a place to drain away.
What to Put at the Bottom of a Chicken Run (The Full “Lasagne” System)
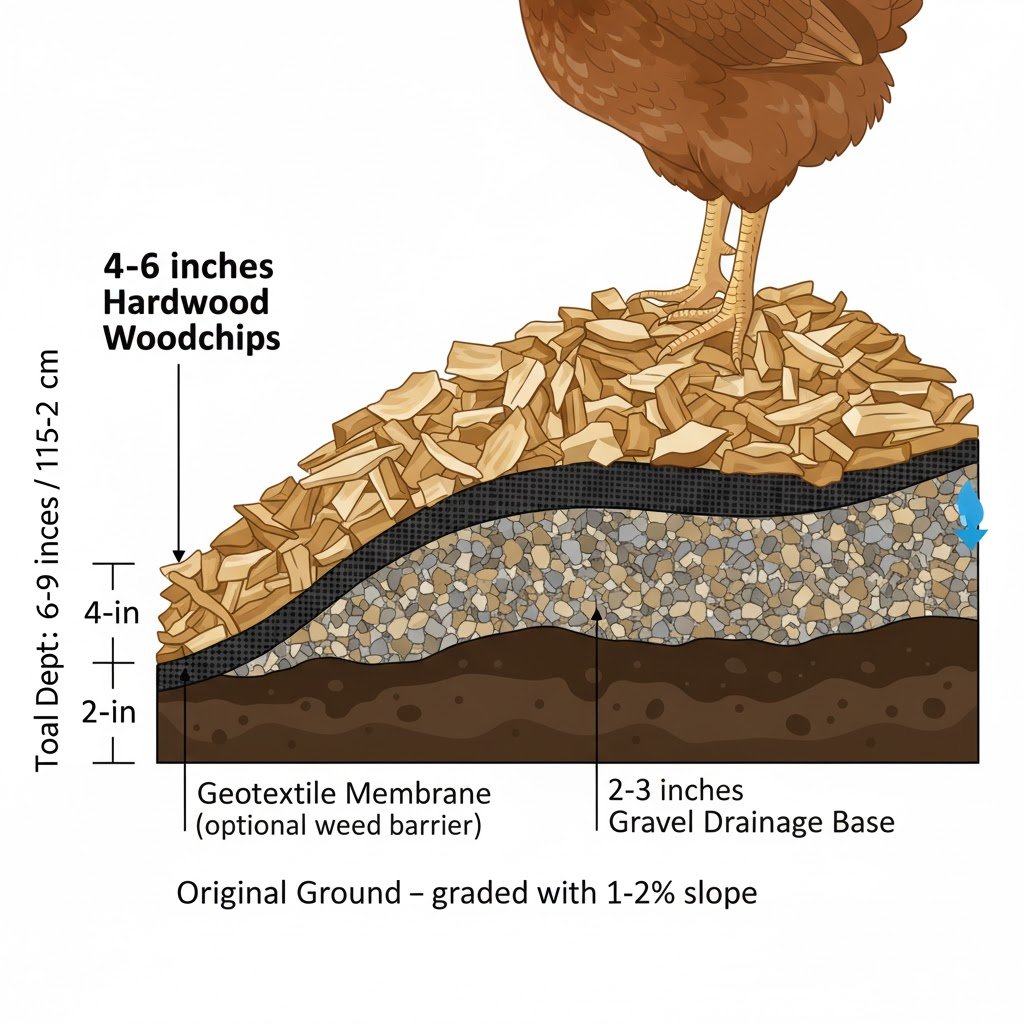
To truly stop mud for good, you need a system. I call this the ‘lasagne’ method, and it’s what I recommend to everyone building a permanent run.
- Dig Down: I know, sorry. Dig out 6-8 inches of your current soil/mud. Get it all out.
- Grade the Base: While it’s empty, slope the earth base slightly.
- Fabric Layer: Lay down a geotextile fabric (a weed barrier). Tuck it up the sides like you’re lining a tin. This stops mud from pushing up and your gravel from sinking.
- Drainage Layer: Put in 2-3 inches of 10mm gravel. This is your drainage.
- Top Layer: Add your 4-6 inch ‘comfort’ layer of hardwood woodchip or builder’s sand.
This system, combined with a roof, means rain that blows in drains instantly. It’s the ultimate mud-free solution.
This ‘lasagne’ method is the ultimate long-term solution. But what if you’re stuck with mud right now and need to add bedding?
Best Bedding for Muddy Chicken Run
What if your run is already a muddy mess? The key is to fix the problem (the mud), not just cover it. For a deep dive, see this guide on the best bedding for chickens in the UK for dampness.
Immediate Solution:
- Scrape out as much of the wet mud and sludge as you can.
- Put down a thick 6-8 inch layer of hardwood woodchips. This will sit on top of the remaining mud and create a new, clean surface.
- Avoid straw. It just absorbs the water, rots down, and turns into a slimy, smelly mat.
Long-Term Strategy: The “best bedding” is to remove the mud, fix the drainage (with the gravel base), and then add your sand or woodchip top layer. Don’t just keep piling new stuff on top of old mud.
Can You Use the “Deep Litter Method” in a Covered Run?
Yes! In fact, a covered run is the only place this method really works in the UK.
- What it is: The Deep Litter Method is where you start with a 4-6 inch layer of woodchips (or shavings). Instead of replacing it, you just ‘turn’ it with a fork every week and add a fresh thin layer on top.
- How it works: The good bacteria in the droppings start a “cold compost.” This breaks down the waste, keeps it dry, and generates a tiny bit of warmth. It’s a living, healthy floor.
- Why it works here: This method only works if it stays dry. A covered run makes this possible. An uncovered run in the UK is too wet and it just turns into a cold, rotting, smelly mess.
A dry run with a good bedding strategy is a happy run. But it’s not a ‘no-maintenance’ run. Here’s how to keep it perfect.
Maintaining Your Dry Run Year-Round
Once you’ve done all this hard work, you need to maintain it. A dry run is much easier to look after.
- Autumn/Winter: Before the rainy season, check your cover is secure. Tighten tarps. Clear gutters. Top up your woodchip layer. This is all part of a good winterizing chicken coop guide.
- Spring/Summer: On dry days, hose down sand or woodchip to clean it (this is fine now it can drain/dry). Use a rake to fluff up any compacted areas.
- Regular Tasks:
- Daily: Poo-pick. This is the one job you can’t skip! It’s the key to stopping smells and bacteria.
- Weekly: Check the cover’s security.
- Monthly: Check for any low spots where water might be gathering. Top up flooring.
The Perfect Spot for a Dry Dust Bath
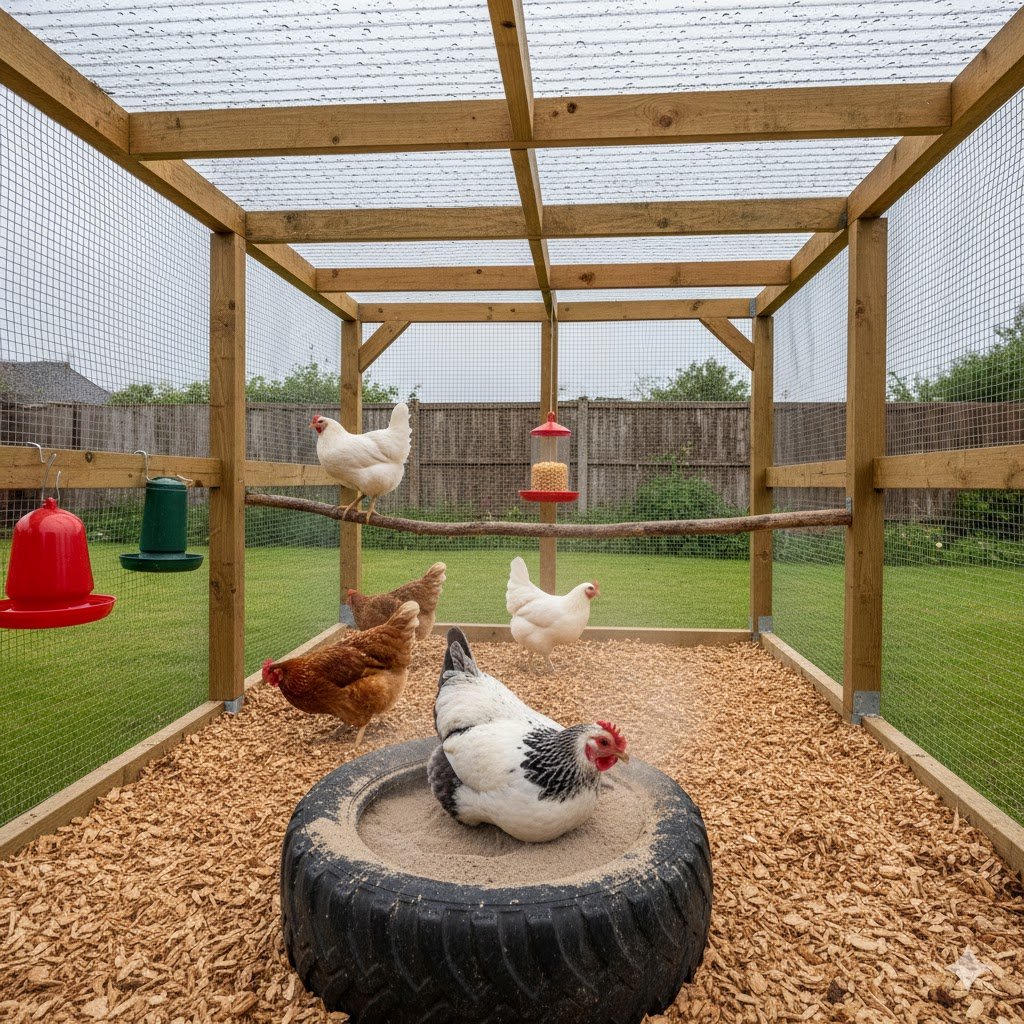
One of the best things about a covered run? You can finally have a dust bath that stays dry!
- Why? Hens need to dust bathe to control mites and lice. It’s non-negotiable for their health and happiness. A wet, muddy run stops them from doing this.
- How to make one: Get a container. An old tyre (my favourite), a large cat litter tray, or a shallow wooden box (2ft x 2ft) is perfect. Our guide on how to set up a dust bath for chickens has more ideas.
- Location: Place it under the covered part of your run.
- The Magic Recipe: Mix 50% dry, loose soil (from your garden, if it’s not heavy clay) with 25% builder’s sand and 25% wood ash (from a bonfire or wood burner – no coal ash).
- They will absolutely love you for it, and their feathers will be in amazing condition.
Maintaining the run is one thing, but what about the chickens themselves? How should they behave when the rain starts lashing down?
What Should I Do with My Chickens When It Rains?
Once your covered run is set up, this becomes an easy question to answer.
- Let them choose! Most chickens will self-regulate. They’ll head for their covered, dry area when the rain starts.
- Provide Entertainment: Make the covered area the ‘fun’ area. Put their feeder, drinker, and some perches or a dust bath under the cover. This encourages them to use it.
- Check on Them: In a really heavy downpour, just pop your head out and check.
- The 15°C Rule: If it’s cold (below 15°C) and chucking it down, and you see a chicken looking soaked and miserable, bring it inside and towel-dry it. But with a good covered run, this should almost never happen.
A Covered Run is a Predator-Proof Run
A huge bonus of a covered run that people often forget is that it adds a massive layer of security.
- Aerial Predators: Your flock is now 100% safe from protecting your flock from UK birds of prey like buzzards, red kites, or (in some areas) large gulls.
- Climbing Predators: It also stops a fox from climbing over the top. BUT…
- Crucial Security Check: Any ‘open’ or ‘ventilated’ parts of your roof (like the 1/3 I recommended) must be covered in strong 1/2-inch weld mesh (not chicken wire, a fox can bite through that). Secure this mesh to the frame with screws and washers, not staples which can be prized off. This is a key part of predator-proofing 101 and creating best fox-proof chicken coops in the UK. For ultimate protection, you could also add best electric fencing kits UK around the perimeter.
A secure, dry run is the goal. But even with the best setup, you can run into the odd problem.
Troubleshooting Common Problems
- Problem: My tarp is sagging and pooling water.
- Solution: It’s not tight enough, or it doesn’t have enough slope. Add a centre support pole to create a “peak” and tighten the bungee cords until they ‘ping’.
- Problem: Water is still getting in my covered run.
- Solution: The wind is blowing it in. Your cover needs a bigger “overhang” (at least 6 inches). You might need to add a side panel (like a small tarp) on the side of the prevailing wind.
- Problem: My run is covered, but it’s still muddy!
- Solution: This is a ground drainage problem, not a cover problem. Water is flowing into your run from the surrounding garden. You need to install a French drain (see section 7) and use the ‘lasagne’ flooring system.
- Problem: My covered run smells strongly of ammonia.
- Solution: Not enough ventilation. You’ve covered too much of the run. Remove a side panel or reduce the cover to 2/3 of the run. See the ventilation section. Also, poo-pick more often. Refer to our guide on how to keep a chicken coop from smelling.
- Problem: My woodchips are washing away.
- Solution: You need to add a “border” around your run. A simple 6-inch high wooden plank frame is enough to keep all your lovely flooring material in.
- Problem: My ‘clear’ roof panels are now green and covered in moss.
- Solution: This happens to all of us. It’s algae. Once a year, on a dry day, get a long-handled brush and a bucket of poultry-safe disinfectant (like Virkon S or just a white vinegar solution) and give it a good scrub. It’ll let the light back in.
Hopefully, that list solves any little issues. To finish up, let’s run through the most common questions one last time.
FAQ Section
Should I put a tarp over my chicken run?
Yes, a tarp is an excellent, budget-friendly solution to keep your chicken run dry from rain. Use a-heavy-duty, clear PVC tarp and secure it tightly with a slope so water runs off and doesn’t pool.
How do I waterproof my chicken run?
True waterproofing involves three steps:
Overhead Cover: Install a tarp or corrugated roofing panels.
Flooring: Remove dirt and mud. Install a free-draining floor like builder’s sand or hardwood woodchips (ideally on a gravel base).
Ground Drainage: Ensure the ground slopes away from the run and, if needed, add a French drain to catch runoff.
What is the best flooring for a muddy chicken run?
For an existing muddy run, the best fix is to scrape out the mud and put down a deep (6-8 inch) layer of hardwood woodchips. For a new run, the best solution is a gravel base (for drainage) topped with either hardwood woodchips or builder’s sand.
What soaks up water in a chicken coop?
Inside the coop, dry wood shavings or hemp bedding are best for absorbing moisture and droppings. Outside in the run, you want materials that drain (like sand and hardwood chips), not absorb. Materials that absorb water in the run just turn to sludge.
How to keep chicken run dry in the rain?
The best way is a 3-part approach:
Cover at least 2/3 of the run with a clear tarp or roofing panels.
Install a deep, free-draining floor like 6 inches of hardwood woodchips or sand.
Ensure the run is on high ground or has drainage (like a French drain) to stop ground water from flowing in.
What’s the best way to ventilate a covered chicken run?
The best way is ‘cross-ventilation.’ Leave one side (like the front 1/3) open to the air, or have ventilation gaps (covered with weld mesh) on opposite sides of the run, ideally just under the roofline. This lets fresh air in and pushes stale, ammonia-filled air out, without letting rain in.
Conclusion: Your Mud-Free Run is Worth the Effort
Sorting out a muddy chicken run can feel like an endless, back-breaking job, especially during a wet British winter. I’ve been there, and I know how frustrating it is. But I promise you, the effort you put in now will pay you back tenfold.
By following this three-part plan—a good cover overhead, the right flooring underfoot, and smart drainage—you’re not just fixing a muddy patch of ground. You’re creating a permanent, healthy, and safe environment for your flock. You’ll swap that smelly bog for a clean, dry, and usable space. You’ll spend less time fighting mud and more time enjoying your hens.
Knowing how to create a covered run to keep your flock dry in the rain is the key to happy, healthy chickens and a much happier chicken keeper. Your hens will thank you for it, and you’ll be able to look out at the rain, smile, and know your flock is perfectly dry and content.

Oladepo Babatunde is the founder of ChickenStarter.com. He is a backyard chicken keeper and educator who specializes in helping beginners raise healthy flocks, particularly in warm climates. His expertise comes from years of hands-on experience building coops, treating common chicken ailments, and solving flock management issues. His own happy hens are a testament to his methods, laying 25-30 eggs weekly.