Imagine healthier chickens with stronger immune systems, better eggshells, and a lower monthly feed bill. This isn’t a new magic supplement; it’s a simple, age-old process: fermenting chicken feed. This guide shows you how to transform your regular feed into a probiotic-rich superfood. We’ll go over the pros and cons, the simple science, and a step-by-step process so you can start giving your flock this powerful nutritional boost.
Is Fermenting Chicken Feed a Good Idea? The Pros and Cons
Before you start, it’s helpful to understand the benefits and potential drawbacks of fermented feed. The process is simple, but it requires a bit of consistency.
The Benefits of Fermented Feed (Pros)
Fermenting feed changes its nutritional value, making it a living, beneficial food source for your flock.
- IMPROVED GUT HEALTH & DIGESTION: The fermentation process creates natural probiotics and a thriving population of beneficial bacteria, most notably Lactobacillus. These microbes populate the chicken’s gut, creating a healthy microbiome that helps improve digestion and fight off harmful pathogens like E. coli and Salmonella. A chicken with a healthy gut absorbs nutrients more efficiently, which is the foundation for overall vitality.
- INCREASED NUTRIENT ABSORPTION: Raw grains and seeds contain “anti-nutrients” such as phytic acid, which can block a chicken’s ability to absorb essential minerals. Fermentation breaks down these compounds, making key nutrients like calcium, phosphorus, zinc, and B vitamins more available for your poultry to absorb. This is a primary reason why fermented feed leads to better shell quality and improved overall health.
- BETTER HYDRATION & RESPIRATORY HEALTH: Because fermented feed is wet, it’s a great way to ensure your flock is getting enough water, which is especially important during hot summer months when they are prone to dehydration. The moisture in the feed also helps prevent dust inhalation, a common respiratory irritant for birds, particularly in dry coops.
- STRONGER IMMUNE SYSTEM: A healthy gut, full of beneficial bacteria, is the foundation of a strong immune system. When a chicken’s digestion is working well, its body can focus its energy on fending off illness. The probiotics in the fermented feed help support a robust immune response.
- POTENTIAL FEED SAVINGS: Chickens can feel fuller on less fermented feed because of the increased nutrient absorption and the filling nature of the wet mash. The feed itself expands as it soaks up water. Many keepers report their birds eating about 25-30% less, which can significantly lower your monthly feed bill.
The Potential Drawbacks (Cons)
While the benefits are significant, there are a few downsides to be aware of.
- Time Commitment: Fermenting requires a daily chore of stirring the batch and preparing new ones. It’s not a “set it and forget it” solution. You’ll need to spend a few minutes each day monitoring the process and preparing new batches. However, with a simple routine, this becomes a quick and easy habit.
- Risk of Spoilage: If not done correctly, the feed can spoil and grow dangerous mold. This is why it is essential to follow the process carefully and trust your nose. Moldy feed can make your hens sick.
- Can Be Messy: The wet mash can be a bit messier than dry feed. To prevent a mess around the coop, consider feeding the fermented feed in a dedicated, easy-to-clean container, such as a rubber tub or bowl.
The benefits of improved gut health, reduced costs, and enhanced nutrient absorption are clear, but the process does require a daily commitment. Understanding these trade-offs is the first step to deciding if this method is right for your flock. Next, let’s explore the science behind how this transformation actually happens.
What’s Happening in That Bucket? The Science of Fermentation
At its core, fermentation is a natural biological process. You aren’t adding any magic ingredients; you’re simply creating the right conditions for the good bacteria that are already present on the grains to thrive.
The process is called lactic acid fermentation. Tiny microbes, primarily from the Lactobacillus family, feed on the sugars and starches in the grain. As they do, they produce lactic acid, which lowers the pH of the mixture. This acidic environment acts as a natural preservative, inhibiting the growth of harmful bacteria and mold. It also gives the feed that characteristic tangy, sour smell. In essence, you’re cultivating a powerful, nutrient-rich “live food” for your chickens.
The process is anaerobic, meaning it happens without oxygen. This is why you need a loose-fitting lid—it keeps bugs and debris out while allowing gas (primarily carbon dioxide) to escape. This allows the beneficial bacteria to multiply rapidly, creating the healthy ferment you’re looking for.
Fermentation vs. Soaking: What’s the Difference?
A common question is whether fermenting is the same as simply soaking the feed in water. It is not. While soaking feed does increase hydration and can make some nutrients more accessible, it doesn’t create the probiotics and beneficial acids that true fermentation does. The key difference is the controlled growth of beneficial bacteria, which requires a specific environment and a longer time period.
The secret to fermented feed’s power lies in the unseen world of microbes and chemistry. By creating a controlled environment for lactic acid fermentation, we’re not just wetting the feed—we’re actively cultivating a living superfood. Now, let’s put that science into practice with our step-by-step guide.
How to Ferment Chicken Feed: A Simple Step-by-Step Guide
The process of how to ferment chicken feed is surprisingly simple. You are essentially creating a beneficial, sour environment that encourages good bacteria to grow.
What You’ll Need
- A Container: Use a food-grade bucket, a large glass jar, or a ceramic crock. Plastic is fine, but make sure it is marked as food-grade. Avoid metal containers, which can react with the acids produced during fermentation. A 5-gallon bucket is a great size for a small to medium-sized flock.
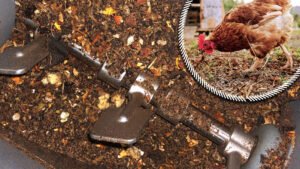
- Your Regular Chicken Feed: You can ferment whole grains, pellets, crumbles, or mash.
- De-chlorinated Water: Chlorine kills the beneficial bacteria you want to cultivate. To de-chlorinate tap water, simply let it sit in an open container for 24 hours. You can also use filtered water or well water.
- A Cloth Cover or a Loose-fitting Lid: This is important for the anaerobic process. You want to keep bugs and dust out, but you need to allow gases to escape.
Step 1: Combine Feed and Water
Place your chicken feed in the bucket and add enough de-chlorinated water to cover the feed by about 2-3 inches. The feed will expand as it absorbs the water, so you want to be generous to ensure everything stays submerged. The ideal ratio is roughly 1 part feed to 1.5 parts water. The goal is a watery oatmeal consistency, not a thick paste. Use a spoon or your hand to mix it thoroughly, making sure there are no dry spots.
Step 2: Cover and Wait
“Do you put a lid on fermenting chicken feed?” You should use a cover, but it should not be airtight. Use a tea towel, a cloth, or a loose-fitting lid. This allows gases (like carbon dioxide) to escape, which is crucial for the anaerobic fermentation process. An airtight lid could cause pressure to build up and even explode. How many days to ferment chicken feed? Let the mixture sit for 2 to 4 days. The exact timing will depend on the ambient temperature. The ideal temperature for fermentation is between 60-80°F (15-27°C).
Step 3: Stir Daily
It is critical to stir the mixture 1-2 times a day. This serves two main purposes: it helps release gas and ensures all the feed remains submerged. Any feed exposed to air on the surface of the mixture is at risk for spoilage and mold. Stirring also distributes the beneficial bacteria throughout the mix.
Step 4: Know When It’s Ready
The key is to trust your senses. The fermentation is complete when the mixture has a sweet, slightly sour, or tangy smell, similar to a sourdough starter. You may also see small bubbles rising to the surface, and a thin, whitish film called kahm yeast may form on top. It should never smell foul, rotten, or alcoholic.
Feeding Your Flock: How Much, How Often, and How to Store It
Now that you have your fermented feed, here’s how to use it with your flock.
How Much Fermented Feed Per Chicken Per Day?
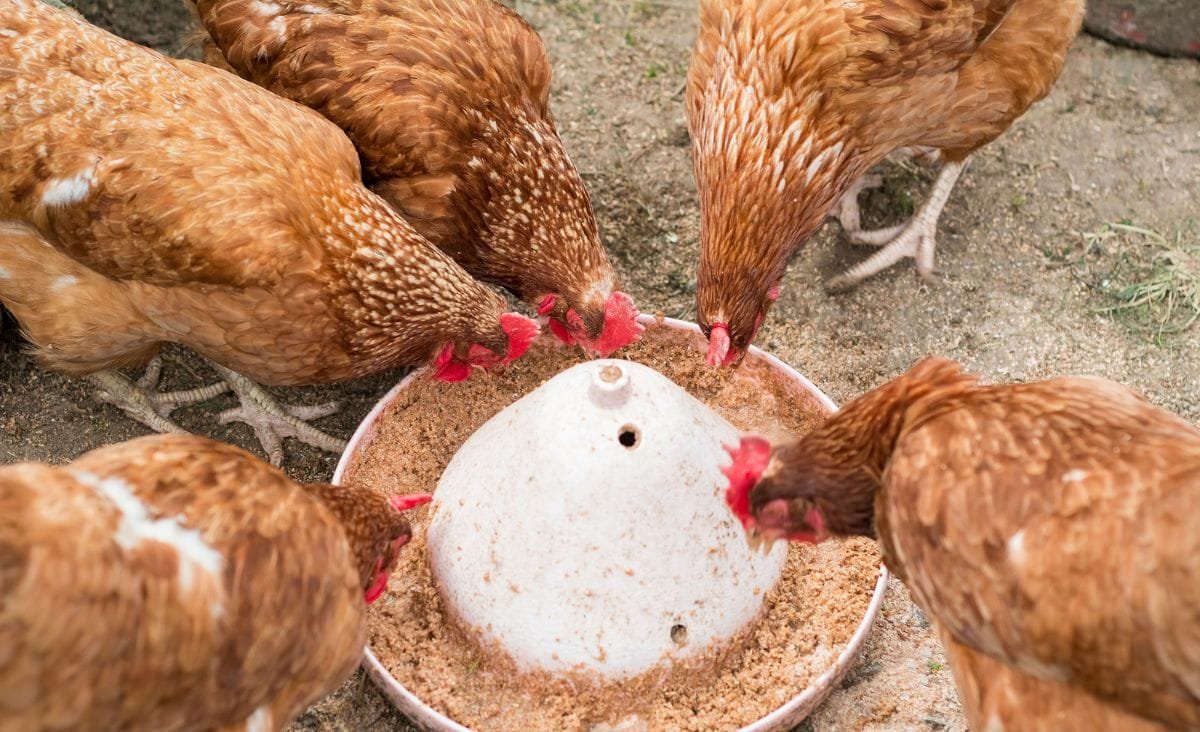
A good starting point is to provide roughly the same amount by weight as you would dry feed, but you will quickly notice they eat less. The feed is more nutrient-dense and filling. For an average hen, this is about 1/4 to 1/3 pound of feed per day. The best method is to start by offering a full ration and adjusting based on how much they consume. Don’t worry if they don’t finish it right away—they will eat it throughout the day.
The Continuous Brew Method
To simplify the process and ensure a consistent supply, you can use a continuous brew method. Once a batch is ready, simply scoop out what you need for the day and then add fresh dry feed and water back into the remaining fermented mash. This uses the existing liquid as a “starter culture” and speeds up the next batch. This method reduces the need to start from scratch each time and maintains a healthy population of beneficial bacteria.
Transitioning Your Flock to Fermented Feed
To prevent digestive upset, introduce the fermented feed gradually. For the first few days, mix a small amount of fermented feed with their regular dry feed. Over the next week, slowly increase the ratio of fermented feed until they are eating it exclusively or at your desired ratio. Try mixing in a favorite treat, like black soldier fly larvae or a handful of scratch grains, to encourage them to eat the fermented feed.
Advanced Techniques & Variations
Once you’re comfortable with the basic process, you can enhance your fermented feed even further and streamline your routine.
Adding Boosters for Extra Nutrition
To give your flock an extra nutritional punch, you can add “boosters” to the feed before you start fermenting.
- Apple Cider Vinegar (with “the mother”): A small splash of raw, unpasteurized ACV acts as a great starter. Its beneficial bacteria help kick-start the fermentation process and can also provide a small nutritional boost.
- Kelp: A spoonful of dried kelp powder can be added to the dry feed before fermenting. Kelp is a nutrient-rich seaweed that adds valuable minerals and vitamins, including iodine, which is great for overall health.
- Dried Herbs: You can mix in dried herbs like oregano, thyme, or basil for added vitamins and natural antimicrobial properties.
The Two-Bucket System
For a highly efficient and continuous supply of fermented feed, try the two-bucket system. This method ensures you always have a fresh batch ready to go without any interruption.
- Bucket A (Feeding): This is your main bucket. You use it to feed your flock for a couple of days.
- Bucket B (Fermenting): This is your second bucket. As you start to run low on feed in Bucket A, you prepare a new batch in Bucket B.
- Rotate: Once the feed in Bucket B is ready, you switch the buckets. Bucket B becomes your feeding bucket, and you clean and start a new batch in Bucket A. This simple rotation ensures a continuous supply of fermented feed for your flock.
Cost-Benefit Analysis
Fermenting feed can lead to significant cost savings over time. The increased nutrient absorption means your chickens get more out of every bite, leading them to feel fuller on less food. Here’s a hypothetical example of the potential savings for a small flock.
| Metric | Standard Dry Feed | Fermented Feed (25% Savings) |
|---|---|---|
| Daily Feed per 10 Hens | 2.5 lbs | ~1.875 lbs |
| Monthly Feed Cost | $25.00 | $18.75 |
| Monthly Savings | $6.25 |
These savings can add up to over $75 a year, which you can then put toward other things for your flock, such as bedding, treats, or supplements.
Common Myths Debunked
There are many misconceptions about fermenting feed. Let’s tackle a few of the most common ones.
- Myth: “It will make my chickens drunk.” Fact: This is a common concern, but it’s not what happens with lactic acid fermentation. While alcoholic fermentation (like making beer) produces alcohol, lactic acid fermentation produces… you guessed it, lactic acid. This is the same process used to make yogurt, kimchi, and sourdough bread. Your chickens will get a healthy, probiotic-rich meal, not a buzz. If your ferment smells like alcohol, it has gone bad, and you should throw it out.
- Myth: “It’s too complicated for a beginner.” Fact: While it may seem intimidating at first, the process is very forgiving and easy to learn. The most important things to remember are to keep it submerged, stir daily, and trust your nose. Once you get a couple of batches under your belt, it will become second nature and a quick part of your daily chores. The payoff in health and savings is well worth the small learning curve.
Safety and Troubleshooting
Preventing issues with your feed is a priority. Here are some key tips for troubleshooting.
How to Prevent Mold in Fermented Chicken Feed
Preventing mold is the most important step for safe fermented feed. Mold can grow on any part of the feed that is exposed to air. Here’s how to prevent it:
- Use a Clean Container: Always start with a sanitized bucket or jar. You can wash it with soap and water and then rinse it thoroughly.
- Keep Feed Submerged: This is the most common cause of mold. Always add enough water to keep everything submerged. If a bit of feed floats to the surface, push it down with your spoon.
- Stir Daily: Don’t skip this step. Stirring helps keep feed submerged and releases gases.
- Trust Your Nose: A healthy ferment smells pleasantly sour, a bit like a tangy, yeasty bread dough. If it smells foul, rotten, or alcoholic, it has spoiled and must be thrown out. A little bit of kahm yeast on the surface is not mold and is safe.
Fermenting Chicken Feed in Winter
Lower temperatures will slow down the fermentation process. If you notice your ferment taking longer than usual, consider moving it to a warmer spot, such as indoors or in a heated shed, to get it going. It may take 4-5 days instead of the usual 2-3.
Troubleshooting Common Issues
- “My feed isn’t bubbling.” Bubbling is a sign of an active ferment but it’s not always visible. As long as the mixture smells tangy and not foul, the fermentation is likely still happening.
- “It smells like alcohol.” This can mean the ferment has gone on too long and the good bacteria have started producing alcohol instead of lactic acid. This can still be fed to your flock in small amounts, but it’s best to start a fresh batch.
- “My chickens won’t eat it.” Chickens can be picky.
With these tips, you’re equipped to handle any challenge that comes your way. To wrap up, let’s address some of the most frequently asked questions about this process.
Fermenting Chicken Feed FAQ
Is fermented feed good for broilers and chicks?
Yes, it is excellent for broilers and chicks once they are old enough to be on solid feed. The increased nutrient absorption can lead to healthier growth and better weight gain. It also helps improve their overall gut health, which is vital for fast-growing birds. For more on this, check out our guide on bringing chicks once they are old enough.
What is the best fermented food for chickens?
The best fermented food for poultry is their regular, balanced layer feed, as this ensures they get all the necessary nutrients in a more digestible form. You can also ferment single grains or other chicken-safe foods, but a balanced feed is the best for a complete diet.
What’s the difference between fermented feed and just wet mash?
Wet mash is simply feed and water. Fermented feed is a living food, full of beneficial probiotics created through a biological process. It’s the beneficial bacteria that provides the major health benefits, not just the hydration.
Do I need a starter culture to ferment feed?
No, you do not need a starter culture. The process of fermentation will naturally begin from beneficial bacteria that are already present in the feed and the air. However, using the continuous brew method (as described above) will make each new batch ferment faster.
What about grit and oyster shells?
Even with fermented feed, your chickens still need access to a separate source of grit and oyster shells. Fermented feed helps with nutrient absorption, but the grit is essential for grinding down food in their gizzard, and the oyster shells provide the calcium needed for strong eggshells.
Can I ferment treats like corn or scratch grains?
Yes, you can ferment treats like corn, oats, or scratch grains. This can make them more digestible and add a probiotic boost. However, remember that these are treats and should only be given in moderation as part of a balanced diet.
Can other animals eat fermented feed?
Fermented feed is great for chickens and other poultry like ducks and turkeys, but it is not recommended for other livestock such as rabbits or goats. Their digestive systems are different and may not handle the fermented grains well. Always stick to poultry-specific feeds for your flock.
Conclusion: A Simple Step to a Healthier Flock
Fermenting chicken feed might sound like a complicated process, but as you can see, it is a simple and forgiving technique. By following this guide, you can give your flock a major boost in gut health, nutrient absorption, and overall immunity, while also potentially saving money on your feed bill. Give it a try—your flock will thank you for it!

Oladepo Babatunde is the founder of ChickenStarter.com. He is a backyard chicken keeper and educator who specializes in helping beginners raise healthy flocks, particularly in warm climates. His expertise comes from years of hands-on experience building coops, treating common chicken ailments, and solving flock management issues. His own happy hens are a testament to his methods, laying 25-30 eggs weekly.