This post contains affiliate links. As an Amazon Associate, I earn from qualifying purchases at no extra cost to you. Product recommendations are based on my personal experience raising backyard chickens.
Last Updated: January 2026 – Added off-grid heating solutions, rooster management guidance, expanded health section with wry neck treatment, cost breakdowns, and updated product recommendations.
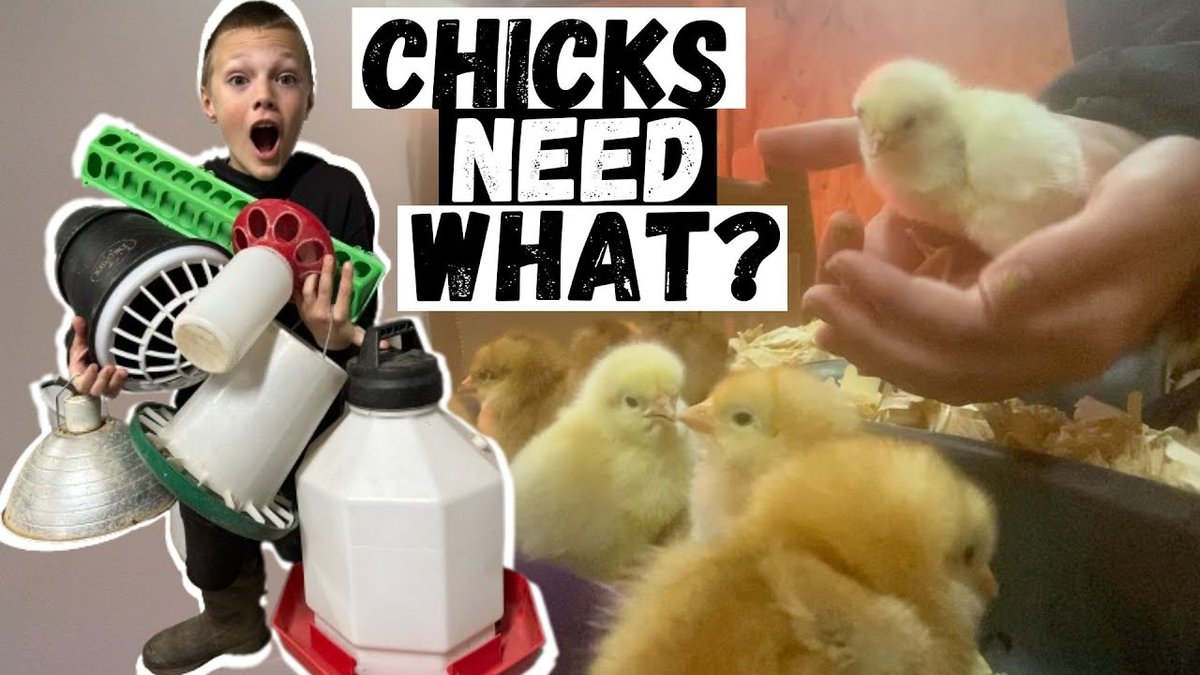
To bring baby chicks home safely, you need 15 essential items: a brooder, heat source (plate recommended over lamp), digital thermometer, pine or hemp shavings, chick feeder, waterer, starter feed, electrolytes, grit, pasting up supplies, first aid kit, biosecurity supplies, brooder cover, roosting bars, and enrichment items. Set up your brooder 24 to 48 hours before arrival with temperatures at 90 to 95°F (32 to 35°C) at floor level.
The day you bring your first baby chicks home is an exciting milestone. The peeping sound and fluffy little bundles of energy are completely irresistible.
It is easy to get caught up in the excitement, but after raising over 200 chicks across eight breeding seasons since 2018, I have learned that preparation is everything. A little work upfront ensures your new flock gets the best possible start in life.
This guide will walk you through everything you need, from setting up their new home to the essential supplies on your shopping list. We will also cover what you need to do when you first bring chicks home and how to care for them. Think of this as your complete, ready for anything chick preparation and management guide.
Why More Families Are Raising Backyard Chickens
Before diving into the checklist, it helps to understand why backyard chicken keeping has surged in popularity. Fluctuating egg prices, concerns about bird flu outbreaks affecting commercial supplies, and a growing desire for food security have pushed many families toward raising their own flocks.
The global chicken coop market is valued at over USD 560 million and is projected to reach USD 907 million by 2035, reflecting just how mainstream backyard poultry keeping has become.
Having chickens means more control over your food supply. You know exactly what your birds eat, how they are treated, and you have fresh eggs available regardless of grocery store shortages or price spikes.
Whether you are motivated by self sufficiency, sustainability, or simply wanting the freshest eggs possible, starting with healthy chicks and proper preparation sets the foundation for years of successful flock management.
What Does It Cost to Get Started?
Understanding the financial commitment upfront helps you plan appropriately and avoid surprises.
Brooder Setup Costs
Setting up a complete brooder for baby chicks typically costs between $75 and $200 depending on whether you repurpose items or buy everything new.
| Item | Budget Option | Mid-Range | Premium |
|---|---|---|---|
| Brooder container | $0 (repurposed tote) | $15 to $30 | $50 to $165 |
| Heat source | $20 to $38 (lamp) | $40 to $50 (basic plate) | $60 to $100 (premium plate) |
| Thermometer | $8 to $12 | $15 to $20 | $25 to $35 |
| Bedding | $10 to $15 | $15 to $26 | $26 to $35 |
| Feeder and waterer | $0 (repurposed) | $15 to $25 | $30 to $50 |
| Starter feed | $15 to $20 | $25 to $40 | $50 to $80 (organic) |
| Supplements and grit | $10 to $15 | $15 to $25 | $25 to $40 |
| Brooder Total | $63 to $100 | $140 to $216 | $266 to $505 |
Chick Costs
Baby chicks range from $2 to $10 each depending on breed and source. Common breeds at local feed stores typically cost $4 to $6 each, while rare or heritage breeds from specialty hatcheries can cost $10 to $25 or more.
For a starter flock of 6 chicks, budget $24 to $60.
Complete First Year Costs
When you factor in the coop, run, adult feeders and waterers, ongoing feed, and supplies, research indicates an average first year total of approximately $500 to $1,500 for a typical beginner flock of 5 to 6 chickens. The largest expense is the coop, which can range from $200 for a basic DIY build to $500 to $1,000 for a quality pre-built option.
After the first year, ongoing costs average $25 to $50 per month for a small flock, covering feed, bedding, and occasional supplies.
For detailed cost breakdowns as your flock matures, see our guide on the cost to raise chickens for the first year.
Quick Shopping List for Busy Readers
If you are in a hurry, here is your essential shopping checklist:
- Brooder
- Heat Source (Plate or Lamp)
- Digital Thermometer
- Pine or Hemp Shavings Bedding
- Chick Feeder
- Chick Waterer
- Chick Starter Feed
- Electrolytes and Vitamins
- Chick Grit
- Pasting Up Kit
- First Aid Kit
- Biosecurity Supplies
- Brooder Lid or Cover
- Roosting Bars
- Entertainment (Mirror or Millet)
Keep reading for crucial details on how to choose and use each item.
What Every First Time Chicken Owner Should Know
Before you even start shopping for supplies for your chickens, it is important to understand the three core principles of raising healthy baby chicks: warmth, food and water, and safety.
A tiny chick is completely dependent on you for all three. They cannot regulate their own body temperature for the first few weeks and are vulnerable to predators, illness, and injury.
This checklist is not just a list of items to buy. It is a plan to ensure your new chicks have everything they need to thrive and help you avoid the common mistakes every first time chicken keeper makes.
Why Warmth is Non Negotiable
A chick’s feathers do not provide adequate insulation until they are several weeks old. Without a reliable external heat source, they will quickly get chilled, leading to sickness and a high risk of mortality.
According to the University of Kentucky Cooperative Extension Service, chicks require supplemental heat starting at 95°F during their first week, decreasing by 5°F each week until fully feathered. A chilled chick cannot properly digest food or water, and its immune system is compromised.
Why Food and Water Are So Specific
You cannot just throw any food or water at them. Chick food is specially formulated with the correct protein levels and nutrients for their rapid growth.
Their water must be in a shallow container to prevent accidental drowning. A chick can die from dehydration in a matter of hours.
Why Safety is Paramount
Young chicks are completely defenseless. They can be trampled, attacked by household pets, or escape and get lost in your home.
Their brooder must be a safe, secure fortress that protects them from any external threats and keeps them from getting into trouble.
Preparing for Arrival: Setting Up Your Brooder
The brooder is the safe, warm home for your chicks for the first four to six weeks. It is where they will spend all their time, so setting it up before they arrive is absolutely critical.
You want to make sure the temperature is perfect and the space is ready for them to move in as soon as you get them home.
1. The Brooder Itself
A brooder can be as simple or as complex as you want. The goal is to provide a draft free, safe space that is easy to clean.
I have used large galvanized stock tanks, plastic storage totes, and even large wooden boxes. The key is to make sure it is big enough for the chicks to move away from the heat source if they get too warm and to be large enough for them for several weeks.
A good rule of thumb is to start with at least 0.5 square feet of space for every chick you have, then increase it to a full 1 square foot per chick after three weeks. Be prepared to upgrade to a larger space if you are raising a large flock. For more details on spacing requirements, see our guide on how much space chickens really need.
2. A Reliable Heat Source
Chicks need supplemental heat until they grow their full feathers, which is around 4 to 6 weeks. The two most common options are a heat lamp or a heat plate.
Heat Lamps
These are often the cheapest and most common option. They provide a broad heat area, allowing chicks to find the perfect spot.
However, they use a lot of energy and, most importantly, are a significant fire hazard. You must secure them with a chain or clamp and keep them far away from flammable materials. Never use a red bulb, as it can disrupt a chick’s natural sleep cycle.
Heat Plates
These are a fantastic, safer alternative. They are like a heating pad for chicks, mimicking the warmth of a mother hen.
Chicks huddle underneath for warmth and can easily move away if they get too hot. They use less energy than a heat lamp and virtually eliminate the risk of fire.
I have transitioned to using a radiant heat plate over the years and cannot recommend them enough for peace of mind. My current heat plate has successfully brooded six batches without a single heat related loss. The surface does not get hot enough to burn, and there is no artificial light to disrupt natural sleep patterns.
Off Grid and Emergency Heating Solutions
Power outages happen, and some homesteaders live entirely off grid. A standard 250 watt heat lamp uses approximately 6 kilowatts over 24 hours, which can quickly drain solar battery systems or become impossible during extended outages.
Here are proven alternatives that work without electricity:
Hot Water Bottles and Containers
Fill a plastic gallon container with warm water (not boiling), wrap it with fleece strips, and place it in the brooder. Chicks will snuggle between the fleece and the warm container. You will need to rewarm the water every three to four hours.
A hot water bottle wrapped in a towel can last through the night and is easy to sanitize for repeated use. This method works best for chicks that are at least a few days old and when you have four or more chicks that can huddle together for additional warmth.
Insulated Brooder Design
Line the outside of your brooder box with mylar emergency blankets or reflective insulation. Use a deep layer of natural bedding materials like straw or shavings. The combination of insulation and bedding retains heat much longer.
Heated Rice Socks
Fill several clean socks with dry rice and warm them in an oven at low temperature or in a microwave. Place the warm socks in the brooder for chicks to huddle around. This provides gentle, safe heat for several hours.
Deep Litter Method for Ambient Heat
While not sufficient for very young chicks on its own, the deep litter method generates natural warmth through decomposition. Layering new bedding on top of old bedding creates a composting effect that raises ambient temperature inside the brooder or coop.
For detailed temperature management strategies, see our guide on automated brooder weaning temperature controllers.
3. A Digital Thermometer
This is an absolute must have. You cannot tell if the temperature is right just by looking at the chicks.
The ideal temperature for the first week is between 90 to 95°F (32 to 35°C). Place the thermometer on the floor of the brooder, directly beneath the heat source, so you know exactly what the chicks are experiencing.
I use a digital thermometer with a probe because it allows me to monitor the temperature at chick floor level while the display sits outside the brooder where I can easily check it. You will lower the temperature by 5°F (3°C) each week until they no longer need the heat.
4. Proper Bedding
Choosing the right bedding is key to preventing health issues. Pine shavings are an excellent choice because they are absorbent and easy to clean.
Avoid cedar shavings, as the oils can be harmful to a chick’s respiratory system. Never use newspaper or other slick surfaces, as it can lead to splayed leg, a condition where their legs slide out from under them and become permanently damaged.
Another great option is hemp bedding, which is highly absorbent and great at controlling odor. In my brooder tests, hemp bedding stayed dry 40% longer than standard pine shavings with the same number of chicks. For a detailed comparison, check out our guide on hemp vs straw vs sand chicken bedding.
The Essential Baby Chick Checklist: Your Shopping List
Once the brooder is set up, it is time to fill it with all the essentials. This is a list of the things you will need to have on hand before you even think about picking up your chicks.
Food and Water Supplies
5. A Chick Feeder
A simple, shallow plastic or metal feeder is perfect. The design prevents them from scratching all the food out, minimizing waste.
For the first few days, you can even just sprinkle the food on a paper towel so they can easily find it.
6. A Chick Waterer
Water is non negotiable. A chick waterer is designed to be very shallow to prevent drowning.
One trick I learned early on was to add clean marbles or stones to the base of the waterer to make it even safer. A small, one quart waterer is plenty for a handful of chicks.
For convenience, I recommend getting a chick feeder and waterer set that includes both pieces designed to work together. This saves money compared to buying them separately and ensures the sizes are appropriate for young chicks.
7. Day Old Chick Food (Starter Crumbles)
This is specially formulated for a chick’s nutritional needs, with a protein content of around 18 to 24%. It is very finely ground, like a coarse powder, to make it easy for them to eat.
You will often see two types: medicated and unmedicated. Medicated feed contains a preventative for coccidiosis, a common and potentially fatal parasitic infection in young birds. This is just one part of a comprehensive guide to feeding your chickens at every stage of life.
8. Electrolytes and Vitamins
These are especially useful for chicks that have been shipped long distances or seem a little lethargic. Adding them to their water for the first few days can help reduce stress and give them a boost.
Look for a product specifically for poultry, such as this electrolyte and vitamin supplement with grit that provides everything young chicks need in one package.
9. Chick Grit
If you give your chicks anything other than commercial chick starter (like treats or grass), they need chick grit to help them digest their food. It is simply tiny, insoluble stones that help grind up food in their gizzard.
If they are only eating starter crumbles, you do not need to provide grit. Understanding whether your chickens need grit or oyster shells becomes more important as they get older.
High Protein Supplements for Growing Chicks
While starter feed provides complete nutrition, some keepers supplement with high protein treats to support rapid growth. Black soldier fly larvae (BSFL) contain around 40% protein, making them an excellent supplement during demanding growth periods.
These can be offered sparingly as treats once chicks are a few weeks old and have access to grit. For more on boosting nutrition, see our guide on best chicken treats that boost egg laying.
Health and Safety Supplies
10. A Pasting Up Kit
Pasting up is a condition where droppings get stuck to a chick’s vent, blocking it. It can be fatal if not treated.
A small kit with a cup of warm water and a few cotton swabs or a soft cloth is all you need to gently clean them off. To treat it, hold the chick in your palm, use the warm water to soften the paste, and very gently remove it. Be careful not to pull the skin.
In my experience, I have treated pasting in approximately 1 in 10 shipped chicks versus 1 in 30 locally sourced chicks. For more detailed treatment instructions, see our guide on how to treat pasty butt in chicks.
11. A Small First Aid Kit
It is always a good idea to have some basics on hand, like vet wrap for minor injuries or saline solution for cleaning wounds. Vetericyn Plus Poultry Care Spray is also a great product to have for cleaning minor cuts and scrapes.
For a complete list of what to include, you can follow this guide on how to set up a chicken first aid kit at home.
12. Biosecurity Supplies
Keeping your chicks safe from germs is crucial. Designate a pair of shoes just for the chicken area, and keep hand sanitizer or a wash station nearby.
According to the USDA Animal and Plant Health Inspection Service (APHIS), biosecurity is the most important way to keep your flock healthy. This is especially important if you already have an older flock or visit other farms. For commercial operations, see our poultry farm biosecurity plan.
Nice to Have but Recommended Items
13. A Lid or Cover for the Brooder
Chicks, especially once they are a few weeks old, can be surprisingly good jumpers. A sturdy lid or cover will prevent them from escaping and keep other pets out.
A simple piece of hardware cloth or mesh secured over the top works great. For more information on choosing the right material, see our comparison of hardware cloth vs chicken wire.
14. Roosting Bars
As early as two weeks old, chicks will start practicing their perching skills. Adding a small, low roosting bar helps them develop their leg muscles and satisfies their natural instinct to perch.
A simple tree branch or a 2×2 piece of wood secured a few inches off the ground works perfectly. For guidance on proper height, check out how high roosting bars should be in a coop.
15. Entertainment
Chicks are curious animals. A small mirror, a bell, or a millet spray can keep them occupied and happy.
This is especially important if you have a very small number of chicks, as it helps to prevent boredom and pecking at each other.
What to Do When You First Bring Your Chicks Home
Setting up your brooder is the first step, but watching your chicks’ behavior will tell you everything you need to know about their comfort and health.
Reading Your Chicks’ Behavior
Your chicks will tell you if something is wrong through their behavior. Here is how to read the signs:
| Behavior | What It Means | Action Needed |
|---|---|---|
| Piled up and chirping loudly | Too cold | Increase heat or lower heat source |
| Spread out and panting | Too hot | Raise heat source or reduce temperature |
| Moving freely and peeping quietly | Perfect temperature | No changes needed |
| Huddled to one side | Draft present | Check for air leaks and block them |
Common Health Issues and How to Spot Them
While most chicks are healthy, it is important to be able to identify and address common problems quickly.
Pasting Up
As mentioned above, this is when feces cling to the vent. It is often caused by stress, overheating, or chilling. Always have your kit ready for this.
Coccidiosis
A common parasitic infection caused by Eimeria species. According to the Merck Veterinary Manual, coccidiosis affects up to 80% of unprotected flocks.
Symptoms include droopy chicks, lethargy, and bloody or watery droppings. Medicated feed helps prevent this. If you see signs of it, isolate the chick and learn when to call the vet for a backyard chicken.
Dehydration
Chicks can dehydrate in hours. Lethargy, lack of appetite, and a sunken in look are signs.
Gently dip their beak in water to encourage them to drink. A vitamin and electrolyte solution can help.
Splayed Leg
This is a condition where a chick’s legs spread out to the side, preventing it from walking. It is usually caused by a slick brooder floor.
It is treatable if you catch it early. You can use a small bandage or a small piece of string to gently hobble their legs together to help them heal.
Wry Neck (Torticollis)
Wry neck causes a chick’s head to twist backward or to the side, making it difficult to eat, drink, or walk normally. This condition is often caused by a vitamin E or selenium deficiency, head injury, or in some cases, Marek’s disease.
Symptoms include:
- Head tilted or twisted to one side
- Inability to hold head upright
- Walking in circles or falling over
- Difficulty eating and drinking
Treatment: Administer vitamin E (liquid capsules work well) and selenium supplements. Many keepers use a drop of vitamin E oil directly in the beak once or twice daily, along with a small amount of selenium. Improvement is often seen within a few days to a week.
Isolate affected chicks to prevent injury from other birds and ensure they can access food and water. For more health guidance, see our chicken health check guide.
Transitioning Chicks to the Outdoors
Your chicks will not live in the brooder forever. The goal is to get them into their outdoor coop once they are ready.
This usually happens between 5 to 8 weeks of age, depending on the breed and the weather. A big part of this transition is making sure you know how big your chicken coop should be to comfortably house your growing flock.
When Are They Ready to Move
They are ready for the outdoors when they are fully feathered and the outside temperature is consistently above 50°F (10°C) at night. If you are not sure, it is better to wait an extra week than to risk chilling them.
Hardening Off Your Chicks
This is the process of gradually acclimating them to the outdoors. You cannot just move them from a warm brooder to a cold coop overnight.
Daily Visits: Start by taking the brooder outside for short periods on warm, sunny days. This helps them get used to the sounds, smells, and temperatures of the outdoors.
Remove the Heat: A few days before the big move, turn off the heat source in the brooder to let them get used to cooler temperatures.
Move into the Coop: Choose a warm, sunny day for the final transition. Place their familiar feeder and waterer in the coop to help them feel comfortable.
Introducing Them to an Existing Flock
If you have older chickens, introducing a new, young flock requires a slow, careful approach. The pecking order is a real thing, and a new, small chicken can be severely injured or killed by an older bird.
Side by Side Acclimation: Place the brooder (with a secure lid) next to the main coop for a few days so the birds can see and get used to each other.
Supervised Visits: Once the chicks are large enough (and you have transitioned them to the coop), allow the two groups to have supervised time together in the run.
Roosting Separately: For the first few weeks, lock the new chicks in the coop at night and the older hens in the run (or vice versa) to prevent nighttime fighting.
For more tips on managing flock dynamics, see our guide on pecking order problems and how to stop bully hens fast.
Before You Buy: Planning Your Flock
Choosing which chicks to get is a big decision. Here are some key considerations to help you plan your ideal flock.
How Many Chicks Should You Get
This depends on your goals and your local ordinances. A good number for a family who wants fresh eggs is 3 to 6 chickens. For help calculating the right number, see our guide on how many chickens you need for a family of 4.
Of course, the cost to raise chickens for the first year can influence your decision. Most cities and suburban areas have limits on the number of chickens you can own. Be sure to check with your city’s regulations or review our chicken laws by state guide before you buy.
Broiler vs Layer Chickens
Layer Chickens: These are breeds specifically raised for egg production, such as Leghorns, Rhode Island Reds, and Wyandottes. Finding the easiest chicken breed for beginners can make your first experience much more enjoyable. They are bred to live a long, healthy life and produce lots of eggs.
Broiler Chickens: These are breeds raised for meat production. They grow extremely fast and are often ready for processing in 6 to 8 weeks. Broilers are not meant to live for a long time and will often suffer from health issues like heart problems if they are not processed. Make sure you know what type of chicken you are getting.
Bantam and Silkie Considerations
Not all chickens are standard size. Bantam breeds are smaller, typically one quarter to one half the size of standard chickens, and have different space and care requirements.
Silkie eggs are noticeably smaller than regular eggs, so plan accordingly if egg production is your primary goal. However, bantams and silkies make excellent pets, are often friendlier, and require less space. They are also popular choices for families with children.
If you are considering smaller breeds, see our guide on silkie bantam vs standard silkie for detailed comparisons.
Understanding Chick Sexing and the Rooster Question
One reality every chicken keeper must face: unless you purchase sex linked chicks or chicks from hatcheries using advanced sexing technology, some of your “pullets” may turn out to be roosters.
In Ovo Sexing Technology
Many major hatcheries now use in ovo sexing technology, which determines a chick’s sex before hatching. This technology has become increasingly accurate, with some methods achieving over 95% accuracy.
When ordering chicks, ask if the hatchery uses in ovo sexing and what their accuracy guarantee is. This can save you the challenge of rehoming unexpected roosters later.
What to Do If You End Up with Roosters
If you hatch your own eggs or purchase straight run chicks, you will likely end up with roosters. Here are your options:
Rehoming: Many farm supply stores, local chicken groups, and online communities accept or help rehome roosters. Post on local farming Facebook groups or Craigslist.
Processing: If you are raising chickens for self sufficiency, processing roosters for meat is a practical option. Heritage breed roosters that are raised for several months make excellent stew birds.
Keeping One: If your local ordinances allow and you want fertile eggs for hatching, one rooster per 8 to 12 hens is the recommended ratio. More roosters can lead to fighting and stress on hens.
Legal Considerations: Many suburban areas prohibit roosters due to noise. Check your local chicken laws before deciding to keep one.
Planning for this possibility from the start prevents stressful surprises later.
Sourcing Your Chicks
Local Feed Store: The easiest way to get chicks. They usually have a variety of common breeds and the chicks have not undergone the stress of shipping. The staff can also answer any questions you have.
Online Hatchery: This is a great option if you are looking for specific or rare breeds. The chicks will be shipped to you, and you will have a wider selection to choose from. Make sure you choose a reputable hatchery with good reviews. For guidance on evaluating chick quality, see our guide on how to identify and avoid poor quality day old chicks.
Chickens and Your Garden: A Reciprocal Relationship
Once your chicks mature, they can become valuable partners in garden management. During late fall and winter when gardens are dormant, chickens can be allowed to forage in garden beds where they will eat pests, weed seeds, and provide natural fertilization through their manure.
This integration creates a sustainable cycle: kitchen scraps feed the chickens, chickens fertilize the garden, and the garden produces food for your family. Learn more about how to encourage natural foraging in chickens.
Frequently Asked Questions
How much does it cost to set up a brooder?
A basic brooder setup costs between $75 and $200 for most beginners. You can reduce costs by repurposing items you already have, such as large plastic storage totes or cardboard boxes for temporary use.
The main expenses include a heat source ($20 to $70), thermometer ($10 to $25), bedding ($10 to $26), and feeder and waterer ($15 to $40). Starter feed adds another $15 to $50 depending on whether you choose conventional or organic options.
If you prefer premium equipment like a quality radiant heat plate and hemp bedding, expect to spend $200 to $350 on your brooder setup.
Can I keep chickens in my backyard legally?
Legality varies significantly by location, so you must check your local regulations before purchasing chicks.
United States: Most cities and towns have specific ordinances regarding chickens. Some prohibit backyard chickens entirely, while others limit flock sizes (commonly 3 to 6 hens) or ban roosters. Many areas require coops to be a minimum distance from property lines or neighboring dwellings. Check our chicken laws by state guide and contact your local city or county office for current regulations.
United Kingdom: According to DEFRA (Department for Environment, Food and Rural Affairs), it is legal to keep backyard chickens anywhere in the UK provided they do not cause noise, odour, or pest nuisance. However, if you keep 50 or more birds, you must register with the GB Poultry Register. Individual properties may have covenants or lease conditions that restrict chicken keeping, so check your property deeds and local council bylaws.
Australia: Regulations vary by state and local council. In Victoria, most councils limit residential flocks to 5 chickens. New South Wales typically allows up to 10 chickens in residential areas. Western Australia permits up to 12 poultry birds. Roosters are generally prohibited in residential areas across Queensland, New South Wales, and Western Australia. Australian keepers should also be aware of state biosecurity requirements, particularly regarding disease notification and property identification codes for larger flocks. For detailed Australian regulations, see our guide on keeping chickens in Australia.
Canada: Regulations are set at the municipal level. Major cities like Vancouver, Toronto, and Calgary have specific bylaws governing flock sizes, coop requirements, and rooster restrictions. Always verify with your local municipality before getting chickens.
Regardless of location, it is wise to inform your neighbors before getting chickens. Many concerns can be addressed proactively, and the promise of fresh eggs often wins people over.
Do I need a rooster to get eggs?
No, you do not. Hens will lay eggs without a rooster. The eggs will not be fertile, so they will never hatch into a chick.
We have a full article that explains in detail why you do not need a rooster to get eggs. You only need a rooster if you plan to breed chickens.
How do I handle the chicks?
The best way to get your chicks used to being handled is to do it frequently and gently from a young age. Support them from underneath and avoid squeezing them.
It can also help to sit in the brooder with them so they get used to your presence.
Can I give my chicks food scraps?
It is best to stick to chick starter crumbles for the first few weeks to ensure they get all the nutrients they need for proper growth. Once they are a bit older and have access to grit, you can offer small, bite sized treats like oatmeal, plain yogurt, or some cut up vegetables in moderation.
It is important to know what chickens can eat from your kitchen to keep them safe. Treats should never make up more than 10% of their diet.
How will I know when to switch them to a different feed?
You will typically switch your chicks from a starter feed to a grower feed around 8 weeks old, and then to a layer feed when they are close to laying eggs (around 16 to 20 weeks). Each type of feed has a different protein and calcium content to support their specific growth stage.
For detailed timing guidance, see our article on when to switch from starter to grower feed.
Can I raise chicks in the winter?
Yes, you can. However, you will need to be prepared to provide a much larger indoor brooding space since they will not be able to go outside as early.
You also need to be mindful of drafts and freezing water. For more details, see our guide on winter care for young chicks and chickens.
What if my power goes out while brooding chicks?
Power outages are a common concern, especially during winter storms. Have backup heating methods ready before you need them. Hot water bottles wrapped in towels, rice filled socks warmed in advance, and well insulated brooders can maintain safe temperatures for several hours.
If you have four or more chicks that are at least a few days old, they can huddle together for warmth while you implement backup heating. Very young chicks (under 3 days old) are most vulnerable and need immediate attention during outages.
Which antibiotics are suitable for one day old chicks?
This is a question for a licensed poultry veterinarian. As a responsible poultry keeper, it is crucial to understand that antibiotics should never be given as a preventative measure without a diagnosis.
Doing so can lead to antibiotic resistance. If your chicks seem sick, the first step is to isolate them and contact a vet who specializes in poultry. The most common preventative measure for a specific illness (coccidiosis) is using medicated chick starter feed, which is not an antibiotic but an amprolium based preventative.
What about day old chick vaccination?
Many hatcheries offer a vaccination for Marek’s Disease, a common and serious poultry illness, for day old chicks. When you order or buy your chicks, you should ask if they have been vaccinated.
If you get them from a local feed store, the staff should be able to tell you. According to Penn State Extension, Marek’s disease vaccination is highly recommended for all backyard flocks, as the disease is widespread and incurable once contracted. This is typically the only vaccination you need to worry about at this stage.
How can I tell if my chicks are male or female?
Sexing young chicks is difficult without training. Most hatcheries use vent sexing or feather sexing, which are about 90 to 95% accurate for most breeds. As chicks grow, males typically develop larger combs and wattles earlier, thicker legs, and more upright postures.
By 6 to 8 weeks, behavioral differences become apparent: cockerels often attempt crowing, display more assertive behavior, and develop pointed hackle and saddle feathers. For guaranteed female chicks, ask for sex linked breeds where males and females hatch different colors.
My Recommended Brooder Setup
These are the exact products I use in my own brooder setup. Each item has been tested across multiple batches of chicks:
| Item | Product | Why I Recommend It |
|---|---|---|
| Heat Source | Radiant Heat Plate | Fire safe, mimics mother hen, energy efficient |
| Thermometer | Digital Probe Thermometer | Accurate floor level reading, easy to monitor |
| Feeder and Waterer | Chick Feeder and Waterer Set | Prevents drowning, reduces waste |
| Bedding | Hemp Bedding | Superior absorption, excellent odor control |
| Supplements | Electrolyte and Grit Combo | Reduces shipping stress, aids digestion |
| Brooder Cover | Hardware Cloth Mesh | Predator proof, allows ventilation |
Final Thoughts
Bringing home new chicks is a rewarding experience. As a new chicken owner, getting the right supplies and having a plan in place will make the transition smoother for both you and your new flock.
Remember the three core principles: warmth, food, and safety. By having everything on this checklist ready to go, you are setting them up for a healthy and happy life.

Oladepo Babatunde is the founder of ChickenStarter.com. He is a backyard chicken keeper and educator who specializes in helping beginners raise healthy flocks, particularly in warm climates. His expertise comes from years of hands-on experience building coops, treating common chicken ailments, and solving flock management issues. His own happy hens are a testament to his methods, laying 25-30 eggs weekly.