For any backyard chicken keeper or avid bird watcher, few things are as rewarding as finding a pristine egg nestled in a clean box or watching a fledgling take its first flight from a birdhouse. The key to both of these experiences often comes down to one simple thing: the nesting box. It’s more than just a container; it’s a sanctuary. A well-designed nesting box provides a safe, comfortable, and private place for hens to lay their eggs and for wild birds to raise their young.
As a long-time chicken keeper, I’ve learned that the right nesting box can make all the difference, helping you avoid many of the mistakes every first-time chicken keeper makes. This guide will provide a comprehensive look at every aspect of nesting boxes, from the ideal dimensions and materials to the perfect placement, so you can create the best possible environment for your feathered friends and get answers to all your common questions.
Why Nesting Boxes are Essential
For Chickens: The Psychology of the Laying Hen
Hens have a powerful, innate instinct to seek out a secluded, protected spot to lay their eggs. Providing a dedicated nesting box fulfills this natural urge and is crucial for maintaining a healthy and productive flock. A good nesting box prevents the frustration of “floor-laying,” where eggs are scattered throughout the coop, often becoming dirty, broken, or hidden.
I’ve found that this is also an important way to prevent egg-eating, a destructive habit that can develop when hens find and accidentally break eggs on the coop floor. When a hen has a safe, clean, and private space, she’s more likely to use it, which in turn leads to a consistent supply of clean, unbroken eggs for you. A proper nesting box signals to the hen, “This is the safe place. This is where you lay.”
In short, a good nesting box:
- Fulfills a hen’s natural instinct for a safe laying spot.
- Prevents floor-laying, leading to cleaner eggs.
- Reduces the risk of broken eggs and egg-eating.
- Makes egg collection easier and more consistent for you.
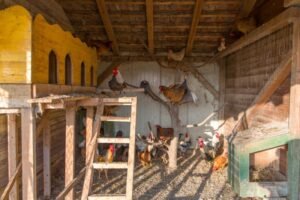
For Wild Birds: A Crucial Role in Conservation
In many urban and suburban areas, natural nesting sites like tree cavities or dense thickets are becoming scarce due to development and habitat loss. By placing a nesting box (or “birdhouse”), you can provide a crucial safe haven for local bird populations. It’s a small act that can have a big impact, serving as a vital breeding ground and a shelter from predators. It’s also an incredible way to connect with nature, and there’s a real joy in watching blue tits, robins, wrens, or sparrows build a nest, raise their fledglings, and bring a new generation to your garden. According to the National Audubon Society, providing birdhouses is a key way to help wild birds thrive.
The Perfect Size for Your Nesting Box
A nesting box should be designed to be snug but not cramped. It should be large enough for the animal to turn around in comfortably, but small enough to feel secure and prevent multiple birds from crowding inside. An overly large box doesn’t offer the same sense of safety and may encourage multiple hens to squeeze in at once, which often leads to broken eggs. In my experience, a box that’s too big can also become a popular spot for chickens to roost and sleep in, which defeats the purpose entirely.
Chicken Nesting Box Dimensions
The size of your nesting boxes should be tailored to the size of your flock’s largest members, so it’s helpful to know if you have one of the easiest chicken breeds for beginners or a larger heritage type. Here is a quick reference chart for standard nesting box sizes:
| Chicken Breed | Dimensions (Inches) | Dimensions (Centimeters) |
|---|---|---|
| Standard (e.g., Leghorns) | 12inches×12inches×12inches | 30cm×30cm×30cm |
| Larger (e.g., Orpingtons) | 14inches×14inches×14inches | 35cm×35cm×35cm |
| Bantam Breeds | 10inches×10inches×12inches | 25cm×25cm×30cm |
| Broody Hens | 14inches×14inches (floor space) | 35cm×35cm |
Birdhouse Dimensions and Types
For birdhouses, the size of the entrance hole is the most critical dimension. The Cornell Lab of Ornithology’s NestWatch program provides detailed charts for dozens of species. It must be specific to the species you want to attract and small enough to keep larger birds and predators like raccoons or cats from entering.
| Bird Species (Example) | Entrance Hole Size (Inches) | Entrance Hole Size (Millimeters) |
|---|---|---|
| Blue Tits, Coal Tits | 1′′ | 25mm |
| Great Tits, Tree Sparrows | 1.25′′ | 32mm |
| Starlings | 1.75′′ | 45mm |
For birds like robins and wrens who prefer open spaces, an “open-fronted” box without a full entrance hole is the best option. Barn owls, on the other hand, require a very large, deep box to raise their young.
Choosing the Best Materials
The material you choose for your nesting boxes can affect durability, insulation, and even pest control. The most common materials are:
- Wood (Plywood, Cedar): The traditional and most popular choice. Wood provides excellent insulation, keeping the box warm in winter and cool in summer. Cedar is naturally rot-resistant and its scent can help repel some insects. Always use untreated wood to avoid chemicals that can be harmful to your animals.
- Plastic: A great, budget-friendly option. Plastic is lightweight, very easy to clean with a quick spray of a hose, and less prone to housing mites and other pests, which is a key part of the natural ways to keep parasites out of your coop. However, it offers less insulation than wood and can become brittle over time if exposed to direct sunlight.
- Metal: Very durable and easy to sanitize, but can become extremely hot or cold depending on the weather. If you use a metal box, make sure it is properly shaded and insulated to prevent temperature fluctuations that could be dangerous for hens or eggs.
- Repurposed Materials (DIY Focus): Many keepers have success with DIY projects using items like 5-gallon buckets, milk crates, or old wooden crates. These are low-cost and often just as effective as commercial options. Just be sure the material is safe and free of any sharp edges or hazardous residue.
Overall Recommendation: For the best balance of insulation, durability, and natural appeal, untreated wood like cedar or pine is my top choice for most climates.
Essential Bedding Materials
The best bedding is comfortable, absorbent, and easy to replace. It keeps eggs clean and provides a soft landing. I’ve found that fresh straw, pine shavings, or hemp bedding are all excellent choices.
- Straw: My personal favorite. It’s affordable, widely available, and easy for hens to shape into a nest. It’s also very absorbent.
- Pine Shavings: Provide good absorbency and a pleasant scent. Be sure to use large-flake shavings, as the finer “dust” can be bad for a hen’s respiratory system.
- Hemp Bedding: A newer, more sustainable option. It’s highly absorbent and lasts a long time.
- Materials to Avoid: I strongly advise against using hay, as it can get moldy and trap moisture. I would also avoid cedar shavings, as some research, often cited by poultry extension programs at universities, suggests they can cause respiratory issues in chickens.
Location, Location, Location: Where to Place Your Nesting Boxes
The perfect nesting box is only as good as its location. Proper placement is crucial to ensuring your animals use them correctly.
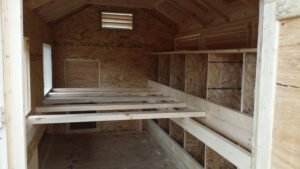
Inside the Chicken Coop
- Height: Place the boxes about 18−20 inches off the ground. This makes them easy for the hens to access. I have found success with some boxes on the floor as well, especially for training young pullets.
- Key Rule: This is the most important tip I can give you: always place the nesting boxes lower than the roosting bars, and understanding how high roosting bars should be is critical to getting this right.
The Golden Rule of Placement: Always place nesting boxes lower than the roosting bars. Chickens are naturally driven to sleep at the highest point available. If your nesting boxes are the highest spot, they will become bedrooms, not nurseries.
- Location: Position them in the darkest, quietest, and least-trafficked part of the coop, a key factor when deciding on the best place to put your chicken coop in the first place. A secluded corner away from the main door or frequent human activity is ideal. This makes the hens feel safe and secure.
- Direction: To keep the boxes dark and cool, face them away from direct sunlight. This helps prevent the eggs from “cooking” in the summer heat.
Common Placement Mistakes to Avoid
- Placing them in a high-traffic area. Hens won’t feel safe if they are constantly being disturbed by other chickens or by you opening the coop door.
- Putting them in direct sunlight. This can make the boxes too hot and can even cook the eggs.
- Putting them too high. While hens will jump to get to them, making them too high can cause injuries or make it difficult for older birds to use them.
Placing Birdhouses
- Height: Generally, a height of 2-4 meters (6-13 feet) is suitable for small birds. Woodpeckers and owls prefer higher placements. For robins and wrens, who prefer open-fronted boxes, a height of 1-2 meters is best, often hidden among dense foliage.
- Direction: The best direction is typically facing between North and East to avoid both the strong afternoon sun and prevailing winds/rain. This also keeps the entrance hole from overheating.
- Other Tips: Ensure the birdhouse has a clear flight path to the entrance and is tilted slightly forward to allow rain to run off. Do not place it too close to a bird feeder, as the constant activity can disturb nesting birds. Also, be sure to place the box high enough to deter cats, squirrels, and other predators, using some of the same principles as our predator-proofing 101 guide for coops.
How Many Nesting Boxes Do You Need?
The golden rule for chickens is to provide one nesting box for every 3-5 hens. This ratio works because hens often lay at different times of the day, and they are also sociable and don’t always use the same boxes.
- For 20 chickens: You would need 4-7 nesting boxes.
- For 10 chickens: Three or four boxes would be ideal.
It’s completely normal for all the hens to want to use the same one or two boxes, even when plenty are available. This is simply a matter of preference. Providing enough options simply prevents them from waiting in a line and squabbling over a single spot.
Setting Up for Success: The Finishing Touches
A few small details can make a big difference in the success of your nesting boxes:
- The “Lip”: Add a 4-6 inch lip at the front of the nesting box to keep bedding and eggs from rolling out.
- The Sloped Roof: A slanted roof on top of the nesting boxes will discourage chickens from roosting on them and pooping all over the outside.
- Privacy Curtains: Many keepers add a small curtain of fabric or plastic at the entrance to make the boxes even more private and appealing.
Training Your Hens to Use the Boxes
- Place a Fake Egg: To train young hens, try placing a golf ball or a ceramic nest egg in the box. This simple trick encourages them to lay in the designated spot.
- Confine them in the Coop: Until your hens are accustomed to using the boxes, you can confine them to the coop until mid-morning. This is the time of day when most hens lay their eggs, and it will help establish the habit.
Maintenance and Cleaning
Nesting boxes should be cleaned regularly. I typically do a quick spot-check daily, removing any soiled bedding or droppings. I do a full clean of the boxes every 1-2 weeks, removing all old bedding and replacing it with fresh, clean material. A full clean helps prevent mites and ensures a healthy laying environment.
DIY Nesting Box Plans
Building your own nesting box is a great way to save money, and if you enjoy this project, you might be ready to learn how to build a chicken coop for under $200. Here are some simple, basic plans for a single wooden nesting box.
Materials
- One 2ft×4ft sheet of 1/2-inch plywood
- 1-inch wood screws
Tools
- Measuring Tape
- Saw (circular or hand saw)
- Drill
Cut List
- Top: One piece at 12′′×12′′
- Bottom: One piece at 12′′×12′′
- Back: One piece at 12′′×12′′
- Sides: Two pieces at 12′′×12′′
- Front: One piece at 12′′×6′′
- Front Lip: One piece at 12′′×4′′
Instructions
- Cut the pieces according to the dimensions above.
- Screw the back piece to the bottom piece.
- Screw the two side pieces to the bottom and back.
- Attach the front piece, leaving a 6″ opening at the top.
- Attach the front lip to the bottom, on the outside of the front opening.
- Finally, screw the top piece onto the structure.
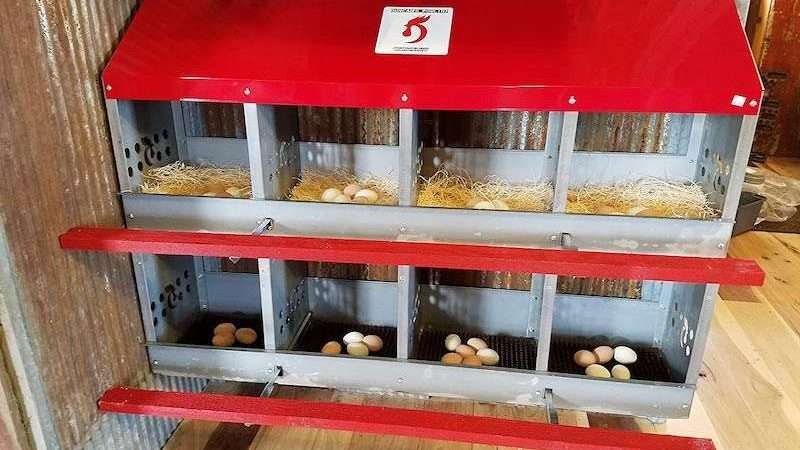
What to Look for in a Store-Bought Nesting Box
If you’re not interested in a DIY project, buying a pre-made nesting box is a great way to get started. While many models are available, it’s smart to look for a few key features that will save you time and effort in the long run.
- Durable, non-porous materials: Boxes made from hard plastic or coated metal are a breeze to clean, as droppings won’t stick and you can simply spray them down with a hose. They also don’t absorb moisture like untreated wood, which helps prevent bacteria and mold.
- Good ventilation: Look for designs with air vents or a mesh bottom. Proper airflow is essential for keeping the box cool in the summer and reducing moisture buildup.
- Anti-roosting features: Many commercial nesting boxes come with a sloped or pitched roof. This simple design prevents hens from roosting on top of the boxes at night, which keeps the exterior of the boxes clean and encourages them to sleep on their roosting bars instead.
Exploring Different Nesting Box Styles
While the traditional nesting box is the most common, some alternative designs can solve specific problems and offer added convenience.
Roll-Away / Roll-Out Nesting Boxes
These innovative boxes feature a sloped floor that is slightly angled. As soon as a hen lays an egg, it gently rolls down into a protected, often padded, collection tray at the front. The key benefits of this design are perfectly clean eggs and the complete prevention of egg-eating, as the eggs are immediately removed from the hen’s reach.
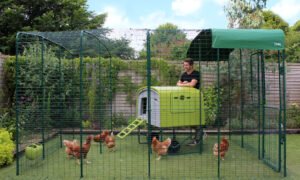
External Nesting Boxes
External nesting boxes are an excellent space-saving and convenient option. As the name suggests, they are attached to the outside of the coop. This allows you to collect eggs from the exterior of the coop, meaning you never have to step inside the run or the coop to gather your daily eggs. It’s a huge time-saver and makes egg collection much more convenient, especially on a rainy or muddy day.
Troubleshooting Common Nesting Box Problems
Even with the perfect setup, you may run into a few common issues. Here are some quick solutions to help you get back on track.
Problem: My hens are still laying on the floor!
If your hens are laying their eggs on the coop floor instead of in their nesting boxes, it’s a sign they don’t feel the boxes are a more appealing or safe option.
- Re-train with a fake egg: Place a golf ball or ceramic nest egg in the box you want them to use. This provides a visual cue that this is the designated laying spot.
- Temporarily block their preferred spot: If they have a specific corner they love to lay in, try placing a bucket or some wire mesh there to make it unavailable. This encourages them to find a new, hopefully better, location.
- Make the boxes more appealing: Double-check that the boxes are darker, quieter, and more private than the floor space. You may need to add more bedding or even a small curtain to the front of the boxes.
Problem: My hens are sleeping (and pooping) in the nesting boxes!
This is a very common issue and goes against the golden rule of placement. Hens will always try to roost in the highest spot, and if that’s the nesting box, they’ll turn it into a bedroom.
- Reiterate the roosting bar rule: First, make sure your roosting bars are higher than your nesting boxes. This is the most effective solution.
- Block access at night: If you have the roosting bars at the right height but they still insist on sleeping in the boxes, you can physically block access to the nesting boxes after the last hen has laid for the day. Simply place a plank of wood or a crate over the front of the boxes. This will force them to use the roosting bars.
Problem: My hens are fighting over one box!
Even if you have the correct ratio of boxes, it’s normal for hens to have a “favorite” box. This isn’t a sign that you need more boxes, but it can lead to squabbles and broken eggs.
- Make all boxes identical: Hens can be picky! If one box has different bedding, different light, or is a slightly different size, they will all try to use the most appealing one. Make all the boxes identical to reduce the “favorite box” phenomenon.
- Reassure the user this is normal: It’s important to remind yourself and your readers that this behavior is normal. A little bit of jostling is expected, and as long as no one is getting hurt, it’s usually not a major problem.
Frequently Asked Questions (FAQ)
What are the rules for nesting boxes?
The primary rules are to provide a clean, dark, secure space that is appropriately sized and placed lower than the roosting bars.
Do nesting boxes need to be dark?
Yes, hens feel safest and most comfortable in a dark, private environment for laying.
How many nesting boxes for 20 chickens?
You should aim for 4-7 nesting boxes, as a good rule of thumb is one box for every 3-5 hens.
Is 4 nesting boxes enough for 10 chickens?
Yes, 3-4 boxes is a good range for 10 chickens.
How high should a nesting box be placed?
Ideally, 18−20 inches off the ground.
Which direction should chicken nesting boxes face?
They should be positioned away from direct sunlight to prevent the boxes from overheating.
Where is the best place to put a nesting box?
In the darkest, quietest, and least-trafficked part of the coop.
What is the best height for a birdhouse?
Generally 2-4 meters (6-13 feet) off the ground, but this varies by species.
What materials are used for nesting boxes?
The most common are untreated wood (plywood, cedar), plastic, and metal.
Can a nesting box be too big?
Yes, an overly large box can feel unsafe, encourage multiple hens, and be used for sleeping.
What size is a pigeon nesting box?
Pigeons prefer a larger, open nesting platform rather than a confined box.
What do chickens need for a nesting box?
They need a comfortable, absorbent bedding material like straw, pine shavings, or hemp bedding.
How to set up a nesting box?
Place bedding inside, ensure it is in a dark and quiet location, and add a lip at the front to hold bedding and eggs in place.
What material is used for bird boxes?
Untreated wood is the most common and best choice.
Do nesting boxes need to be off the ground for chickens?
Not necessarily, but it can help keep eggs clean and discourage floor-laying.
Conclusion
By providing the right nesting boxes, you’re creating a happy and healthy environment for your flock or a safe sanctuary for local wild birds. Getting the size right, choosing the best materials, and placing them in a strategic location are the three key factors for success. A well-designed nesting space encourages the behaviors you want, prevents common problems like broken eggs, and ultimately makes your job as a keeper easier and more rewarding.
What are your favorite nesting box tips? Share them in the comments below!

Oladepo Babatunde is the founder of ChickenStarter.com. He is a backyard chicken keeper and educator who specializes in helping beginners raise healthy flocks, particularly in warm climates. His expertise comes from years of hands-on experience building coops, treating common chicken ailments, and solving flock management issues. His own happy hens are a testament to his methods, laying 25-30 eggs weekly.