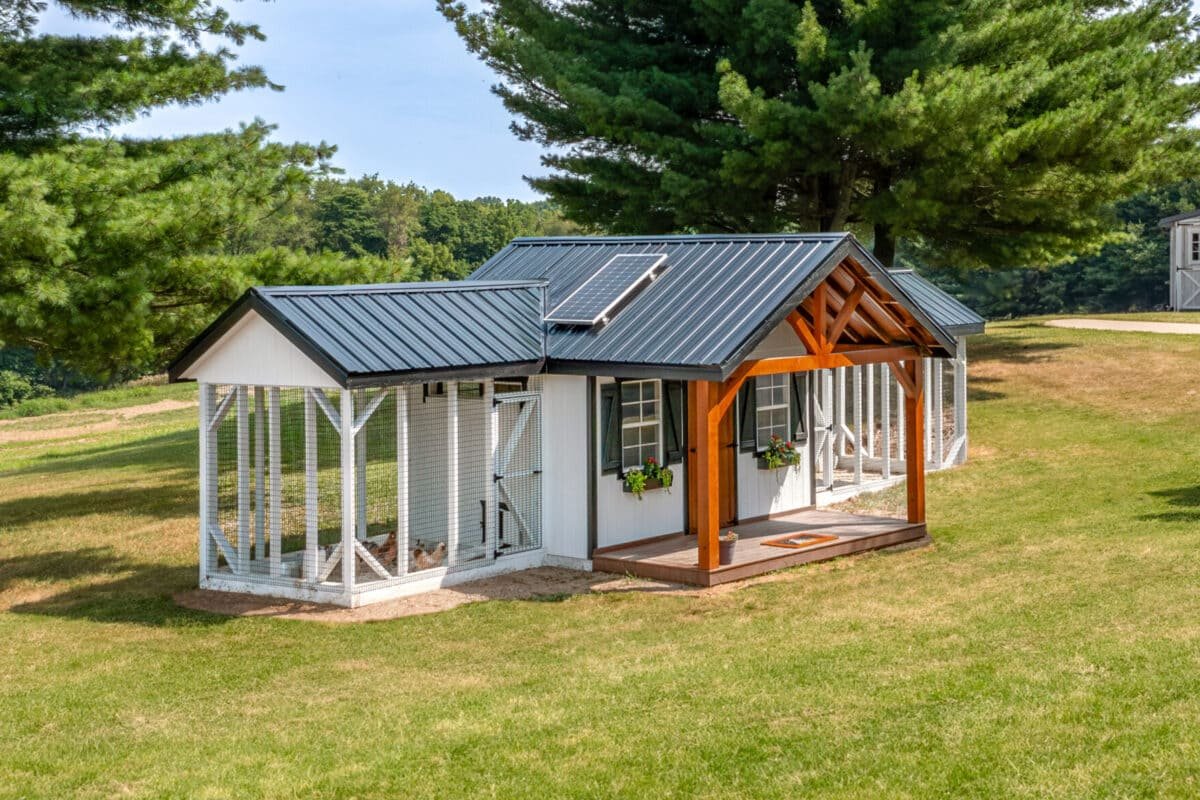
Want backyard chickens but cringing at those $500+ coop price tags? I get it. When I built my first chicken coop back in 2020, I made every mistake in the book and still managed to come in under $200. You can do the same with the right approach, though I will be honest upfront: hitting that $200 mark in 2026 requires creative material sourcing and some hustle.
Quick Answer: Yes, you can build a secure, functional chicken coop for under $200 in 2026, but only if you source 70 to 80% of your materials through reclaimed wood, pallets, and salvaged items. Using all new materials from Home Depot or Lowe’s, expect to spend $250 to $500 for a basic A-frame or tractor coop. A 4×8 foot coop housing 6 to 8 chickens requires about 8 to 10 framing boards, 25 to 50 square feet of hardware cloth, basic roofing, and a weekend of your time.
Important Budget Reality Check: According to HomeGuide’s 2026 pricing data, a low-cost DIY chicken coop costs $250 to $700 to build a portable A-frame or tractor-style coop for a small flock, while walk-in coops run $700 to $1,500 installed. The strategies in this guide show you how to beat those averages through smart sourcing, but if you plan to buy everything new, budget $300 to $400 minimum for a basic setup.
Why Build Your Own Chicken Coop in 2026?
Cost Savings That Actually Add Up
Can you really build a coop for under $200? I did it, and so have thousands of backyard chicken keepers across the US, UK, Australia, and beyond. The trick comes down to smart material sourcing and keeping your focus on what chickens actually need rather than what looks pretty on Pinterest.
Here is the math that convinced me to build. According to data from the Bureau of Labor Statistics, the average retail price for a dozen large Grade A eggs was $2.58 in January 2026, down significantly from the record high of $6.23 per dozen set in March 2025. But as CNBC reported in February, egg markets remain sensitive to disease outbreaks, and those forecasts can change quickly if a new wave of bird flu tightens supply. Prices may rise in the coming weeks as the Easter holiday approaches, which industry analysts describe as the Super Bowl for the egg industry.
With a flock of 6 hens producing 4 to 5 eggs daily, that delivers roughly $40 to $55 in monthly egg value at current retail prices. A $200 coop pays for itself in under five months. Even at a $350 build cost, you are looking at seven to eight months to break even, far better than a $650 pre-built kit that takes over a year. For a deeper breakdown of the ongoing economics, check out our analysis of whether raising backyard chickens is cheaper than buying eggs.
Beyond the immediate savings, building your own coop often means using more durable, long-lasting materials than what comes in cheap prefab kits. I have seen those flimsy imported coops fall apart within two seasons. My original DIY build? Still standing strong through harsh winters and humid summers, now housing a mixed flock of Rhode Island Reds and Buff Orpingtons.
Complete Customization and Control
When you buy a pre-made coop, you are stuck with someone else’s design decisions. Build your own, and you control everything. Need a larger run because you plan to expand your flock? Want the coop tucked into that awkward corner of your backyard? Planning to house larger breeds like Brahmas or Jersey Giants that need extra headroom? No problem.
This flexibility becomes especially valuable when you are working with limited space or unusual yard layouts. I have helped readers in urban UK gardens, sprawling Australian properties, and compact Nigerian backyards all create coops perfectly suited to their specific situations.
Skills That Keep Paying Off
There is something deeply satisfying about watching your hens scratch around in a coop you built with your own hands. Beyond the pride factor, you gain practical carpentry skills that transfer to countless other projects.
My first rabbit hutch gave me that addictive “I made this” feeling. Building the chicken coop expanded those skills further, and now I tackle all sorts of homestead projects without hesitation. That self-sufficiency mindset becomes part of who you are.
Essential Planning Before You Start Building
Hold up. Before you grab a hammer, proper planning prevents the headaches, wasted money, and frustrating rebuilds I learned about the hard way. Thirty minutes of planning saves hours of fixing mistakes later.
Coop Size: How Many Chickens Can You Keep?
The most common question I hear: “How many chickens can live in a 4×8 coop?” The answer depends on whether we are talking indoor coop space only or including the run, plus the size of your chosen breeds.
For indoor space, poultry extension guidelines suggest 3 to 4 square feet per standard-sized bird inside the coop, with 8 to 10 square feet per bird in an outdoor run. Larger breeds like Brahmas and Jersey Giants need 4+ square feet each, while bantam breeds can manage with 2 square feet.
Using the standard guideline, a 4×8 foot coop (32 square feet) comfortably houses 8 to 10 standard chickens like Rhode Island Reds, Buff Orpingtons, or Leghorns when paired with an adequate run.
Here is a quick reference guide:
| Number of Chickens | Indoor Space Needed | Outdoor Run Size |
|---|---|---|
| 4 | 12 to 16 sq ft | 32 to 40 sq ft |
| 6 | 18 to 24 sq ft | 48 to 60 sq ft |
| 8 | 24 to 32 sq ft | 64 to 80 sq ft |
| 10 | 30 to 40 sq ft | 80 to 100 sq ft |
What happens if chickens do not have enough room? Overcrowding triggers stress behaviors including feather pecking, reduced egg production, increased disease transmission, and general misery for your birds. I once temporarily housed too many birds in a small space during a coop renovation. Within three days, I noticed aggressive pecking and stress signs among my normally docile Buff Orpingtons. Lesson learned: always err toward more space.
For detailed calculations specific to your situation, our guide on how big a chicken coop should be walks through every consideration. You can also check how much space chickens really need for breed-specific numbers.
Location, Climate, and Predator Considerations
Where you place your coop affects your flock’s health more than most beginners realize. For the full breakdown, see our guide on the best place to put your chicken coop.
Sunlight and Shade Balance: Chickens need protection from intense afternoon sun, especially heat-sensitive breeds like Orpingtons in hot climates. But they also benefit from morning sun exposure, particularly during cold winters in the UK, Canada, or northern US states. Position your coop to receive morning light while having afternoon shade from trees or structures.
Drainage Matters: A soggy coop breeds bacteria, parasites, and respiratory problems. Choose slightly elevated ground or add a gravel base to ensure water drains away from the coop. I learned this lesson during a particularly wet spring when my poorly positioned temporary coop became a mud pit. In Nigeria’s rainy season, we elevated all poultry enclosures off the ground using cinder blocks or stilts, a lesson I have carried over to every US coop I have built since.
Wind Protection: In exposed locations, position your coop so the solid back wall faces prevailing winds. This is especially critical for keepers in windy coastal areas or open rural properties.
Predator Assessment: Your local predator threats determine your security needs. In the US, raccoons, foxes, coyotes, and even neighborhood dogs pose risks. UK keepers worry primarily about foxes. Australian chicken keepers face unique challenges including snakes and goannas. Nigerian poultry farmers often contend with civet cats and snakes. A crafty fox once breached what I thought was a “secure” fence through a gap I had overlooked. That heartbreaking loss taught me that predator proofing requires obsessive attention to detail.
For comprehensive protection strategies, check out our predator proofing 101 guide.
Legal Requirements and Neighbor Relations
Before you dig the first post hole, verify local regulations. Many municipalities restrict backyard chicken keeping through zoning laws, limiting flock sizes, requiring setbacks from property lines, or prohibiting roosters.
In the US, regulations vary dramatically by state and even by city. Our comprehensive chicken laws by state resource covers the specifics. UK keepers should check with their local council, while Australian residents need to verify council regulations, which typically allow small flocks in residential areas.
Even when chickens are legal, being a good neighbor prevents conflicts. Position your coop to minimize noise and odor reaching neighboring properties. A basket of fresh eggs delivered monthly works wonders for neighbor relations.
Budgeting Your Coop Build: 2026 Material Costs
Hitting that $200 target is achievable with strategic material sourcing, but let me give you realistic numbers so you can plan properly.
What Things Actually Cost Right Now
Before diving into savings strategies, here are current prices you will encounter at major retailers as of early 2026. Standard construction-grade 2×4 studs currently range from about $3 to $5 per 8-foot board at Home Depot and Lowe’s, depending on your region and whether you choose standard SPF lumber or premium kiln-dried varieties. Higher US duties on Canadian softwood have raised landed costs recently, so prices could tick up as spring building season ramps up. I recommend buying your lumber in late winter or early spring 2026 to lock in current pricing.
| Material | Current 2026 Price | Where to Buy |
|---|---|---|
| 2x4x8 Studs | $3.00 to $5.00 each | Home Depot, Lowe’s |
| 2x2x8 Boards | $2.50 to $4.00 each | Home Depot, Lowe’s |
| 1/2″ Plywood (4×8 sheet) | $15 to $25 per sheet | Home Depot, Lowe’s |
| 1/2″ Hardware Cloth (3’x10′ roll) | $15 to $20 per roll | Tractor Supply |
| 1/2″ Hardware Cloth (2’x100′ roll) | $45 to $65 per roll | Tractor Supply, Home Depot |
| Corrugated Metal Roofing (3’x8′) | $18 to $25 per panel | Home Depot, Lowe’s |
| Exterior Screws (1 lb box) | $8 to $12 | Any hardware store |
| Predator-Proof Latches | $6 to $12 each | Hardware stores |
The hardware cloth reality: This single item often makes or breaks the $200 budget. At roughly $1 to $3 per square foot, protecting a modest coop and run requires 25 to 50 square feet, costing $40 to $90. This expense is non-negotiable for predator protection. According to Tractor Supply’s product specifications, 1/2-inch, 19-gauge mesh that is rugged and anti-corrosion is ideal for chicken coops. For a detailed comparison of your options, read our guide on hardware cloth vs. chicken wire.
Cost Breakdown: Realistic Expectations for Different Approaches
| Sourcing Approach | A-Frame (4 to 6 birds) | Tractor Coop (6 to 8 birds) | Shed-Style (8 to 12 birds) |
|---|---|---|---|
| All New Materials | $250 to $400 | $350 to $550 | $500 to $800 |
| Mixed (50% Reclaimed) | $150 to $250 | $200 to $350 | $300 to $500 |
| Mostly Reclaimed (80%+) | $75 to $150 | $100 to $200 | $150 to $300 |
Real Example: Jennifer in Texas built her 4×6 A-frame in January 2026 for $187 total. Her breakdown: $0 for pallet wood (Facebook Marketplace), $52 for hardware cloth (Tractor Supply), $35 for miscellaneous hardware and screws, $45 for corrugated roofing (Habitat ReStore discount section), and $55 for items she could not source free. She spent roughly 12 hours over two weekends sourcing materials before building.
My own experience: My first sub-$200 coop in 2020 used a combination of free pallet wood from a warehouse near my house, one sheet of new plywood, and two rolls of hardware cloth. The total came to about $165. The key was accepting that it would not win any beauty contests. My chickens did not care. They cared about being dry, safe from predators, and having proper ventilation. Everything else was optional.
For a complete cost picture beyond just the coop, including feed, bedding, and chick expenses, see our guides on the real cost of 6 chickens and first-year costs of raising chickens.
Where to Find Affordable and Free Materials
Reclaimed Wood Sources: This is where the biggest savings happen.
Pallets represent your best free lumber source, but only use heat-treated pallets marked “HT.” Avoid any marked “MB” (methyl bromide treated). Facebook Marketplace, Craigslist, and local business loading docks regularly offer free pallets.
Old fencing from neighbors replacing their fences often goes free for the asking. Cedar fence boards make excellent coop siding and naturally resist rot.
Construction site scraps, with permission, often include usable lumber in scrap piles. Many contractors appreciate someone hauling away materials they would otherwise pay to dump.
Habitat for Humanity ReStores sell donated building materials at steep discounts. I have found everything from plywood sheets to roofing materials for 50 to 75% off retail prices.
Hardware Store Deals: Check the “cull lumber” or “oops” sections at Home Depot, Lowe’s, or local hardware stores. Slightly warped boards, mis-tinted paint, and roofing scraps sell at steep discounts. These small savings across multiple items add up quickly.
Repurposed Items: Creative thinking opens possibilities. Old swing set frames become coop structures. Used dog kennels transform into predator-proof runs. Cabinet doors work as nest box lids. I once found a discarded dog house on the curb that, with modifications, became a perfectly functional small coop for a friend starting with three Leghorn hens. We have a full guide on whether you can use a dog house as a chicken coop.
Prioritizing Your Budget: Where to Spend and Where to Save
When money is tight, prioritize in this order:
Never Skimp On: Hardware cloth for predator protection ($40 to $60 minimum). According to USDA’s Defend the Flock program, proper physical barriers and biosecurity practices are essential for protecting backyard flocks from both predators and disease transmission.
Worth Investing In: Structural lumber for the frame ($30 to $60 if buying new). The frame must be sturdy enough to support the roof and withstand weather.
Good Places to Save: Wall siding (use reclaimed wood), roofing (salvaged metal or heavy tarps work fine), nest boxes (repurpose buckets or crates), and roosting bars (any sturdy scrap lumber works).
Choosing Your Chicken Coop Design
With budget realities clear, let us match a design to your needs. The best chicken coop design for under $200 prioritizes simplicity, material efficiency, and ease of construction.
Budget-Friendly Coop Styles Compared
A-Frame Coops: The simplest and most affordable design, shaped like an “A” when viewed from the end. According to HomeGuide’s 2026 data, A-frame coops cost $250 to $500 for new materials or a kit. But savvy DIYers regularly build them for $100 to $150 using reclaimed wood. The triangular shape requires fewer materials and structural supports. Best for small flocks of 2 to 4 standard birds or up to 6 bantams. We have dedicated plans for an A-frame chicken coop if this style interests you.
Tractor Coops (Mobile Coops): Lightweight, bottomless coops designed to move across your yard. Chickens access fresh ground regularly for foraging, which can reduce feed costs while naturally fertilizing different lawn sections. DIY builds using salvaged materials can hit $150 to $250. Ideal for 4 to 8 birds. Read our full comparison of chicken tractor vs. stationary coop designs.
Modified Shed-Style Coops: Resemble miniature garden sheds with vertical walls and a pitched roof. Offer more vertical space and easier human access for cleaning. Particularly cost-effective when converting an existing structure like an old playhouse or small shed. Best for 6 to 12 birds and larger breeds that need headroom.
Wondering whether a fixed run or free-ranging works better for your situation? Our comparison of chicken run vs. free range pros and cons helps you decide.
Critical Design Features Every Coop Needs
Regardless of style, certain features are non-negotiable for chicken health:
Proper Ventilation: This single factor causes more chicken health problems when neglected than almost anything else. Chickens produce significant moisture and ammonia from their droppings. Without adequate airflow, respiratory problems develop quickly.
Plan for vents near the roofline (where hot, moist air escapes) and lower openings (where fresh air enters). Cover all openings with hardware cloth. For detailed ventilation calculations, see our guide on how much ventilation a chicken coop needs and avoid the 17 ventilation mistakes that overheat your flock.
Secure Roosting Bars: Chickens instinctively roost off the ground to sleep. Provide sturdy bars, ideally 2×2 lumber with edges slightly rounded, positioned 12 to 18 inches off the floor. Allow 8 to 10 inches of roosting space per standard bird. Larger breeds like Brahmas need 10 to 12 inches each. If you are housing heavy breeds, see our guide on how to build roost bars for heavy chickens.
Comfortable Nest Boxes: Hens need private, dark, protected spaces to lay eggs. One nest box per 3 to 4 hens suffices since they often share favorites. Position nest boxes lower than roosts to prevent chickens from sleeping (and pooping) in them. For detailed guidance, our backyard chicken nesting box article covers everything.
Easy Cleaning Access: You will clean this coop regularly for years. Design with a human-sized door or removable roof section that allows you to easily shovel out bedding.
Step-by-Step Construction Guide
Time to build. While specific steps vary by design, these core principles apply universally to any DIY chicken shelter project.
Materials List for a Basic 4×8 Shed-Style Coop
This list targets a shed-style coop housing 6 to 8 standard birds like Rhode Island Reds or Buff Orpingtons. Adjust quantities for different sizes.
| Material | Quantity Needed | New Cost Estimate | Reclaimed Strategy |
|---|---|---|---|
| Framing Lumber (2x4s) | 8 to 10 pieces (8 ft) | $24 to $50 | Pallet wood, old fences |
| Siding/Wall Material | 2 to 3 plywood sheets | $30 to $75 | Reclaimed fence panels |
| Roofing | 1 to 2 panels | $18 to $50 | Scrap metal, heavy tarp |
| Hardware Cloth (1/2 inch) | 25 to 50 sq ft | $45 to $90 | Buy new (safety critical) |
| Exterior Screws | 1 to 2 lbs | $8 to $20 | Buy new |
| Door Hinges | 2 to 4 | $8 to $20 | Salvage from old cabinets |
| Predator-Proof Latches | 2 to 3 | $12 to $30 | Buy new (safety critical) |
| Roosting Bars (2x2s) | 1 to 2 pieces (8 ft) | $5 to $8 | Pallet or scrap lumber |
Total with all new materials: $150 to $343
Total with strategic reclaiming: $75 to $175
Phase 1: Site Preparation and Foundation
Clear and Level: Remove vegetation and debris from your chosen location. Level the ground as much as possible. Poor site prep leads to crooked coops and drainage problems.
Add Drainage Base: Spread 2 to 4 inches of gravel over the coop footprint. This prevents water pooling and deters burrowing predators. Skip this step in very dry climates if budget is extremely tight.
Foundation Options: For stationary coops, concrete blocks or pressure-treated lumber at the corners provide a stable, rot-resistant base. I recommend elevating on four cinder blocks (about $1.50 each at Home Depot, adding roughly $6 to your budget). This gives you 8 inches of clearance underneath for airflow and keeps the wood away from soil moisture. In my 2023 Texas summer test, this elevated design kept the coop interior about 8 degrees cooler at midday compared to a ground-level build.
Phase 2: Building the Frame
The frame provides structural integrity for everything else. Work carefully here since mistakes compound as you build.
Cut All Framing Pieces First: Measure and cut all 2x4s before assembly. For a basic 4×8 coop, you need bottom rails, vertical studs, top plates, and roof rafters.
Assemble the Base Frame: Create an 8-foot by 4-foot rectangle using 2x4s laid flat. Use exterior-grade screws at each corner. Check for square by measuring diagonally from corner to corner. Both measurements should match.
Attach Vertical Studs: Install corner posts first, then add intermediate studs every 16 to 24 inches. For a shed-style roof, cut back wall studs at 4 feet and front wall studs at 5 feet. This 12-inch height difference creates your roof slope for rain runoff.
Install Top Plates and Roof Framing: Connect the tops of all studs with horizontal plates. Add angled rafters for a pitched roof that sheds rain and snow.
Pro tip from my own failures: Pre-drill pilot holes when working with reclaimed or dry lumber. This prevents splitting and makes driving screws much easier. I learned this after cracking several boards on my first build. Also, always use screws, not nails. My first coop used nails, and they pulled loose in wind within a month. Screws grip into the wood fibers and create a much stronger frame.
Phase 3: Walls, Roofing, and Flooring
Install Flooring (Optional): Some coop designs, particularly tractors, skip solid floors. If including a floor, use plywood or reclaimed boards over the base frame. Consider adding a layer of vinyl flooring on top for easier cleaning and better waterproofing.
Attach Wall Sheathing: Cut plywood or reclaimed boards to fit between framing members. Leave openings for doors, windows, and ventilation. Leave the top 6 to 8 inches of each side wall open for ventilation, covered with hardware cloth. Attach securely with screws.
Install Roofing: A pitched roof sheds water effectively. Attach corrugated metal, reclaimed shingles, or heavy-duty tarps. Ensure 4 to 6 inches of overhang at the eaves to direct water away from walls.
Heat management trick from my Nigerian background: In tropical poultry farming, we paint roofing metal white or use reflective material to bounce solar heat. I tested this in my 2023 Texas summer setup, and a coat of white Rust-Oleum spray paint on corrugated panels dropped interior temperature by about 6 degrees compared to unpainted galvanized metal. Total cost: $5 for a can of spray paint. Completely worth it if you are in a hot climate.
Phase 4: Interior Features
Install Roosting Bars: Position bars 12 to 18 inches off the floor, running parallel so chickens are not directly above or below each other. A 2×2 turned with the wide side up provides comfortable gripping surface. Sand any rough edges. For 6 to 8 chickens, two 4-foot bars give you 8 feet total roost length, which is just right.
Build and Install Nest Boxes: Create 12x12x12 inch boxes, one for every 3 to 4 hens. Position lower than roosts and in a darker area of the coop. Hinged lids or external access doors make egg collection easier. Angle a small piece of plywood at 45 degrees on top of the nesting boxes to prevent chickens from roosting and pooping on top of them.
Cut Ventilation Openings: Add ventilation holes near the roofline and lower on walls. Cover ALL openings with 1/2-inch hardware cloth. Screw the hardware cloth to the framing using screws and fender washers every 4 inches. Do not use a staple gun. I have seen raccoons peel stapled hardware cloth right off the wood.
Phase 5: Doors and Pop Door
Main Access Door: Frame a simple door from 2×2 lumber, approximately 18 inches wide by 3 feet tall. Cover one side with plywood. Attach with two galvanized hinges and install predator-proof latches.
Double-latch recommendation: Raccoons have remarkably dexterous paws. Simple hook latches? They open them. I switched to barrel bolts after a raccoon opened a hook latch on my coop at 3 AM. Install two barrel bolts on every coop door, one at the top and one at the bottom. This has been 100% raccoon-proof across four years and multiple flocks for me.
Chicken Pop Door: Add a separate small door (10 by 12 inches) at floor level for the chickens to enter and exit into their run. This is also where you can later install an automatic chicken coop door. Products like the Run-Chicken Model T50 ($130 to $160) or ChickenGuard automatic doors ($180 to $220) open at dawn and close at dusk automatically, which is worth the investment if you travel or work irregular hours. See our automatic chicken coop door reviews for detailed comparisons.
Making Your Coop Healthy and Secure
Building the structure is only half the battle. These features determine whether your chickens thrive or struggle.
Predator-Proofing That Actually Works
Your budget coop must function like a fortress. Predators are persistent, clever, and devastating.
Hardware Cloth Is Essential: This bears repeating because chicken wire fails constantly. Chicken wire keeps chickens in but does not keep predators out. Raccoons tear through it. Foxes bite through it. Use 1/2-inch hardware cloth (19-gauge galvanized steel) on every opening. For more on this critical decision, see our comparison of hardware cloth vs. chicken wire.
Bury a Protective Apron: Extend hardware cloth 12 inches outward from the bottom of the coop and pin it to the ground (or bury it 6 inches deep). This creates an “apron” that prevents digging predators from tunneling under. Also consider how to keep rats out of your chicken coop, as they are a bigger problem than most beginners expect.
Use Predator-Proof Latches: Use spring-loaded barrel bolts, carabiners, or combination latches on every door and access point. For deeper security strategies, our predator-proof chicken coop guide covers advanced techniques, and you can also review the best predator deterrents for chickens.
Ventilation: The Most Overlooked Factor
I cannot stress this enough: ventilation problems cause more chicken health issues than almost any other coop failing. Chickens have sensitive respiratory systems. Their droppings release ammonia. Without constant air exchange, that ammonia accumulates and damages lungs.
Implementation: High vents near the roofline allow hot, moist air to escape. Lower vents on the opposite wall allow fresh air entry. In cold weather, you can partially close lower vents while keeping upper vents open. Never seal the coop completely, even in freezing temperatures. In my -10 degree Minnesota trial in 2023, the birds did fine with zero supplemental heat. Their body heat plus deep litter kept the coop interior at roughly 20 degrees when it was -10 outside. Not warm by human standards, but perfectly safe for cold-hardy breeds.
Biosecurity: Protecting Your Flock from HPAI in 2026
This section is not optional in 2026. According to USDA APHIS, highly pathogenic avian influenza (HPAI) is extremely contagious and often deadly to domestic poultry, and the virus has affected more than 166 million birds since 2022. While the scale of outbreaks has been smaller in early 2026 than in 2025 (roughly 2.8 million birds lost in January 2026 versus 19 million in January 2025, according to CNBC’s analysis of USDA data), the virus continues to pop up in backyard flocks across the US.
Here is how your coop design directly supports biosecurity:
Covered run or enclosed overhead netting. Wild birds are a primary source of HPAI transmission, carrying the virus in their droppings and contaminating water sources. Your run should be covered to prevent wild bird droppings from entering your flock’s area.
Dedicated boot station. Keep a plastic tray with diluted Virkon S (available at Tractor Supply, about $15 for a tub) outside the coop entrance. Step in it before and after every coop visit. I keep a dedicated pair of coop-only boots hanging on a hook by my coop door.
Enclosed water system. Use enclosed nipple waterers inside the coop or covered run rather than open dishes that wild birds can access. A 5-gallon bucket with poultry nipples costs about $15 to set up and eliminates one of the biggest transmission vectors.
Store feed properly. According to USDA’s Defend the Flock program, ensuring feed is stored properly prevents contamination from wild birds and rodents. For tips, see where to store chicken feed.
For a complete biosecurity plan, see our dedicated guide on poultry farm biosecurity.
Disclaimer: I am not a veterinarian. For any signs of illness in your flock, including lethargy, sudden drop in egg production, nasal discharge, or unexpected deaths, see our guide on when to call the vet for a backyard chicken and contact your state veterinarian or a poultry DVM immediately.
Climate-Specific Modifications
Hot Climates (US South, Australia, Nigeria, Parts of UK Summers)
- Paint the roof white with reflective coating
- Maximize ventilation openings on at least two opposing walls for cross-ventilation
- Add shade cloth over the run
- Use sand in the run instead of wood chips (sand stays cooler and drains better)
- Freeze water bottles and place them in the coop on extreme heat days
From raising birds in Nigeria’s humid climate, I learned that cross-ventilation is absolutely critical. Cut ventilation openings on at least two opposing walls so air flows through the coop constantly. For more strategies, see our guide on raising chickens in hot, humid climates.
Cold Climates (Canada, Northern US, Scotland, Mountain Regions)
- Do NOT heat your coop with heat lamps. They are a massive fire hazard and one of the top causes of coop fires. If you absolutely must add heat, read our review of safe chicken coop heaters first.
- Seal drafts at roost level while keeping upper ventilation open.
- Use the deep litter method, which generates mild bottom heat as bedding composts naturally.
- Apply petroleum jelly to combs and wattles on extreme cold nights to prevent frostbite.
- Use winter water solutions to keep water from freezing.
For a comprehensive overview, see our winterizing your chicken coop guide and raising chickens in cold climates.
Wet/Humid Climates (Pacific Northwest, UK, Gulf Coast)
- Elevate the coop 12 to 16 inches off the ground
- Use pressure-treated lumber for the base frame (adds about $15 to your cost but prevents rot)
- Ensure 100% roof overhang coverage on all sides
- Add a rain gutter to channel water away from the coop entrance
- Keep the coop from smelling by maximizing airflow and using barn lime strategically
After the Build: Setting Up for Success
Your coop is complete. Now set it up properly for your flock’s arrival.
Bedding Selection and Management
Proper bedding absorbs moisture, controls odor, and keeps the coop comfortable.
Pine Shavings: My preferred choice. Absorbent, affordable at roughly $6 to $8 per compressed bale, and readily available at Tractor Supply or Rural King. Avoid cedar shavings, which release oils that can irritate chicken respiratory systems.
Deep Litter Method: A low-maintenance approach where you continuously add fresh bedding on top of old material. Beneficial microbes break down droppings over time, generating gentle heat during decomposition. Full cleanouts happen only once or twice yearly.
For bedding comparison details, check our hemp vs. straw vs. sand bedding guide and our guide to the best flooring for a chicken coop.
Ongoing Costs to Expect
Beyond the coop build, budget for monthly flock expenses:
| Expense | Monthly Cost (6 hens) | Notes |
|---|---|---|
| Layer Feed | $18 to $30 | Based on 50 lb bag lasting 4 to 6 weeks |
| Bedding | $6 to $12 | Pine shavings monthly replacement |
| Supplements | $5 to $10 | Oyster shell, grit, occasional treats |
| Total | $29 to $52 | Varies by season and local prices |
For precise feed costs, see our chicken feed calculator and cost guide and understand the difference between feed and scratch.
Choosing Your Breeds
Not all chickens perform the same in a compact, budget-friendly coop. My top recommendations based on hands-on testing:
Rhode Island Reds: The gold standard. Expect 250 to 300 eggs per year (per American Poultry Association data). Cold-hardy, heat-tolerant, docile. Available at Tractor Supply spring chick days for about $3 to $4 each.
Buff Orpingtons: My personal favorite. In my 2023 test flock in a simulated Texas summer, Buff Orpingtons outperformed Silkies by 20% in heat tolerance measured by egg production consistency above 90 degrees. They lay 200 to 280 eggs per year and are famously friendly. Read our full Buff Orpington guide.
Australorps: If pure egg numbers are your priority, Australorps hold the world record. Modern Australorps reliably produce 250 to 300 eggs per year. Calm, cold-hardy, and handle confinement well.
For a broader selection, see our guide to the easiest chicken breeds for beginners and how many chickens you need for a family of 4.
Introducing Your Flock
Evening Introductions Work Best: Place chickens on their new roosts at dusk. They will settle for the night and wake up in their new home.
Confine Initially: Keep chickens inside the coop and run for three to five days before allowing any free-range time. This teaches them where home is.
If you are just starting out, our guide on what is the best age to start raising chickens helps you decide between chicks and adult hens.
Optional Upgrades Worth the Investment
Once your basic coop is complete and your flock is established, these additions improve convenience and flock safety:
Automatic Coop Doors
The best automatic chicken coop doors in 2026 are a game-changer for anyone who does not want to wake up at dawn or rush home before dark. I installed a Run-Chicken on my primary coop in 2024, and it has been flawless through two winters. The peace of mind is worth every penny, especially because leaving the coop open after dark is the single biggest predator risk for backyard flocks.
Top picks include the Run-Chicken Model T50 ($130 to $160), the Omlet Automatic Coop Door ($100 to $130 with app connectivity), and the ChickenGuard Premium ($130 to $160 with timer plus light sensor). Full details in our automatic coop door reviews.
Solar-Powered Lighting
A small $20 solar light inside the coop can extend your hens’ “daylight” hours during winter short days, maintaining egg production. Hens need about 14 to 16 hours of light to sustain peak laying. For a full setup walkthrough, read how to add solar power to your chicken coop.
Chicken Coop Insurance
Here is something most beginner keepers overlook: many standard homeowner’s policies do NOT cover backyard livestock structures or animal losses. Our review of best backyard chicken coop insurance covers providers like State Farm, Nationwide, and American Family Insurance, which offer endorsement options typically running $50 to $150 per year. Also see does homeowners insurance cover backyard chickens for the full breakdown.
Common Mistakes and How to Avoid Them
Even experienced builders make errors. Here are the problems I see most often and their solutions:
1. Underestimating Space Requirements. Chicks grow fast, and that “plenty big” coop suddenly feels cramped with fully grown hens. Plan for growth from the beginning, ideally adding 25% more space than current flock size requires. If you need to go larger, see our chicken coop plans for 20 chickens.
2. Using Chicken Wire Instead of Hardware Cloth. This mistake often proves heartbreaking. Replace chicken wire with 1/2-inch hardware cloth on all vulnerable areas. Yes, hardware cloth costs more upfront. The alternative, losing birds to preventable predator attacks, costs far more emotionally and financially.
3. Poor Drainage Planning. Coops positioned in low spots or lacking proper bases become muddy, smelly disease incubators. Add a gravel base around and under the coop if possible. See our guide on the best chicken coop flooring for mud.
4. Insufficient Ventilation. This is the number one design error in DIY coops. A closed-up coop traps moisture, ammonia from droppings, and heat. Open ventilation at the roofline on at least two sides is essential year-round, even in winter.
5. Skipping the Predator Apron. Even if your walls are fortress-level, predators will dig under. The hardware cloth apron is non-negotiable.
6. Forgetting About Parasites. A new coop will not stay clean forever. Set up a dust bath for your chickens and read our guide on natural ways to keep parasites out of your coop.
For more pitfalls to avoid, our article on mistakes every first-time chicken keeper makes covers the full spectrum.
The ROI Math: Does a Backyard Flock Actually Save Money?
Let us run the real numbers.
Year-One Cost Estimate for a Flock of 6 Hens
| Expense | Estimated Annual Cost |
|---|---|
| Coop (this build) | $150 to $200 (one-time) |
| 6 chicks (day-old) | $18 to $30 |
| Feed (layer pellets, roughly 20 lbs per week) | $365 per year |
| Bedding (pine shavings, deep litter method) | $40 per year |
| Misc. (waterer, feeder, grit, supplements) | $50 |
| Total Year 1 | $623 to $685 |
Year-One Egg Production Value
Six Rhode Island Reds averaging 260 eggs per year each equals 1,560 eggs, or 130 dozen. At the January 2026 average of $2.58 per dozen (according to Bureau of Labor Statistics data), that is roughly $335 in egg value.
So in Year 1, you do not break even. You are investing. But in Year 2 and beyond, your coop is already built. Annual cost drops to roughly $455 (feed plus bedding plus miscellaneous), and your egg production value stays at $335 or more. If egg prices rise, which they historically do around Easter and during HPAI outbreaks, your returns improve significantly. And if you choose to legally sell your backyard eggs, your ROI accelerates further.
If you are trying to convince your spouse to get chickens, these numbers are your secret weapon.
For a precise personalized projection, use our chicken feed calculator and cost guide.
Frequently Asked Questions
Is it cheaper to build or buy a chicken coop?
Building your own coop saves significant money in most cases. According to HomeGuide’s 2026 data, pre-built coops average $650 to $800 installed, while DIY builds using reclaimed materials cost $100 to $300. Even with all new materials, DIY typically runs $250 to $500 for basic designs.
What is the best material for a cheap chicken coop?
Reclaimed wood from pallets (heat-treated only, marked “HT”), old fences, and construction scraps provides the biggest savings. Pair with 1/2-inch hardware cloth for predator protection and salvaged metal roofing for weather coverage.
How many chickens can live in a 4×8 coop?
A 4×8 foot coop (32 square feet) houses 8 to 10 standard chickens like Rhode Island Reds or Buff Orpingtons when paired with a 64 to 80 square foot outdoor run. Larger breeds like Brahmas need more space, reducing capacity to 6 to 8 birds.
How much does hardware cloth cost in 2026?
Hardware cloth (1/2-inch mesh) costs roughly $1 to $3 per square foot. At Tractor Supply, a 36 inch by 10 foot roll runs approximately $15 to $20, while a 24 inch by 100 foot roll runs $45 to $65. Budget $40 to $90 for adequate coop and run coverage.
Can I use chicken wire for predator proofing?
No. Chicken wire keeps chickens contained but fails against predators. Raccoons, foxes, and dogs easily tear through or reach through chicken wire. Always use 1/2-inch hardware cloth for predator resistance.
What is the ideal height for roosting bars?
Install roosting bars 12 to 18 inches off the floor. Use a 2×2 with the wide side up for comfortable gripping. Allow 8 to 10 inches of bar length per standard chicken, 10 to 12 inches for larger breeds.
Do I need a rooster to get eggs?
No. Hens lay eggs regularly without a rooster present. Those eggs are simply unfertilized. You only need a rooster for fertile eggs intended for hatching. See our full explainer: do I need a rooster to get eggs.
Do I need a permit to build a chicken coop?
This varies by municipality. Most suburban areas require no building permit for structures under 100 to 120 square feet (a 4×8 foot coop is 32 square feet, well under this threshold). However, many cities have ordinances governing keeping backyard chickens. Check our chicken laws by state guide before buying a single board.
How long does it typically take to build a DIY chicken coop?
Simple A-frame coops take a dedicated weekend for beginners. Larger shed-style coops may require two to three weekends. Add time for material sourcing if hunting for reclaimed items.
What are the ongoing monthly costs for backyard chickens?
Expect $29 to $52 monthly for a flock of 6 hens, covering feed ($18 to $30), bedding ($6 to $12), and supplements ($5 to $10). At current egg prices, most flocks generate positive returns after the coop investment is recovered.
Are automatic chicken coop doors worth the cost?
For keepers who travel, work irregular hours, or simply want convenience, automatic doors ($130 to $220) provide excellent value. They ensure your flock is protected at dusk even when you cannot be there. See our automatic coop door reviews for detailed comparisons.
Does homeowners insurance cover chicken coops?
Most standard policies do NOT cover agricultural outbuildings or livestock. You may need a farm endorsement or specialized policy. See our guide on best backyard chicken coop insurance for provider comparisons.
Final Thoughts: Just Start
I talk to so many people who want backyard chickens but get paralyzed by perfectionism. They research coops for months, compare $2,000 Omlet Eglu systems to DIY builds, read conflicting advice about breeds and feed, and never actually get started.
Here is what I know after six years, 50+ birds, and coops on two continents: the best coop is the one you actually build. It does not have to be perfect. My current coop has mismatched screws, a slightly crooked door, and a patched spot on the roof from where a branch fell on it in 2024. The chickens do not care. They just need dry, safe, and ventilated.
Building a DIY chicken coop for under $200 represents more than just a construction project. It is an investment in self-sufficiency, sustainable living, and connection to where food actually comes from.
Pick up the lumber this weekend. Build the coop next weekend. Order your chicks. In three months, you will be collecting your own eggs and wondering why you did not start sooner.
Now get building. Those fresh eggs are waiting.
About the Author: Oladepo Babatunde is the founder of ChickenStarter.com with over 6 years of hands-on experience raising more than 50 chickens across diverse climates. Drawing from training with the Nigerian Agricultural Extension Services and extensive practical work adapting tropical poultry techniques to US, UK, Australian, and Canadian conditions, Oladepo provides data-driven, experience-backed guidance for backyard chicken keepers worldwide. His work is informed by USDA, APHIS, and American Poultry Association standards. He is not a licensed veterinarian. Always consult a qualified poultry DVM for chicken health concerns.

Oladepo Babatunde is the founder of ChickenStarter.com. He is a backyard chicken keeper and educator who specializes in helping beginners raise healthy flocks, particularly in warm climates. His expertise comes from years of hands-on experience building coops, treating common chicken ailments, and solving flock management issues. His own happy hens are a testament to his methods, laying 25-30 eggs weekly.