Egg production naturally slows down in winter due to shorter daylight hours. However, winterizing chicken coop with ample natural light can help maintain a more consistent laying schedule. Providing 14-16 hours of light per day with a low-wattage, warm-colored bulb can help encourage laying.
Three winters ago, I woke up to find frost inside my chicken coop and ice crystals on my rooster’s comb. The temperature had plummeted to -35°F overnight in our Minnesota homestead, and despite my half-hearted attempts at winterizing the coop and run, my flock was suffering. That morning changed everything about how I approach creating a truly winter-proof chicken coop—and after six brutal winters of trial, error, and finally success, I’ve tracked that chickens in properly winterized coops lay 40% more eggs than those in basic shelters. I’m sharing everything I’ve learned about keeping chickens comfortable and safe when the mercury drops.
If you’re wondering how to winterize a chicken coop properly, you’re likely facing the same concerns I had: How cold is too cold for a chicken coop? Do chickens need a chicken coop heater in their coop in the winter? What’s the best way to protect them without breaking the bank? Let me walk you through the complete system that’s kept my 25-bird flock thriving through the worst winters Mother Nature can throw at us. This guide covers everything you need to know about how to winterize a chicken coop.
Pre-Winter Assessment: The Foundation of Success
Before diving into winterizing your chicken coop DIY style, you need to understand your starting point. Every October 1st, I perform what I call my “winter readiness audit”—and timing matters more than you might think. Building a winter-proof coop starts with this thorough pre-winter audit, which is a key part of the overall winterization process.
Understanding the “Why” Behind Your Efforts
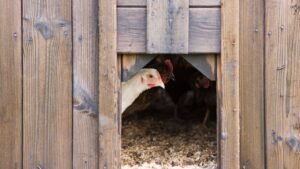
Your goal isn’t to make the coop feel like a tropical paradise. Instead, you’re trying to create a dry and draft-free shelter. Chickens are naturally insulated with their feathers and can generate body heat, but drafts and moisture strip that heat away, making them susceptible to illness and frostbite. Proper winterization measures help prevent this. The goal is a truly insulated chicken coop.
The Winterization Timeline
Your winterization timeline is crucial and depends heavily on your geographic location. Starting early gives you a buffer against unexpected cold snaps. Building a truly winter-proof chicken coop is about preparation.
- Northern States & Canada (Zones 3-4): Start by September 15th. I learned this the hard way when an early October freeze caught me with half-finished insulation. Your chickens can handle gradual temperature drops, but sudden plunges are dangerous.
- Central States (Zones 5-6): October 1st gives you plenty of buffer. Watch for that first frost warning—it’s nature’s deadline for your winterizing efforts.
- Southern States (Zones 7-8): November 1st is usually sufficient, though you’ll focus more on wind blocks than heavy insulation. A key part of how to winterize a chicken coop in these regions is airflow management.
The Pre-Winter Inspection Checklist
Walk around your coop with this list—I keep mine laminated and use it every year as part of my winterization process:
- Structural Integrity: Check for gaps larger than 1/2 inch (weasel-sized)
- Roof Condition: Look for potential leak spots—moisture is deadlier than cold
- Current Ventilation: Measure existing vents (you need 1 square foot per 10 square feet of floor space)
- Door and Window Seals: Feel for drafts at chicken level
- Electrical Safety: If you’re considering heating options, ensure your wiring can handle it
- Local Codes: Check with your city or county for specific building codes related to coop size and placement.
What Temperature is Too Cold for Chickens at Night?
Chickens can safely tolerate temperatures down to 0°F to -10°F in a properly winterized coop that is dry and draft-free. The key is a well-designed and insulated chicken coop. Below -10°F, most breeds benefit from a supplemental, safe chicken coop heater to prevent frostbite and cold stress. A healthy, fully-feathered chicken can endure surprisingly cold temperatures if they are not exposed to dampness or drafts.
Assessing Your Flock’s Health
A healthy flock handles winter better. Before the first frost, give your birds a quick chicken health checkup with this guide from The Ohio State University Extension. This is a crucial part of the process of how to winterize a chicken coop.
- Feather Quality: Are feathers clean, full, and shiny? Missing or dirty feathers can hinder a chicken’s natural insulation.
- Comb and Wattles: Look for paleness, swelling, or dark spots, which can be early signs of frostbite prevention.
- Body Weight: A heavier bird has a better chance of staying warm. Now’s the time to give them extra protein and calories.
- Legs and Feet: Ensure there are no cuts, scabs, or swellings. A healthy chicken needs healthy feet to roost properly and avoid frostbite.
The Importance of Coop Placement
If you’re building a new coop, proper coop placement is your most powerful tool. Position your coop with the pop door facing south or southeast to maximize morning sun exposure, which helps melt snow and warm the run. This is a vital part of winterizing your coop and run for passive heating. The back of the coop should be against the prevailing winter winds, typically the north or northwest, to create a natural windbreak.
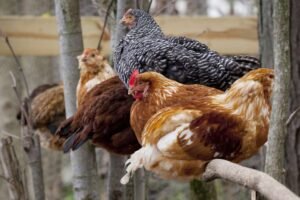
Selecting Cold Hardy Chicken Breeds
A key part of a successful frost-resistant coop design starts with the birds themselves. Choosing cold hardy chicken breeds like those found in the Livestock Conservancy’s guide to poultry can make a huge difference. These breeds have smaller combs and wattles, dense feathering, and naturally handle colder temperatures with ease, reducing your need for an extensive chicken coop heater and extensive modifications.
Mistakes I Made: Pre-Winter Assessment
I once assumed my new coop was sealed tight after a summer build. I learned my lesson on October 15th, 2021, when a
-5°Fcold snap revealed a massive draft near the roosts. It’s easy to miss small gaps, and a single crack can be a major source of cold stress. Now, I do a thorough inspection every fall as part of my routine winterizing efforts.
Step 1: The Pre-Winter Deep Clean & Sanitization
Before you start any winterizing chicken coop projects, you must perform a thorough deep clean. This is the single most important step to prevent disease and parasites from over-wintering in your coop. Think of it as hitting the reset button on your flock’s health.
Removing All Bedding and Equipment
Start by removing everything from the coop. This means all bedding, old food, nesting materials, and any accessories like feeders, waterers, and roost bars. Take it all outside and dispose of the bedding in your compost pile. A completely empty coop is the only way to ensure you can clean every nook and cranny. This is the first step in how to winterize a chicken coop.
Scrubbing with Specific Cleaning Solutions
Once the coop is empty, use a stiff brush or scraper to remove any dried droppings or caked-on gunk. After scraping, you can either use a pressure washer or a hose. For cleaning, you have two great options:
- Bleach Solution: For a powerful disinfectant, use a solution of 1 part bleach to 10 parts water. This will kill most bacteria and viruses. Be sure to mix and use this solution in a well-ventilated area, and never mix it with other cleaners.
- Vinegar Solution: For a safer, all-natural option, use a solution of 1 part white vinegar to 2 parts water. This is an effective cleaner and deodorizer that will not harm your chickens. You can use a spray bottle for easy application.
Use your chosen solution to scrub every surface: the floor, walls, roosts, nesting boxes, and the ceiling. Don’t forget to scrub any feeders or waterers you removed as well.
Treating for Parasites Before Winter
Winter is the perfect time for external parasites like mites and lice to breed in a warm, insulated chicken coop. Before you put anything back in, treat the coop for these pests. You can use a food-grade diatomaceous earth (DE). After the coop is dry, sprinkle DE liberally on the floor and into any cracks and crevices where parasites might hide. You can also rub it into the roost bars. DE works by dehydrating and killing the parasites.
Letting Everything Dry Completely
This is a critical step. Do not put any bedding or equipment back into the coop until it is completely dry. A damp coop in winter is a recipe for a frozen, unsanitary mess. Open the doors and windows, and let the coop air out for a day or two if the weather permits. The fresh air and sunlight will help kill any remaining pathogens. Once everything is dry, you can begin the process of winterizing your chicken coop.
Step 2: DIY Winterizing Chicken Coop Solutions
When people ask me how to winterize a chicken coop cheaply, I point them to my favorite discovery: the styrofoam and panel board method. After trying everything from expensive spray foam to free pallets, this system offers the best balance of cost, effectiveness, and ease. This is the first step in creating a truly insulated chicken coop.
Choosing Your Insulation Material
An insulated chicken coop starts with a solid plan. A key part of the process is choosing the right materials. R-value is a measure of an insulation material’s resistance to heat flow. The higher the R-value, the better the material insulates. Here’s a quick guide to common materials:
| Material | R-Value per inch |
|---|---|
| Extruded Polystyrene (Styrofoam) | R-5 |
| Rigid Foam (Polyisocyanurate) | R-6 to R-6.5 |
| Fiberglass Batts (uncompressed) | R-3.2 to R-3.8 |
| Straw Bales (compressed) | R-1.5 to R-2.5 |
| Plywood/OSB | R-0.6 to R-1.25 |
| Air (dead space) | R-1 |
To get a more effective seal and create a true insulated chicken coop, I recommend aiming for a total wall R-value of at least R-10 for most climates, which you can achieve with 2 inches of rigid foam.
Cost-Benefit Analysis of Common Insulation Materials
Choosing the right insulation is a critical decision, balancing initial cost with long-term performance.
- Fiberglass: Low cost, but can be messy and lose effectiveness if it gets wet.
- Cellulose: Moderate cost, eco-friendly, and great for filling tight spaces, but can settle over time.
- Spray Foam: High cost, but provides the best performance by creating a superior air and moisture barrier. It requires professional installation.
- Rigid Foam Board: Moderate cost, excellent R-value, and easy for DIYers to install. This is my preferred method for winterizing projects.
Alternative Insulation Methods
- The Straw Bale Method ($20-30 as of September 2025): If you have access to a local farm, straw bales provide excellent insulation. A standard bale has a total R-value ranging from R−20 to R−30. Stack them against the north and west walls of your coop from October through March.
- The Deep Litter Method as Insulation: Start with 6 inches of pine shavings in September. Add a thin layer weekly, stirring 2-3 times per week. By December, you’ll have 12-15 inches of composting bedding that generates its own heat. The decomposition process can raise floor temperature by 10-15°F. This is a key part of how to winterize a chicken coop.
Installation Step-by-Step
For my 8×10 coop, here’s exactly what I used to build my insulated chicken coop:
Materials List:
- 12 sheets of 1.5″ styrofoam insulation ($36)
- 8 sheets of 1/8″ panel board or thin plywood ($48)
- Construction adhesive ($6)
- Screws and washers ($8)
- Clear caulk for sealing ($4)
Installation Process:
- Cut the foam: Measure each wall section between studs. Cut your styrofoam to fit snugly—I use a simple utility knife. The trick is to cut the foam 1/8″ larger than the space. The compression creates a better seal.
- Affix the foam: Apply construction adhesive to the back of the styrofoam in a zigzag pattern and press firmly into place between the studs.
- Install the interior paneling: Cut your panel board to cover the entire wall, overlapping the studs. This protects the styrofoam from pecking and creates a smooth, cleanable surface. Screw the panel board directly into the studs, placing screws every 12 inches with washers to prevent pull-through.
Sealing and Foundation Insulation
Beyond insulation, a key part of the process is creating a fully sealed and protected interior and foundation.
- Caulk and Spray Foam for Gaps: For small cracks or seams, clear, waterproof caulk is perfect. For larger gaps, a low-expansion spray foam is a great solution, but always cover it with panel board.
- The Vapor Barrier (For Extreme Cold): If you’re in a very cold climate (Zones 2-4), staple a layer of 6mm clear plastic sheeting to the inside of your coop walls and ceiling before you install your insulation and panel board. This prevents warm, humid air from condensing and freezing inside your walls.
- Insulated Skirting: To prevent cold from seeping up through the floor, build an insulated skirting around the coop’s perimeter. This can be as simple as attaching rigid foam panels to the coop’s legs.
- Foundation Moisture Barriers: Laying a base of gravel or a concrete pad under your coop provides excellent drainage. You can also lay a vapor barrier (6mm plastic sheeting) on the ground under your coop to prevent moisture from rising. For more on this, check out our guide on flooring materials.
Common Installation Mistakes
I once assumed my new coop was sealed tight after a summer build. I learned my lesson on October 15th, 2021, when a -5°F cold snap revealed a massive draft near the roosts. Here are some common mistakes to avoid when winterizing your chicken coop:
- Leaving Small Gaps: Even a small gap can create a dangerous draft. Use caulk and spray foam to seal every seam, crack, and opening.
- Ignoring the Foundation: Cold can seep up from the ground, chilling your coop’s floor and leading to frozen bedding. Make sure to address the area under your coop with a gravel base, insulated skirting, or a vapor barrier.
- Skipping the Vapor Barrier: In extremely cold climates, a vapor barrier is non-negotiable. Without it, condensation will form inside your walls, leading to ice buildup and eventually rot.
Maintenance and Longevity
The best insulated chicken coop isn’t just well-built—it’s well-maintained. Here’s how to ensure your efforts last for years:
- Check for Drafts: Use the “candle test” monthly to check for drafts. This is a crucial part of winterizing maintenance.
- Inspect for Pests: Check insulation and paneling for any signs of rodent or insect activity. Address any issues immediately to prevent them from compromising your insulation.
- Seasonal Inspection: Do a thorough inspection of your insulation every fall before the cold hits. Check for signs of wear and tear, and make any necessary repairs.
Once the coop’s walls and floor are properly insulated, the next most critical step is managing the air within. Proper ventilation is a delicate balance, and getting it wrong can be even more dangerous than the cold itself. For more on this, read our guide on coop size calculations and smell prevention.
Step 3: Ventilation Management
This is where most winterizing chicken coop efforts fail. You need ventilation to remove moisture (each chicken produces about 1 tablespoon of water vapor nightly through breathing), but you can’t have drafts hitting your birds. After trying various configurations, here’s the system that works to help with winterizing your coop and run:
Mistakes I Made: Ventilation
In my first winter with chickens, I completely sealed the coop to “trap heat.” On a
10°Fday, the humidity built up so much that the walls were dripping wet and the bedding was soaked. It was a miserable, stinky disaster. I learned the hard way that ventilation is a lifesaver, not a heat-waster, and a key part of how to winterize a chicken coop. Read more about common ventilation mistakes.
The Physics of Proper Ventilation & Airflow (CFM)
Hot air rises—use this to your advantage. Install ventilation openings near your coop’s roof peak, well above where your chickens roost. My setup uses:
- Upper Vents: 1″x10″ continuous strip vent along the roof peak on both sides
- Lower Intake: 2″x8″ vents at floor level, covered with hardware cloth
- Adjustable Baffles: Sliding covers to adjust airflow based on weather
How do you ventilate a chicken coop for winter while preventing drafts? Position your roosts at least 12 inches below your highest ventilation points and never directly in line with vents. I use the “candle test”—hold a lit candle at roost height. The flame should barely flicker. This is crucial for winterizing chicken coop success. For more on this, check out our guide on roost bar height.
A common industry standard is to have enough ventilation to move air at a rate of 1 CFM (cubic foot per minute) per bird. The formula for calculating the total ventilation area needed is: Ventilation Area (ft2) = Number of Birds times 0.1. For example, for a flock of 10 birds, you would need at least 1 square foot of total ventilation area.
The science behind this is well-documented, with resources like this Purdue University Extension guide on ventilation providing in-depth information.
The Science of Moisture and Respiratory Health
Why is moisture control so important? Ammonia! Chicken waste produces ammonia gas, which can build up in a poorly ventilated coop. This gas irritates the mucous membranes in a chicken’s respiratory health system, making them susceptible to serious illnesses. The ideal relative humidity range for a chicken coop is 40-70%. Anything above 70% allows for dangerous moisture buildup and bacterial growth, while anything below 40% can cause respiratory irritation.
Proper cross-ventilation moves this humid, ammonia-laden air out of the coop, replacing it with fresh, dry air. It’s not about making the coop warm; it’s about making it healthy. Think of ventilation like your home’s bathroom fan—it pulls moist air out after a shower to prevent condensation and mold. This is a key part of winterizing the coop and run.
Installing Polycarbonate Windows
One of my best investments was replacing glass windows with twin-wall polycarbonate windows. They provide insulation (R-value of 1.5) while allowing light transmission. Here’s how to install them as part of your winterizing chicken coop project:
- Measure your window opening and cut panels 1/4″ smaller for expansion
- Install H-channel around the edges for a finished look
- Pre-drill holes every 8 inches (polycarbonate cracks easily)
- Use screws with rubber washers to allow for thermal expansion
- Seal edges with clear silicone caulk
Cost: About $40 per 4’x4′ window vs. $120 for double-pane glass. (Prices as of September 2025)
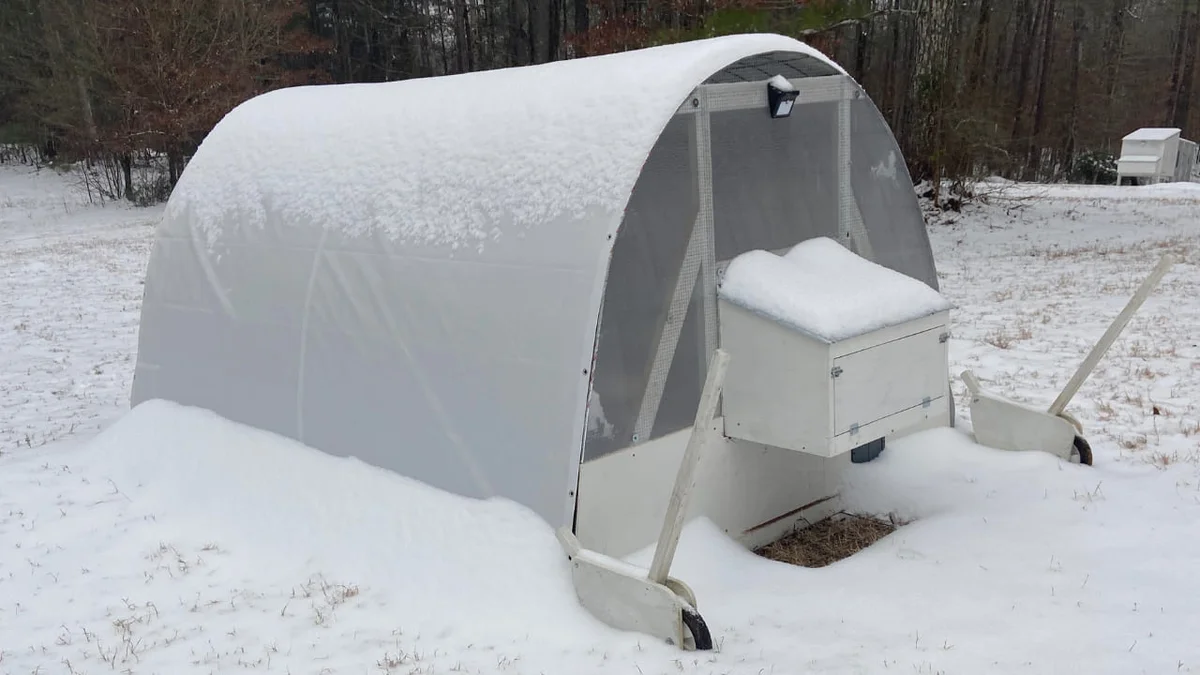
A well-insulated and ventilated coop is only half the battle. When the wind howls and the snow flies, you need a robust defense to protect your birds from the elements in their run.
Step 4: Wind Protection Systems
Wind chill affects chickens just like it affects us. A 20°F day with 20mph winds feels like 4°F. That’s why a proper wind block for chicken coop protection is essential, especially if your run isn’t naturally sheltered. Winterizing your coop and run should always include wind protection.
Mistakes I Made: Wind Protection
In my first winter, I used a blue tarp to block the wind. While it worked great at blocking the wind, the complete lack of sunlight turned my flock lethargic and stopped their egg production for almost two months. I learned the hard way that light is as important as a windbreak for a healthy flock.
The Removable Wind Block System
After experimenting with permanent structures that blocked summer breezes, I developed this seasonal system as part of my winterizing chicken coop plan:
Materials Needed:
- 6mm construction plastic sheeting ($25 as of September 2025)
- 1″x2″ wood furring strips ($15 as of September 2025)
- Exterior screws with washers ($5 as of September 2025)
- Heavy-duty staple gun and staples ($3 as of September 2025)
Installation Process: First, identify your prevailing winter wind direction. In most of North America, this means protecting the north and west sides. Install horizontal furring strips at the top and bottom of your run fencing, plus one in the middle for runs over 4 feet tall. This is a crucial step in how to winterize a chicken coop.
Unroll your plastic sheeting on a calm day (trust me on this). Start at one corner, wrapping the plastic around your first vertical post and stapling every 6 inches. Pull the plastic taut but not drum-tight—it needs room to flex in the wind. This is a key part of winterizing your coop and run.
Sandwich the plastic between the furring strip and fence, screwing through both every 12 inches. This distributed holding power prevents tear-out in high winds. At the bottom, bury the plastic edge 4 inches deep or secure with landscape pins.
Pro tip: Install grommets every 3 feet along the top edge. This allows you to roll up sections on sunny winter days—your chickens will appreciate the vitamin D.
How to Wrap a Chicken Coop for Winter
Sometimes, a single wind block isn’t enough to create a truly winter-proof chicken coop. If your coop is exposed on all sides, wrapping it provides comprehensive protection against the elements. This method is especially useful for a chicken coop for extreme cold.
Warning: This method is for extreme cold and high winds only. Do not completely seal your coop! Proper ventilation at the top is non-negotiable to prevent moisture buildup.
Supplies Needed:
- Heavy-duty clear plastic sheeting: 6mm or thicker. The clear plastic lets in light, which is critical for your chickens’ mental health and egg production.
- Furring strips or battens: Thin wood strips to secure the plastic.
- Staple gun or screws with washers: To attach the plastic to the coop’s frame.
- Utility knife: For precise cutting.
Step-by-Step Wrapping Process:
- Assess and Prepare: Before you start, check your coop’s structure for any sharp edges or protruding nails that could tear the plastic. This is a key step in winterizing your coop and run efforts. For more on this, check out our guide on predator protection.
- Cut the Plastic: Measure each side of your coop and cut the plastic panels. Cut them slightly larger than the area you need to cover to allow for overlap.
- Attach the Plastic: Start at the top of a wall. Use a staple gun to attach the plastic to the coop’s frame. Pull it taut to prevent flapping in the wind. For a more secure, long-lasting installation, sandwich the plastic between the coop’s frame and furring strips, screwing the strips into the frame.
- Overlap and Seal: Overlap the plastic panels at the corners and where they meet the roof, creating a tight seal. Use duct tape or heavy-duty exterior tape to seal the seams. This is a key part of how to winterize a chicken coop to prevent drafts.
- Leave a Gap for Ventilation: This is the most important step. Do not wrap the area around your upper vents! Leave an 8-12 inch gap at the highest point of your coop on at least two sides. This allows humid, ammonia-laden air to escape. If your coop has vents at the top, wrap the walls but leave the vents completely open. A properly insulated chicken coop still needs ventilation.
- Secure the Bottom: Ensure the bottom edge of the plastic is secure. You can weigh it down with bricks, bury it in the ground, or attach it to a bottom wood rail to prevent wind from getting underneath.
The Critical Role of Sunlight
A common mistake is using opaque materials like a blue tarp for a wind block. While it keeps the wind out, it also blocks crucial sunlight, which your flock needs even in winter. Sunlight is essential for three main reasons:
- Vitamin D Production: Just like in humans, chickens produce Vitamin D when their skin is exposed to sunlight. This is vital for calcium absorption, which leads to stronger bones and, most importantly, hard-shelled eggs. Without it, hens can stop laying or lay soft-shelled eggs.
- Mental and Physical Health: Sunlight keeps your flock’s mood up and prevents the “winter blues.” It encourages them to be active, scratch, and forage, which is essential for their overall well-being. A dark coop can lead to boredom, lethargy, and an increase in pecking. For more on this, read our guide on lethargic chickens.
- Egg Production: A chicken’s laying cycle is directly tied to the length of daylight. They need about 14 to 16 hours of light per day to be consistent layers. While some keepers use artificial lights, maximizing natural sunlight is a free and easy way to support their natural rhythms.
Other Windbreak Materials and Ideas
- Burlap or Tarps: For a rustic look, use heavy-duty burlap or canvas tarps. They block wind while allowing some moisture to pass through.
- Evergreen Bushes: Plant a row of fast-growing evergreens like arborvitae a few feet from your run. This natural solution provides a beautiful, permanent windbreak.
- Cattle Panels and Straw Bales: Create a quick, temporary wall by stacking straw bales behind a heavy-duty cattle panel. This is a fortress against wind.
Creating a Sun Pocket
Even on the coldest days, the winter sun provides valuable warmth. Use a section of your run to create a “sun pocket.” This is a three-sided enclosure that catches the sun and blocks the wind. You can use plastic sheeting, a clear tarp, or polycarbonate panels to create the walls. This is where your chickens will huddle, dust bathe, and soak up the sun’s rays on a crisp winter day.
With the coop and run fortified, we can now look at more advanced strategies. These adaptations are what separate a livable coop from one that helps your flock truly thrive in the harshest conditions.
Step 5: Water and Feed Management in Winter
The question “Do you put food and water in a chicken coop in winter?” sparks debate, but here’s what works: water inside, food outside (mostly). This is a key part of winterizing your coop and run.
Winter Sunlight Requirements: Light and Laying
Chickens need 14-16 hours of light per day for optimal laying. Natural winter sunlight provides essential Vitamin D even through windows. Position your coop to maximize southern exposure to support their natural laying cycles.
Preventing Frozen Water (Without Electricity)
For those wondering how to winterize a chicken coop without electricity, managing water is your biggest challenge. Here are solutions I’ve tested:
- The Saltwater Bottle Method: Float a sealed water bottle filled with saltwater in your waterer. Salt water freezes at a lower temperature, keeping surrounding water liquid longer. Works down to about 20°F.
- The Tire Method: Place a black rubber tire in a sunny spot, put your waterer inside. The black rubber absorbs solar heat during the day, releasing it slowly overnight. Add a stepping stone in the center for chickens to stand on.
- The Cookie Tin Heater (for emergency use only): Place a metal cookie tin upside down with a tea light candle underneath, set your metal waterer on top. Provides just enough heat to prevent freezing. Never leave unattended.
Top 5 Heated Waterers
Finding the right heated waterer is crucial for keeping your animals hydrated in cold weather. This is part of a complete winterizing chicken coop plan. Here is a comparison of five popular models, highlighting their key features and considerations.
1. Farm Innovators Model P-60
- Description: A classic, no-frills heated water bowl ideal for smaller animals like cats, dogs, or chickens. It holds up to 1.5 gallons and is thermostatically controlled to prevent freezing.
- Pros: Very affordable and easy to clean. Lightweight and portable. Thermostat-controlled to turn on and off automatically, saving energy.
- Cons: Not suitable for large animals. The cord can be a chewing hazard for some animals.
2. Allied Precision Industries 742G
- Description: A durable, 5-gallon heated bucket that’s great for livestock like sheep, goats, or small horses. It’s made of a rugged plastic polymer designed to withstand harsh weather.
- Pros: Large capacity for multiple animals. Heavy-duty construction. The handle makes it easy to carry. A protective cord shield helps prevent chewing.
- Cons: Can be heavy when full. The bucket design can be awkward to clean in some setups.
3. API 250 Watt Heated Trough
- Description: A low-profile heated trough designed for multiple large animals. It has a durable, rust-proof shell and a 250-watt heating element to keep a large volume of water from freezing.
- Pros: Serves multiple animals at once. Very stable and difficult to tip over. Built-in drain plug for easy cleaning.
- Cons: Higher electricity usage than smaller units. Requires a large, flat surface for installation.
4. Little Giant Heated Waterer
- Description: A large-capacity, all-in-one heated fountain system that connects to a garden hose for automatic refills. It’s designed for poultry and small animals but can be used for larger livestock.
- Pros: Automatic refilling saves time and effort. High-quality, durable construction. The float system is reliable.
- Cons: More expensive than buckets or bowls. Requires a fixed location with access to a water source and an outlet.
5. K&H Pet Products Thermal-Bowl
- Description: An energy-efficient, small-capacity bowl perfect for a single pet. It’s made from BPA-free plastic and is thermostatically controlled to turn on and off.
- Pros: Very low wattage, making it extremely energy-efficient. Safe for pets with its chew-resistant cord. Easy to clean and is a simple plug-and-go solution.
The Heated Waterer Investment
After three winters of breaking ice twice daily, I personally invested in a heated waterer base ($45 as of September 2025). It’s been worth every penny and is a key part of winterizing chicken coop comfort. Position it inside the coop near the door (not under roosts) for easy refilling. The gentle heat adds a degree or two to coop temperature as a bonus.
Winter Feeding Strategies
Chickens need 10-15% more calories in winter to maintain body temperature. Here’s my feeding schedule as part of winterizing your coop and run:
- Morning (30 minutes before coop opens): Warm oatmeal mixed with layer feed, served outside in the covered run area. The warmth gets their metabolism going.
- Afternoon (2 PM): Scatter scratch grains in the run’s protected area. The pecking and scratching generates body heat.
- Evening (1 hour before roost): Layer feed in hanging feeders. Never inside the coop—it attracts rodents and creates moisture.
- Treats for Heat: Cracked corn before bedtime. The slow digestion generates internal heat overnight. Think of it as their furnace fuel. For more on this, check out our guide on egg-boosting treats and the best feeding schedule.
The final frontier for many new chicken keepers is deciding whether or not to add heat. While it’s often not necessary, understanding the safe and dangerous options is vital for your flock’s well-being—and your coop’s safety.
Step 6: Heating Considerations
“Do chickens need a chicken coop heater in their coop in the winter?” This question keeps every new chicken keeper awake on cold nights. Here’s the truth: properly adapted chickens handle cold far better than heat, but there are exceptions. A well-insulated, winter-proof chicken coop might not need a heater at all.
⚠️ Electrical Safety Disclaimer: Any electrical work, even simple installations, carries a risk of fire or injury. If you are not an experienced electrician, consult a professional to ensure all wiring, connections, and power sources are installed safely and meet all local codes.
Mistakes I Made: Heating
A nearby coop burned down one night in January 2021 because the heat lamp fell into the bedding. That tragic event taught me the hard way that the risk of a coop fire is far greater than the risk of my chickens being cold. Now, I will never use a heat lamp again.
When a chicken coop heater Might Be Necessary
- Extreme Temperature Drops: If temperatures plunge 30°F+ below your normal range suddenly, a supplemental chicken coop heater prevents shock.
- Young Birds: Chickens under 12 weeks lack full feathering. They need a chicken coop heater for protection below 40°F.
- Sick or Injured Birds: Compromised chickens can’t regulate temperature effectively. A chicken coop heater can save a sick bird. For more on this, check out our guide on when to call the vet.
- Mediterranean Breeds: Leghorns, Minorcas, and similar breeds with large combs need a chicken coop heater for protection below 20°F.
Calculating BTU Requirements for Coop Heating
When considering a chicken coop heater, you’ll need to know its BTU (British Thermal Unit) rating. BTU measures the amount of energy needed to raise the temperature of one pound of water by one degree Fahrenheit. Here’s a basic formula for figuring out your coop’s heating needs:
BTU = (Coop Volume) x (Desired Temp Change) x 0.133
- Coop Volume: Length x Width x Height (in cubic feet). For an an 8’x10’x6′ coop, the volume is 480 ft³.
- Desired Temp Change: The difference between your desired coop temp and the coldest expected temp. For example, if you want to maintain a minimum of 20°F and the outside temp is -20°F, the change is 40°F.
- 0.133: A constant for air heating.
Example Calculation: BTU=480times40times0.133=2,553.6
This means you would need a chicken coop heater capable of producing around 2,500 BTUs to maintain that temperature difference. However, remember that you should only aim to take the chill off, not to make the coop warm. My rule is to find a chicken coop heater that’s rated for a space slightly larger than your coop.
Safe Heating Options (If You Must)
- Flat Panel Heaters: Mount these on the wall. They warm objects (like chickens) not air. Much safer than heat lamps. A great choice for a safe chicken coop heater.
- Ceramic Heat Emitters: Screw into standard fixtures but produce no light. Use with thermostatic control. A safe and effective chicken coop heater.
- Heating Pads: Place under bedding in a corner for a warm retreat zone. Chickens choose when to use it. A good choice for a small, localized chicken coop heater.
Never Use: 250-watt heat lamps (fire hazard), propane heaters (carbon monoxide), or space heaters (fire risk with bedding).
I learned this lesson expensively—a heat lamp fire destroyed my neighbor’s coop. Now, if temperatures drop below -20°F, I personally use a flat panel chicken coop heater on a thermostat, set to maintain 20°F inside. That’s it. A well-designed insulated chicken coop should not need much more.
The Dangers of Heat Lamps (and What to Use Instead)
Heat lamps are the leading cause of coop fires. They get incredibly hot, and if they fall or come into contact with bedding or other debris, they can ignite instantly. They also produce light, which can disrupt a chicken’s natural sleep cycle, leading to cold stress and behavioral problems. The best alternative is a radiant heat source like a flat panel heater. They warm the surfaces they are pointed at, not the air, making them much safer. They also don’t emit light. A much better choice for a chicken coop heater.
The work doesn’t stop once your coop is winterized. A consistent maintenance schedule is key to ensuring your preparations last all season long.
Maintenance Schedule: Keeping Your System Working
How to winterize a chicken coop is a continuous process. How often should I change the bedding in my chicken coop during winter? This depends on your method, but here’s my tested schedule:
Daily Tasks (5 minutes)
- Check water (break ice or refill heated waterer)
- Collect eggs frequently (prevents freezing)
- Quick visual health check
- Adjust ventilation based on weather
Weekly Tasks (30 minutes)
- Stir deep litter method bedding thoroughly
- Add fresh bedding layer if needed
- Check for drafts with hand or candle test
- Refill grit and oyster shell stations
- Scrape roost bars clean
Monthly Tasks (2 hours)
- Deep inspection of insulation integrity
- Check for signs of a parasite issue
- Clean and check all ventilation openings
- Test heated equipment function
- Remove wet spots in bedding completely
- Check for rodent infiltration signs
The Deep Litter Timeline
Since many ask “How often do you clean poop out of a chicken coop?” with deep litter, here’s my specific schedule:
- September: Start fresh with 6″ pine shavings
- October-February: Add 1-2″ fresh shavings weekly, stir 2-3x weekly
- March: Stop adding new material, let it cure
- April: Complete cleanout, save some for compost starter
This means you’re not removing poop daily in winter—the deep litter method handles it through beneficial decomposition.
Ready to tackle some weekend projects that can make a huge impact on your coop’s winter performance? These DIY ideas are my go-to for adding extra comfort and function.
DIY Winterizing Projects That Make a Difference
For those committed to winterizing chicken coop DIY style, these weekend projects provide maximum impact:
Project 1: The Roost Bar Poop Hammock
- Supplies needed: Canvas fabric, grommets, bungee cords
- Time: 1 hour
- Cost: $15 (as of September 2025) Install a canvas “hammock” under roost bars to catch nighttime droppings. Hang with bungee cords for easy removal. Dump weekly into compost. This keeps bedding cleaner and drier, crucial for winter health. This is a simple but effective step in your winterizing efforts.
Project 2: The Solar Water Station
- Supplies: Black plastic barrel, spigot kit, insulation wrap
- Time: 2 hours
- Cost: $40 (as of September 2025) Paint a food-grade barrel black, wrap with insulation except south-facing side. Install spigot at chicken height. Position in full sun. The thermal mass keeps water liquid hours after sunset. Works down to 25°F overnight temperatures. This is a great alternative to a chicken coop heater for water.
Project 3: The Dust Bath Greenhouse
- Supplies: Old window frame, plastic sheeting, wood scraps
- Time: 3 hours
- Cost: $20 (as of September 2025) Build a 3’x3′ box frame, hinge an old window on top. Position in your run’s sunniest spot. Fill with sand, wood ash, and diatomaceous earth. The glass top creates a greenhouse effect, keeping dust bath material dry and warm. Your chickens will use it daily, even in winter.
Every climate is different, and what works for a Minnesota winter won’t be right for a Texas cold snap. Let’s look at how to winterize a chicken coop and run for your specific region.
Regional Adaptations: Customizing for Your Climate
A chicken coop for extreme cold in Alaska requires different strategies than one in Virginia. Here are regional modifications I’ve learned from connecting with chicken keepers nationwide, tailored to specific USDA zones. For more on this, check out our guide to budget coop building.
Regional Winterization Plan by USDA Zone
A successful winterizing chicken coop plan starts with understanding your specific climate. Here are the key thresholds and start dates for different regions based on the USDA Plant Hardiness Zone Map:
| USDA Hardiness Zone | Typical Region | Start Date | Temperature Thresholds | Key Focus |
|---|---|---|---|---|
| 3-4 | Upper Midwest, Northern Plains, Rocky Mountains | Early to Mid-September | Consistently below 20^\\circ F | Heavy insulation, vapor barrier, and a reliable chicken coop heater for extreme cold snaps. |
| 5-6 | Northeast, Mid-Atlantic, Lower Midwest | Early to Mid-October | Consistently below 30^\\circ F | Insulation, deep litter method, and draft protection. Heating is optional but useful. |
| 7-8 | Mid-South, Pacific Northwest, Southwest | Early to Mid-November | Consistently below 40^\\circ F | Focus on windbreaks, floor insulation, and moisture control. A chicken coop heater is generally not needed. |
| 9-11 | Deep South, Coastal California, Arizona, Florida | Late November to December | Frost warnings, occasional dips below 32^\\circ F | Primarily a wind-block and rain-proofing exercise. Minimal insulation needed. |
Region-Specific Material Availability
When winterizing your coop and run, using local resources can save money and time. Here’s a look at common materials found in different regions:
- Midwest and Plains States: Straw and hay bales are widely available and cheap at local farms and feed stores, making them excellent for external insulation and windbreaks. Sawdust from sawmills can be a free or low-cost source of bedding for the deep litter method.
- Northeast: Pine and aspen shavings are common, as are wood pellets. These are great for deep litter bedding. You’ll also find a good supply of rigid foam insulation and plastic sheeting at home improvement stores to build a truly insulated chicken coop.
- South and Southwest: These regions can often find sand, which is great for summer dust baths, but should be avoided for winter bedding. Focus on materials like polycarbonate panels for windbreaks and sunlight transmission, which are available at most hardware stores. Burlap is also a good, breathable wind-blocking material.
Extreme Cold Coop Design (Below -10°F)
If you’re in a climate where temperatures consistently drop below -10°F for extended periods, a standard winterization plan isn’t enough. You need to focus on building a true thermal fortress that protects against both cold and condensation.
- Double-Wall Construction & Air Gap: A single layer of insulation isn’t enough. Build your coop with a double wall, leaving a 1-2 inch air gap between the outer sheathing and the interior insulation panels. This dead air space provides a powerful barrier against thermal transfer. This is a key step for a truly insulated chicken coop.
- Moisture Barrier is Critical: Before you install any insulation, staple a layer of 6mm plastic sheeting to the inside of your coop walls and ceiling. This acts as a vapor barrier, preventing warm, humid air from the chickens’ breath from reaching the cold outer walls and condensing into ice. Condensation is the enemy—it makes everything damp, and dampness leads to frostbite.
- Refined Ventilation: You must still ventilate, but on these days, you can slightly restrict your adjustable vents to the bare minimum. A small, continuous opening high up on the gable ends is more effective than large openings that create a draft. Remember, even in extreme cold, moisture is a greater threat than the temperature itself.
- Emergency Winter Preparations: Have a plan for power outages. A small inverter (or even a car battery adapter) can run a low-wattage heated waterer for hours. Stock a battery-powered light source for emergency nighttime inspections.
With a solid design in place, the daily work of keeping your flock healthy and warm becomes much more manageable. Now let’s dive into some of the most common issues chicken keepers face when the temperatures really drop.
Troubleshooting Common Winter Problems
After helping dozens of local chicken keepers with their winterizing projects, these issues come up repeatedly:
- Problem: Condensation Dripping from Ceiling
- Solution: You have insufficient ventilation. Add ridge vents or gable vents immediately. I once found icicles inside a friend’s coop—dangerous situation. Proper ventilation should show no condensation even on coldest mornings.
- Problem: Chickens Won’t Leave Coop
- Solution: Create an enticing pathway. Lay straw from pop door to covered run area. Scatter scratch grains along the path. Once one brave chicken ventures out, others follow. Sometimes I’ll carry the boldest hen out first.
- Problem: Eggs Freezing Before Collection
- Solution: Insulate nesting boxes separately with extra bedding. Add a curtain across the front. Position boxes on south wall for solar warming. In extreme cold, collect eggs every 2 hours or consider roll-away nest boxes that keep eggs in insulated collection area.
- Problem: Frostbitten Combs Despite Preparation
- Solution: Apply petroleum jelly or bag balm to large combs when temperatures drop below 10°F. Ensure roosts are wide enough for chickens to cover their toes completely. Check humidity levels—frostbite occurs faster in damp conditions.
- Problem: Droppings Freezing to the Floor
- Solution: This is a sign your deep litter isn’t working or that your coop floor is too cold. The decomposition process should keep it from freezing. Stir the litter more frequently or add another layer of carbon material like leaves.
- Problem: Drastic Drop in Egg Production
- Solution: A lack of sunlight is the most common reason for a complete halt in egg-laying. Ensure your coop and run have as much natural light as possible. If it’s a permanent drop, consider adding a low-wattage, warm-colored light on a timer to provide 14-16 hours of light a day. This will trick your hens into thinking it’s still springtime. For more, check out our guide on molting season.
Now that you have all the knowledge, let’s talk about the real costs. Here’s a realistic breakdown of what you can expect to spend, whether you’re on a tight budget or ready to invest in comfort.
Budget Breakdown: Winterizing Options for Every Wallet (Prices as of September 2025)
Let’s address the elephant in the room—cost. Here’s what winterizing your coop and run really costs at different investment levels:
- The Shoestring Budget ($50 or less)
- Plastic sheeting for wind blocks: $20
- Straw bales (borrowed/returned in spring): $0-15
- Bedding options supply: $15
- DIY saltwater bottles: $0
- Total: $35-50
- This bare minimum keeps chickens alive but requires more daily work.
- The Practical Budget ($150-200)
- Basic insulation (styrofoam method): $50
- Wind block materials: $25
- Heated waterer base: $45
- Quality bedding supply: $30
- Ventilation improvements: $30
- Total: $180
- This level prevents most problems and reduces daily maintenance significantly. A properly insulated chicken coop is the main goal here.
- The Comfort Budget ($300-400)
- Professional insulation: $150
- Automatic door: $120
- Flat panel heater with thermostat: $60
- Heated waterer system: $45
- Polycarbonate windows: $40
- Total: $365
- This investment means minimal worry even in extreme weather and a truly winter-proof chicken coop.
After a long winter, your chickens aren’t the only ones ready for spring. A proper de-winterizing process is just as important as the initial preparations to ensure your coop is ready for the warmer months.
The Spring Transition: De-Winterizing Your Coop
Come March, knowing when and how to winterize a chicken coop in reverse matters:
The Gradual Removal Timeline
- Early March: Stop adding bedding to deep litter
- Mid-March: Open adjustable vents fully during day
- Late March: Remove supplemental wind blocks on south side
- Early April: Complete deep litter cleanout
- Mid-April: Remove all plastic sheeting
- Late April: Store heating equipment, check for repair needs
Don’t rush this process. I’ve seen April blizzards destroy hasty de-winterizing efforts.
Post-Winter Coop Cleanup
After a full winter of deep litter and heavy use, your coop needs a refresh.
- Deep Clean: Scrape the floor and roosts completely clean. Use a shovel to remove all old bedding.
- Sanitize: Spray all surfaces with a solution of 1 part bleach to 10 parts water, or a pet-safe disinfectant.
- Repair: Patch any holes in the hardware cloth and check the roof for leaks. This is a great time for construction terms and preventative maintenance.
Frequently Asked Questions (FAQ) on Winterizing Chicken Coop
How often should you clean a chicken coop in winter?
With the deep litter method, you only need to perform a complete cleanout once a year in the spring. During the winter, you simply add fresh bedding once a week and stir the existing bedding every 2-3 days to keep the composting process active. This method generates heat, reduces moisture, and significantly cuts down on your daily chores.
Do chickens need extra food in winter?
Yes, chickens need 10-15% more calories in winter to generate the body heat necessary to stay warm. A good way to provide this is by offering a warm mash of their regular feed in the mornings and scattering a handful of cracked corn in the evenings as a “furnace fuel” for the night. This is a crucial step in the process of winterizing your chicken coop. For more on winter nutrition, check out our guide on fermented feed.
Is a heat lamp a good way to warm a chicken coop?
No. Heat lamps are one of the leading causes of coop fires. They get incredibly hot and are a significant fire risk, especially when used near bedding. It is highly recommended to use a safer alternative like a flat panel radiant heater or a ceramic heat emitter, both of which warm objects instead of the surrounding air.
Can I use a space heater in my chicken coop?
No. Space heaters are not designed for a dusty, bedding-filled environment like a chicken coop and are a serious fire hazard. They can also produce carbon monoxide if not properly ventilated.
How do I know if my coop has enough ventilation?
On a cold day, a properly ventilated coop will not have visible condensation on the walls or ceiling. If you see water droplets or ice, it’s a sign that humidity is building up and you need to increase your ventilation.
What kind of bedding should I use in winter?
Pine shavings are a great choice for the deep litter method as they are absorbent and provide good insulation. You can also use other materials like chopped straw or aspen pellets. Avoid using hay, as it can trap moisture and cause mold.
Will my chickens stop laying eggs in the winter?
Egg production naturally slows down in winter due to shorter daylight hours. However, a properly winterized chicken coop with ample natural light can help maintain a more consistent laying schedule. Providing 14-16 hours of light per day with a low-wattage, warm-colored bulb can help encourage laying.
Final Thoughts: Your Chickens and Winter Bonding
Here’s something rarely discussed—winter changes your relationship with your chickens. Do chickens recognize their owners? Absolutely, and winter reinforces this bond. You become the bringer of warm treats, the ice-breaker, the protector from storms. My chickens actually became friendlier during winter, running to greet me each morning.
The effort you put into building a winter-proof chicken coop pays dividends beyond chicken health. You’ll collect eggs when neighbors’ hens stop laying. You’ll avoid the heartbreak of losing birds to preventable cold stress. Most importantly, you’ll gain confidence as a chicken keeper, knowing you can handle whatever weather comes. For more, check out our guides on setting up a first aid kit and making homemade feed.
Remember, chickens evolved from jungle fowl, but domestic chickens have adapted remarkably to cold climates with proper support. Your job isn’t to create tropical conditions—it’s to provide a dry, draft-free environment where their natural adaptations can work effectively.
Quick Checklist: Is Your Chicken Coop Winter Proof?
- Insulation: Have you insulated the walls, ceiling, and floor to hold heat?
- Draft-Free: Have you sealed all gaps and cracks to prevent cold air from entering?
- Ventilation: Do you have vents at the highest point to allow moisture to escape?
- Wind Protection: Is the run covered on the side of the prevailing wind to reduce wind chill?
- Safe Heating: If you’re using a heater, is it a flat panel, ceramic, or heating pad, and is it secured properly?
- Water & Feed: Are you providing a source of unfrozen water and extra calories?
- Deep Litter: Have you started building up a deep layer of bedding to generate heat from below?
Resources and Emergency Contacts
Keep these handy throughout winter:
- Local agricultural extension office: For region-specific advice and resources. For example, the University of Minnesota Extension provides excellent guides for cold-climate chicken keeping.
- USDA (U.S. Department of Agriculture): Offers official information on animal welfare and health at a national level.
- Avian veterinarian contact information
- Feed store delivery service (for storm preparations)
- Backup heat source supplier
- Fellow chicken keeper network for emergency assistance
The best winter-proof chicken coop isn’t necessarily the most expensive—it’s the one properly prepared for your specific climate and maintained throughout the season. Whether you’re facing your first winter with chickens or your tenth, remember that preparation beats reaction every time.
Stay warm, keep those birds comfortable, and enjoy the unique satisfaction of collecting fresh eggs on a snowy morning. There’s nothing quite like it.
Natural Integration Techniques: Using Your Landscape
Instead of relying solely on building materials and power, you can use natural elements to your advantage. Strategic landscaping can provide passive winterizing solutions that are both effective and beautiful.
Evergreens as a Natural Windbreak
Plant a row of fast-growing, dense evergreen shrubs like arborvitae or juniper a few feet from your coop’s prevailing wind side. They will create a powerful, permanent windbreak that works year-round. This is a low-maintenance, long-term solution that looks better than plastic sheeting and will only get more effective with time. This is a great part of winterizing your coop and run naturally.
Using Compost as a Heat Source
The deep litter method is a form of composting, but you can take it a step further. If you have an active compost pile, you can place your coop on top of it. The decomposition process will generate a significant amount of heat that will radiate up through the floor, providing a passive, continuous heat source for your flock. This requires a bit of planning but is one of the most effective and eco-friendly solutions for extreme cold.
Have more questions about preparing your coop and run for winter? Found a method that works better? Share your experience—we’re all learning together in this wonderful world of backyard chickens.

Oladepo Babatunde is the founder of ChickenStarter.com. He is a backyard chicken keeper and educator who specializes in helping beginners raise healthy flocks, particularly in warm climates. His expertise comes from years of hands-on experience building coops, treating common chicken ailments, and solving flock management issues. His own happy hens are a testament to his methods, laying 25-30 eggs weekly.