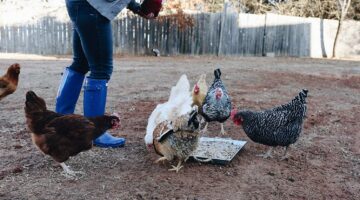
You wake up after three days of rain, pull on your boots, and wade through ankle-deep muck just to collect breakfast. Your hens are huddled on the roost, refusing to touch the ground. Their feet look swollen and angry-red, with little cracks forming between the scales. The coop smells like ammonia.
Sound familiar?
If you live in a rainy climate or have heavy clay soil, this is a constant battle. But here is the good news: you don’t have to accept a swampy run. A dry, clean run isn’t just better for your birds; it improves the aesthetics of your backyard and protects your property value.
Finding the chicken coop floor for mud control isn’t just about dumping a bag of sand on the ground. It requires a bit of engineering. Through years of trial and error with my own flock, I’ve found that quick fixes usually fail. The first winter I kept chickens, I tried throwing straw over the mud. Within two weeks, it was a soggy, stinking mat that was harder to clean than the mud itself. To fix this permanently, we need to look at what’s happening under the soil.
This guide will walk you through the layered substrate strategy. It is the only method I’ve found that keeps runs bone-dry, even during the wettest spring thaw.
Why Muddy Chicken Runs Are a Serious Flock Health Risk
Mud is annoying for you, but it creates significant challenges for your chickens. We aren’t just talking about dirty eggs; we are talking about maintaining a hygienic environment to prevent veterinary issues.
When chickens stand on wet, manure-laden ground, the bacterial load in their environment increases significantly. According to the The Merck Veterinary Manual (merckvetmanual.com), pododermatitis (bumblefoot) occurs when bacteria enter through softened foot pad tissue, making wet environments a primary risk factor. Preventing these conditions through proper flooring is far more effective and affordable than treating infections later.
It doesn’t stop at the feet.
The Respiratory Connection
Mud traps droppings, and when those stay wet, they break down and release ammonia. You know that sharp smell that hits you when you open the coop on a damp morning? That’s ammonia, and it’s hard on their lungs. According to Dakota Storage Buildings’ coop environment analysis (dakotastorage.com), wet droppings release ammonia gas at ground level where chickens breathe. Penn State Extension (extension.psu.edu) confirms that maintaining dry litter is critical for keeping these ammonia levels below toxic thresholds to prevent respiratory damage. A dry run is essential for air quality.
Sanitation and Security
Gail Damerow, author of the authoritative Storey’s Guide to Raising Chickens (available via Storey Publishing at storey.com), notes that dirt floor for chicken run setups are nearly impossible to clean thoroughly. In a wet run, moisture creates a favorable environment for internal parasites like coccidiosis and external pests. USDA APHIS (aphis.usda.gov) emphasizes that strict biosecurity and dry housing are the first lines of defense against such diseases.
Outpost Buildings’ flooring guide also highlights that maintaining a dry floor is key to breaking the lifecycle of these pests. If you leave it muddy, sanitation becomes a daily struggle.
The Hidden Cost of Doing Nothing
Ignoring drainage issues often leads to higher long-term costs. You may end up dealing with egg contamination, purchasing medications, or needing veterinary consultations. Investing in proper flooring materials upfront is an investment in flock wellness and long-term savings.
What Causes Chicken Run Mud (And Why Quick Fixes Fail)
Before we fix it, we have to understand why it’s happening. If you just throw straw over mud, you create a soggy mat that traps bacteria and becomes a perfect mite habitat. You have to fix the drainage physics first.
Clay Soil: The Hidden Culprit
If you have clay soil drainage issues, you are fighting a tough battle. The USDA Natural Resources Conservation Service (NRCS) (nrcs.usda.gov) classifies clay soils as having high water-holding capacity and poor drainage because microscopic particles pack together tightly. This prevents the water table from dropping and stops rain from soaking into the ground (drastically reducing the percolation rate). In regions like the UK, the Pacific Northwest, or the US Southeast, this creates standing water that has nowhere to go.
Why Sand Alone Doesn’t Work on Clay
A common mistake I see is people dumping sand directly onto clay. This creates what engineers call the “bathtub effect.” Water flows through the sand easily, hits the hard clay “tub” underneath, and stops. The water just sits there, saturating the sand until you have a heavy, unstable mess.
I learned this the hard way. Year one, I dumped three bags of play sand in my run. By March, it had mixed with clay underneath and turned into something resembling wet cement. I had to shovel the entire mess out and start over.
The Compaction Problem
Chickens are heavy scratchers. Their constant movement leads to compaction in high-traffic areas. This destroys the soil’s natural ability to drain. Any solution we build has to stand up to daily scratching without packing down into a hard, waterproof layer. Note: Providing adequate space, similar to the welfare standards referenced by the USDA National Organic Program (ams.usda.gov), can also help distribute traffic and reduce localized compaction.
The Layered Substrate Strategy: The Best Chicken Coop Floor for Mud Control
This is the gold standard. Instead of one material, we use a system. This mimics how road engineers build stable surfaces. If you want the best flooring for muddy chicken run environments, this is it.
Project Scope & Budget: For a standard 8×10 run, expect to spend between $200 and $500 depending on material costs in your area. For my own 8×10 run, I spent exactly $287 on fabric, gravel, and wood chips, which was cheaper than a single vet visit for a sick bird. You will likely need to visit a local landscape supply yard for bulk pricing, which is significantly cheaper than buying bagged stone at big-box stores.
Budget breakdown for an 8×10 run:
- Crushed stone (2 cubic yards): $90-$130
- Geotextile fabric (100 sq ft): $25-$40
- Hardwood chips (2 cubic yards): $60-$80
- Tools and miscellaneous: $25-$50
Layer 1: Ground Preparation and Slope Grading
First, remove the wet organic muck from the top using a flat-head shovel. You need to get down to the native soil. Grade the ground so it has a 1-2% slope away from your coop. You want gravity to help the water move away from your birds. This simple step is your first line of defense for runoff management.
- Tools Needed: Flat shovel, garden rake, string level.
Layer 2: French Drain Integration for Severe Cases
If your run looks like a pond, you need a French drain for chicken coop perimeters. This sounds complex, but it’s just a trench with a perforated drain pipe with fabric sleeve (4-inch diameter recommended) that catches water and directs it elsewhere. This approach mirrors techniques used in agricultural drainage engineering as described by the University of Minnesota Extension (extension.umn.edu). This is the secret weapon for long-term erosion control in flooded areas.
- Tools Needed: Trenching shovel, perforated pipe, drainage sleeve.
Layer 3: Geotextile Fabric Foundation
This step is critical for structural stability but requires specific material selection to avoid hygiene issues. Lay down heavy-duty non-woven geotextile drainage fabric (sold in 3-foot and 6-foot rolls) over the native soil. Look for “drainage” or “filter” fabric at Home Depot or Lowe’s, not standard plastic weed block.
Why Use It Here? Some guides advise against membranes because manure can wash through gravel and get trapped on the plastic, creating a bacterial sludge. This is true for shallow gravel layers. However, in this engineering-focused method, the fabric is placed deep (below 4+ inches of base) solely to prevent your rock from sinking into the clay (subgrade separation). It must be permeable to let water drain. Key Maintenance Rule: You must manage droppings at the top surface layer (using the deep litter method or frequent raking) so manure never washes down deep enough to reach this fabric.
Layer 4: Crushed Stone Drainage Base
On top of the fabric, place 3-4 inches of crushed stone base. Do not use round river rock; it shifts too much. You want angular stone (like crushed limestone or #57 stone) that locks together. According to Dandy’s poultry flooring research, specific sizes like 10mm gravel or horticultural grit allow water to flow right through.
- Buying Tip: Bulk crushed stone usually costs $45–$65 per cubic yard at local landscape centers.
Layer 5: Transition Medium
Add a layer of coarse sand or smaller pea gravel. This keeps the smaller top layer from sifting down into the big rocks below.
Layer 6: Top Surface Selection
This is the part the chickens walk on. Let’s compare what to put in muddy chicken run setups for the final layer.
Best Surface Materials for Chicken Runs: Complete Comparison
Choosing the best surface for chicken run use depends on your budget and climate. Here is how the top materials stack up.
Hardwood Chips: The Natural Choice
I love hardwood chips. According to Dandy’s gardening research, chips made from hardwood or white wood are excellent because they provide free drainage and stay mostly dust-free. Unlike soft straw, they resist being trampled into mud.
Chickens love scratching in them, and the carbon in the wood helps neutralize the nitrogen in the poop. This keeps the coop smelling fresh. To further combat odors, you can sprinkle PDZ (Sweet PDZ zeolite), a natural mineral that absorbs moisture and ammonia, directly onto the chips. Just make sure you aren’t using bark mulch, which can hold too much moisture.
Coarse Sand (Grit Sand): The Easy-Clean Option
If you want to scoop your run like a giant cat litter box, use coarse sand/grit sand (often sold as construction sand or concrete sand). Dandy’s poultry flooring guide notes that grit sand is cheap and easy to clean. It drains incredibly well.
Important Safety Rule: According to Raising Happy Chickens (raising-happy-chickens.com), you must use coarse, builder’s sand, not fine or “play” sand. The larger grains help with drainage and are gentler on chickens’ feet. Fine sand tends to pack too tightly and can cause respiratory dust issues.
However, a warning for my Northern friends: sand can freeze solid in winter. If you deal with freeze-thaw cycles, you might end up with a frozen concrete block of sand in January.
Pea Gravel and Crushed Stone
This material serves two different purposes depending on the type.
- Base Layer: As mentioned in the installation steps, use angular crushed stone for your deep base because it locks together.
- Top Layer: For the surface, pea gravel is a solid option. Unlike sharp builder’s gravel, pea gravel is small, round, and smooth. According to Raising Happy Chickens (raising-happy-chickens.com), this makes it much kinder on chicken feet. It is cost-effective, drains instantly, and can be easily hosed down. Just be aware that it can get hot in direct summer sun, so ensure your run has shade.
Rubber Stall Mats: The Premium Solution
For the absolute easiest maintenance, look at rubber stall mats. These are the heavy 4×6 rubber stall mats (typically $45-$60 each at farm supply stores) used for horses (typically available at Tractor Supply, Rural King).
According to Gail Damerow, placing these over a leveled gravel base gives you a surface that is easy to spray down. Greatmats’ analysis points out that rubber won’t rot, bugs can’t eat it, and it stops rodents from digging up from underneath. It is expensive upfront, but you save money on bedding over time.
Plastic Poultry Flooring: The Commercial Standard
For a modern, high-tech solution, consider plastic slats. According to Farmer Boy (farmerboyag.com), plastic slats are becoming increasingly common and popular for hobby farmers because they are “safe for poultry feet, lightweight yet durable, rot resistant, easy to install or replace, and easy to clean.” These interlocking panels sit on a frame, allowing droppings to fall through to a collection area below, keeping the birds completely separated from the waste.
Hemp Bedding: The Eco-Friendly Option
Hemp bedding is one of the most absorbent and eco-friendly flooring options available. Look for names like Aubiose or AubiChick. According to Raising Happy Chickens (raising-happy-chickens.com), it “composts down beautifully, dries droppings quickly, and goes a long way because it’s sold in compressed bales.” It creates a soft, warm surface that is excellent for keeping runs dry.
Concrete or Pavers: The Permanent Base
Concrete or pavers provide a predator-proof, easy-to-clean base, but they are expensive and permanent. They offer excellent drainage if sloped correctly but are hard on chickens’ feet. They work best for small runs when covered with deep bedding or rubber mats to provide cushioning.
Straw: A Warning
Straw is inexpensive and easy to find, but it comes with significant risks for outdoor runs. According to Raising Happy Chickens (raising-happy-chickens.com), “it’s not absorbent and quickly becomes damp and mouldy in outdoor runs. It can also harbour mites.” The only place I recommend using straw is in nest boxes, where it stays dry and is used only for laying.
| Material | Drainage | Durability | Comfort | Cleaning Ease | Cost | Best For |
|---|---|---|---|---|---|---|
| Hardwood chips | Excellent | 1-2 years | High | Moderate | Low | All climates |
| Coarse sand | Good | 6 months | High | Very Easy (scoopable) | Very Low | Dry climates |
| Pea gravel | Excellent | 5+ years | Moderate | Easy (hose off) | Moderate | Top layer on gravel base |
| Rubber mats | Requires base | 10+ years | High | Very Easy | High | Permanent coops |
| Plastic Slats | Superior | 10+ years | Moderate | Very Easy | High | Prefab coops |
| Crushed limestone | Excellent | 3-5 years | Moderate | Moderate | Moderate | Clay soil |
| Hemp bedding | Excellent | 6-12 months | High | Moderate | Moderate | Eco-conscious keepers |
| Concrete/pavers | Excellent | 20+ years | Low (needs topping) | Very Easy | High | Small runs |
| Straw | Poor | Weeks | Moderate | Difficult | Very Low | Nest boxes only |
Pro Tip: Integrating the Deep Litter Method
If you choose hardwood chips as your top layer, you can supercharge your coop’s efficiency. According to First Saturday Lime (firstsaturdaylime.com), you should consider implementing the deep litter method, “where you allow a thick layer of bedding to accumulate and decompose over time.”
The University of Kentucky Poultry Extension (poultry.ca.uky.edu) also supports proper litter management as a key factor in flock health. Instead of cleaning it all out constantly, you add fresh layers on top. The lower layers begin to compost, generating natural heat that helps keep the coop warm in winter. This method can reduce the frequency of full bedding changes and produce nutrient-rich compost for your garden. The key is ensuring your underlying drainage (our gravel base) works perfectly so the composting pile stays aerobic (healthy) rather than anaerobic (slimy and smelly).
How to Keep a Chicken Coop From Being Muddy: Step-by-Step Installation
Ready to fix this? Here is the plan to install a layered system. You can do this yourself or hire a local landscaper if the digging is too heavy.
Tools Checklist:
- Wheelbarrow
- Flat-head shovel and trenching shovel
- Steel garden rake
- Utility knife (for cutting fabric)
- String level and stakes
- Tamper (hand tamper or rental plate compactor)
- Assess your drainage. Dig a small hole and fill it with water. If it sits for hours, you have heavy clay.
- Mark and grade. Use stakes to mark your run. Shovel the dirt so it slopes away from the coop structure.
- Install the drain. If you identified severe water issues, dig your trench and install the French drain pipe now.
- Lay the fabric. Roll out the geotextile fabric. Overlap the edges by at least 6 inches and use landscape staples to hold it down.
- Add the base. Pour in your crushed stone base (3-4 inches deep). Rake it flat and use your tamper to pack it down lightly.
- Add the transition. Add 1-2 inches of smaller gravel or coarse sand.
- Top it off. Add 4-6 inches of your chosen top material (hardwood chips, etc.).
- Plan maintenance. Mark your calendar to check the depth in six months.
Regional Solutions: Mud Control for Your Climate
Pacific Northwest and UK: High Rainfall Strategies
If you live where it rains constantly, the roof is just as important as the floor. Even the best drainage cannot handle direct, constant rainfall. Consider installing a clear corrugated polycarbonate roof over at least part of your run. This allows light in while keeping the worst weather out. Combine this with the full layered substrate.
Northern Europe and Cold Climates: Freeze-Thaw Considerations
Avoid wet sand in the winter. It turns into an ice rink, which can cause leg injuries in heavy breeds. Stick to deep wood chips or the deep litter method in winter, which generates a little heat as it decomposes. For extensive winter care advice, check our guide on winterizing your chicken coop.
Clay Soil Regions: Extra Drainage Steps
If you are on heavy clay, do not skip the French drain. You may also need to make your gravel base deeper—up to 6 inches—to hold water while it slowly percolates into the soil.
Best Thing to Put in the Floor of a Chicken Coop (Inside Solutions)
We’ve talked about the run (outside), but what about the inside of the coop?
According to Homestead Supplier, you want something that protects against predators and rot. A concrete floor is the safest, but it’s cold. If you have a dirt floor coop, be sure to bury hardware cloth (welded wire mesh) around the perimeter to prevent predators from digging in.
For wooden floors, Dakota Storage recommends a premium flooring with an epoxy finish or a product like LP ProStruct Flooring. These create a sealed surface that ammonia and water can’t penetrate.
Outpost Buildings suggests linoleum or vinyl as a budget option. It makes cleaning a breeze—you can just sweep it out. Critical Safety Warning: You must be extremely careful with this choice. According to Outpost Buildings, if chickens peck at toxic vinyl flooring, they can become sick. To use this safely, you must select non-toxic materials and, most importantly, maintain a very thick layer of bedding (pine shavings) at all times to prevent the birds from ever accessing the floor surface directly.
Alternative Strategy: The Mobile Chicken Tractor
If building a permanent engineered floor isn’t possible for you, there is another way to manage mud. According to Raising Happy Chickens (raising-happy-chickens.com), “A simple solution is a chicken tractor: a movable enclosure that lets you rotate your chickens onto fresh ground.”
By moving the coop every day or two, you prevent the chickens from stripping the grass and compacting the soil in one spot. This gives the grass time to recover and prevents mud patches from forming in the first place. This is often the best “flooring” for renters or those with large pastures.
Seasonal Maintenance to Keep Your Chicken Run Mud-Free
You can’t just build it and forget it. Here is how to keep it working.
- Monthly: Check the corners. Chickens dig holes, which can expose the landscape fabric. Rake the material back to level it out.
- Spring: This is the big one. After the winter snow melts, the ground will be soft. Top up your wood chips or sand. Check for any smells—if it smells sour, sprinkle Sweet PDZ to absorb the ammonia.
- Summer: If you use sand, it might get dusty. mist it with water occasionally.
- Fall: Clear out fallen leaves. Wet leaves create a slick, muddy layer on top of your nice drainage system. Add fresh material before the winter rains start.
Frequently Asked Questions About Chicken Run Flooring
How to fix a muddy chicken run permanently?
The only permanent fix is addressing the drainage physics, not just covering the mud. As detailed in the Layered Substrate Strategy above, you must engineer the floor. This involves grading the ground, installing geotextile fabric, laying a crushed stone base, and finishing with a dry top layer. Quick fixes like throwing straw on mud will always fail eventually; you need a system that allows water to drain away from the surface.
Is a dirt floor OK for a chicken run?
According to Gail Damerow, dirt floors are the cheapest option because they are already there. But, they offer zero protection from burrowing predators. In wet climates, a dirt floor guarantees mud, parasites, and a dirty coop. It’s okay for a mobile tractor you move every day, but not for a permanent run.
What is the best gravel for chicken run drainage?
You want angular crushed stone (about ¾ inch size). The sharp edges lock together so it feels stable to walk on. Avoid round river rock or pea gravel for the base layer, as it shifts around too much.
What is the best gravel depth for chicken runs?
For the drainage base layer specifically, you need a minimum of 3-4 inches of angular crushed stone. If you are dealing with heavy clay soil or live in a high-rainfall area, increasing this gravel depth to 6 inches is recommended. This creates a larger “reservoir” to hold water while it slowly drains into the ground below.
How deep should chicken run substrate be?
If you are doing the full layered approach: 3-4 inches of stone base, plus 1-2 inches of transition, plus 4-6 inches of top material. You are looking at a total depth of 8-12 inches. This lifts the birds out of the mud and provides a deep reservoir for drainage.
Can I use sand in a chicken run?
Yes, but be careful. Sand works great over a gravel base or on naturally sandy soil. It fails miserably on clay soil without a base. Many owners on the BackYard Chickens forums love using sand with PDZ on “poop boards” under the roosts because it makes daily cleaning take only 5 minutes.
Creating Your Mud-Free Chicken Run: Final Recommendations
Dealing with mud is the number one reason people quit keeping chickens. It’s exhausting and smelly. But it doesn’t have to be that way.
By implementing this layered substrate strategy, you are creating the chicken coop floor for mud control that your flock deserves. You are solving the root cause of the problem: drainage. Whether you choose hardwood chips, hardware cloth reinforced bases, or rubber mats, the key is separating the muck from the flock.
It takes a weekend of work to install, but when you walk out next spring in your slippers to collect eggs, you’ll be glad you did. Before I installed this system, I dreaded rainy mornings. Now, even after a heavy storm, the surface remains firm and dry.

Oladepo Babatunde is the founder of ChickenStarter.com. He is a backyard chicken keeper and educator who specializes in helping beginners raise healthy flocks, particularly in warm climates. His expertise comes from years of hands-on experience building coops, treating common chicken ailments, and solving flock management issues. His own happy hens are a testament to his methods, laying 25-30 eggs weekly.