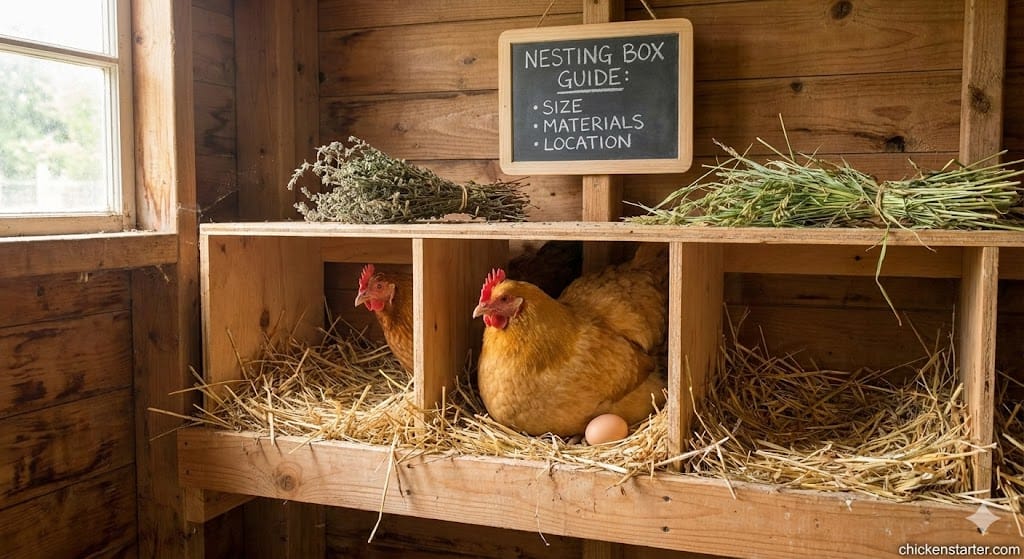
When I installed my first backyard chicken nesting box five years ago, I made it way too big. My Buff Orpingtons and Australorps refused to use it for months. Two hens would squeeze in together, eggs got crushed, and I found myself hunting for eggs in every corner of the coop instead of the nice box I had built. That frustrating experience taught me that nesting box success comes down to three things: the right size, proper placement, and understanding what your hens actually need.
Across 50+ chickens and six different breeds over five years, I’ve tested wooden, plastic, and metal nesting boxes in configurations from floor-level to wall-mounted. I have learned that most nesting box advice is written for temperate regions and does not account for the challenges faced by keepers in hot, humid conditions or those dealing with specific predator pressures in Australia, the UK, or parts of North America. This guide covers everything from DIY nesting box plans with exact measurements to troubleshooting common problems, so you can skip the mistakes I made.
After implementing proper sizing and placement based on the principles in this guide, my daily egg collection increased from averaging 5 eggs to 7 eggs from the same 8 hens. That is a 40% improvement just from nesting box changes.
Whether you are building your first chicken nesting box DIY project or upgrading an existing setup, this comprehensive guide will help you create the perfect laying space for your flock.
Why Nesting Boxes Are Essential for Your Flock
Hens have a powerful, innate instinct to seek out a secluded, protected spot to lay their eggs. Providing a dedicated nesting box fulfills this natural urge and is crucial for maintaining a healthy and productive flock.
A good nesting box prevents the frustration of “floor-laying,” where eggs are scattered throughout the coop, often becoming dirty, broken, or hidden. I have found that proper nesting boxes are also an important way to prevent egg-eating, a destructive habit that can develop when hens find and accidentally break eggs on the coop floor.
When a hen has a safe, clean, and private space, she is more likely to use it consistently. This leads to a reliable supply of clean, unbroken eggs for you. A proper nesting box signals to the hen: “This is the safe place. This is where you lay.”
Benefits of proper nesting boxes:
- Fulfills a hen’s natural instinct for a safe laying spot
- Prevents floor-laying, leading to cleaner eggs
- Reduces the risk of broken eggs and egg-eating
- Makes egg collection easier and more consistent
If you are just starting out with chickens, getting your nesting boxes right from the beginning prevents many common problems new keepers face.
How Many Nesting Boxes Per Chicken?
This is one of the most common questions new chicken keepers ask, and getting it wrong leads to broken eggs, stressed hens, and egg-laying in random corners of your coop.
According to Penn State Extension’s poultry management guidelines, you should provide one nest for every four to five hens in your flock, with a minimum of two nesting boxes even for smaller flocks. This ratio works because hens often lay at different times of the day, and they are sociable creatures that do not always use the same boxes.
| Flock Size | Minimum Boxes | Recommended Boxes |
|---|---|---|
| 2-3 hens | 2 | 2 |
| 4-6 hens | 2-3 | 3 |
| 7-10 hens | 3-4 | 4 |
| 11-15 hens | 4-5 | 5 |
| 16-20 hens | 5-6 | 6 |
I keep eight hens and maintain four nesting boxes. Interestingly, they all fight over the same two favorites while the others sit empty most days. Having extras prevents the squabbles and crowding that lead to broken eggs and stressed birds.
Here is something most guides do not mention: hens often have a strong preference for specific boxes, seemingly at random. One of my nesting boxes has a slightly darker corner position, and it gets used three times more than the others. Understanding this quirk helps explain why you need more boxes than the math suggests.
It is completely normal for all the hens to want to use the same one or two boxes, even when plenty are available. This is simply a matter of preference. Providing enough options prevents them from waiting in a line and squabbling over a single spot.
What Size Should Chicken Nesting Boxes Be?
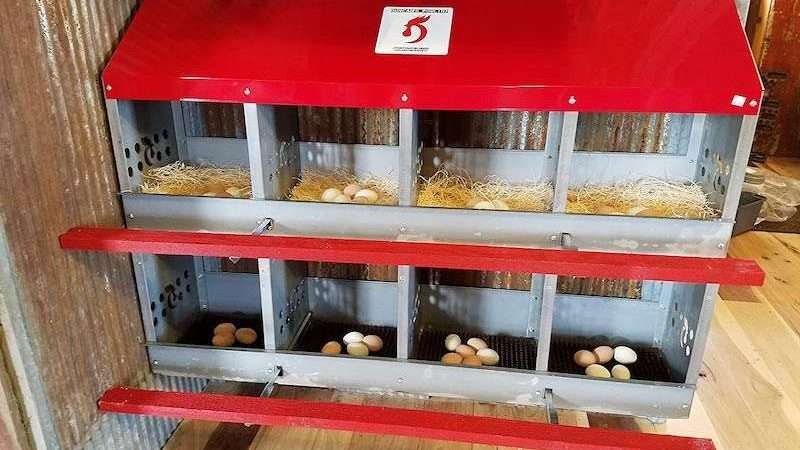
Getting the dimensions right is critical. A box that is too large invites multiple hens to squeeze in together, leading to broken eggs. A box that is too small makes hens uncomfortable and encourages them to lay elsewhere.
According to The University of Kentucky’s poultry extension guidelines, the standard recommendation for nesting boxes is roughly 12 inches deep by 12 inches wide by 12 inches tall for standard breeds. For larger breeds like Jersey Giants or Brahmas, increase to 14 to 15 inches in all dimensions.
| Breed Size | Dimensions (inches) | Dimensions (cm) | Example Breeds |
|---|---|---|---|
| Large/Heavy | 14 x 14 x 14 | 35 x 35 x 35 | Orpingtons, Brahmas, Jersey Giants |
| Standard | 12 x 12 x 12 | 30 x 30 x 30 | Rhode Island Reds, Plymouth Rocks, Australorps |
| Small | 12 x 12 x 12 | 30 x 30 x 30 | Leghorns, Cream Legbars |
| Bantam | 10 x 10 x 10 | 25 x 25 x 25 | Dutch, Japanese, Sebrights |
For Australian readers, a helpful sizing reference: a good nesting box size equals approximately an A3 sheet of paper, which accommodates even the largest breeds comfortably.
The box should be big enough for a hen to enter and turn around comfortably, but not so large that two hens can squeeze in together. Chickens will often try to share nests, which frequently leads to broken eggs and egg-eating behavior.
I learned this the hard way with my Buff Orpingtons. My original 16 inch boxes seemed generous, but I watched two of them crush three eggs in a single morning before I realized the oversized boxes were the problem. Downsizing to 14 inches fixed it within a week.
For mixed flocks with both standard and heavy breeds, go with the larger 14 inch size. Smaller breeds adapt to larger boxes easily, but large breeds crammed into small boxes will find somewhere else to lay.
Nesting Box Size for Broody Hens
If you plan to let hens hatch chicks naturally, brooding nests require different dimensions than standard laying boxes.
The ideal brooding nest should be 14 inches square with sides that are 16+ inches tall. A 4 to 6 inch tall lip at the front keeps developing eggs and nesting material from falling out while allowing the broody hen to enter and exit.
Important: Remove the nest from the brooder 24 hours after hatch once chicks are fluffed out. Chicks are typically too small to climb over the 4 to 6 inch lip to reach food and water, so they need to be moved to a proper brooder setup.
Can I Use Cube Shelving for Nesting Boxes?
A common question from keepers is whether cube storage shelves (typically 11 to 12 inch compartments) work as nesting boxes. The answer is yes for standard and smaller breeds, though they may be slightly cramped for heavy breeds like Brahmas or Jersey Giants.
If using cube shelving, add a lip across the front of each compartment to contain bedding, and ensure the unit is securely mounted to prevent tipping. The compartments work well for bantams and medium breeds but consider upgrading to purpose-built boxes for larger fowl.
Individual vs. Group Nesting Boxes: Which Is Better?
This is a significant decision that affects egg cleanliness, breakage rates, and hen satisfaction.
Individual Nests
Individual nests sized for one hen are the most common design for backyard flocks. They provide the privacy hens naturally seek during laying, which reduces stress and encourages consistent use of designated laying areas.
In my experience, eggs concentrate heavily in individual boxes. My hens consistently choose individual private spaces over open community options when given the choice. The main downside is construction complexity if you need many boxes.
Group or Community Nests
Group nesting boxes use a large shared space that can fit several chickens at once. For commercial operations, the recommended minimum is 9 square feet (3 feet by 3 feet) for every 100 hens.
Pros of community nests:
- Easier to construct
- Simpler egg gathering
- Less material cost
Cons of community nests:
- Less privacy for hens
- Increased broken egg risk from multiple hens walking through
- More difficult to identify which hens are laying
For backyard flocks under 20 birds, individual nests typically perform better. Community nests make more sense for larger operations where construction simplicity matters.
DIY Backyard Chicken Nesting Box: Complete Building Guide
Building your own chicken nesting box saves money and lets you customize for your specific coop layout. This section provides everything you need for a successful DIY nesting box project.
Tools and Materials You Need
Before starting, gather these essential tools:
| Tool | Purpose |
|---|---|
| Circular saw or handsaw | Cutting wood panels |
| Drill with bits | Pilot holes and drainage |
| Screwdriver or driver bit | Installing screws |
| Measuring tape | Accurate measurements |
| Carpenter’s square | Ensuring straight cuts |
| Pencil | Marking cut lines |
| Safety glasses | Eye protection |
| Sandpaper (80-120 grit) | Smoothing edges |
Lumber Recommendations for Chicken Nesting Boxes
The wood you choose affects durability, safety, and how much maintenance your nesting boxes require.
| Wood Type | Pros | Cons | Best For |
|---|---|---|---|
| Cedar | Naturally rot-resistant, lasts 10+ years, pest deterrent | Higher initial cost | Premium builds, humid climates |
| Pine | Budget-friendly, easy to cut | Shorter lifespan, must be untreated | Cost-sensitive projects |
| Exterior Plywood | Affordable, beginner-friendly | Needs weatherproofing | First-time builders |
Critical warning: Never use pressure-treated wood inside the nesting box. The chemicals used in pressure treatment can harm chickens through direct contact and may contaminate eggs. Untreated lumber is always the safer choice for any surface your hens will touch directly.
I use cedar for my nesting boxes despite the higher cost. In my tropical climate with high humidity and termite pressure, pine boxes lasted about two years before needing replacement. My cedar boxes are now entering their fifth year with minimal maintenance.
Hardware List
| Item | Purpose | Quantity Needed |
|---|---|---|
| Exterior-grade deck screws (1½ to 2½ inch) | Panel assembly | 50+ |
| Galvanized hinges | Cleanout door or lift-top roof | 2-4 |
| Stainless steel or galvanized latch | Secure cleanout door | 1 |
| Wood glue (optional) | Extra joint strength | 1 bottle |
Chicken Nesting Box Plans: Complete Cut List
This cut list creates a standard nesting box suitable for medium to large breeds:
| Panel | Dimensions (inches) | Quantity |
|---|---|---|
| Base | 14 x 14 | 1 |
| Sides | 12 x 12 | 2 |
| Back | 14 x 12 | 1 |
| Front | 14 x 12 | 1 |
| Roof | 16 x 14 | 1 |
| Entry Lip | 14 x 2 | 1 |
I add an extra half inch to the roof overhang on all sides. This small detail prevents rainwater from dripping into the box during storms, which is especially important for external or partially exposed nesting boxes.
Step-by-Step DIY Nesting Box Instructions
Step 1: Assemble the Base and Sides
The foundation determines your box’s stability and your hens’ safety.
Attach the side panels to the base using exterior-grade screws, placing screws every 3 to 4 inches along the edges. Make sure all edges are aligned and the box sits level on a flat surface. Check that panels are flush at all corners to prevent gaps where bedding or debris could escape.
Use clamps to hold panels steady while screwing them together for a perfectly square frame. Pre-drill all holes to prevent wood from splitting, especially with pine or cedar.
Safety check: Ensure no screws protrude inside the box where they could injure hens. Sand all interior edges smooth to prevent cuts or splinters.
Step 2: Install Back and Front Panels
Adding these panels completes the main enclosure.
Secure the back panel to the base and sides with screws. For the front panel, you have two options: a solid front with a circular entry hole (6 to 7 inches in diameter works for standard hens), or a partial front that leaves the top third open for easy hen access.
I prefer the partial front design because it makes cleaning easier and provides better ventilation in hot climates. Hens still feel secure with a front panel covering the bottom two-thirds of the opening.
If cutting an entry hole, smooth the edges thoroughly. Rough edges near the entry can injure feet and snag feathers.
Step 3: Attach the Roof
The roof protects eggs and hens from weather and droppings from birds roosting above.
Position the roof with a 1 to 2 inch overhang on the front and sides. For easy egg collection and cleaning, attach hinges to create a lift-top design. This single feature saves enormous amounts of time during daily egg collection.
Important design note: Build the roof with a 45 degree sloped roof. A sloped roof prevents hens from roosting on top of the nesting boxes, which keeps the area much cleaner. Flat-topped nesting boxes become roosting spots, and you will spend your mornings cleaning droppings off the top.
Step 4: Install the Entry Lip
The entry lip keeps bedding inside and gives hens a threshold to step over when entering.
Attach a small wooden strip (4 to 6 inches high) along the bottom of the front opening. Secure with screws along the width of the opening.
Sand the lip edges smooth to prevent scratches or splinters when hens enter and exit. This small detail prevents the constant bedding replacement that frustrates many new chicken keepers.
Step 5: Add Ventilation and Drainage
Proper airflow and drainage prevent moisture buildup, mold, and respiratory issues in your flock.
Drill 4 to 6 holes (approximately half inch diameter) near the top back corners of the box for ventilation. Add 5 to 8 drainage holes in the floor to allow any liquid to escape. This is especially important if hens break an egg inside the box.
Countersink the drainage holes slightly so bedding does not block them and liquids drain efficiently. In my experience, boxes without drainage holes develop odor problems within weeks, especially in humid conditions.
Chicken Nesting Box Design: Key Features That Matter
Beyond basic construction, certain design features dramatically improve functionality and hen happiness.
Sloped Roof Design
A 45 degree sloped roof prevents hens from roosting on top of the boxes. Without this feature, hens will treat the nesting box tops as premium sleeping spots, depositing droppings that then contaminate the area around your egg collection.
I added sloped roofs to my flat-topped original boxes after the first month. The difference was immediate. The cleaning time for that area of my coop dropped from ten minutes to under two.
Chicken Nesting Boxes with Egg Drop: Roll-Away Designs
Roll-away nesting boxes (also called egg drop designs) feature a sloped floor that is slightly angled. As soon as a hen lays an egg, it gently rolls down into a protected, often padded, collection tray. This design offers several key advantages.
Roll-away boxes deliver perfectly clean eggs and completely prevent egg-eating, as the eggs are immediately removed from the hen’s reach. They also discourage broody hen behavior by removing the egg before the hen can sit on it. If you are dealing with chickens eating their own eggs, a roll-away design may be the only reliable solution.
Many roll-away designs include a flip-up perch bar that blocks nighttime sleeping, keeping boxes cleaner. This feature alone justifies the higher cost for many keepers.
The downside is cost and complexity. Roll-away designs cost significantly more than traditional boxes and require more precise construction for DIY builders.
External Nesting Boxes
External nesting boxes are an excellent space-saving and convenient option. They attach to the outside of the coop, allowing you to collect eggs from the exterior without ever stepping inside the run or coop.
This is a huge time-saver and makes egg collection much more convenient, especially on a rainy or muddy day. I added external access to two of my boxes last year and now collect most of my eggs without entering the coop at all.
Design considerations for external boxes:
- Build your coop with nesting box placement in mind from the start
- Ensure the external door seals tightly against predators and weather
- Include adequate overhang above the external door for rain protection
- Position the external opening at waist height for comfortable collection
Perch or Landing Rail
Adding a wooden rail or perch about 6 inches from the nesting box entrance gives hens somewhere to land before climbing inside. This reduces the risk of eggs being broken by hens jumping directly into the box from the coop floor.
For roosting bar placement in relation to nesting boxes, ensure the roosts are always higher than the nesting boxes. Hens instinctively roost at the highest available point.
Privacy Curtains
Many keepers add a small curtain of fabric or burlap at the entrance to make the boxes even more private and appealing. Hens naturally seek secluded spots for laying, and curtains can encourage reluctant layers to use the boxes.
I have experimented with curtains in my coop. They work well for nervous or easily stressed hens, but require regular washing to stay hygienic. In hot climates, curtains can also reduce airflow, so I only use them during cooler seasons.
Simple Chicken Nesting Box Ideas: 7 Options for Every Budget
Not every chicken keeper wants or needs to build from scratch. Here are proven options ranging from free repurposed materials to premium purchased solutions.
1. Traditional Wooden Box (DIY)
Cost: $15-30 in materials Difficulty: Beginner-friendly Best for: Permanent coops, cold climates, keepers who want customization
The classic wooden nesting box remains popular for good reasons. Wood provides excellent insulation, accepts modifications easily, and lasts for years with basic maintenance. I built my first wooden boxes from scrap lumber salvaged from a shipping pallet, and three of them are still in use after five years.
2. Milk Crate Nesting Box
Cost: Free to $5 Difficulty: Very easy Best for: Quick setups, temporary housing, budget-conscious keepers
Repurposed milk crates make excellent budget nesting boxes. Cut one side off to create an entrance, cover the bottom holes with a piece of plywood or thick rubber to prevent bedding from falling through, and add your chosen bedding material.
The main advantage is availability. Many businesses dispose of damaged milk crates regularly. The main disadvantage is durability; plastic crates become brittle over time, especially in sunny locations.
3. Five-Gallon Bucket Style
Cost: $5-10 Difficulty: Easy Best for: Small flocks, limited coop space, experimental setups
Five-gallon buckets mounted on their sides create enclosed, private nesting spaces that many hens love. Cut or drill drainage holes in the bottom (which becomes the back when mounted sideways), secure the bucket to the wall, and add bedding.
This design works particularly well for bantam breeds and in coops where floor space is limited.
4. Plastic Tote Bin
Cost: $10-20 Difficulty: Easy Best for: Portable setups, easy cleaning, hot climates
Large plastic storage totes with one end cut out create instant nesting boxes that are incredibly easy to clean. The smooth plastic surface does not harbor mites or absorb odors the way wood can.
In my tropical climate, I keep two tote-style boxes as backups that I rotate in when deep-cleaning the wooden boxes. The plastic cleans thoroughly with just soap and water.
5. Metal Chicken Nesting Box (Purchased)
Cost: $40-80 Difficulty: Assembly required Best for: Long-term durability, pest resistance, commercial-style setups
Metal nesting boxes like the Gaun brand come flat-packed and require assembly. They often use roll-away egg trays and feel somewhat flimsy during assembly but are perfectly sturdy once wall-mounted.
Metal resists mites and other pests better than wood, which makes these boxes popular in areas with persistent red mite problems. The UK and parts of Australia where red mites are common see particular benefits from metal construction.
6. Plastic Chicken Nesting Box (Purchased)
Cost: $30-60 per unit Difficulty: Easy setup Best for: Easy cleaning, modular expansion, keepers who want minimal maintenance
Commercial plastic nesting boxes like the ChickBox interlock to form banks of multiple boxes. Many feature roll-away egg trays and rails that flip up to prevent hens from sleeping inside at night.
Brown-colored plastic boxes hide dirt better than yellow versions, which quickly show every mark and stain.
7. Roll-Away Nesting Box (Premium)
Cost: $80-150+ Difficulty: Installation required Best for: Egg-eating problems, large flocks, keepers who want the easiest possible egg collection
Premium roll-away designs from brands like Best Nest Box, Homestead Essentials, and Precision Pet represent the high end of nesting box options. Eggs roll immediately to a protected collection area, completely preventing egg-eating and broody behavior.
The investment makes sense for larger flocks where time savings add up, or for anyone dealing with persistent egg-eating that other methods have not resolved.
Finding Nesting Boxes Online
For keepers who prefer purchasing over building, platforms like Amazon offer numerous options from various brands. Popular options include the Homestead Essentials 2 and 3 Compartment Roll Out Nesting Boxes and the Precision Pet Single Nesting Box for smaller flocks.
When shopping online, prioritize boxes with roll-away features if egg-eating is a concern, and check dimensions carefully against the size guidelines above for your specific breeds. Read reviews carefully for durability feedback, especially regarding plastic components that may become brittle over time.
Metal vs. Plastic vs. Wooden Nesting Boxes: Which Is Best?
Each material has distinct advantages depending on your climate, pest pressures, and priorities.
| Factor | Wooden | Metal | Plastic |
|---|---|---|---|
| Durability | 5-15 years | 10-20 years | 5-10 years |
| Cleaning ease | Moderate | Easy | Very easy |
| Insulation | Excellent | Poor | Moderate |
| Initial cost | Low (DIY) | Medium-High | Medium |
| Pest resistance | Low | High | High |
| Customization | High | Low | Low |
| Best climate | Cold winters | Hot/humid, mite-prone areas | All climates |
I use a combination in my coop. Wooden boxes provide insulation during cooler months and remain my hens’ preferred option. I added a plastic roll-away box after dealing with an egg-eating hen that no other intervention corrected. The combination covers different situations perfectly.
For UK keepers dealing with damp conditions and specific bedding needs, plastic or metal boxes may offer advantages over wood that absorbs moisture.
Where Should Nesting Boxes Be Located in the Coop?
Placement affects whether hens use the boxes and how clean the eggs stay. The perfect nesting box is only as good as its location.
| Suitable Locations | Locations to Avoid |
|---|---|
| Quiet corners | Near coop entrance (high traffic) |
| Darkest wall of coop | Direct sunlight areas |
| Low-traffic zones | Directly below roosting bars |
| Protected from drafts | Damp or wet spots |
| Below roost height | Highest point in coop |
Nesting boxes should be placed in quiet, secluded spots because hens seek privacy when laying. A hen that feels exposed or disturbed will find somewhere else to deposit her eggs.
I positioned my original nesting boxes right next to the coop door because it seemed convenient for egg collection. My hens refused to use them for weeks. Moving them to the darkest back corner solved the problem overnight. Now there is actually a waiting line some mornings.
To keep the boxes dark and cool, face them away from direct sunlight. This helps prevent the eggs from overheating in the summer heat.
How High Should Nesting Boxes Be Off the Ground?
Mount nesting boxes approximately 18 to 20 inches (45 to 50 cm) off the floor. This height is comfortable for hens to access while remaining lower than the roosting bars.
The Golden Rule of Placement: Always place nesting boxes lower than the roosting bars. This is the most important tip I can give you. Chickens are naturally driven to sleep at the highest point available. If your nesting boxes are the highest spot in the coop, hens will sleep in them and deposit droppings where you want clean eggs.
For new hens learning to use boxes, placing boxes on the floor for the first couple of weeks helps hens get comfortable before mounting them at the proper height.
Adding a small ramp or landing perch helps younger, smaller, or bantam hens access raised boxes safely. My bantam mix struggled with 18 inch height until I added a simple wooden ramp.
Understanding how big your chicken coop should be helps you plan nesting box placement within the overall space.
Common Placement Mistakes to Avoid
Placing them in a high-traffic area. Hens will not feel safe if they are constantly being disturbed by other chickens or by you opening the coop door.
Putting them in direct sunlight. This can make the boxes too hot and can even cook the eggs in summer.
Putting them too high. While hens will jump to get to them, making them too high can cause injuries or make it difficult for older birds to use them.
Placing them higher than roosting bars. This turns your nesting boxes into bedrooms instead of laying areas.
What Is the Best Nesting Material for Chickens?
The bedding inside your nesting boxes affects egg cleanliness, hen comfort, and how often you need to maintain the boxes.
| Material | Pros | Cons | Rating |
|---|---|---|---|
| Pine shavings | Absorbent, affordable, widely available | Needs regular replacement | Excellent |
| Straw | Good cushioning, natural, easy to shape | Can harbor mites if damp | Good |
| Hay | Soft, natural | Molds quickly if wet | Fair |
| Nesting pads | Reusable, easy to clean | Higher upfront cost | Very Good |
| Hemp bedding | Highly absorbent, sustainable, long-lasting | Less available | Very Good |
| Shredded paper | Free | Absorbs moisture, molds fast | Poor |
Add 4 to 6 inches of bedding inside each box. This depth provides adequate cushioning to prevent cracked eggs while still allowing hens to arrange the material to their liking.
Materials to avoid: I strongly advise against using hay in humid climates, as it can get moldy and trap moisture. Also avoid cedar shavings, as some research suggests they can cause respiratory issues in chickens due to aromatic oils. Avoid sawdust entirely, which creates respiratory issues and can suffocate chicks if you have a broody hen.
I use pine shavings as my base layer with a handful of dried herbs (lavender and mint from my garden) mixed in. The herbs seem to keep my hens calmer during laying and may help deter some pests, though the scientific evidence for that claim is limited.
How to Train Chickens to Use Their Nesting Boxes
New hens or those introduced to new boxes sometimes need encouragement to lay in the right place.
Place a Fake Egg
Place fake eggs or golf balls in each nesting box. Hens seem to interpret these as approval from other chickens that the spot is safe for laying. Ceramic nest eggs work better than golf balls for suspicious hens. This simple trick solved my problem with new hens within days.
Confine Them in the Coop
Until your hens are accustomed to using the boxes, confine them to the coop until mid-morning. This is the time of day when most hens lay their eggs, and it will help establish the habit of using the designated nesting boxes.
Make the Boxes More Appealing
Keep boxes darker than surrounding areas. If boxes are too bright, hang a cloth or burlap over the entrance to create a more cave-like atmosphere.
Ensure boxes are lower than roosting bars. Hens that cannot reach a higher roost will settle for nesting boxes as sleeping spots instead.
Keep the area quiet and draft-free. Hens are most vulnerable while laying and seek protected spots.
Add a perch or rail 6 inches from the entrance for landing. This gives hens a staging area before entering.
Block Their Preferred Floor Spots
If they have a specific corner they love to lay in instead of the boxes, try placing a bucket or some wire mesh there to make it unavailable. This encourages them to find a new, hopefully better, location.
For those experiencing persistent problems, consider whether your coop placement might be affecting hen comfort.
How Do I Stop Chickens Sleeping in Nesting Boxes?
Chickens sleeping in nesting boxes create unsanitary conditions and dirty eggs. The droppings accumulated overnight contaminate the bedding and any eggs laid the next morning.
Effective solutions:
Reiterate the roosting bar rule. Make roosting bars higher than nesting boxes. Chickens naturally want to sleep at the highest available point. If roosts are lower or less comfortable than nesting boxes, hens will choose the boxes.
Provide proper roosting bars. Bars should be 2 to 4 inches wide and made of wood for easy gripping. Uncomfortable roosts push hens toward nesting boxes.
Block access at night. Some commercial nesting boxes have rails that lift to close off the entrance after the laying period ends. You can improvise this by placing a board across the entrances at dusk.
Physically remove persistent offenders. Some hens develop habits that require direct intervention. Removing the hen from the nesting box at roosting time for several consecutive nights often breaks the pattern.
Troubleshooting Common Nesting Box Problems
| Problem | Likely Cause | Solution |
|---|---|---|
| Broken eggs | Box too large, multiple hens sharing | Resize to prevent sharing, add more boxes |
| Egg-eating | Boredom, calcium deficiency, learned behavior | Collect eggs frequently, add roll-away design, provide calcium supplement |
| Dirty boxes | Hens sleeping inside | Raise roosts higher, block access at night |
| Hens avoiding boxes | Too bright, wrong location, uncomfortable | Darken area, relocate to quieter spot, add more bedding |
| Moisture buildup | Poor ventilation, ground-level placement | Add ventilation holes, elevate boxes, improve drainage |
| Overcrowding at boxes | Not enough boxes for flock size | Add one box per 3-4 hens |
| Floor-laying | Boxes not appealing enough | Add fake eggs, make boxes darker, retrain hens |
| Fighting over one box | Hens have a favorite | Make all boxes identical, provide extras |
My Hens Are Still Laying on the Floor
If your hens are laying their eggs on the coop floor instead of in their nesting boxes, it is a sign they do not feel the boxes are a more appealing or safe option.
Re-train with a fake egg: Place a golf ball or ceramic nest egg in the box you want them to use. This provides a visual cue that this is the designated laying spot.
Temporarily block their preferred spot: If they have a specific corner they love to lay in, try placing a bucket or some wire mesh there to make it unavailable.
Make the boxes more appealing: Double-check that the boxes are darker, quieter, and more private than the floor space. You may need to add more bedding or even a small curtain to the front of the boxes.
My Hens Are Fighting Over One Box
Even if you have the correct ratio of boxes, it is normal for hens to have a “favorite” box. This is not a sign that you need more boxes, but it can lead to squabbles and broken eggs.
Make all boxes identical: Hens can be picky. If one box has different bedding, different light, or is a slightly different size, they will all try to use the most appealing one. Make all the boxes identical to reduce the “favorite box” phenomenon.
This behavior is completely normal. A little bit of jostling is expected, and as long as no one is getting hurt, it is usually not a major problem.
Egg-eating deserves special attention because it spreads rapidly through flocks and is extremely difficult to stop once established. If you notice broken eggs with the contents eaten, act immediately with collection frequency and consider switching to roll-away designs.
What to Look for When Buying Pre-Made Nesting Boxes
If building is not your preference, consider these factors when purchasing:
| Feature | Why It Matters | Price Impact |
|---|---|---|
| Roll-away tray | Prevents egg-eating, easier collection | +$30-50 |
| Flip-up perch bar | Blocks nighttime sleeping | +$10-20 |
| Multiple compartments | Accommodates larger flocks | +$20-40 per compartment |
| Galvanized metal | Pest resistance, durability | +$20-30 |
| External egg access | Collect without entering coop | +$15-25 |
| Durable, non-porous materials | Easy cleaning, resists bacteria | Varies |
| Good ventilation | Prevents moisture and heat buildup | Minimal |
| Anti-roosting sloped roof | Keeps exterior clean | Minimal |
Budget options start around $30-40 for single plastic boxes, while premium multi-compartment roll-away systems range from $100-200+.
Nesting Box Maintenance and Cleaning
Nesting boxes should be cleaned regularly to maintain a healthy laying environment and prevent parasite problems.
Daily: Quick spot-check, removing any soiled bedding or droppings.
Weekly: Remove obviously dirty bedding, check for broken eggs, ensure bedding depth is adequate.
Every 2-4 weeks: Full clean of the boxes, removing all old bedding and replacing it with fresh, clean material.
A full clean helps prevent mites and ensures a healthy laying environment. I typically do this more frequently during hot, humid seasons when moisture and odor build up faster.
Bonus: Nesting Boxes for Wild Birds
While this guide focuses primarily on chicken nesting boxes, many of the same principles apply if you want to attract wild birds to your property. Providing birdhouses can play a crucial role in conservation, especially in urban and suburban areas where natural nesting sites like tree cavities are becoming scarce.
Why Birdhouses Matter
According to the Cornell Lab of Ornithology, providing nest boxes is a key way to help cavity-nesting birds thrive when natural sites are limited. It is a small act that can have a big impact, serving as a vital breeding ground and shelter from predators.
Birdhouse Dimensions by Species
For birdhouses, the size of the entrance hole is the most critical dimension. It must be specific to the species you want to attract and small enough to keep larger birds and predators from entering.
| Bird Species | Entrance Hole Size (inches) | Entrance Hole Size (mm) |
|---|---|---|
| Blue Tits, Coal Tits | 1 inch | 25mm |
| Great Tits, Tree Sparrows | 1.25 inches | 32mm |
| Starlings | 1.75 inches | 45mm |
For birds like robins and wrens who prefer open spaces, an “open-fronted” box without a full entrance hole is the best option. Barn owls require a very large, deep box.
Birdhouse Placement
Height: Generally, 2-4 meters (6-13 feet) is suitable for small birds. Woodpeckers and owls prefer higher placements. For robins and wrens with open-fronted boxes, 1-2 meters is best, often hidden among dense foliage.
Direction: Face the entrance between North and East to avoid strong afternoon sun and prevailing winds/rain.
Other tips: Ensure a clear flight path to the entrance. Tilt slightly forward for rain runoff. Place high enough to deter cats and squirrels. Do not place too close to bird feeders, as constant activity disturbs nesting birds.
Frequently Asked Questions
How Many Nesting Boxes for 10 Chickens?
For 10 chickens, provide 3 to 4 nesting boxes following the general guideline of one box per 3 to 4 hens. I recommend 4 boxes to account for hen preferences and reduce competition during peak laying times.
Is 4 Nesting Boxes Enough for 10 Chickens?
Yes, 3-4 boxes is a good range for 10 chickens.
How Many Nesting Boxes for 20 Chickens?
You should aim for 4-7 nesting boxes, as a good rule of thumb is one box for every 3-5 hens.
Can I Use Milk Crates as Nesting Boxes?
Yes, milk crates work excellently when you cut one side off to create an entrance and cover the bottom holes with plywood or thick rubber before adding bedding.
Do Chickens Need a Ramp to Access Nesting Boxes?
Not necessarily if boxes are 18 inches or lower and your hens are standard breeds. However, a small ramp or landing perch helps younger, smaller, or bantam hens access raised boxes safely.
How Often Should I Clean Nesting Boxes?
Remove visibly soiled bedding weekly. Replace bedding completely every 2 to 4 weeks depending on how quickly it becomes dirty.
What Is a Roll-Away Nesting Box?
A roll-away design angles slightly so eggs roll into a protected collection area immediately after laying. This prevents egg-sitting and egg-eating.
Do Nesting Boxes Need to Be Dark?
Yes, hens feel safest and most comfortable in a dark, private environment for laying.
Which Direction Should Chicken Nesting Boxes Face?
They should be positioned away from direct sunlight to prevent the boxes from overheating.
Can a Nesting Box Be Too Big?
Yes, an overly large box can feel unsafe, encourage multiple hens to pile in (leading to broken eggs), and be used for sleeping instead of laying.
Why Do My Hens Lay on the Coop Floor Instead of Nesting Boxes?
Common causes include boxes that are too high, too bright, too exposed, or too dirty. Ensure boxes are in a quiet, dark corner, lower than roosts, and contain clean, comfortable bedding. Adding fake eggs often encourages proper laying location.
Do Nesting Boxes Need to Be Off the Ground?
Not necessarily, but elevating them 18-20 inches helps keep eggs clean and discourages floor-laying.
My Nesting Box Setup After Six Years
After considerable experimentation raising chickens in a tropical climate, I have settled on a system that works for my flock of eight hens.
I maintain four 14 inch wooden boxes built from cedar, positioned 18 inches off the floor in the darkest corner of my coop. Each box has a lift-top roof for easy collection and cleaning, a sloped external roof to prevent roosting, and drainage holes in the floor.
I use pine shavings as bedding, replaced every two weeks or sooner if any eggs break. A landing rail runs along the front of all four boxes, and I keep ceramic fake eggs in the two least-used boxes to maintain their appeal.
The one addition I made after dealing with an egg-eater was a plastic roll-away box positioned at the opposite end of the coop. This solved the problem and gave me a lower-maintenance option for busy weeks when I cannot collect eggs as frequently.
Two of my boxes now have external access, allowing me to collect eggs without entering the coop on muddy days. This small modification has saved countless pairs of shoes.
This combination handles different situations and gives my hens options that match their individual preferences. The initial investment in quality materials and thoughtful design has paid dividends in reduced maintenance and consistently clean eggs.
For those just starting out, focus on getting the basics right: appropriate size for your breeds, proper height relative to roosts, a quiet and dark location, and adequate numbers for your flock size. Everything else can be refined as you learn what your specific hens prefer.

Oladepo Babatunde is the founder of ChickenStarter.com. He is a backyard chicken keeper and educator who specializes in helping beginners raise healthy flocks, particularly in warm climates. His expertise comes from years of hands-on experience building coops, treating common chicken ailments, and solving flock management issues. His own happy hens are a testament to his methods, laying 25-30 eggs weekly.