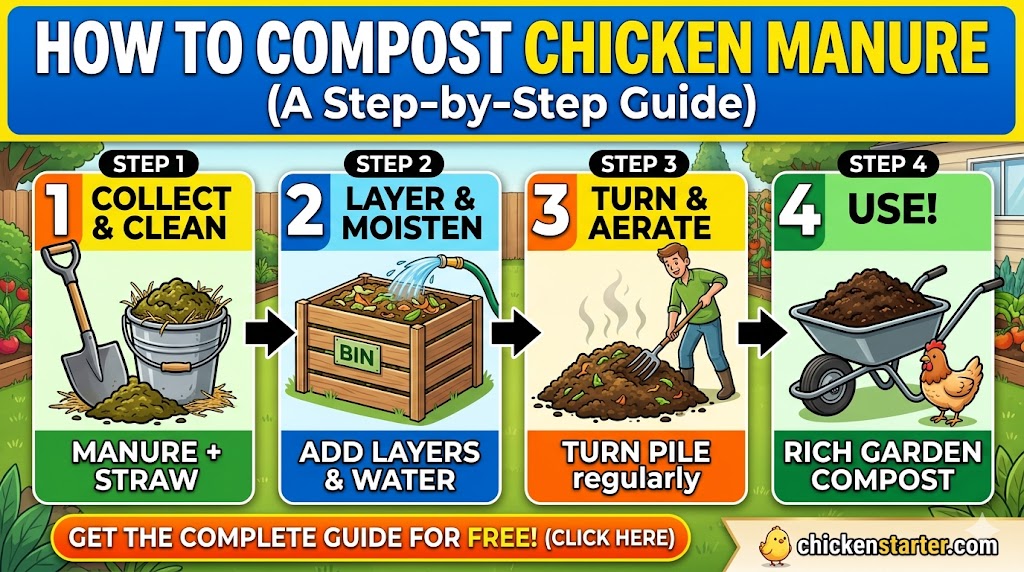
If you keep backyard chickens, you already know the coop produces a lot more than eggs. Every week, you are shoveling out bedding soaked with droppings, and if you have been tossing it all in the trash or piling it in a corner of your yard, you are literally throwing away one of the best garden fertilizers on the planet.
Chicken manure compost is often called “black gold” by gardeners because of how rich it is in nitrogen, phosphorus, and potassium. But here is the critical part that every chicken keeper needs to understand: you cannot use fresh chicken manure directly on your garden. It will burn your plants, and it can make you and your family sick.
The good news? Composting chicken manure is not complicated. It does not require expensive equipment. And once you learn the process, you will have a free, endless supply of premium organic fertilizer that most gardeners would pay good money for.
Let me walk you through exactly how to do it safely and efficiently.
Why Fresh Chicken Manure Cannot Go Straight on Your Garden
Before we get into the composting process, you need to understand why this step is not optional.
Fresh chicken manure is extremely “hot” in gardening terms. It has one of the highest nitrogen concentrations of any livestock manure. That nitrogen, in its raw form, exists primarily as ammonia and uric acid. Applied directly to plants, it chemically burns roots, scorches leaves, and can kill seedlings overnight.
But the bigger concern is food safety. Raw chicken droppings can contain harmful pathogens including Salmonella, E. coli, and Campylobacter. If you spread uncomposted manure on your vegetable garden and then eat produce from that soil, you risk serious illness. This is especially dangerous for leafy greens and root vegetables that contact the soil directly.
According to guidelines from the University of Georgia Extension, raw poultry litter should never be applied to soil where food crops are growing. The composting process, when done correctly, destroys these pathogens through sustained high temperatures.
There is also an important distinction most articles miss: “aged” manure is not the same as “properly composted” manure.
Simply letting chicken manure sit in a pile for six months does reduce some pathogens and mellow the nitrogen, but it does not guarantee pathogen destruction the way proper hot composting does. If you are growing food, proper composting with verified temperatures is the safest approach.
What Makes Composted Chicken Manure So Valuable
Once properly composted, chicken manure becomes one of the richest soil amendments available. Here is why gardeners love it:
Nutrient density. Chicken manure has an approximate NPK ratio of 3-2-2 (nitrogen, phosphorus, potassium) in its composted form. That is significantly higher than horse manure (0.7-0.3-0.6) or cow manure (0.6-0.2-0.5). It also contains meaningful amounts of calcium, magnesium, and sulfur.
Soil structure improvement. The organic matter in finished chicken manure compost improves soil drainage in clay soils and water retention in sandy soils. It feeds the beneficial microorganisms that keep your garden soil alive and healthy.
Slow-release nutrition. Unlike synthetic fertilizers that dump nutrients all at once, composted chicken manure releases nutrients gradually over weeks and months. Your plants get steady, consistent feeding throughout the growing season.
It is free. Your chickens are producing this fertilizer every single day whether you use it or not. Once you set up a simple composting system, you never need to buy bagged fertilizer again.
If you are interested in how your flock contributes to your garden ecosystem beyond just manure, our guide on how chickens can improve your garden naturally covers pest control, tilling, and more.
Choose Your Method: Hot Composting vs Cold Composting
There are two fundamental approaches to composting chicken manure. Your choice depends on how quickly you need finished compost and how much effort you are willing to put in.
Hot Composting: Fastest and Safest
Timeline: 5 to 8 weeks of active composting, plus 45 to 60 days of curing. Total: roughly 3 to 4 months from start to garden-ready compost.
Hot composting uses controlled conditions to encourage thermophilic (heat-loving) bacteria to rapidly break down organic material. The pile reaches internal temperatures of 130 to 150°F, which reliably kills pathogens, parasites, and most weed seeds.
This method requires:
- A minimum pile size of 3 feet x 3 feet x 3 feet
- Regular turning (every 3 to 7 days during active phase)
- Moisture monitoring
- A compost thermometer
- Active attention for several weeks
Best for: anyone growing food crops, anyone who wants compost ready within one season, anyone concerned about pathogen safety.
Cold Composting: Easiest but Slowest
Timeline: 6 to 12 months minimum.
Cold composting is the hands-off approach. You pile up your materials, moisten them, cover the pile, and essentially let nature take its course. You might turn it occasionally, maybe once a month, but there is no active temperature management.
The pile may or may not reach pathogen-killing temperatures. Decomposition happens slowly through mesophilic bacteria, fungi, and invertebrates working at ambient temperatures.
Best for: people with no timeline pressure, non-food garden applications (flower beds, ornamental trees), or those building up material for a future hot composting batch.
Which Method Should You Choose?
If you plan to use your compost on a vegetable garden, herb garden, or fruit trees, hot composting is strongly recommended. The temperature verification gives you confidence that pathogens have been destroyed.
If your compost is going on flower beds, lawns, or ornamental plantings where food safety is not a concern, cold composting works fine. You just need patience.
What You Need Before You Start
The equipment list for composting chicken manure is short and inexpensive. You probably already own most of it.
Essential:
- A composting area (bin, tumbler, or open pile spot with good drainage)
- Compost thermometer with a probe at least 12 inches long
- Pitchfork or garden fork for turning
- Water source (garden hose works fine)
- Tarp or cover to control moisture and deter pests
Helpful but not required:
- Wheelbarrow for transporting materials
- Second or third bin for a rotation system
- Straw bales for insulation in cold climates
Location considerations: Place your compost area in a spot with partial sun and good drainage. Keep it accessible but away from areas where your family spends time, especially during the active phase when smell can be noticeable. Position your composter as far from your chickens as practical to avoid attracting rodents back toward the coop.
If you are still figuring out the best layout for your property, our guide on the best place to put your chicken coop includes considerations for waste management access.
Step-by-Step Hot Composting Process
This is the proven method that produces safe, garden-ready compost in the shortest time. Follow each step carefully.
Step 1: Collect Your Materials
Every time you clean your coop, you are gathering exactly what you need: a mix of chicken manure and carbon-rich bedding material. This combination is actually ideal for composting because it already contains both nitrogen (the manure) and carbon (the bedding).
If you use pine shavings, straw, hemp bedding, or dried leaves in your coop, you can add the entire cleanout directly to your compost pile. There is no need to separate manure from bedding.
If you also use a droppings board that collects pure manure without bedding, set that aside and mix it with extra brown materials when building your pile.
The bedding you choose in your coop actually affects how well your compost works. Some materials break down faster than others and contribute different carbon levels. If you are not sure which bedding is best for your situation, our comparison of hemp vs straw vs sand for chicken bedding covers the practical differences.
Step 2: Get the Carbon to Nitrogen Ratio Right
This sounds technical, but it is actually simple once you understand the concept.
Composting bacteria need both carbon (for energy) and nitrogen (for growth). The ideal ratio for active hot composting is roughly 25-30 parts carbon to 1 part nitrogen by weight.
Chicken manure alone has a C:N ratio of about 6-10:1. That means it is extremely nitrogen-heavy. If you piled up pure chicken manure without bedding, it would create an anaerobic, smelly, ammonia-laden mess instead of proper compost.
The solution is adding enough carbon-rich “brown” material to balance things out. Here is the practical guidance:
If your coop uses deep pine shavings (6 to 8 inches deep, changed every few months): your cleanout likely already has a decent ratio because there is so much shaving material relative to manure. You might only need to add a small amount of extra browns.
If your cleanout is manure-heavy (shallow bedding, frequent cleaning, or droppings board waste): you need to add significant brown material. Aim for roughly 2 to 3 parts brown material to 1 part manure-heavy material.
Practical brown materials to add:
- Dried leaves (free and excellent)
- Extra wood shavings
- Shredded cardboard
- Straw
- Wood chips (will slow things down but add bulk)
- Dried grass (brown, not fresh green)
The wrung-out sponge test works here too: if your materials feel wet and dense, add more browns. If they feel dry and fluffy, the ratio is likely carbon-heavy and you might add a bit more green material or manure.
Step 3: Build the Pile
Size matters for hot composting. Your pile needs to be at least 3 feet wide, 3 feet deep, and 3 feet tall (one cubic yard). This is the minimum mass needed to generate and retain the internal heat required for proper composting. Larger is even better, up to about 5 feet in each direction, though bigger piles are harder to turn.
You can either layer your materials (a few inches of brown, then a few inches of green, alternating) or simply mix everything together thoroughly. Both approaches work. Mixing tends to heat more evenly and quickly.
As you build the pile, add water to achieve consistent moisture throughout. The entire pile should feel like a wrung-out sponge. When you grab a handful and squeeze firmly, one to three drops of water should come out. No drops means too dry. A stream of liquid means too wet.
If your pile is too dry, decomposition will stall. Too wet, and you will get anaerobic conditions that create terrible smells and slow everything down.
Step 4: Monitor Temperature
This is where your compost thermometer earns its keep. Insert the probe into the center of the pile.
Target internal temperature: 130 to 150°F (55 to 65°C).
If your pile is built correctly with good ratios and moisture, it should reach this temperature range within 24 to 72 hours. You will likely feel heat radiating from the pile within a day or two.
Critical rule: Maintain 130°F or above for at least 3 consecutive days. This is the minimum time at temperature needed to reliably destroy harmful pathogens like Salmonella and E. coli.
Do not let it exceed 160°F. Temperatures above this threshold kill the beneficial microorganisms doing the decomposition work. If your pile gets too hot, turn it immediately to release excess heat and allow cooling.
Check temperature daily during the active phase. It takes less than a minute and gives you confidence that the process is working.
Step 5: Turn the Pile
After your pile has maintained 130°F+ for three or more days, the temperature will naturally begin to drop as bacteria in the center exhaust their food supply.
When internal temperature falls below about 110°F, it is time to turn. This means moving the outer edges of the pile into the center and the center material to the outside. The goal is to expose all material to the hottest zone of the pile over multiple cycles.
After turning, remoisten any dry areas. The pile should reheat within a day or two as fresh material reaches the center and bacteria reactivate.
Repeat this turning cycle 3 to 5 times over the course of several weeks. Each cycle, the pile will heat a little less and cool a little faster as available food diminishes. This is normal and indicates the composting process is working.
For most backyard flocks producing a moderate amount of manure, the active hot composting phase takes about 5 to 8 weeks with turns every 3 to 7 days.
Step 6: Cure the Finished Compost
Once your pile no longer reheats significantly after turning, it has entered the curing phase. This is not the same as being “done.”
Curing is essential. During this phase, slower-acting organisms continue breaking down remaining materials, beneficial fungi colonize the compost, and any residual ammonia dissipates. Nutrients stabilize into forms that plants can actually use.
Cover the pile loosely (allow some air circulation) and let it sit undisturbed for 45 to 60 days minimum. Some experts recommend 90 days of curing for extra safety when using on food crops.
Your compost is finished and ready to use when it is:
- Dark brown to black in color
- Crumbly and soil-like in texture
- Sweet and earthy in smell (like forest floor)
- Cool to the touch (ambient temperature)
- Free of any recognizable bedding or manure pieces
If you can still identify wood shavings or straw chunks, it needs more time. If it still smells like ammonia or manure, it is not ready.
Cold Composting: The Patient Approach
If hot composting sounds like more effort than you want to invest, cold composting is the alternative. It is dead simple.
- Pile your coop cleanout (manure + bedding) in a designated spot or bin
- Moisten to wrung-out sponge consistency
- Cover with a tarp
- Turn occasionally, maybe once a month or whenever you think of it
- Wait 6 to 12 months
That is genuinely the whole process. Nature does the work. The pile will decompose through ambient-temperature organisms, fungi, insects, and worms over time.
The trade-off: cold composting does not guarantee pathogen destruction. The pile may never reach temperatures high enough to kill Salmonella or other harmful bacteria. For this reason, cold-composted chicken manure should be aged for a full 12 months before application to food gardens, and even then, the 120-day pre-harvest rule applies to ground-contact crops.
Cold composting works well for:
- Flower beds and ornamental gardens
- Perennial borders
- Areas around non-food-producing trees
- Building soil in new garden beds you will not plant for a year
The Deep Litter Method Connection
If you use the deep litter method in your coop, you are already doing a form of in-coop composting. The manure, bedding, moisture, and microbial activity inside the coop start breaking materials down before you ever clean it out.
However, deep litter that has been composting inside your coop for months is still not safe to apply directly to a food garden. It needs to go through a proper composting or extended aging process outside the coop to ensure pathogen destruction.
The good news is that deep litter cleanouts usually have an excellent carbon-to-nitrogen ratio right out of the coop. All those layers of bedding you added over the months provide abundant carbon. You can often start a hot composting pile with deep litter material without adding much extra brown material.
Timing your deep litter cleanout with your composting schedule makes everything more efficient. Many chicken keepers do a full cleanout in early fall, hot compost through autumn and early winter, and have finished compost ready for spring garden preparation.
If your annual coop cleanout is approaching, our spring chicken coop cleaning checklist walks through the complete process including what to do with all that material.
How to Tell When Chicken Manure Compost Is Actually Ready
This is one of the most common questions, and getting it wrong has consequences. Using unfinished compost can burn plants and potentially expose your family to pathogens.
The Five Signs of Finished Compost
1. Color: Rich, dark brown to nearly black. Not light brown, not yellowish, not mottled with pale spots.
2. Texture: Crumbly and loose, like quality potting soil. Should break apart easily in your hand. No slimy, wet, or compacted areas.
3. Smell: Pleasant, earthy aroma similar to a forest floor after rain. If it smells like ammonia, manure, sulfur, or rot, it is not ready.
4. Temperature: The pile sits at ambient temperature and does not reheat after turning. If it still generates heat, active decomposition is ongoing.
5. Appearance: You cannot identify the original materials. No visible wood shavings, straw pieces, or recognizable manure. Everything should look uniformly like soil.
The Squeeze Test
Grab a handful of your compost and squeeze it firmly in your fist.
- It should hold its shape briefly when you open your hand
- Then crumble apart easily when you poke it
- No liquid should drip out
- It should not feel sticky or slimy
If it passes all of these checks, your compost is ready to use.
Safety Rules for Using Chicken Manure Compost in Your Garden
Even properly composted chicken manure requires some safety practices, especially when growing food.
The 90/120 Day Rule
This is a critical food safety guideline that applies to all manure-based compost applied to food gardens:
- 90 days minimum between compost application and harvesting crops that do NOT touch the soil (tomatoes, peppers, beans, cucumbers on trellises, corn)
- 120 days minimum between compost application and harvesting crops that DO touch the soil (lettuce, spinach, strawberries, carrots, radishes, potatoes)
The simplest strategy is to apply your finished compost in fall after your harvest is complete. This gives the entire winter for the compost to integrate with your soil, far exceeding the 120-day requirement by the time spring planting arrives.
Application Rates
More is not always better. Chicken manure compost is potent, and over-application can create nutrient imbalances or salt buildup in your soil.
General garden beds: Spread 1 to 2 inches over the soil surface annually, either worked in lightly or left as a top dressing.
Raised beds: Mix into the top 4 to 6 inches of existing soil.
Container plants: Use no more than 25 to 30 percent compost in your potting mix. The rest should be regular potting soil or other growing media.
Lawns: Light top-dressing of approximately 100 to 150 grams per square meter. Use less rather than more to avoid burning the grass.
Handling Precautions
- Always wear gloves when handling composted manure, even finished compost
- Wash hands thoroughly with soap after working with compost
- Keep young children away from active and curing compost piles
- If your hens were recently treated with antibiotics or chemical dewormers, wait at least one full composting cycle before using that batch on food gardens
- Do not spread compost on windy days to avoid inhaling dust particles
Making Chicken Manure Tea: Liquid Fertilizer From Your Compost
Once you have good, fully finished compost, you can make a liquid fertilizer tea that is easy to apply and gives plants a quick nutrient boost during the growing season.
Important: Only make tea from completely finished compost. Never steep raw or partially composted manure in water. That creates a pathogen-rich liquid that is unsafe and smells atrocious.
Simple Chicken Manure Compost Tea Recipe
- Fill a burlap sack or old pillowcase about two-thirds full with finished chicken manure compost
- Tie the top closed
- Place in a large bucket or barrel and fill with water at a ratio of approximately 1 part compost to 2 parts water
- Set in a sunny spot
- Dunk the bag up and down 2 to 3 times daily to introduce oxygen
- Steep for up to 2 weeks until the liquid is a deep brown color
- Remove the bag and discard contents (or add back to compost pile)
Before using, dilute the tea: Mix 1 part tea with 4 parts water. Use the diluted mixture to water established plants at the soil line. Avoid spraying directly on leaves or using on seedlings, as even diluted tea can be too strong for young plants.
Troubleshooting Common Composting Problems
Your Pile Is Not Heating Up
This is the most common frustration for first-time composters. If your pile is not reaching 130°F, check these factors in order:
Not enough moisture. The most frequent cause. Add water gradually while turning until the squeeze test produces 1 to 3 drops.
Not enough nitrogen. If your pile is almost entirely bedding with very little manure, it may lack the nitrogen needed to fuel bacterial activity. Add more manure, fresh grass clippings, or a small amount of blood meal.
Pile is too small. Anything under 3x3x3 feet simply cannot retain enough heat. Make it bigger.
Too compacted. Turn and fluff the pile to introduce oxygen. Anaerobic (oxygen-starved) conditions slow decomposition dramatically.
Cold weather. In winter, piles take longer to heat and may not reach full temperature without insulation. Surround the pile with straw bales or move to a sunny, wind-protected spot.
Your Pile Smells Terrible
A properly managed compost pile should not produce offensive odors. If yours stinks, something is out of balance.
Ammonia smell: Too much nitrogen relative to carbon. Add more brown materials (shredded cardboard, dry leaves, extra wood shavings) and turn well.
Rotten or sulfur smell: Too wet and anaerobic. Turn immediately to introduce oxygen, and add dry brown materials to absorb excess moisture.
General strong odor: Cover the pile with a tarp between turnings. This contains smell and also prevents rain from oversaturating the pile.
If you are dealing with odor complaints from neighbors, a compost tumbler with a sealed barrel is the best solution for small spaces. They contain smell effectively while still allowing proper composting.
Attracting Rats, Flies, or Wildlife
Compost piles, especially those near chicken coops, can attract unwanted visitors. Here is how to prevent that:
- Use an enclosed bin or tumbler rather than an open pile
- Cover open piles securely with a solid tarp or lid
- Do not add meat, dairy, or cooked food scraps to your chicken manure compost
- Place the compost as far from your coop as practical
- If rats are an issue around your property, our guide on how to keep rats out of your chicken coop covers proven deterrent methods that apply equally to compost areas
Compost Is Taking Forever
If you have been waiting months with little visible progress:
- Switch from passive cold composting to active hot composting
- Turn more frequently (every 3 to 5 days)
- Check and adjust moisture
- Ensure pile meets minimum size requirements
- Consider your bedding type. Large wood chips decompose very slowly. If your pile is full of chunky material, consider shredding or chipping it smaller before adding to your next batch
Best Bedding Materials for Easier Composting
The bedding you use in your coop directly impacts how smoothly your composting goes. Here is a practical comparison:
| Bedding Type | Composting Speed | Best For |
|---|---|---|
| Pine shavings | Medium (3-6 months in pile) | Most common, widely available, good balance |
| Hemp bedding | Fast (breaks down quickly) | Excellent absorption, decomposes rapidly |
| Straw | Medium-fast | Good aeration, avoid seed-heavy varieties |
| Dried leaves | Medium | Free, excellent carbon source |
| Shredded cardboard | Slow-medium | Good supplement, use alongside other bedding |
Avoid using sand-based coop bedding in your compost. Sand does not decompose and will make your finished compost gritty and less useful for garden soil.
If you are choosing coop bedding with composting in mind, hemp bedding is increasingly popular because it absorbs moisture exceptionally well, controls odor in the coop, and breaks down faster than wood shavings in the compost pile. Our detailed comparison of hemp vs straw vs sand for chicken bedding can help you decide what works best for your specific setup.
Composting in Small Spaces and Urban Settings
Not everyone has room for a three-bin compost system or a large open pile. If you keep a small flock of 3 to 6 chickens in a suburban backyard, here is how to make composting work:
Compost tumblers are ideal for small spaces. They are enclosed (controlling smell and pests), elevated off the ground (discouraging rats), and easy to turn with a crank or handle. A 40 to 60 gallon tumbler can handle the output of a small flock if you clean the coop regularly and process batches one at a time.
Small two-bin systems using plastic storage bins or wooden pallets take up minimal space. One bin actively composts while the other cures.
Frequency adjustments: With 3 to 5 chickens, you may not produce enough material weekly to build a full hot composting pile. Instead, store your coop cleanouts in a covered container, adding material each week until you have enough to build a proper pile (at least one cubic yard).
Neighbor considerations: Keep your compost covered, use an enclosed bin or tumbler, and avoid turning the pile on weekends when neighbors are likely to be outdoors. Properly managed chicken manure compost genuinely should not produce strong odors once you get the carbon ratio right.
Seasonal Composting Tips
Spring and Summer
Warm temperatures make composting faster and easier. Piles heat up quickly and cycle through the process in less time. However, watch moisture carefully since warm weather and sun dry things out faster. Check moisture every time you turn and add water as needed.
Spring is an excellent time to start a hot composting batch if you want finished compost ready for fall garden application.
Fall
The ideal season to apply finished compost to your garden beds. Spread it after harvest, and winter weather helps incorporate it naturally into the soil.
Fall is also the best time for a major coop cleanout, especially if you run the deep litter method. Clean out accumulated litter, start a fresh composting pile, and let it work through winter.
Winter
Composting slows significantly when temperatures drop below freezing. Your pile will not reach proper hot composting temperatures without help.
Options for cold climates:
- Insulate the pile with straw bales on all sides and a tarp on top
- Continue collecting and stockpiling material through winter, then build a proper hot composting pile when temperatures rise in spring
- Accept that your winter pile will cold-compost and plan for a longer timeline
Even in cold climates, decomposition does not stop completely. It just slows down. The material you add over winter will be partially broken down by spring, giving you a head start when you build your hot pile.
For more on managing your coop through cold months, including cleaning schedules and bedding management, see our winterizing your chicken coop guide.
Myths vs Facts About Chicken Manure Composting
Myth: You can scatter old chicken bedding directly on your garden if it has been sitting a while. Fact: “Sitting in a pile” is not the same as composting. Without verified temperatures, you cannot confirm pathogen destruction. For food gardens, always properly compost or age for a minimum of 12 months.
Myth: Chicken manure compost is too acidic for most plants. Fact: Composted chicken manure is actually close to neutral pH (around 6.5 to 7.5). The composting process neutralizes the acidity present in raw manure.
Myth: You need expensive equipment to compost chicken manure. Fact: All you truly need is a pile at least 3x3x3 feet, a thermometer (under $15), a pitchfork, and a water source. Everything else is convenience, not necessity.
Myth: Composting chicken manure always produces terrible smell. Fact: A properly managed compost pile with correct carbon-to-nitrogen ratio and adequate turning should not produce strong offensive odors. If it stinks, something is wrong with your ratio or moisture level.
Myth: If your chickens have been on medicated feed or dewormers, the compost is unsafe. Fact: Most medications break down during the composting process, especially during hot composting. However, as a precaution, avoid using compost from recently medicated birds on food crops. One full hot composting cycle (3 to 4 months) after medication is generally considered sufficient.
Myth: You can speed up composting by adding commercial compost activators. Fact: Chicken manure itself is one of the most powerful compost activators available. It does not need help getting started. Proper moisture, ratio, and pile size are all that is required.
Frequently Asked Questions
How long does chicken manure need to compost before it is safe for a vegetable garden?
Using the hot composting method with verified temperatures of 130°F+ for 3 consecutive days, followed by multiple turns and 45 to 60 days of curing, your compost can be ready in 3 to 4 months. Cold composted material should age 12 months minimum before food garden use. Regardless of method, always follow the 90/120-day pre-harvest application rule.
Can I add chicken manure to my existing compost pile?
Yes, but be mindful of ratios. Chicken manure is extremely nitrogen-rich, so adding a large amount to an existing pile without additional carbon can throw off the balance. Add manure gradually and incorporate extra brown materials to compensate.
Does composting chicken manure kill weed seeds?
Hot composting at 130 to 150°F for multiple cycles will kill most weed seeds. Cold composting does not reliably destroy weed seeds, which is one reason hot composting is preferred.
Can I use chicken manure compost around fruit trees?
Absolutely. Apply finished compost in a ring around the tree, starting about 6 inches from the trunk and extending out to the drip line. Apply 1 to 2 inches in fall for best results.
Is it safe to compost manure from chickens that free range?
Yes. Free-range chickens produce the same type of manure as confined birds. The composting process handles any additional pathogens they might pick up from the environment.
What if my compost pile gets too hot (above 160°F)?
Turn it immediately to release heat and introduce cooler air. Excessively hot piles kill the beneficial bacteria doing the decomposition work, which actually slows down your composting process.
Can I add kitchen scraps to my chicken manure compost?
Fruit and vegetable scraps, coffee grounds, and crushed eggshells are fine additions. Avoid adding meat, dairy, oils, or cooked foods, as these attract pests and can create odor problems. If you already feed kitchen scraps to your chickens, whatever comes out the other end is perfect compost material on its own.
How much finished compost will my flock produce?
A small flock of 4 to 6 chickens typically produces enough manure and bedding for one to two large batches of compost per year, yielding roughly 2 to 4 cubic feet of finished compost per batch. That is plenty for a small to medium vegetable garden.
From Coop Waste to Garden Gold
Composting chicken manure is one of the most satisfying closed-loop systems you can create as a backyard chicken keeper. Your birds eat kitchen scraps and garden waste, convert it into eggs and manure, and that manure becomes the fertilizer that grows next year’s food and treats. Nothing is wasted.
The process is straightforward once you understand the basics:
- Collect your manure and bedding together
- Get your brown-to-green ratio right
- Build a pile at least 3 feet in each dimension
- Keep it moist like a wrung-out sponge
- Monitor temperature and maintain 130 to 150°F for 3+ days
- Turn multiple times as the pile cools and reheats
- Cure for 45 to 60 days
- Apply to your garden following safety timelines
Start with whatever you have available. You do not need a perfect setup on day one. Even a simple pile in the corner of your yard with a tarp over it will produce usable compost given enough time. The important thing is to stop throwing away what your flock is producing for you every single day.
Your chickens are not just giving you fresh eggs every morning. They are giving you the richest natural fertilizer you can get. All you have to do is compost it properly, and your garden will thank you for years to come.

Oladepo Babatunde is the founder of ChickenStarter.com. He is a backyard chicken keeper and educator who specializes in helping beginners raise healthy flocks, particularly in warm climates. His expertise comes from years of hands-on experience building coops, treating common chicken ailments, and solving flock management issues. His own happy hens are a testament to his methods, laying 25-30 eggs weekly.