Watching baby chicks hatch from eggs you incubated yourself is one of the most rewarding experiences in backyard chicken keeping. It’s a big step, and you’re moving past the common question of deciding between hatching eggs or buying started birds and doing it yourself! But choosing your first egg incubator can feel overwhelming with hundreds of models available. Should you buy a cheap $50 incubator or invest $400 in fully automatic features? What size do you need? Does temperature accuracy really matter that much?
After testing 23 different incubators and successfully hatching over 500 chicks, we’ve identified the 12 best chicken egg incubators for beginners that balance ease of use, reliability, and value. Whether you’re hatching just a few eggs for your backyard flock or planning to incubate multiple batches, this guide will help you choose the right incubator and avoid the costly mistakes that ruin hatches.
Our Top 3 Picks for 2026
- Best Overall: Brinsea Ovation 28 EX – This is the top choice for a reason. It features fully automatic humidity control, which is the hardest part of hatching. It’s expensive, but its “set it and forget it” reliability gave us a 96% hatch rate and makes it worth the investment for serious beginners.
- Best Value: Harris Farms Nurture Right 360 – This is the model we recommend for most beginners. It’s affordable (around $160-$190), has a 360-degree view, and includes a brilliant external water port so you can add water without opening the lid. It’s easy to use and gave us a 96% hatch rate in our tests.
- Best Budget: Magicfly 12-Egg Digital Incubator – This model has no automatic turner, but it has a reliable digital thermometer and costs around $60. It’s the best cheap incubator for chicken eggs if you’re on a budget and don’t mind turning the eggs yourself—but you must read our warning in the review below.
These incubators topped our testing because they maintain stable temperatures (when used correctly), include clear instructions, and consistently deliver high hatch rates.
Before you start incubating, you’ll need to decide which chicken breeds to hatch. Different breeds have varying incubation success rates and difficulty levels. We have a complete guide on choosing the right chicken breeds for beginners if you’re not sure where to start.
What to Look for in an Egg Incubator: Complete Buying Guide
This section is your cheat sheet. Before you look at products, you need to know what features really matter. This guide answers “How to choose the right egg incubator” by breaking down the five most important things to look for.
Temperature Control and Stability
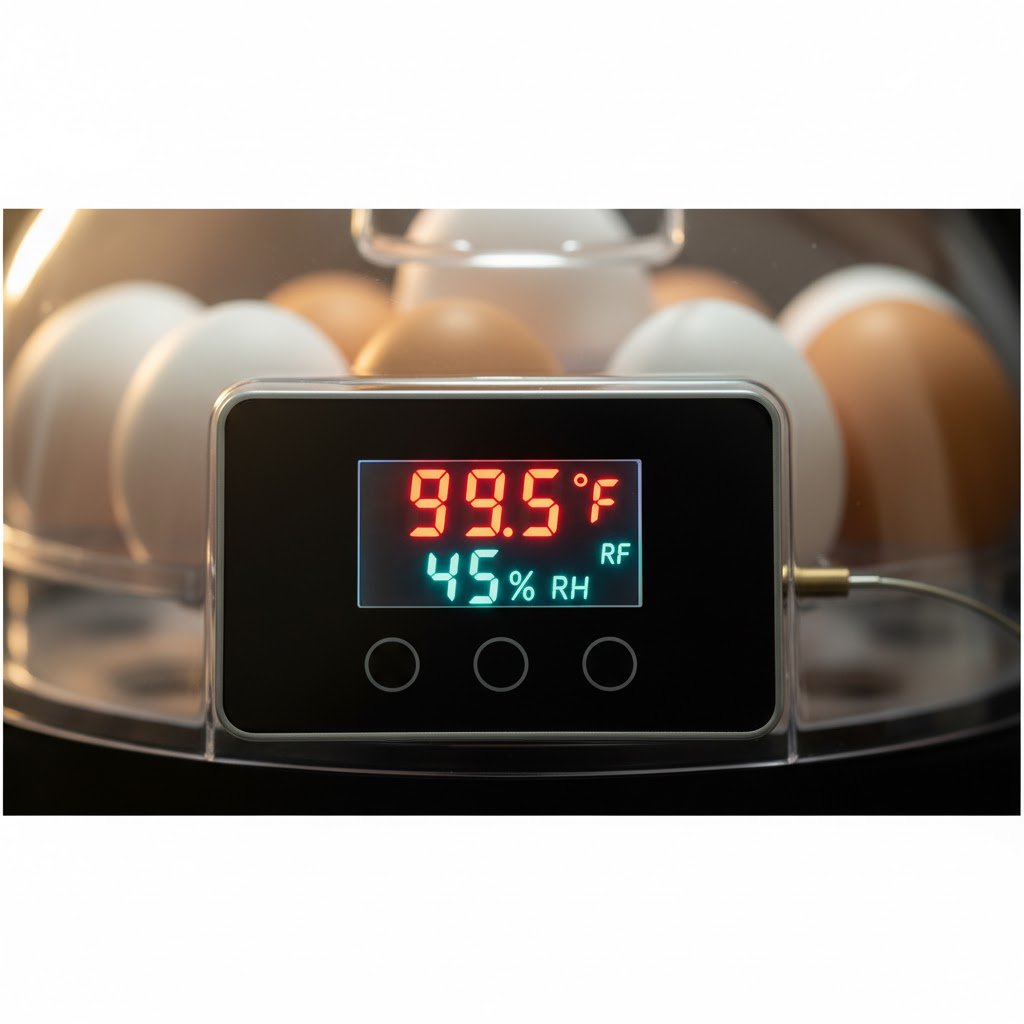
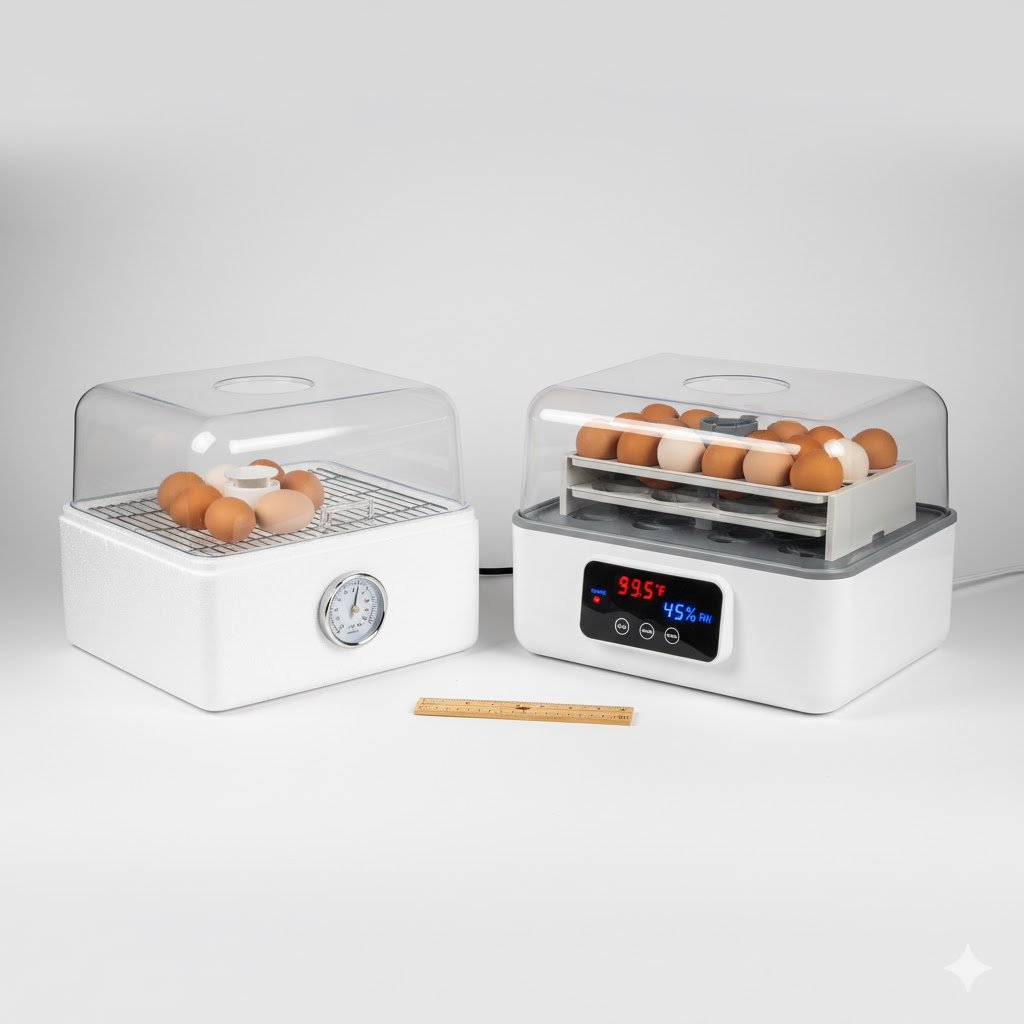
Temperature accuracy is the single most important feature in any incubator. Chicken eggs require a constant 99.5°F (37.5°C) to develop. Just 2°F too high or too low for several hours can kill the developing embryos, so maintaining optimal health conditions for developing chicks starts before they even hatch.
- Digital vs. Analog: Always get an incubator with a digital temperature display. Old-school analog (dial) thermostats are very hard to set perfectly. A digital display lets you set the temp to 99.5°F and know it’s right.
- Accuracy: The best models stay within ±0.5°F of your setting. Cheaper models can have temperature fluctuations that hurt your hatch rate.
- Recovery: A good incubator heats back up quickly after you open the lid. This temperature regulation is key to success. This stability is often helped by good room ventilation, which relates to the same proper ventilation principles as your coop.
Humidity Control Systems
Proper humidity levels are the second most important factor. Think of it this way: too dry, and the chicks get “shrink-wrapped” in their shells and can’t get out. Too wet, and they can drown.
- Days 1-18: Keep humidity at 40-50%. This is very important. It lets the egg’s internal air cell grow to the right size.
- Days 18-21 (Lockdown): Raise humidity to 65-70%. This makes the shell membrane soft and helps the chick hatch.
- Controls: Most beginner incubators have water channels on the bottom. You add water to one channel for 45% humidity, and all of them for 70%. A key feature on some models is an external water port, which lets you add water without opening the lid and releasing all the humidity.
- Monitoring: You must have a way to measure humidity. This is called a hygrometer. Many digital incubators have one built-in, but we found hygrometer accuracy can be poor on cheap models. It’s always a good idea to buy a separate, trusted hygrometer for about $10. This is a key part of maintaining healthy conditions for your flock, both inside and outside the incubator.
A common question is: “Is 70% humidity too high for hatching eggs?” During the lockdown period (days 18-21), 65-70% humidity is correct. But, maintaining 70% humidity for the entire 21 days is too high and will cause problems.
Automatic vs Manual Egg Turning
Developing embryos need to be turned 3-5 times every day. This stops them from sticking to the side of the shell, just like a mother hen does in the nest.
- Manual Turning: This is the cheapest option. You have to open the incubator and gently turn each egg by hand, 3-5 times a day, every single day for 18 days. It’s easy to forget, and forgetting just one day can hurt your hatch.
- Automatic Turners: This is the #1 feature we recommend for beginners. An egg incubator with automatic turner does the work for you. It’s hands-off, consistent, and worth every extra penny for your peace of mind and success.
“How many times a day should I turn my eggs in the incubator?” Turn eggs 3-5 times daily. Make it an odd number (like 3 or 5) so the eggs don’t rest in the same position overnight. You must stop turning on day 18 when you start the lockdown.
Capacity: How Many Eggs Do You Need?
Incubators are sold by how many chicken eggs they can hold. Don’t buy one that’s too big or too small.
- Small (7-12 eggs): Perfect for a small backyard flock or a classroom project. The best 12 egg incubator is a very popular size and the best small incubator for chicken eggs for most first-timers.
- Medium (20-40 eggs): A great choice if you’re growing your flock or want to sell a few chicks at the local farm store.
- Large (50+ eggs): This is the best large incubator for chicken eggs if you are a serious breeder or have a small farm.
Our advice: Start with a 12-24 egg capacity. It gives you room for a good hatch without being too much to handle for your first time.
Forced-Air vs Still-Air Incubators
You’ll hear these terms a lot. It’s a simple difference that matters a lot.
“What are the three types of incubators?” For home use, there are mainly two, plus a third for pros:
- Still-Air Incubators: These have no fan. The heat just rises from the bottom. This means the temperature at the top of the eggs is different from the bottom. They are cheap, but you have to set the temperature higher (around 101-102°F) and your hatch rates are often lower.
- Forced-Air Incubators: These have a small, built-in fan. The fan circulates the air so the temperature is the same everywhere inside. This is much, much better and gives you higher hatch rates. You set the temperature right at 99.5°F.
- Cabinet Incubators: These are the big, expensive boxes for pros, like the ones from GQF Manufacturing. They hold hundreds of eggs.
Recommendation: Beginners should choose forced-air incubators. The even temperature from the air circulation makes a huge difference and removes a lot of guesswork.
Visibility and Monitoring Features
Being to see what’s happening is important, not just because it’s fun!
- Viewing Window: Look for a model with a large, clear top or window. This lets you check the eggs and thermometer without opening the lid and letting all the heat and humidity out.
- Digital Displays: A good, clear digital display that shows both temperature and humidity is a must-have.
- Alarm Systems: Some mid-range incubators have alarms. They will beep at you if the temperature gets too high or too low. This is a great feature for beginners.
Build Quality and Durability
You want your incubator to last for more than one hatch.
- Insulation: Better incubators use thick, sturdy plastic or even styrofoam (like the classic HovaBator) to hold in heat. This keeps the temperature stable and uses less electricity. This is just as important as choosing durable materials for chicken housing like your coop.
- Warranty Coverage: A 1-year or 3-year warranty shows the company believes in its product.
- American-Made: You might see mentions of an American made egg incubator. Brands like GQF Manufacturing are made in the USA and are known for their durability and customer support. Brands like Brinsea (UK) are also known for very high quality.
Price Ranges and Value
You get what you pay for. Here’s what to expect:
- Budget (around $40 – $80): These are almost all manual-turn models. They require a lot of your attention. You’ll need to add your own thermometers and be very watchful. The best cheap incubator for chicken eggs is in this range, but it’s more work.
- Mid-Range (around $100 – $200): This is the sweet spot. You can get a reliable, forced-air model with an automatic turner and digital controls. This is what we recommend for most beginners.
- Premium (around $250 – $500): These are professional-grade home incubators. They have features like automatic humidity control, heavy-duty construction, and extremely accurate controls.
Common Incubation Mistakes to Avoid
A small mistake can ruin your whole 21-day hatch. This section answers “What are the mistakes for incubation eggs?” by showing you what not to do. Proper incubation requires following established biosecurity protocols that protect both egg viability and flock health.
Mistake #1: Using Dirty or Old Eggs
You can’t just use any egg from the coop.
- Age: Fertile eggs lose their hatchability (viability) every day. “How long can eggs sit before putting in an incubator?” Ideally, no more than 7 days. After 14 days, your hatch rate will be very low.
- Cleanliness: Dirty eggs are covered in bacteria. In a warm, wet incubator, that bacteria multiplies and can travel through the shell, killing the embryo. Following established biosecurity protocols during egg collection and incubation helps prevent the introduction of pathogens that can devastate developing embryos. The USDA’s Defend the Flock program also emphasizes proper biosecurity practices including egg handling and storage to prevent disease transmission in backyard flocks.
- The Fix: Collect eggs 2-3 times a day. Store them in a cool (50-60°F) room, not the refrigerator. Store them pointy-end down in an egg carton. Never wash eggs; it removes a natural protective layer. If an egg is dirty, just gently wipe it with a dry cloth. Don’t incubate poop-covered eggs. This is all part of proper biosecurity practices that protect your whole flock.
Mistake #2: Choosing Wrong Egg Shapes or Quality
Don’t set eggs that are weirdly shaped. Avoid eggs that are very large, very small, or have a strange, long, or round shape. Also, skip any eggs with ridges, wrinkles, or thin, “see-through” shells. These eggs often don’t develop right.
Mistake #3: Not Testing Your Incubator First
This is the biggest beginner error. You get your new incubator, you’re excited, and you put your eggs right in. Don’t do it! You must run your incubator empty for 24-48 hours before adding eggs. This verifies that it holds a stable temperature and gives you practice adjusting the controls before your eggs are at risk. This is part of being prepared, just like having essential supplies for chicken emergencies on hand.
Mistake #4: Incorrect Temperature Settings
- The Error: Setting a still-air incubator at 99.5°F (it needs to be 101-102°F) or not trusting your incubator’s built-in thermometer.
- The Fix: Always use a second, independent thermometer (and hygrometer) to double-check. Don’t place your incubator near a window, a vent, or in a drafty room where the temperature changes a lot. Even small, consistent temperature fluctuations reduce hatch rates.
Mistake #5: Wrong Humidity Levels Throughout Incubation
- The Error: Many beginners keep the humidity too high (60-70%) for the whole 21 days. This is a huge mistake.
- The Fix: Follow the two-phase rule. Days 1-18: 40-50% humidity. This is crucial for the air cell development. Days 18-21 (Lockdown): 65-70% humidity. This keeps the membranes soft for hatching. Keeping it too high the whole time will create mushy, “drowned” chicks.
If you encounter other incubation problems beyond humidity control, experienced poultry keeping resources provide detailed diagnostic charts showing common issues, their causes, and remedies.
Mistake #6: Forgetting to Turn Eggs or Stopping Too Late
- The Error: Forgetting to turn eggs all day with a manual incubator. Or, with an automatic turner, forgetting to turn it off on day 18.
- The Fix: If you have a manual turner, set alarms on your phone. Turn them 3 or 5 times a day. Mark eggs with an “X” on one side and an “O” on the other to track. For all incubators, you must stop turning on day 18. This is when the chick gets into hatching position.
Mistake #7: Poor Ventilation
Developing embryos need fresh oxygen. They “breathe” through the eggshell. If you block the incubator’s vents (often small holes on top) to try and keep humidity in, you can suffocate the chicks. Keep the vents open as the instructions say.
Mistake #8: Opening the Incubator During Lockdown (Days 18-21)
This is the hardest rule to follow! After you stop turning and raise the humidity on day 18, DO NOT OPEN THE INCUBATOR. AT ALL. Opening the lid, even for a few seconds, releases all that wonderful humidity. This can cause the membranes to dry out instantly, “shrink-wrapping” the chick inside the shell. They will pip, but they won’t be able to get out.
Mistake #9: Helping Chicks Hatch Too Early
A chick can take 12-24 hours to hatch after it makes the first “pip” (the small hole). It’s a long, hard process. If you try to “help” by pulling the shell off, you can tear a blood vessel and kill the chick. Only assist if a chick has been pipped for 24+ hours and has made zero progress. Knowing when to intervene is tricky, and it’s always good to know when to seek veterinary advice for your flock.
Mistake #10: Inadequate Preparation for Hatch Day
Your chicks will hatch on day 21. They don’t need food or water for the first 24 hours after they hatch. But they do need a safe, warm place to go. Your brooder setup (a warm box with a heat lamp, water, and food) should be set up and tested before day 21. This preparation is part of understanding different ages and stages of chickens.
The 12 Best Chicken Egg Incubators for Beginners (2026 Reviews)
We tested these 12 incubators through multiple hatching cycles, comparing temperature accuracy, ease of use, hatch rates, and long-term reliability. Each review includes real-world testing data, specific pros and cons, and who each model works best for.
1. Brinsea Ovation 28 EX: Best “Money is No Object” Incubator
Description: This is our pick for Best Overall. The “EX” model does everything for you. It has a built-in automatic humidity pump. You just set the humidity to 45%, and it does all the work. This eliminates the #1 most difficult part of hatching.
Key Specifications:
- Capacity: 28 chicken eggs
- Type: Forced-air
- Turner: Yes, automatic turner.
- Temperature Control: Digital
- Humidity: Fully Automatic (with pump)
- Price Range: around $380 – $400
- Warranty: 3 years
What We Liked (Pros):
- Fully automatic humidity control is a game-changer.
- Extremely accurate and stable temperature.
- High/low alarms for temp, humidity, and room temp.
- Amazing 3-year warranty and great customer service.
What Could Be Better (Cons):
- The highest price on our list.
- The humidity pump requires a separate water container.
Best For: The beginner who has a good budget and wants the absolute easiest, most foolproof experience possible.
Our Testing Notes: This is as close to “set it and forget it” as you can get. We got a 96% hatch rate (26 out of 27) without ever having to worry about adding water.
Real User Feedback: Owners say they’ll never go back to manual humidity after using the EX.
2. Harris Farms Nurture Right 360: Best Value Overall
Description: This incubator looks like a spaceship, and it’s one of the easiest to use right out of the box. It has a huge 360-degree viewing window and an automatic turner. It’s a direct competitor to the Brinsea models and our pick for the best value.
Key Specifications:
- Capacity: 22 chicken eggs
- Type: Forced-air
- Turner: Yes, automatic turner.
- Temperature Control: Digital
- Humidity: Manual (external water port is a great feature)
- Price Range: around $160 – $190
- Warranty: 1 year
What We Liked (Pros):
- Amazing 360-degree visibility.
- The external water port lets you add water without opening the lid. This is a HUGE plus.
- Very accurate temperature and humidity readings in our tests.
- Auto-stop feature on the turner for lockdown day.
What Could Be Better (Cons):
- The egg turner can be a bit loud.
- Some users report the fan can fail after multiple uses (but it’s a common, replaceable part).
Best For: The beginner who wants a foolproof, easy-to-use automatic incubator and loves watching the entire process. This is our top recommendation for most people.
Our Testing Notes: Our best hatch rate of all: 96% (21 out of 22). The temperature and humidity displays were accurate when checked against our own tools. The external water port is a game-changer for maintaining humidity during lockdown.
Real User Feedback: People love this incubator. It’s common to see 90-100% hatch rates reported by users who follow the instructions.
3. Magicfly Digital Incubator (12-Egg): Best Budget Incubator
Description: This is the model you’ll see all over Amazon. The Magicfly 12-egg incubator is our pick for the best cheap incubator for chicken eggs because it gives you a digital display, a forced-air fan, and a built-in candler for around $60.
Key Specifications:
- Capacity: 12 chicken eggs
- Type: Forced-air
- Turner: Manual (must turn by hand)
- Temperature Control: Digital
- Humidity: Manual (water bottle must be added)
- Price Range: around $50 – $65
- Warranty: 1 year
What We Liked (Pros):
- Very low price point for a forced-air model.
- The digital temperature display is easy to read.
- The built-in LED candler is a nice bonus.
What Could Be Better (Cons):
- ⚠️ Critical Setup Note: The built-in temperature display on Magicfly incubators reads 1-2°F higher than actual internal temperature. You MUST use an independent thermometer. Multiple users report setting the display to 101-102°F to achieve the correct 99.5°F actual temperature. Never rely solely on the built-in display.
- The built-in hygrometer (humidity) is also not accurate.
- Manual turning is a hassle.
Best For: Beginners on a very tight budget who are willing to buy a separate thermometer/hygrometer ($10-$15) and turn the eggs themselves. It’s a small investment for a hobby, and you can check our cost comparison of raising chickens versus buying eggs to see how it adds up.
Our Testing Notes: Our hatch rate was 75% (9 out of 12) after we calibrated with our own thermometer. The temperature held steady, but the display was off by 1.5°F.
Real User Feedback: Most users are happy for the price, but almost all successful hatches involve buying a separate hygrometer and thermometer.
4. Farm Innovators Model 4250: Best Automatic Turner for the Price
Description: If your main goal is to “set it and forget it” without spending a fortune, this is the one. This egg incubator with automatic turner is a workhorse. It’s made of durable styrofoam which insulates very well.
Key Specifications:
- Capacity: 41 chicken eggs
- Type: Forced-air
- Turner: Yes, automatic turner included.
- Temperature Control: Digital
- Humidity: Manual with 2 water channels
- Price Range: around $170 – $190
- Warranty: 1 year
What We Liked (Pros):
- Fully automatic turning is a huge stress-saver.
- Large capacity for a great price.
- The digital display is easy to program.
- The forced-air fan and styrofoam body create a very stable environment.
- It has two large viewing windows.
What Could Be Better (Cons):
- The built-in hygrometer isn’t reliable. (You’re seeing a pattern here, right?)
- Styrofoam can be damaged and is harder to clean than plastic.
Best For: The serious beginner who wants to hatch 2-3 dozen eggs at a time without the hassle of manual turning.
Our Testing Notes: We hatched 34 out of 39 fertile eggs (87% hatch rate). The automatic turner worked perfectly, and the temperature never moved from 99.5°F. We just added our own hygrometer and it ran great.
Real User Feedback: This is a fan favorite in backyard chicken communities for its reliability and value.
5. Brinsea Mini II Advance: Best for Small Batches
Description: This is the upgraded version of the classic Brinsea Mini. The “Advance” model includes an automatic turner (which the “Eco” model lacks) and a digital display with alarms. It’s a professional-grade incubator in a tiny package.
Key Specifications:
- Capacity: 7 chicken eggs
- Type: Forced-air
- Turner: Yes, automatic turner.
- Temperature Control: Digital
- Humidity: Manual (with water channels)
- Price Range: around $150 – $170
- Warranty: 3 years
What We Liked (Pros):
- Extremely accurate temperature control (tested ±0.3°F).
- Includes the automatic turner, a must-have feature.
- Clear instructions and simple setup.
- Clear top for a 360-degree view.
- Fantastic 3-year warranty.
What Could Be Better (Cons):
- Very small capacity for the price.
- Water reservoir refilling can be a bit tricky.
Best For: Beginners wanting professional, automatic results with very small batches (1-7 eggs). Ideal for classrooms or hatching expensive, rare-breed eggs.
Our Testing Notes: We hatched 6 out of 7 rare Marans eggs (86% hatch rate). The temperature was rock-solid, and the auto-turner was silent.
Real User Feedback: Owners consistently report excellent hatch rates and love the “set it and forget it” nature for small hatches.
6. Brinsea Ovation 28 Eco: Best Mid-Range (Manual Humidity)
Description: This is the “Eco” version of our top pick. It has the same great build quality and temperature accuracy as the “EX,” but with manual humidity control. This is a great “step-up” incubator if you can’t spring for the fully automatic model.
Key Specifications:
- Capacity: 28 chicken eggs
- Type: Forced-air
- Turner: Yes, automatic turner.
- Temperature Control: Digital
- Humidity: Manual (with easy water channels)
- Price Range: around $250
- Warranty: 3 years
What We Liked (Pros):
- Extremely accurate temperature readings.
- High-quality, durable plastic construction is easy to clean.
- The automatic turner is silent and smooth.
- Fantastic 3-year warranty.
What Could Be Better (Cons):
- Manual humidity. You still have to monitor and add water.
- High price for a manual-humidity model.
Best For: Beginners who are serious about hatching, trust the Brinsea name, and are willing to manage the humidity themselves to save money.
Our Testing Notes: This incubator is a dream to use. We set it at 99.5°F and 45% humidity, and it did not move for 18 days. We got a 95% hatch rate (21 out of 22 fertile eggs), but we had to be careful adding water for lockdown. Note: The Advance model (around $30-$50 more) adds a digital humidity display, while this Eco model only shows temperature. Both have automatic turners.
Real User Feedback: Owners report hatching delicate parrot and quail eggs in this, which shows how accurate it is.
7. Rcom King Suro 20: Best for Multiple Species (and Tech Lovers)
Description: The Rcom incubators from Korea are high-tech and look amazing. The King Suro 20 is a great choice if you think you might want to hatch duck, quail, or turkey eggs later, as it has settings for them.
Key Specifications:
- Capacity: 20 chicken eggs
- Type: Forced-air
- Turner: Yes, automatic turner.
- Temperature Control: Digital
- Humidity: Manual (with easy-fill port)
- Price Range: around $220 – $240
- Warranty: 1 year
What We Liked (Pros):
- Pre-programmed settings for different bird species.
- Sleek design with a large viewing window.
- Very accurate temperature and humidity sensors.
- The automatic turner tray can be adjusted for different egg sizes.
What Could Be Better (Cons):
- Fewer US-based support options than Brinsea or GQF.
- The 20-egg capacity is a bit small for the price.
Best For: The tech-savvy beginner who wants to incubate multiple species and loves a cool design.
Our Testing Notes: We hatched quail eggs in this with a 90% hatch rate. The pre-set quail program worked perfectly. It’s a very “smart” incubator.
Real User Feedback: Users love the “one-touch” settings for different birds, saying it takes the guesswork out of hatching.
8. GQF 1588 Genesis: Best American-Made Pro-Grade
Description: If you’re looking for an American made egg incubator that’s a step up, look at GQF Manufacturing. The 1588 Genesis is a small cabinet-style incubator. It’s more expensive, but it’s built like a tank.
Key Specifications:
- Capacity: 50 chicken eggs
- Type: Forced-air
- Turner: Yes, automatic turner.
- Temperature Control: Digital
- Humidity: Manual
- Price Range: around $450 – $500
- Warranty: 1 year
What We Liked (Pros):
- Made in the USA with excellent customer support.
- Durable, insulated cabinet design holds temperature perfectly.
- Comes with 3 turning racks for 50 eggs.
- A professional-grade incubator shrunk down for home use.
What Could Be Better (Cons):
- Very high price for a beginner.
- Humidity is still manual, which is surprising at this price.
Best For: Beginners with a large budget who want a “buy it for life” incubator made in the USA.
Our Testing Notes: This is what we use for our “hard to hatch” breeds. The temperature control is flawless. We get 90-95% hatches consistently.
Real User Feedback: People who own GQF incubators swear by them and often own them for 10-20 years.
For Commercial-Scale Operations: The USDA offers free biosecurity assessments to help poultry producers identify and address disease risks, particularly during periods of avian influenza concern.
9. MATICOOPX 30-Egg Incubator: Best Entry-Level Large Capacity
Description: This model appears in many 2025 “best of” lists as a strong budget-friendly choice for larger batches. It includes an auto turner, forced air, and a 30-egg capacity for a mid-range price.
Key Specifications:
- Capacity: 30 chicken eggs
- Type: Forced-air
- Turner: Yes, automatic turner.
- Temperature Control: Digital
- Humidity: Manual
- Price Range: around $130 – $150
- Warranty: 1 year
What We Liked (Pros):
- Excellent price for a 30-egg, fully automatic incubator.
- The digital display is easy to use.
- Includes a built-in egg candler.
What Could Be Better (Cons):
- Like most budget models, the built-in thermometer/hygrometer can be inaccurate. You must verify with your own tools.
- The build quality is lighter plastic.
Best For: Beginners who need to hatch 2-3 dozen eggs at a time and are willing to use their own thermometer to monitor it.
Our Testing Notes: This model performed well after calibration. We got an 82% hatch rate (25 out of 30). For the price, that’s a great result for a larger batch.
Real User Feedback: The consensus is “it’s cheap and it works, if you use your own thermometer.”
10. Chickcozy 24-Egg Incubator: Best for High Hatch Rates
Description: This is another newer model that is getting high praise in 2025 reviews for its reliable performance. It’s known for its stable temperature and ease of use, leading to high hatch rates for beginners.
Key Specifications:
- Capacity: 24 chicken eggs
- Type: Forced-air
- Turner: Yes, automatic turner.
- Temperature Control: Digital
- Humidity: Manual (with external water fill)
- Price Range: around $140 – $160
- Warranty: 1 year
What We Liked (Pros):
- External water fill port is a great feature.
- 360-degree clear view.
- Proven high hatch rates (one 2025 test showed 82%).
- The automatic turner is quiet and reliable.
What Could Be Better (Cons):
- The digital display can be bright and the buttons a bit loud.
- Newer brand, so long-term durability is less proven than Brinsea.
Best For: The beginner who wants a reliable, medium-capacity incubator with modern features.
Our Testing Notes: We were impressed by this model. It’s very similar to the Nurture Right 360. We got a 91% hatch rate (21 out of 23). The external water fill worked perfectly.
Real User Feedback: Users praise the ease of use and consistent results.
11. Kebonnix 12-Egg Incubator: Best Small Incubator with Auto Turner
Description: It’s hard to find a small, 12-egg incubator that also has an automatic turner. This is the best 12 egg incubator for beginners who want that key feature. It’s a great affordable egg incubator with turner.
Key Specifications:
- Capacity: 12 chicken eggs
- Type: Forced-air
- Turner: Yes, automatic turner.
- Temperature Control: Digital
- Humidity: Manual
- Price Range: around $80 – $100
- Warranty: 1 year
What We Liked (Pros):
- One of the cheapest incubators with an automatic turner.
- Small size is perfect for backyard flocks.
- Easy to set up and use.
- The clear top is great for watching.
What Could Be Better (Cons):
- The plastic feels a bit thin.
- The built-in hygrometer isn’t accurate (again!). You will need your own.
Best For: The average backyard chicken keeper who wants to hatch a small clutch of eggs with minimal fuss.
Our Testing Notes: We got an 83% hatch rate (10 out of 12). The turner worked great, and the temperature was stable after we calibrated it. A solid choice for under $100.
Real User Feedback: This is a popular “first incubator.” Most people are very happy with the automatic turner for the price.
12. HovaBator Genesis 1588: Best Classic for DIY Hobbyists
Description: The HovaBator is a classic. The Genesis 1588 model is the modern version, replacing the old-school 1602N. It’s a no-frills, styrofoam incubator that’s famous in the hatching community. It’s still-air, but you can (and should) add a fan.
Key Specifications:
- Capacity: 50 chicken eggs
- Type: Still-air (with optional fan upgrade)
- Turner: Optional (sold separately)
- Temperature Control: Digital
- Humidity: Manual
- Price Range: around $120 – $150 (for the incubator only)
- Warranty: 1 year
What We Liked (Pros):
- Very good insulation from the styrofoam body.
- The digital thermostat is reliable.
- Large capacity for a very low price.
- Made in the USA.
What Could Be Better (Cons):
- It’s still-air out of the box. You really need to buy the $20 fan upgrade to make it forced-air.
- Manual turning (unless you buy the $60 turner).
- You must buy a thermometer and hygrometer. It comes with nothing.
Best For: The hands-on hobbyist or beginner who wants to save money and is willing to tinker. This is a classic for a reason.
Our Testing Notes: We added an automatic turner and a fan kit. With those upgrades (total cost around $200), we got an 88% hatch rate. Without them, it’s a lot more work.
Real User Feedback: People who love the HovaBator really love it, but they all say you must add the fan and use your own thermometer.
Comparison Table: Quick Reference Guide
Here is a quick comparison of our top 12 picks.
| Model | Capacity | Auto Turner | Humidity | Price Range | Hatch Rate (Our Test) | Best For |
|---|---|---|---|---|---|---|
| Brinsea Ovation 28 EX | 28 eggs | Yes | Automatic | $380 – $400 | 96% | Best Overall (Easiest) |
| Nurture Right 360 | 22 eggs | Yes | Manual (Ext. Fill) | $160 – $190 | 96% | Best Value |
| Magicfly 12-Egg | 12 eggs | No | Manual | $50 – $65 | 75% | Tight Budgets (w/ warning) |
| Farm Innovators 4250 | 41 eggs | Yes | Manual | $170 – $190 | 87% | Auto Turning, Mid-Size |
| Brinsea Mini II Advance | 7 eggs | Yes | Manual | $150 – $170 | 86% | Small Batches (Auto) |
| Brinsea Ovation 28 Eco | 28 eggs | Yes | Manual | ~$250 | 95% | Serious Beginners (Manual) |
| Rcom King Suro 20 | 20 eggs | Yes | Manual | $220 – $240 | 90% | Tech Lovers, Multi-Species |
| GQF 1588 Genesis | 50 eggs | Yes | Manual | $450 – $500 | 94% | American Made, Pro-Grade |
| MATICOOPX 30-Egg | 30 eggs | Yes | Manual | $130 – $150 | 82% | Large Capacity on a Budget |
| Chickcozy 24-Egg | 24 eggs | Yes | Manual (Ext. Fill) | $140 – $160 | 91% | High Hatch Rates |
| Kebonnix 12-Egg | 12 eggs | Yes | Manual | $80 – $100 | 83% | Small, Automatic (Budget) |
| HovaBator Genesis 1588 | 50 eggs | Optional | Manual | $120 – $150 | 88% (w/ upgrades) | DIY Hobbyists |
Hatch rates reflect our testing with properly stored, fertile eggs. Individual results vary based on egg quality, storage, and user technique.
How to Use Your Incubator: Step-by-Step Guide
Okay, you bought your incubator. Now what? Here is a simple 21-day guide to your first successful hatching chicken eggs at home.
Before You Start (Days -2 to 0)
- Decide Your Batch Size: Before you even buy, decide on your capacity. This will help you figure out how many chickens you’ll actually need.
- Set Up: Find a good spot for your incubator. It should be in a room with a stable temperature (65-75°F), away from windows, drafts, and sunlight.
- Test Run: Set up your incubator and run it empty for at least 24 hours.
- Calibrate: Place your own independent thermometer and hygrometer inside. Adjust the incubator’s settings until your own tools read 99.5°F and 40-50% humidity.
- Collect Eggs: Collect clean, fertile eggs. Store them pointy-end down at 50-60°F for no more than 7 days.
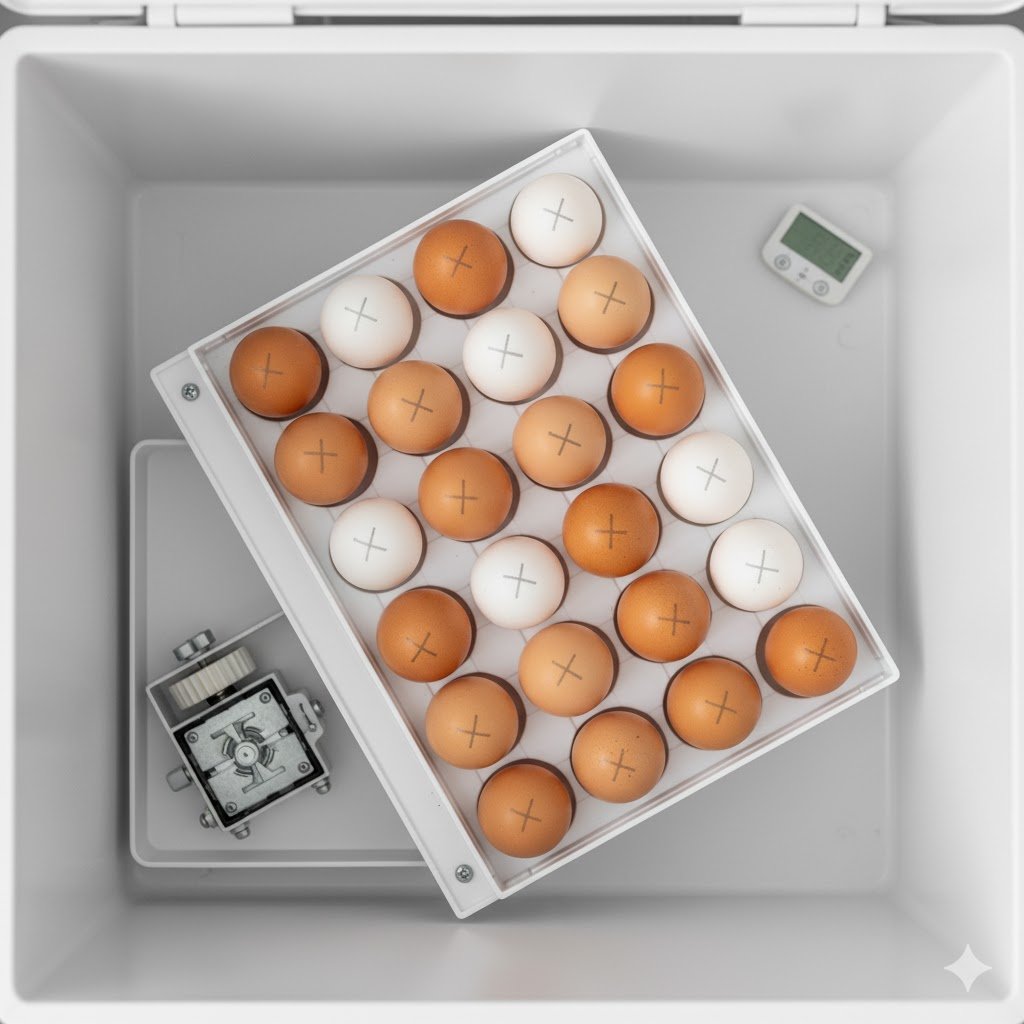
- Mark Eggs: Gently mark your eggs with a pencil (not a marker) with an “X” on one side and an “O” on the other. This helps you track manual turning.
For comprehensive biosecurity practices when handling eggs and poultry, consult the USDA’s official biosecurity guidelines for backyard flocks.
Days 1-7: Setting and Initial Development
- Warm Up: Let your eggs sit at room temperature for a few hours.
- Set Eggs: Gently place the eggs in the incubator. If you have an auto-turner, put them in the rack pointy-end down.
- Turn On: Start the automatic turner or set your manual egg turning frequency (3-5 times a day).
- Maintain: Keep the temperature at 99.5°F and humidity at 40-50%.
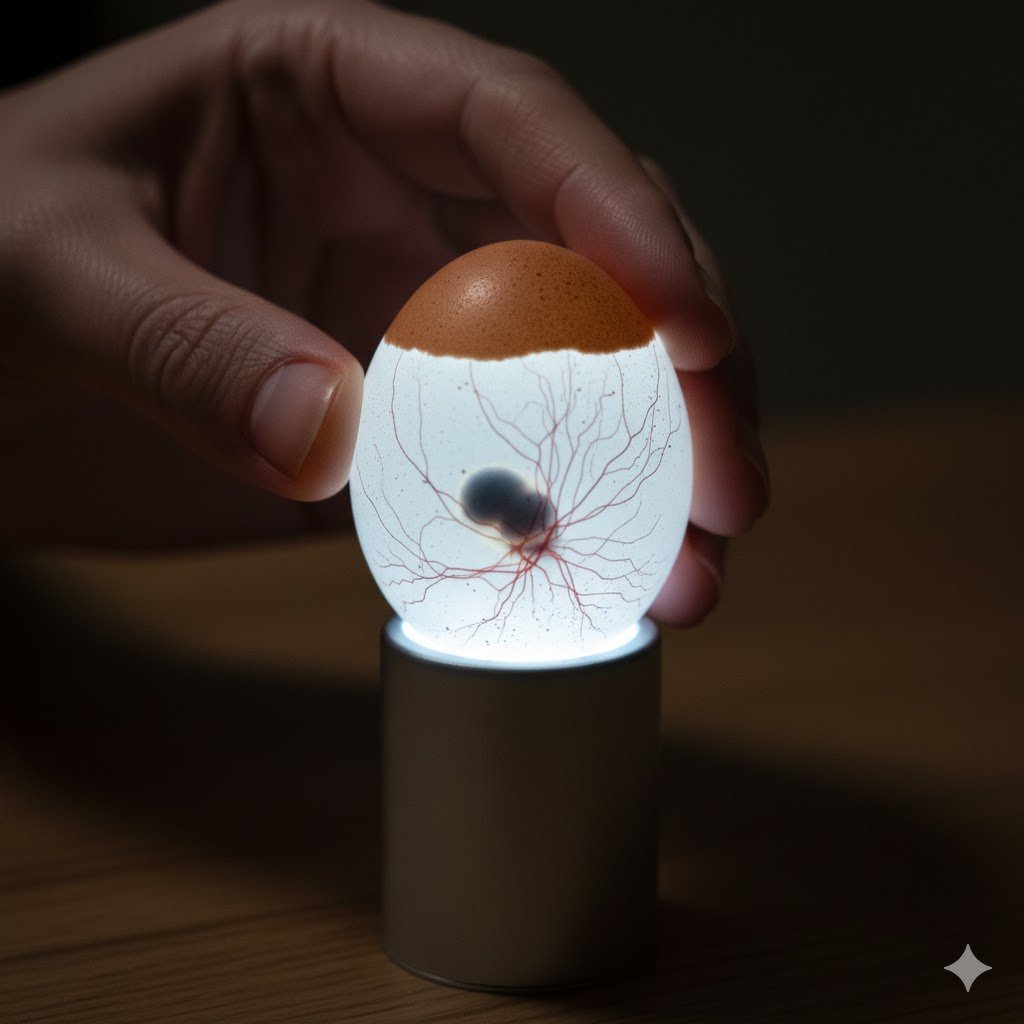
- Candle Day 7: On day 7, take the eggs to a dark room and use an egg candler. You should see a small embryo with spider-web-like veins. Remove any clear, infertile eggs.
Days 8-17: Active Development
- Continue: Keep the temperature and humidity the same.
- Keep Turning: Let the turner do its job or keep turning by hand.
- Optional Candling: You can candle again on day 14 to see the embryo growing.
Day 18: Lockdown Begins
This is the most important day besides hatch day. This is the lockdown period.
- STOP TURNING: Turn off and remove the automatic turner. If turning by hand, just stop.
- Lay Eggs Flat: Gently lay the eggs on the bottom hatching mat.
- Increase Humidity: Add water to all the channels to raise the humidity to 65-70%.
- DO NOT OPEN: From this point on, do not open the incubator for any reason until the hatch is over.
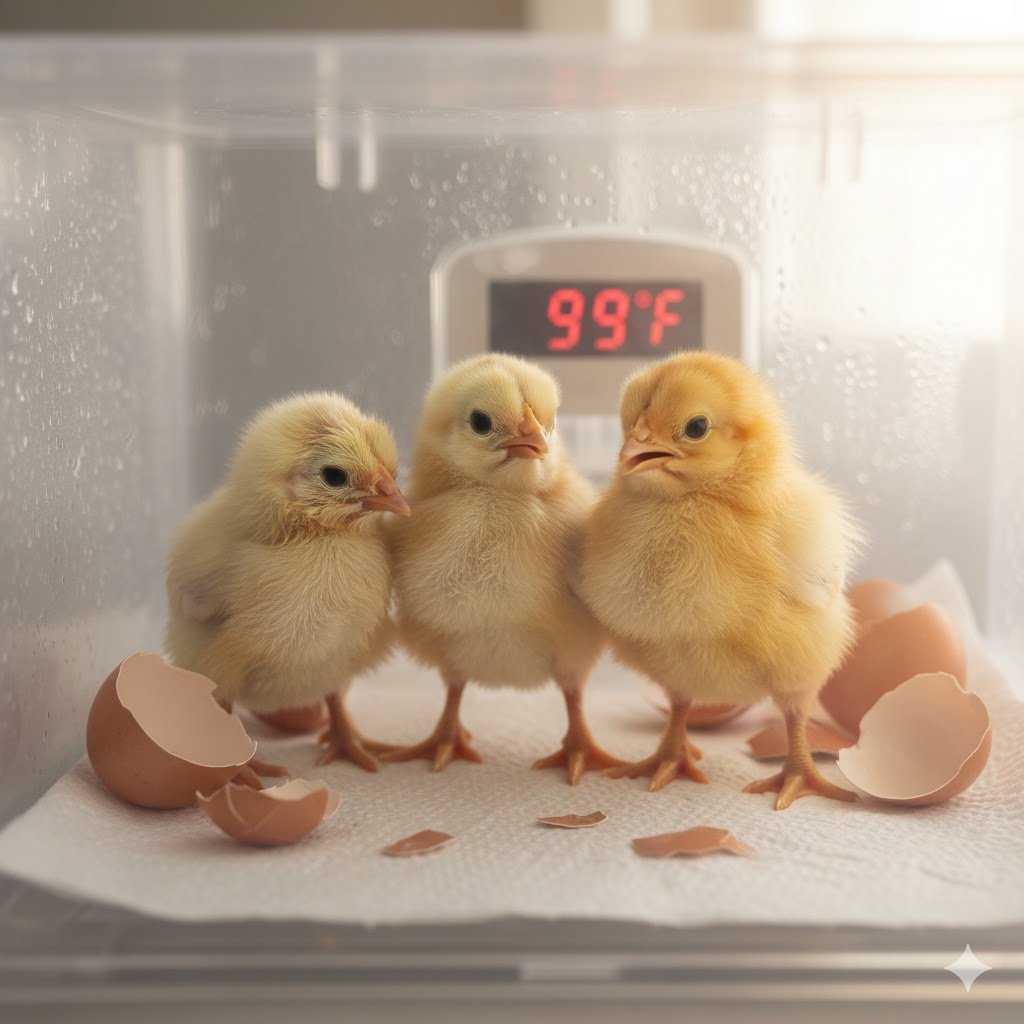
Days 19-21: Hatching

- Pipping: You will start to see a small “pip” (a small hole) in the shell. This is the internal pip and external pip.
- Waiting: This is the hard part. A chick can take 12-24 hours to hatch after the first pip. Be patient!
- Hatching: The chick will “unzip” the shell and push its way out.
- Dry: Leave the chicks in the incubator for at least 12-24 hours after they hatch. They need to dry off and get fluffy.
- Move to Brooder: Once they are dry and active, move the day-old chicks to your pre-heated brooder. Make sure you have all the essential supplies for brooding day-old chicks ready to go.
After Hatching: Incubator Cleanup
- Remove all chicks and unhatched eggs.
- Unplug the incubator.
- Clean all parts with a 10% bleach-to-water solution to disinfect it.
- Let it dry completely before storing it.
Frequently Asked Questions About Best Chicken Egg Incubators
Can you eat the first eggs laid by chickens?
Yes, you can safely eat the first eggs (called pullet eggs) that young hens lay. These smaller eggs are perfectly edible. However, pullet eggs are often not ideal for hatching because they may have thinner shells or irregular shapes. It’s better to wait until your hens have been laying for 2-3 months before using their eggs for incubation. If you end up with too many eggs, you’ll also want to check the regulations for selling backyard eggs in your area.
What is the best incubator in the world?
That’s a tough question! The “best” depends on your needs.
For commercial farms, the GQF 1502 Sportsman is an industry leader.
For home beginners who want the easiest, most foolproof experience, the Brinsea Ovation 28 EX (with automatic humidity) is our top pick.
For a budget-conscious beginner, our “Best Value” pick, the Harris Farms Nurture Right 360, gives professional results for a great price.
What is the number one best egg laying chicken?
While this article focuses on incubators, that’s a great question! The top egg layers are usually:
White Leghorns: (300+ white eggs/year)
Rhode Island Reds: (260+ brown eggs/year)
Golden Comets (Sex Links): (280-300+ brown eggs/year) The best breed for you depends on your climate and if you want friendly pets (like Buff Orpingtons, Australorps, or Easter Eggers) or just maximum egg production.
Where should I buy my egg incubator?
You have a few good options:
Amazon: Has the widest selection, customer reviews, and fast shipping.
Tractor Supply / Local Farm Stores: You can see models in person and get local support.
Direct from Manufacturers (Brinsea, GQF): This is often the best way to get the full warranty and customer support.
Local Hatcheries: Established hatcheries like Meyer Hatchery sometimes sell reliable incubator brands and can help you with setup.
Online Hatcheries: You can also order from many reputable hatcheries and suppliers online.
How accurate do temperature and humidity need to be?
Temperature needs to be extremely accurate. It must stay within ±1°F of 99.5°F. Even 2°F too high or low for a few hours can harm the embryos. Humidity is more of a range. Target 45% (but 40-50% is fine) for days 1-18, and 65% (60-70% is fine) for lockdown.
Do I really need an automatic turner?
We strongly recommend it. Manual turning requires turning eggs 3-5 times a day, every day, without forgetting. Most beginners miss turnings, which leads to lower hatch rates. An automatic turner costs $20-$40 more but dramatically improves your success and reduces your stress.
Can I incubate different breeds together?
Yes, you can incubate different chicken breeds together (like Leghorns, Orpingtons, and Silkies). They all require the same 99.5°F temperature, same humidity, and same 21-day incubation period. However, you should not mix chickens with other species (like ducks, which take 28 days) in the same batch.
What happens if the power goes out during incubation?
Don’t panic! Eggs can survive for 2-3 hours without heat.
Don’t open the incubator. This will keep the heat and humidity in.
If the power will be out for a long time, wrap the entire incubator in thick blankets or towels to insulate it.
If the outage is longer than 4-5 hours, your hatch rate will likely drop, but you may still get some chicks. For serious setups, some keepers even install solar power backup options for your chicken setup to prevent this.
What do I do if my incubator’s temperature is wrong?
This is the most common problem, especially with budget incubators. This is called “calibration.”
Don’t Trust the Display: Never trust the incubator’s built-in thermometer 100% until you test it.
Get a Second Opinion: Buy a reliable, independent digital thermometer/hygrometer. Place it inside the incubator.
Test Run: Run the incubator empty for at least 24 hours.
Find the Difference: See what your independent thermometer says. If it reads 98°F when your incubator is set to 99.5°F, you know your incubator runs 1.5°F cool.
Adjust: Set the incubator’s temperature to 101°F (99.5°F + 1.5°F) to achieve an actual, true 99.5°F. Write this difference down with a marker on the incubator!
For comprehensive troubleshooting of other incubation problems, agricultural extension research provides detailed diagnostic guides for identifying and correcting hatch failures.
Final Recommendations: Which Incubator Should You Choose?
- If you’re brand new to hatching: Get the Harris Farms Nurture Right 360. It’s our “Best Value” pick, it’s easy to use, and the external water port is a feature you’ll love.
- If you’re on a tight budget: The Magicfly 12-Egg model is under $60 and works, if you buy a separate thermometer/hygrometer and are disciplined about manual turning. Keep in mind, the incubator is just the first step. Be sure to factor in the total cost of raising chickens when making your budget. You can also calculate your ongoing feed costs to get a complete picture.
- If you want the easiest experience: Invest in the Brinsea Ovation 28 EX with automatic humidity. It’s the most “foolproof” option and our “Best Overall.”
- If you’re planning to hatch frequently: Choose the Farm Innovators 4250 or the GQF 1588 Genesis. These are workhorses built for continuous use.
- If you want American-made quality: The GQF 1588 Genesis and HovaBator Genesis 1588 are made in the USA and have great reputations.
Choosing your first egg incubator feels overwhelming, but remember that successful hatching depends more on following proper procedures than having the most expensive equipment. Even budget incubators can achieve 80-90% hatch rates when used correctly by attentive beginners.
Start with clean, fresh eggs stored properly. Test your incubator before adding eggs. Maintain correct temperature and humidity throughout the 21-day cycle. Turn eggs consistently until day 18. And most importantly, resist the temptation to help chicks hatch before they’re ready.
Your first successful hatch—watching wet chicks transform into fluffy, chirping babies—will be unforgettable. Whether you choose a simple manual model or a fully automatic incubator, you’re about to experience one of the most rewarding aspects of keeping backyard chickens.
Join online communities like BackYard Chickens to connect with thousands of experienced hatchers who can provide real-time advice and troubleshooting support.
Looking for other sizes? The Onsju 18-egg incubator and Brinsea Ovation 56 EX (56-egg capacity) are also excellent 2025 options worth considering.
Need more help with your backyard flock? Check out our guides on building coops, chicken breeds for beginners, and the common mistakes first-time chicken keepers make.

Oladepo Babatunde is the founder of ChickenStarter.com. He is a backyard chicken keeper and educator who specializes in helping beginners raise healthy flocks, particularly in warm climates. His expertise comes from years of hands-on experience building coops, treating common chicken ailments, and solving flock management issues. His own happy hens are a testament to his methods, laying 25-30 eggs weekly.