How it was created: Hands-on examination techniques documented over 144+ monthly health checks across my mixed flock of Rhode Island Reds, Australorps, and Buff Orpingtons, consultation with three avian vets, and reference to peer-reviewed poultry health literature.
Why it exists: To help backyard flock owners catch health issues early, reduce mortality, and maintain happy, productive birds.
For years, I believed that as long as my chickens were eating, drinking, and laying, they were healthy. That changed in 2015 when I lost three of my favorite hens to a preventable respiratory infection that I simply didn’t notice until it was too late. That heartbreaking experience taught me that proactive, hands-on care is the key to a healthy flock.
This guide shares my proven monthly examination process, a simple routine that takes just 3-5 minutes per bird. It also covers the daily and weekly habits that help you spot problems before they become emergencies. By the time you finish this article, you’ll know how to differentiate between normal variation and critical red flags that require veterinary care.
Disclaimer: This guide provides observational techniques only. Diagnosis and treatment require a licensed veterinarian. Never administer medications without veterinary guidance.
How to Health Check Chickens: Overview, Tools, and Schedule
My monthly health check kit is a small tackle box I keep right by my coop door. Having everything in one place makes the process quick and efficient.

Essential Tools for Your Health Check Kit
- LED Headlamp: A hands-free light source is non-negotiable. It allows you to shine light into the mouth, under wings, and at the vent while keeping both hands free to hold the bird and part feathers.
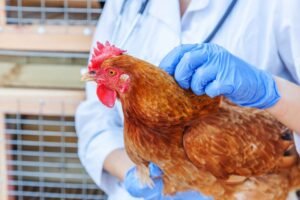
- Disposable Nitrile Gloves: These are crucial for biosecurity and hygiene. They prevent the transfer of germs between birds and protect you from potential pathogens.
- Digital Kitchen Scale: Accuracy is key. A scale that measures to the nearest gram will allow you to track subtle weight changes, which can be the earliest indicator of a health issue.
- Health Log Notebook or App: I’ve found that tracking data is invaluable. I use a poultry health tracking app, but a simple notebook works just as well. Log each bird’s weight, notes, and observations.
- Hand Sanitizer: Use this between checking each bird to prevent cross-contamination.
- Isolation Crate: A dedicated crate is essential for quarantining sick birds immediately to prevent them from infecting the rest of the flock.
- Magnifying Glass: This is a small but mighty tool for spotting tiny parasites like mites and lice, which can be difficult to see with the naked eye.
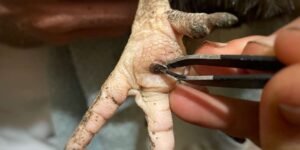
- Petroleum Jelly or Salve: This is a vital tool for treating scaly leg mites. The jelly suffocates the mites, which live under the scales.
- Syringes or Pipettes: These are for the safe, no-mess administration of water or liquid supplements to a bird isn’t drinking on their own.
- Saline Flush: For cleaning minor wounds.
- Bandage Scissors: For cutting bandages or gauze.
- Styptic Powder: To quickly stop bleeding from a broken nail or other minor wound.
- Cotton-tipped Applicators: For applying ointments or cleaning small, hard-to-reach areas.
How often do I need to check on my chickens?
The best way to monitor your flock’s health is with a three-tier system: daily visual checks, a weekly hands-on check for 20-30% of the flock, and a monthly full exam for every bird.
How long can chickens go without being checked on?
While daily visual checks are ideal, chickens with secure housing and automatic feeders/waterers can manage for 24 hours maximum. Beyond this, risks of undetected illness, predator attacks, or equipment failure increase significantly.
Seasonal Adjustments to Your Health Check
A monthly health check is a great baseline, but the changing seasons bring different challenges. It’s crucial to adjust your routine to match the needs of your flock and local environment.
- Warmer Months: Parasite Season: When temperatures rise, parasites like mites and lice flourish. During the summer, increase your weekly hands-on checks and perform more frequent, detailed inspections of the vent, under wings, and legs. Look for tiny “moving pepper” or rice-shaped specks and feather damage.
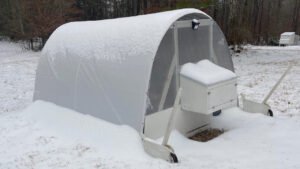
- Colder Months: Respiratory and Frostbite Risk: In cold weather, the biggest threats are respiratory issues from poor ventilation and frostbite on combs and wattles. In winter, focus your checks on the cleanliness of the coop, signs of wheezing or sneezing, and any pale or blackened areas on the combs or wattles.
- Molt Season: Nutritional Support: Molting is a physically demanding process. During the fall, ensure you are checking your chickens for signs of stress, such as lethargy, and providing extra protein to support feather regrowth.
What are the characteristics of a healthy chicken?
A healthy chicken has bright eyes, a red comb, smooth breathing, a clean vent, firm droppings, and is active and foraging. They should also have a body condition score of 3 (ideal) with a well-padded keel bone.
Monthly Step-by-Step: The Full Examination
The goal of this exam is to check every part of your chicken, from head to tail.
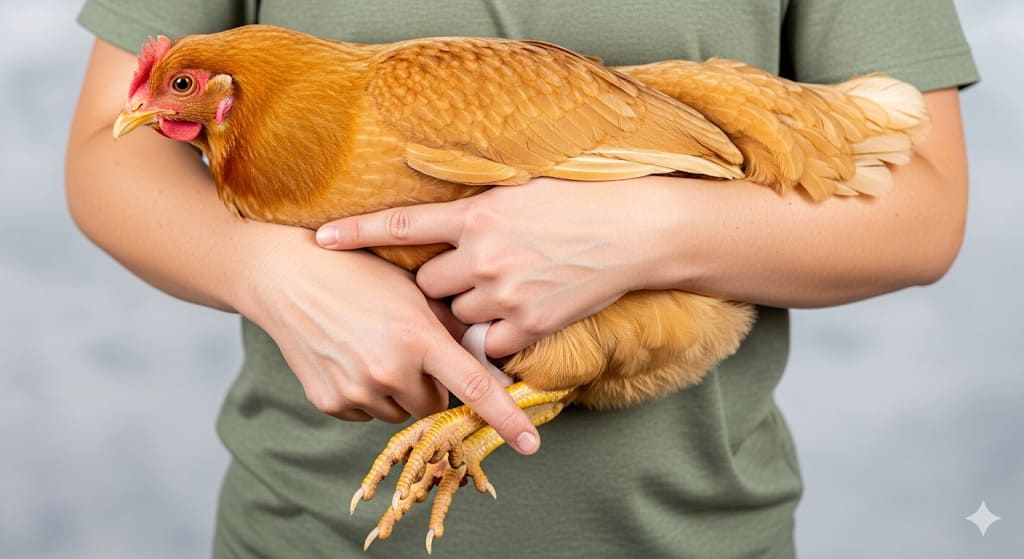
Hold the bird with your index finger between its legs, your thumb gripping one thigh, and the rest of your fingers gripping the other thigh. This provides secure control while minimizing stress.
1. Observe Posture, Gait, and Behavior
Before you even pick up a bird, watch them from a distance. A healthy chicken’s tail should be held at a 45° angle, their posture should be upright, and they should walk without limping or favoring a leg. Look for birds that are:
- Hunched: This can be a sign of pain or general illness.
- “Penguin” stance: Standing straight up with a puffed-out chest can indicate a serious issue like egg binding or peritonitis.
- Listing to one side: This is a serious red flag and can suggest injury or neurological issues like Marek’s disease.
- Lethargic or isolating themselves: A sick bird will often be lethargic or isolate itself from the rest of the flock.
- Drooping Wings: Healthy chickens hold their wings close to their body. Drooping wings can be a sign of illness, injury, or stress.
2. Comb, Wattles, and Eyes
A healthy laying hen’s comb and wattles should be bright red, full, and warm to the touch. The color and texture can tell you a lot about their health.
- Pale Pink: Can indicate anemia, often caused by an internal (worms) or external (mites) parasite infestation.
- Purple or Blue: A serious sign of poor circulation or a respiratory issue. This requires immediate attention.
- Scabs or Lesions: May be a sign of fowl pox, a viral disease.
- Eyes: The eyes should be clear, bright, and alert. Look for any cloudiness, discharge, or bubbles. Check the area around and in front of the eyes for any swelling, which could indicate a sinus infection. Pupils should be round, approximately the same size, and react to light by constricting. A misshapen or gray pupil could indicate Marek’s disease. When you gently part the eyelid, the nictitating membrane (third eyelid) should be cloudy white and retract when stimulated.
- Ears: Clean feathers should cover the ear openings, located behind and slightly below the eyes. Gently part these feathers to check that the ear canal is free of discharge, debris, or foul odor.
3. Check the Crop
The crop is a pouch at the base of the neck where food is stored before digestion. It’s a key indicator of gut health.
- Normal: The crop should be full and soft, but not hard, at night, right before the birds go to roost. In the morning, before they have had access to food or water, the crop should be completely empty. If the crop is empty at night or full in the morning, this indicates a problem.
- Impacted Crop: If the crop feels hard, swollen, and full in the morning, it could be impacted. Gently massaging it with warm water can sometimes help, but if it doesn’t resolve within 24 hours, you need veterinary intervention.
4. Mouth, Nares, and Breathing
Respiratory issues are common and can spread quickly.
- Respiration Rate: Count the number of breaths per minute while the bird is at rest. Normal is 20-30 breaths per minute. A higher rate could mean they’re stressed, too hot, or have a respiratory infection.
- Mouth and Nares: Gently open the beak and look for white patches (a sign of canker), foul odor, or excessive moisture. The nares (nostrils) should be clean and dry with no discharge.
- Beak Alignment: Check the alignment of their upper and lower beak. The top should be directly above the bottom and slightly longer. If the beaks go in different directions (scissor beak or cross beak), the chicken may need softer foods and regular beak trimming.
- Sounds: Healthy breathing is quiet and not audible. Listen for wheezing, gurgling, or sneezing, all of which are signs of a respiratory problem. A bird with a respiratory infection may also breathe with its mouth open.
5. Feathers and Skin
A healthy bird will have smooth, complete feathering.
- Parasites: Part the feathers at the vent, under the wings, and around the neck to look for parasites. Northern fowl mites look like moving black pepper. Lice are larger, yellowish-white, and rice-grain shaped. Pin holes in feathers are a telltale sign of parasite damage.
- Feather Damage: Differentiating between types of feather damage can help you diagnose the problem.
- Rooster Treading: Missing feathers on the back or rump are most often caused by a rooster’s feet during mating.
- Feather Picking: Missing feathers on the head, face, or vent can indicate feather picking by other flock members, a sign of stress or boredom.
- Bare patches on a hen’s back are a normal sign of mating and should not be confused with a sign of illness.
- Scaly Leg Mites: Inspect the legs. They should have smooth, flat scales. Raised, flaky, or crusty scales are a telltale sign of scaly leg mites. I once found mites on my Australorp by seeing tiny red dots crawling on my white nitrile gloves.
- Preening and Condition: Observe if the bird is preening itself. A lack of preening can indicate illness. This keeps their feathers clean and helps them manage external parasites.
6. Keel Bone and Body Condition Score (BCS)
The keel bone is the breastbone. Checking it is the best way to determine your chicken’s body condition. Run your fingers along the keel bone, from front to back.
Note that mature large breed chickens typically have a featherless strip of red skin along their keel. This is a normal part of their anatomy, but you should check for drier or flakier areas that could indicate developing sores.
- Score 1 (Underweight): The keel bone feels sharp and prominent with no muscle covering. This could be due to illness or poor nutrition.
- Score 3 (Ideal): You can feel the keel bone, but it is well-padded with muscle on either side. Most healthy layers fall into this category.
- Score 5 (Obese): You can’t feel the keel bone at all because it’s covered in fat. Obesity can cause a bird to stop laying and lead to health problems like fatty liver disease.
7. Abdomen Palpation
Gently feel the abdomen – it should be soft and round. A hard, solid abdomen could indicate egg yolk peritonitis, while a squishy, fluid-filled abdomen suggests ascites.
8. Feet and Underside
Flip the bird over to check its feet and vent. These checks are recommended weekly to monthly.
- Perching Reflex: To check for a healthy neurological system, place a finger under each of the chicken’s feet. A healthy chicken should immediately grasp your finger with both feet. This simple test checks for neurological problems that might indicate Marek’s disease or other issues.
- Feet: Check the pads of the feet for signs of bumblefoot, which starts as a black scab, often with swelling. Also, check between the toes for mud, string, or other foreign objects that can get wrapped around them. Examine the joints for any swelling, which can indicate Mycoplasma Synoviae infection. Note that older birds, especially large breed roosters, may naturally develop slightly raised scales where the foot meets the leg – this is normal aging, not always mites.
- Vent: The vent area should be clean, pink, and moist, not wet or excessively dry. A messy vent is a sign of diarrhea, which can indicate illness. Prolapsed vent, where the pink/red tissue protrudes, is an emergency requiring immediate care.
9. Egg Production and Vent Check
If you have laying hens, monitor their egg production closely. A sudden drop in laying can be one of the earliest indicators of an underlying health problem.
- Consistency: A healthy hen will lay regularly, often with a predictable cycle. Track which hens are laying and the size, shape, and shell quality of their eggs.
- Abnormal Eggs: Eggs with thin shells, no shells (a “softie”), or a rough texture can indicate a calcium deficiency or an illness like Infectious Bronchitis.
- Vent: Check the vent for any signs of swelling, redness, or discharge. A swollen, reddened vent can be an early sign of egg binding.
Completing this thorough check takes a little time, but it’s the best way to catch problems before they become serious. Remember, early detection is everything. Once you’ve completed your exam, the next step is to make sure your chickens have a healthy, safe environment to thrive in.
How to Keep Chicken Flocks Healthy
Proactive care is the best prevention. The following are crucial for a healthy flock.
1. Biosecurity
Biosecurity is a set of practices designed to prevent the introduction and spread of disease.
- Quarantine: All new birds must be quarantined for a minimum of 30 days in a separate space at least 30 feet away from your flock. For chicks, it’s also important to note that all chickens should receive a Marek’s disease vaccination on day 1.
- Sanitize: Dedicate specific footwear for your coop and use a footbath with a veterinary-approved disinfectant at each entrance.
- Visitors: Be cautious about letting others who own chickens visit your coop, as they can track in pathogens.
How to disinfect a chicken coop
A clean coop is essential for preventing the spread of diseases. You should do a deep clean at least twice a year.
- Remove everything: Take out all feeders, waterers, and nesting boxes.
- Scrape and remove litter: Shovel all old bedding and waste out of the coop. Scrape any caked-on droppings from the floor and perches.
- Clean surfaces: Use a stiff brush and a cleaning solution (like a mix of half water and half vinegar, or a poultry-safe disinfectant) to scrub the floor, walls, and perches. Pay special attention to corners and crevices.
- Spray and let dry: Spray down all surfaces with a disinfectant solution. Allow the coop to air dry completely before putting new bedding in.
- Add new bedding: Put down a fresh, thick layer of pine shavings or other appropriate bedding.
2. Nutrition
A balanced diet is the foundation of health.
- Feed: Feed a high-quality, 16% protein layer feed.
- Calcium: Provide free-choice oyster shell for calcium, which is essential for strong eggshells and bone health.
- Grit: Chickens don’t have teeth and need insoluble grit for proper digestion to help them grind up food in their gizzard. Always provide free-choice grit.
- Treats: Keep treats, like scratch grains and mealworms, to less than 10% of their total diet to prevent obesity and nutritional deficiencies.
How many times should chickens be fed per day?
Chickens should have access to their main feed, a high-quality commercial layer feed, at all times. They will naturally eat when they are hungry, a practice known as ad libitum feeding. You should check the feeders once or twice a day to ensure they are full.
What food makes chicken grow faster?
For chicks and young chickens (pullets and broilers), a medicated chick starter feed is formulated with a higher protein content (20-24%) to support rapid growth and development. This is the best way to ensure your young chickens grow quickly and healthily. As they mature, they should be transitioned to a lower-protein layer feed to prevent health issues from excess weight gain.
What are signs of an overfed chicken?
Obese chickens show reduced activity, labored breathing in heat, fatty deposits around the vent, decreased egg production, and an inability to feel the keel bone through fat padding.
3. Water
Clean, fresh water is more important than food.
- Quantity: Provide at least one gallon of water per 5 birds. I use multiple waterers to ensure there is always enough.
- Cleanliness: Scrub waterers weekly to prevent the buildup of bacteria, algae, and biofilm.
- Placement: Position waterers 6 inches off the ground to keep them clean.
Do chickens need water at night?
Chickens rarely drink after roosting in darkness but must have water available at first light. In hot weather, they may drink at night if disturbed.
How to feed chickens when on holiday
When you’re away, it’s essential to have a plan to ensure your flock is fed and watered.
- Automatic Feeders: Invest in a large-capacity automatic feeder to dispense dry feed.
- Automatic Waterers: Use a nipple-style waterer connected to a large water barrel or a waterer with a reservoir.
- A “Chicken Sitter”: The best option is a trusted friend, family member, or neighbor who can check on the birds at least once daily. They can ensure the automatic systems are working, top off feed and water, and collect eggs. They can also perform a quick daily health check to make sure no birds are ill.
4. Ventilation and Litter Management
Proper ventilation prevents ammonia buildup, which can cause respiratory issues.
- Ventilation: Ensure your coop has at least 1 square foot of ventilation per 10 square feet of floor space. However, if you can smell ammonia, your ventilation is inadequate regardless of the square footage.
- Deep Litter Method: This method uses a thick base of pine shavings that is actively managed. You must turn the litter with a rake or fork at least weekly to aerate it and encourage decomposition. The natural composting process provides warmth and helps break down waste. The litter is only completely changed twice a year, during a full coop cleaning.
5. Environmental Enrichment and Stress Reduction
Stress is a major contributor to illness. Providing a stimulating environment helps keep your flock happy and healthy.
- Dust Baths: A dust bath is not optional; it’s essential. Provide a dry area with sand or dry soil for chickens to bathe in. This keeps their feathers clean and helps them manage external parasites.
- Foraging: Let your chickens free-range or provide them with foraging toys and fresh greens to keep them active and engaged.
- Adequate Space: Overcrowding is a huge stressor. A good rule of thumb is at least 4 square feet per bird inside the coop and 10 square feet per bird in the run.
Chicken Behavior and Instincts
Do chickens know their home?
Yes, chickens imprint on their coop location. New birds need 3-7 days confined to learn their home. Most chickens naturally return to roost at dusk once established.
Common Chicken Health Questions
What Are Two Signs of Unhealthy Chickens?
The two most reliable early warning signs are lethargy and abnormal droppings.
- Lethargy: A sick bird will often be inactive, hunched over, and may keep its eyes closed. It may also refuse food or treats.
- Abnormal Droppings: Healthy droppings are firm, dark brown in color with loose, white portions (the uric acid cap). Watery, bloody, or yellow droppings are all serious red flags that warrant immediate investigation.
- Droppings Boards: To make droppings evaluation easier, consider installing a droppings board directly under the roosts. Because chickens have bowel movements as often as every 20-40 minutes, a droppings board provides a near real-time snapshot of their digestive health each morning.
How to check if your chicken has worms
Checking your chickens for worms involves two main methods: a visual inspection and a veterinary-supervised fecal test. While a visual check can alert you to a potential issue, a fecal test is the only way to confirm a diagnosis and determine the type of parasite present.
Visual Inspection:
- Droppings: Look for small, rice-like segments in your chickens’ droppings, which are a sign of tapeworms.
- Worms: You might see actual worms, particularly long, thin roundworms, in the droppings.
- Irritation: A worm infestation can cause irritation around the vent, leading to “pasty butt” (feces caked to the feathers) even in mature birds, or a pale comb and wattles due to anemia from blood loss.
Fecal Testing:
- Collection: Collect a fresh sample of droppings (within a few hours) and place it in a sealed container or bag.
- Submission: Submit the sample to a local veterinarian or a poultry diagnostics lab.
- Results: The lab will analyze the sample for the presence and quantity of parasite eggs, providing a definitive diagnosis that allows for targeted treatment.
At what age do you deworm chickens?
There’s no fixed age for deworming. Only deworm based on positive fecal test results or veterinary recommendation, not on a schedule. Veterinary guidelines recommend annual fecal testing minimum, though twice yearly provides better parasite monitoring. Over-deworming promotes drug resistance.
Why is my chicken shaking and sneezing his head?
This is a clear sign of a potential respiratory infection. Chickens that are sneezing, coughing, or have a runny nose are likely suffering from a disease like Infectious Bronchitis, Mycoplasma, or another common respiratory illness. It’s crucial to isolate the bird immediately from the rest of the flock to prevent the disease from spreading. A vet visit is required for a proper diagnosis and treatment plan, which may include antibiotics.
How to Handle a Common Injury or Illness
While these require a vet’s diagnosis, there are things you can do to help a bird in distress.
- Egg Binding: This is a life-threatening condition where a hen cannot pass an egg. You may see her straining, sitting in a penguin-like posture, and she may feel swollen near the vent. Immediate action: Soak the hen in a warm bath for 15-20 minutes to help her muscles relax. Gently massage the abdomen and apply a lubricant (like petroleum jelly) around the vent. If the egg does not pass within a few hours, you must seek veterinary care.
- Bumblefoot: This is a staph infection in the foot. It starts as a small black scab on the foot pad. Immediate action: Soak the foot in warm water with Epsom salts to soften the scab. Apply an antiseptic or antibiotic ointment and bandage the foot to keep the area clean. This is often a recurring problem, and a vet should be consulted for proper debridement.
- Minor Cuts: For small cuts or scrapes, clean the wound with a mild antiseptic solution and apply a poultry-safe antibiotic ointment. Monitor the wound for signs of infection.
Heat and Cold Stress
Chickens are susceptible to temperature extremes. Knowing the signs is crucial.
- Heat Stress: Signs include panting, holding wings away from the body, lethargy, and a pale comb or wattles. Action: Provide shade, fresh, cool water, and a dust bath. You can also freeze water in a plastic bottle and place it in the coop for them to lean against.
- Cold Stress: Signs include standing on one foot, huddling together, and frostbite. Action: Frostbite is a serious condition that requires immediate veterinary care. While you can warm the bird and apply petroleum jelly to affected areas, a vet needs to diagnose the severity and may prescribe pain medications, antibiotics, or even surgical intervention. Don’t use a heat lamp unless temperatures are extreme, as it can cause fires and prevent the birds from acclimating to the cold.
How to Introduce New Chickens to the Flock
This is a delicate process that can cause stress and injury if not done correctly.
- Phase 1: Separate but Visible (30 days minimum): Keep the new birds in a separate cage or enclosure where they can see and hear the main flock, but not touch them. This is the quarantine period to ensure they aren’t carrying diseases.
- Phase 2: Supervised Free-Ranging: Once the quarantine is over, allow both groups to free-range together for short, supervised periods in a large, open space. This allows them to get to know each other on neutral ground.
- Phase 3: The Big Move: On a calm night, after the birds have gone to roost, gently place the new birds on a perch inside the main coop. When they wake up in the morning, they’ll all be together and the pecking order will be established naturally, with less fighting.
Chicken Life Cycle and Laying
At what age do chickens stop laying?
A hen’s egg-laying production peaks in her first two years and gradually declines each year after that. Hens typically stop laying consistently around 5-7 years of age. However, some breeds, like the Rhode Island Red and Leghorn, are known to be productive layers for a longer period.
Monthly Chicken Health Check Checklist
Use this checklist as a quick reference during your monthly exam.
- Posture/gait normal
- Eyes clear and bright
- Comb/wattles appropriate color
- Crop status (full/empty)
- Breathing normal (20-30/min)
- Feathers complete, no parasites
- Body condition score (1-5): ___
- Feet healthy, no swelling
- Perching reflex is strong
- Vent clean
- Weight: ___ kg/lbs
- Droppings normal
- Notes: ________________
Conclusion: Your Role as a Proactive Keeper
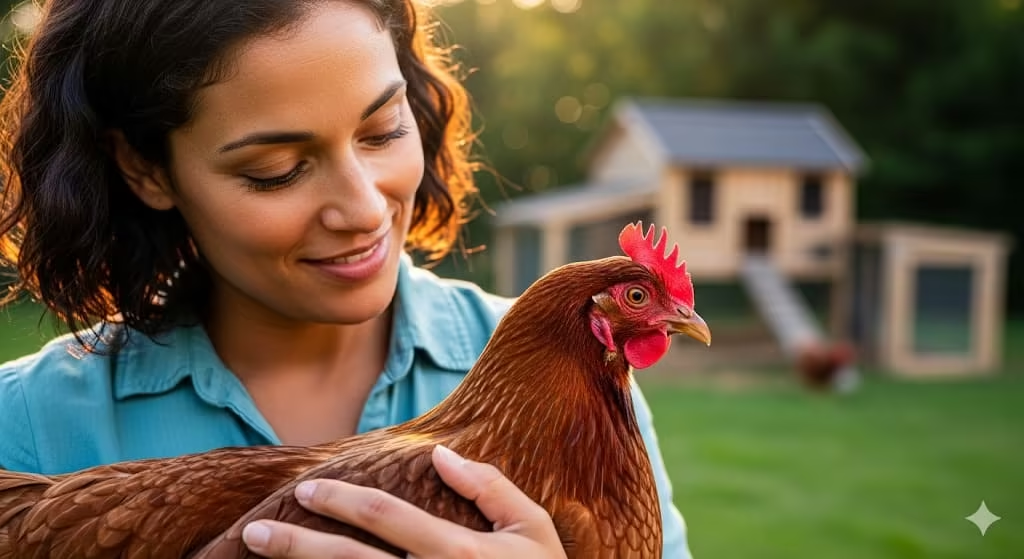
Your flock’s health is a direct reflection of your care. By adopting a consistent, hands-on health check routine, you’re not just reacting to illness; you’re actively preventing it. This simple practice builds a deep familiarity with each of your birds, allowing you to notice subtle changes that an outsider would miss.
Remember, a flock’s health isn’t just about avoiding sickness. It’s about providing a stress-free environment, a balanced diet, and fresh water. By paying attention to these daily and weekly habits, you’ll ensure your chickens are not just surviving but thriving. Don’t wait for a problem to arise. Start your monthly check routine today, and rest easy knowing you’re doing everything you can to keep your birds happy and healthy for years to come.
Sources, Safety, and When to Call a Vet
Immediate veterinary care is needed for:
- Difficulty breathing/gasping
- Bloody diarrhea in multiple birds
- Sudden deaths
- Paralysis or severe lameness
- Prolapsed vent
- Suspected poisoning
- Eye injuries
Review process: This guide synthesizes peer-reviewed research from Poultry Science, Avian Diseases, and clinical guidelines from the American Association of Avian Pathologists, combined with practical experience managing backyard flocks since 2013.
Remember: This guide is for observation and documentation. Only licensed veterinarians can diagnose and prescribe treatments. When in doubt, call your avian vet.

Oladepo Babatunde is the founder of ChickenStarter.com. He is a backyard chicken keeper and educator who specializes in helping beginners raise healthy flocks, particularly in warm climates. His expertise comes from years of hands-on experience building coops, treating common chicken ailments, and solving flock management issues. His own happy hens are a testament to his methods, laying 25-30 eggs weekly.