In commercial poultry farming, one mistake separates profit from disaster more than any other: underestimating the critical need for space. Cutting corners on the size and design of your poultry house is a common mistake that can lead to disastrous financial and health consequences. I once consulted on a farm that tried to fit 1,000 birds into a house meant for 750. In a little over a month, their daily egg collection plummeted by almost 30%, and they were losing birds to respiratory illness every week. The money they thought they were saving on construction was lost tenfold in lost productivity and vet bills.
Overcrowding in a hot, humid climate like Nigeria’s is particularly dangerous. The confined space traps heat and moisture, creating a perfect breeding ground for bacteria and viruses. By prioritizing proper space from the very beginning, you are not just building a structure; you are building a resilient, profitable, and humane environment for your birds.
A well-planned space is the foundation of a successful poultry business. Now that you understand why this is non-negotiable, let’s get into the specifics of how much space you really need.
The Numbers That Matter: Calculating Space for Your Flock
Now for the most critical part of your plan: the numbers. Getting these right from the start is non-negotiable. Below is a clear guide for different flock sizes and types, based on the deep litter system common in Nigeria.
| Bird Type | Flock Size | Minimum Space (sq. ft.) | Minimum Space (sq. meters) | Recommended House Size (Example) |
|---|---|---|---|---|
| Layers | 1000 Birds | 2,000 – 2,500 sq. ft. | 185 – 232 sq. m. | 25 ft x 100 ft |
| Layers | 500 Birds | 1,000 – 1,250 sq. ft. | 93 – 116 sq. m. | 25 ft x 50 ft |
| Layers | 200 Birds | 400 – 500 sq. ft. | 37 – 46.5 sq. m. | 20 ft x 25 ft |
| Broilers | 1000 Birds | 800 – 1,000 sq. ft. | 74 – 93 sq. m. | 20 ft x 50 ft |
A Note on a Modern Poultry House Design for 1000 Layers: As you can see, the standard size of a poultry house for 1000 birds varies significantly. A broiler operation requires less than half the space of a layer farm. The most common mistake I see is farmers using a broiler house plan for a layer business to save money, which always leads to overcrowding and lost revenue. For more on this, check out our article on how big should a chicken coop be.
Knowing these numbers is the first step. The next is to translate them into a concrete, well-thought-out plan. Let’s start building your blueprint.
The Blueprint: Designing a Successful Poultry House from the Ground Up
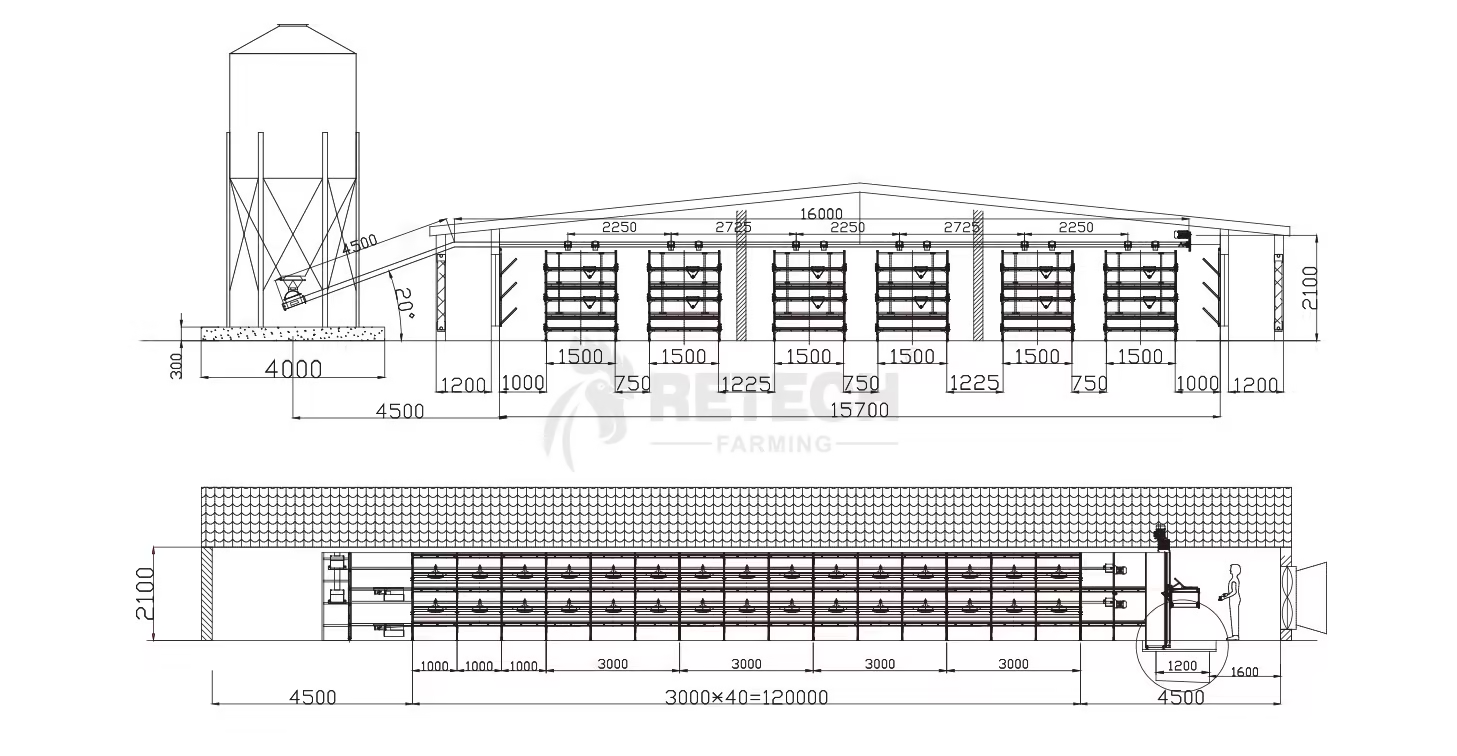
This is where your vision takes shape. A well-designed poultry house considers everything from the climate to the behavior of your birds. The best structure for a poultry house in a tropical climate is one that prioritizes ventilation. This is why a modern poultry house design for 1000 layers in Nigeria often features open sides with wire mesh.
Your Housing Options: Choosing the Right System for Your Farm
There are three common systems you can choose from. These are the 3 types of housing in poultry PDF documents often describe.
- Deep Litter System: The most popular system in Nigeria due to its low initial cost and simple management. The a deep litter floor is a great option for a layer house in poultry. It works by using bedding material (like wood shavings or rice husks) to absorb moisture and create a compost-like surface.
- Pros: Low startup cost, manure can be sold as fertilizer for additional income, and the litter provides a soft surface for birds to move on.
- Cons: Higher risk of disease if not managed properly, requires more manual labor for cleaning, and requires a concrete floor to prevent disease-carrying organisms from living in the soil below.
- Semi-Intensive System: This system combines the benefits of confinement and free-range. Birds are kept in a house with a deep litter system but also have access to a fenced outdoor run. For more on this, read our guide on chicken run vs. free range.
- Pros: Provides birds with access to fresh air and natural forage, which can reduce feed costs.
- Cons: Higher risk of predators, requires secure fencing for the outdoor run, and you need more land than with an intensive system.
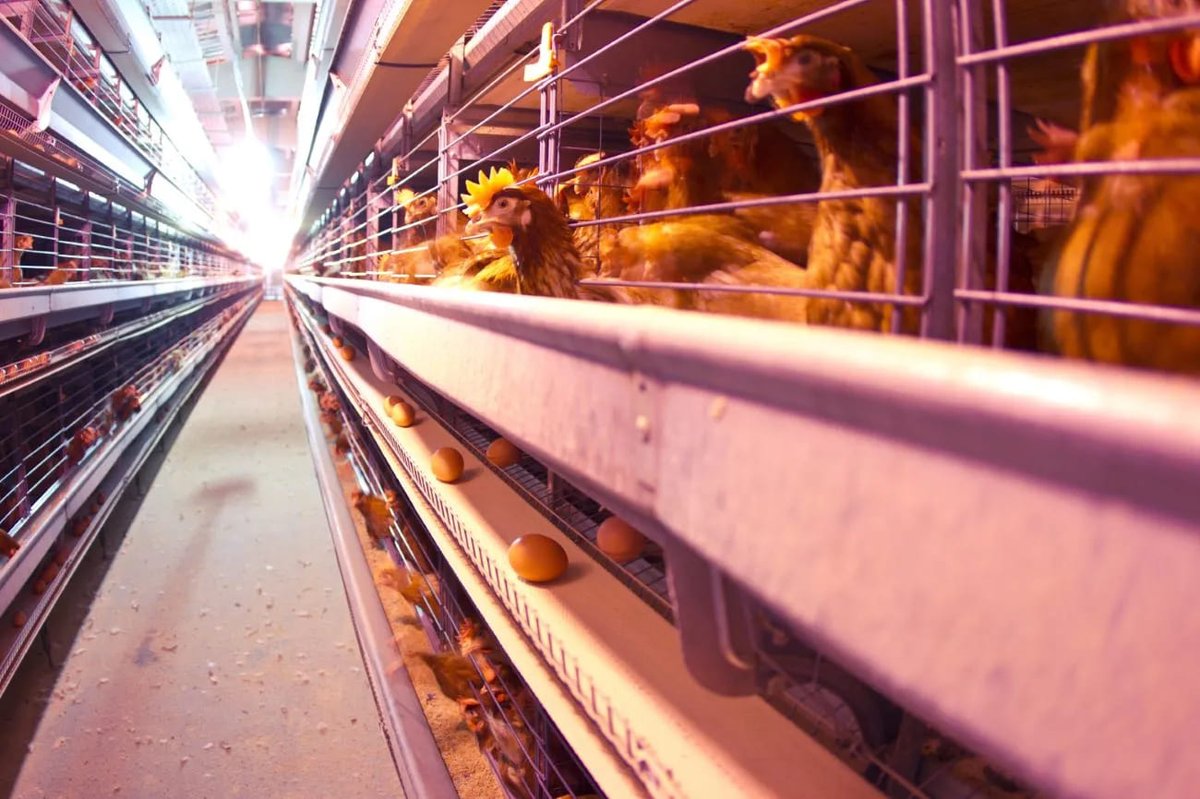
- Cage System: Birds are housed in wire cages, often stacked in tiers. This system is designed for high efficiency, which is why people often ask, “How many chickens are in a layer cage?” A typical cage is designed for 3-5 hens.
- Pros: Highly efficient for commercial egg production, excellent biosecurity, and easy manure collection. It’s the best option for managing disease outbreaks.
- Cons: High initial setup cost, birds have limited movement, which can be seen as less humane, and requires a reliable electricity source for automatic feeders and waterers.
The 5 Pillars of a Fail-Proof Poultry House Design
Your design must incorporate several critical elements for long-term success.
- Ventilation: This is the most important factor in poultry house design. Proper ventilation removes heat, moisture, ammonia, and dust. For optimal natural ventilation in Nigeria, design a wide-open house with no walls, using only wire mesh and adjustable curtains. Position the house so the prevailing wind blows through it. The adjustable curtains are essential for controlling airflow and temperature, especially during the harmattan season. You can learn more about 17 coop ventilation mistakes.
- Flooring: A concrete floor is the single best investment. It’s a bigger upfront cost, but the time you save on cleaning and the money you save on disease prevention are worth it. When building, ensure the floor has a slight slope (about 1-2 degrees) toward a drain to allow for easy cleaning and runoff. Find out more about the best flooring for a chicken coop.
- Orientation: Always position the poultry house from East to West to minimize direct sunlight. The sun rises in the east and sets in the west, and orienting your house this way exposes the smallest surface area to the direct rays. This helps to keep the interior cooler, reducing bird stress.
- Lighting Schedule and Intensity: Proper lighting is essential for stimulating growth in broilers and egg production in layers. I’ve found that consistency is key.
- Broilers: Provide 24 hours of light during the first week to encourage feeding. After that, a schedule of 20 hours light and 4 hours dark is a common practice to promote growth while allowing for rest.
- Layers: A consistent 14-16 hours of light is ideal for maximizing egg production. Any less, and egg-laying can slow down or stop completely. If you are having problems, you can read our guide on chickens eating their own eggs.
- Choosing the Right Roof Material: A zinc/corrugated iron roof is the most practical option in Nigeria. You can counteract its tendency to get hot by adding a layer of straw or reflective paint on top. A raised roof with a gap for ventilation is also an excellent option to reduce heat transfer and improve airflow.
A well-designed physical structure is just the first step. The real work is in the day-to-day management that keeps your flock healthy and productive.
Day-to-Day Farm Management: Beyond the Blueprint
With the physical structure planned, it’s time to think about the daily operations that will protect your investment and ensure your flock’s well-being.
Water Management
In a hot, humid climate, access to clean, cool water is critical. Birds can suffer from heat stress and stop eating if their water supply is warm or dirty. A simple way to keep water cool is to place waterers in the shade and away from direct sunlight.
- Water Quality: Ensure your water source is clean and free of contaminants. If you’re using a well, consider a water filtration system. Add multivitamins and electrolytes to the water during periods of high heat or stress.
- Waterers: Use nipple drinkers or bell-shaped waterers. Nipple drinkers are highly recommended as they prevent birds from spilling water, which keeps the litter dry and reduces the growth of harmful bacteria.
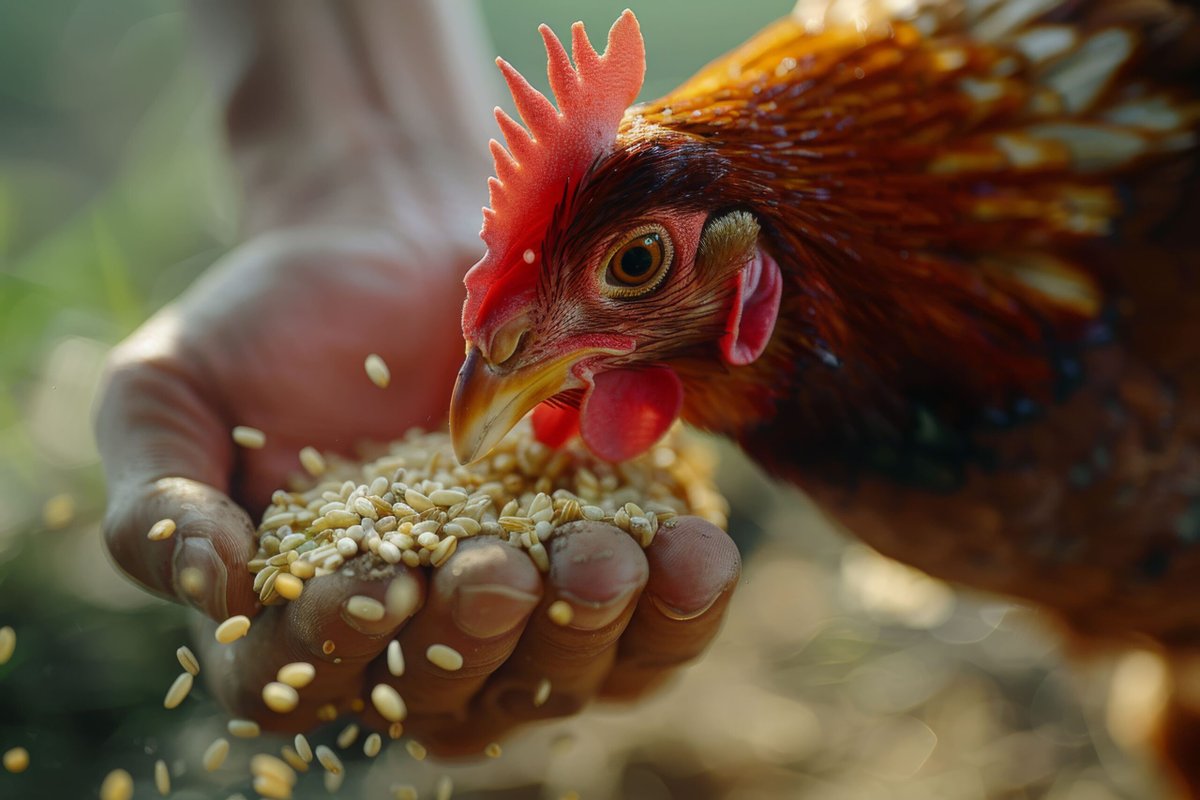
Feed Management and Storage
Feed is your largest expense, so managing it efficiently is key.
- Buying: Always buy from a reputable supplier and, if possible, buy in bulk to get a discount. Learn about what to feed chickens from your kitchen as well.
- Storage: Store feed in a cool, dry place in airtight containers to prevent spoilage and rodent infestations. Never store feed on the ground.
- Feeding Schedule: For broilers, provide feed continuously, especially during the first two weeks, to maximize growth. For layers, a consistent feeding schedule (e.g., morning and afternoon) helps to regulate egg production.
Daily Observation and Record Keeping
This is the most crucial part of your daily routine. Spend time observing your birds’ behavior.
- Look for: Changes in bird behavior (lethargy, huddling), signs of illness (watery or bloody droppings, coughing, sneezing, swollen joints), or a drop in feed and water consumption. Early detection of disease can save your entire flock. You can learn how to spot and treat bumblefoot and how to treat chicken respiratory infection from our other guides.
- Keep records of: Daily mortality, feed and water consumption, and egg production. This data will help you spot trends and identify problems early.
Mastering these daily routines is the key to running a profitable farm. Next, let’s look at how to protect your investment from external threats.
Securing Your Future: Budgeting and Protecting Your Investment
Once the physical structure is in place, you need to turn your attention to the financial and security aspects of your farm.
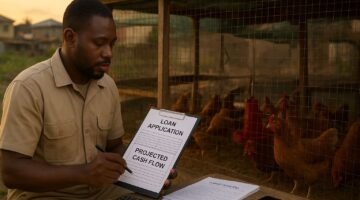
The Money Talk: A Realistic Budget Breakdown
A comprehensive budget is crucial for the success of your poultry business. I’ve seen too many projects fail because of poor financial planning. Our guide on the cost to raise chickens for the first year can help.
- Capital Costs (One-Time Expenses): This includes the cost of land, building materials (wood, cement, roofing sheets, and wire mesh), labor for construction, and the initial purchase of all your equipment.
- Operational Costs (Recurring Expenses): Feed will be your largest expense, often making up 60-70% of your total operational costs. Other costs include day-old chicks, vaccines and medications, electricity/fuel, and labor wages.
Guarding Your Flock: Securing Against Predators and Pests
Your poultry house is an investment, and protecting it and its inhabitants is a top priority. Use a double layer of defense: a sturdy outer fence and reinforced wire mesh on all house openings will keep out foxes, dogs, and other larger predators. Install wire mesh on all openings to prevent rodents and snakes from entering. Our guide on predator-proofing 101 has some simple fixes to keep your flock safe.
Biosecurity: The Ultimate Defense
Biosecurity is a set of practices that protect your farm from disease. It is non-negotiable for a healthy flock.
- Foot Baths: Place foot baths containing a disinfectant at the entrance of your poultry house. All visitors and staff must use them.
- Limited Access: Restrict visitors to the farm. Only allow essential personnel to enter the poultry house.
- All-In, All-Out: The best way to prevent disease is to raise a single flock at a time, sell all the birds, and then clean and disinfect the house before bringing in a new batch of chicks.
With your finances and security in order, the next logical step is to prepare the first home for your new flock: the brooder.
Don’t Lose Your Chicks: Mastering the Critical First 4 Weeks in the Brooder
The brooder is where your chicks will spend the first few weeks of their lives, and its setup is vital for their survival and health. I always tell people that the first two weeks are the most critical. This is where you set your flock up for success.
- Create a Brooder Ring: Use a circular enclosure made of cardboard or wire mesh to keep the chicks close to the heat source for the first week. This circular shape prevents them from huddling in corners and suffocating.
- Heat Source: A heat lamp or gas brooder is essential for maintaining the ideal temperature.
Temperature Guide:
- Week 1: 90-95°F (32-35°C)
- Week 2: 85-90°F (29-32°C)
- Week 3: 80-85°F (26-29°C)
- Week 4: 75-80°F (24-26°C)
Reduce the temperature by 5°F each week. Watch the chicks’ behavior to know if they are comfortable. Huddling together means they are cold; spreading out far from the heat source means they are too hot. For more help, check out our guide on how to treat pasty butt in chicks.
Bedding and Feeding
Use clean, dry bedding like wood shavings and ensure feed and water are always available within the brooder ring. Use chick trays for feed for the first few days to make it easy for the chicks to eat.
A successful brooder setup gets your chicks off to a strong start. To keep the momentum going, let’s explore some valuable resources and address common questions.
Free Resource: Your Printable Poultry House Planning Checklist
Reading a guide is one thing, but having a checklist in hand when you’re making decisions is another. To help you turn this plan into a reality, I’ve created a detailed, printable PDF checklist.
It walks you through every phase of the project—from budgeting and site selection to equipment purchasing and biosecurity measures. This is the same checklist I use with my own clients to ensure no detail is overlooked.
Click Here to Download Your Free Poultry House Planning Checklist PDF
With your resources in hand, let’s address some common questions that often come up on a poultry farm.
Your Questions Answered: The Poultry Farm FAQ
Q: How do I control flies in my poultry house?
A: Good hygiene is the best way to control flies. Regularly remove manure and use fly traps or bait. Flies love moisture, so a dry litter is your first line of defense. The best structure for a poultry house to prevent flies is one with good ventilation and a concrete floor. For more tips, read our guide on how to repel flies.
Q: What is the best structure for a poultry house?
A: A solid poultry house design for 1000 layers in Nigeria often involves an open-sided structure with a high roof to maximize airflow. A deep litter floor is a great option for a layer house in poultry. The specific poultry house design for 1000 layers you choose will depend on your budget and resources, but a wide, open design is always my recommendation for a tropical climate.
Q: What size chicken coop for 1000 chickens?
A: The size depends on the type of chicken. For broilers, the standard size of poultry house for 1000 birds is around 800 sq ft. For layers, you would need a larger poultry house design for 1000 layers of at least 2,500 sq ft.
Q: What’s the best type of roofing for a poultry house in a hot climate?
A: Metal roofing is durable, but it can get very hot. Consider a raised roof with a gap for ventilation or using insulating materials to reduce heat transfer.
Q: Can I use a bamboo floor instead of concrete?
A: While possible, bamboo floors are harder to clean and can harbor disease-causing microorganisms. Concrete is the safer, more durable option for a permanent structure.
Q: How can I manage my feed costs, which are so high?
A: Feed is your biggest expense. My advice is to always buy from a reputable supplier and, if possible, buy in bulk. Store your feed in a dry, cool place to prevent spoilage and rodent infestations. For more on this, check out our chicken feed calculator and cost guide.
Q: What are the common signs of disease I should watch for?
A: Early detection is everything. Look for changes in bird behavior: they’ll become lethargic and lose their appetite. You might also notice watery or bloody droppings, coughing, or sneezing.
Q: My hens are not laying as many eggs as they used to. What could be the problem?
A: A drop in egg production is a common headache. The first thing I look at is stress. Next, check their nutrition, age, and lighting—are they getting a full 14-16 hours of light?
Q: How often should I change the deep litter in the poultry house?
A: You don’t need to change it completely every week. Regularly stir the litter to keep it dry and aerated. You should only need to replace the entire litter once a year or every two years.
Q: How soon can I expect to start making a profit from my poultry farm?
A: For broilers, which are a short-cycle venture, you can start selling birds in about 6-8 weeks. For layers, it could be 4-6 months after they start laying before you’ve recouped your initial investment.
Conclusion
Building a poultry house is a significant investment, but with the right plan and a focus on long-term health and efficiency, it can be a highly rewarding one. By taking a thoughtful approach to design, understanding your space requirements, and planning for every stage, you are laying the foundation for a prosperous poultry business. The time you invest in planning today will pay dividends for years to come.

Oladepo Babatunde is the founder of ChickenStarter.com. He is a backyard chicken keeper and educator who specializes in helping beginners raise healthy flocks, particularly in warm climates. His expertise comes from years of hands-on experience building coops, treating common chicken ailments, and solving flock management issues. His own happy hens are a testament to his methods, laying 25-30 eggs weekly.