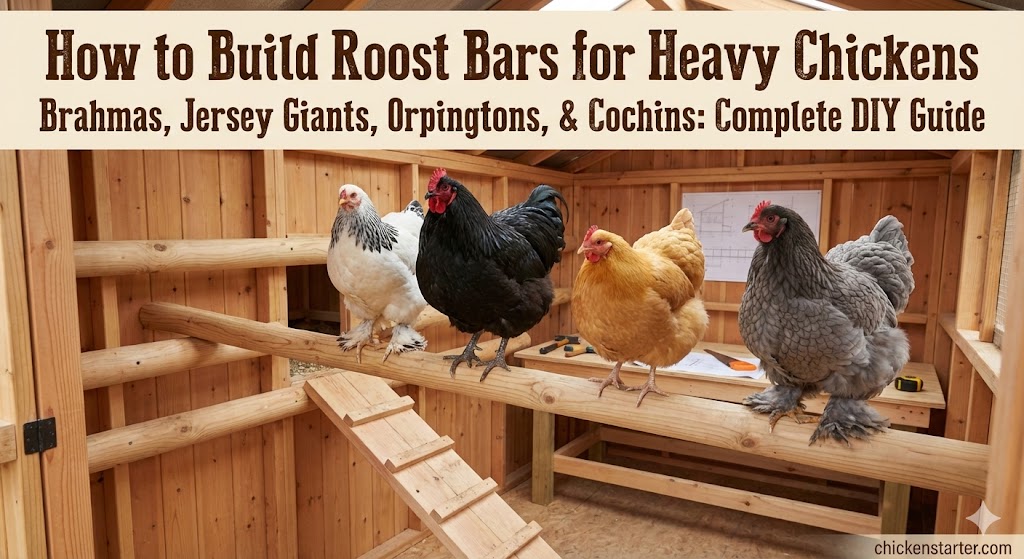
When I first started keeping Brahmas, I made the mistake of using the same roost setup that worked fine for my lighter breeds. Within three months, two of my hens developed bumblefoot. The culprit was a standard roost positioned at four feet high, a height that forced my 10-pound birds to crash-land every morning. That experience taught me that heavy breeds like Brahmas, Jersey Giants, Orpingtons, and Cochins need specialized roosts designed for their size and limited flying ability.
According to Dine-A-Chook, if chickens have to jump too far from their perch to the ground, the heavy landings can cause bumblefoot and bone damage, including keel bone fractures. This guide provides exact specifications and step-by-step instructions for building roost bars that protect your heavy breeds from foot injuries, joint stress, and pododermatitis (the medical term for bumblefoot).
Why Heavy Breeds Require Specialized Roosts
Standard roost designs that work perfectly for Leghorns or Rhode Island Reds can cause serious problems for heavy breeds. Understanding why helps you build roosts that keep your big birds healthy.
The Risk of Bumblefoot and Keel Bone Injuries
Heavy breeds weighing 8 to 12 pounds or more experience significantly greater impact force when landing compared to lighter birds. According to Dine-A-Chook, roosting chickens actually rest more on their keel bone than on their feet. The keel bone is not well protected and regular pressure leads to minute fractures and deformities that cause discomfort, health issues, and reduced egg production.
According to Chicken Coop Company, bumblefoot, which is a staph infection of the foot and leg, is often caused by hard landings off of roosting bars. The repeated stress of heavy birds jumping down morning after morning creates the perfect conditions for this painful condition to develop.
Honestly, I was skeptical that roost height would make such a difference until I saw the improvement in my birds’ feet within weeks of lowering their roosts. The change was dramatic.
If you notice any early signs of foot problems in your flock, our guide on how to spot and treat bumblefoot in chickens covers identification and treatment options.
Why Standard 2×2 Perches Fail Large Birds
Many pre-made coops come with thin dowels or 2×2 lumber as roosts. These work adequately for bantams and light breeds, but they create problems for heavy chickens.
According to BackYard Chickens, an ideal piece of wood is a 2×4 inch wide side up piece. Birds as large as the Jersey Giant can sit upright without wobbling. A chicken’s feet and legs are the only parts of its body left exposed while it sleeps. The birds can sit on a 2×4 quite happily and cover their toes in their feathers when they sit down.
The key insight here is that chickens do not grip roosts like songbirds do. According to Chicken Coop Company, chickens do not wrap their feet around a perch like wild birds do. They actually prefer to sleep flat-footed. This has the added benefit of keeping their feet protected from frostbite in the winter.
According to Dine-A-Chook, chickens prefer wider perches of over 4.5 cm (about 2 inches) in diameter, and balance movements decrease with perch diameter, suggesting hens get better rest when roosting on wider perches.
Understanding Roosting Behavior in Heavy Breeds
According to Chicken Coop Company, chickens take their pecking order very seriously and those highest in the pecking order will grab the highest perch, leaving the lower and more vulnerable spots to those lower in the flock order. This is why ladder-style roosts work well for mixed flocks, as they accommodate natural hierarchy while keeping heavy breeds at safe heights on the lower rungs.
Ideal Dimensions for Heavy Chicken Roosts
Getting the measurements right is critical for protecting your heavy breeds. Here are the specifications that work.
Height: The Low Roost Rule for Joint Safety
According to Dine-A-Chook, roosts should not be higher than 1 meter (about 3.3 feet) above the ground. Despite being able to fly, chickens tend to land heavily. Falls are common when hens are scuttling for roosting position in the evening. Therefore, roosts should be close enough to the ground that unexpected falls will not cause injury.
According to BackYard Chickens, a slightly lower perch of twelve inches is recommended for heavier chickens to prevent leg and foot injuries. Perches that are lower to the ground may be needed for old or disabled chickens.
According to Chicken Coop Company, the ideal height for a chicken roosting bar is at least 1 foot from the ground and 6 inches from the wall. If you are going to make the roost much higher than two feet, staggering several roosting bars like stairs at varying heights will make it easier for chickens to get up and down.
| Breed Type | Minimum Height | Ideal Height | Maximum Height |
|---|---|---|---|
| Jersey Giant, Brahma | 12 inches | 18 to 24 inches | 3 feet |
| Orpington, Cochin | 12 inches | 2 feet | 3 feet |
| Mixed flock (ladder) | 12 inches | Multi-level | 3 feet (top rung) |
Width: Why the 4-Inch Flat Side Is Essential
According to Chicken Coop Company, chicken roosting bars should be at least 2 inches wide and preferably 4 inches wide. Chickens do not wrap their feet around a perch like wild birds do. They actually prefer to sleep flat-footed. This has the added benefit of keeping their feet protected from frostbite.
According to Life at Cobble Hill Farm, chickens will also roost on flat surfaces such as a 2×4 or a shelf. This can also help prevent frostbite in cold coops because rather than their toes wrapping around the roost they lay flat and their feathers cover them.
The flat-footed sleeping position has an important winter benefit. When chickens sleep with their feet flat on a wide surface, they can tuck their toes under their breast feathers for warmth. For heavy breeds, I recommend using 2×4 lumber with the 4-inch side facing up as the minimum.
Spacing: 12 to 15 Inches per Bird
Heavy breeds need more personal space on the roost than smaller chickens. According to Life at Cobble Hill Farm, typically about 10 to 12 inches of space per chicken will be sufficient for standard breeds.
According to Dine-A-Chook, a minimum of 14 cm (about 5.5 inches) of perch space per average-sized hen is needed for comfort and well-being. Hens without enough space may choose not to roost, and lack of space may also lead to issues like bullying and feather pecking. More space may be needed for roosters and different breeds.
For heavy breeds specifically, plan for 12 to 15 inches of horizontal space per bird. This extra room prevents crowding-related stress and gives large birds space to settle comfortably.
Example calculation: For 6 Buff Orpingtons at 12 inches each, you need 72 inches (6 feet) of total roosting bar space.
For more information on space requirements for your coop overall, our guide on how much space do chickens really need covers both indoor and outdoor requirements.
Recommended Materials and Tools
Choosing the right materials ensures your roosts last for years and provide safe, comfortable sleeping spots for your heavy breeds.
Lumber Selection
According to Dine-A-Chook, although easier to clean, metal and plastic perches contribute to bumblefoot and keel bone issues. Wood is best.
According to BackYard Chickens, the use of metal is not recommended because it will be too cold in winter and too hot in summer. Wood is still the most popular material. It is simple to work with, durable, and readily available.
Pine or fir (softwood): Affordable at $3 to $6 per 8-foot board at Home Depot or Lowe’s, easy to work with, widely available. This is what I use for all my roosts.
Cedar: Naturally rot-resistant and pleasant smelling, but more expensive at $8 to $12 per board. A good choice if your coop stays damp.
Avoid pressure-treated lumber: The chemicals used to treat this wood can be harmful to chickens who may peck at or rub against the roosts.
Safety Essentials: Sanding and Rounding Edges
Splinters and rough surfaces can cause foot injuries that lead to infections. According to BackYard Chickens, all splinters and rough areas should be removed from these limbs to prevent bumblefoot.
According to Chicken Coop Company, if you use a 2×4 put the 4-inch side up and you could even round the edges for the comfort of the birds with a router.
Alternative: Rope Wrapping
According to Chicken Coop Company, wrapping your roosting bars in rope can create a more natural feel for chickens. Veterinarians recommend this for the prevention and treatment of bumblefoot because it allows for airflow underneath the bird’s feet.
Materials List
| Item | Quantity | Purpose | Estimated Cost |
|---|---|---|---|
| 2×4 lumber (8 ft) | 2 to 3 | Roosting rungs | $6 to $18 |
| 2×4 lumber (4 ft) | 2 | Side supports | $6 to $12 |
| 3-inch galvanized screws | 16 to 24 | Assembly | $8 |
| L-brackets | 4 | Wall mounting ($2-4 each) | $8 to $16 |
| 80-grit sandpaper | 2 sheets | Initial smoothing | $3 |
| 120-grit sandpaper | 2 sheets | Final smoothing | $3 |
| Total | $35 to $60 |
Pre-made roosting bar kits are available for $40 to $80, but building your own costs under $50 and allows customization for heavy breeds.
Step-by-Step: Building a Heavy-Duty Ladder Roost
A ladder-style roost is ideal for heavy breeds because it provides an easy way for birds to hop up and down in stages rather than making one big jump. Here is how to build one.
Step 1: Measure and Plan
First, measure your coop to determine how much space you have for the roost. You will need:
- Width of coop (for roost bar length)
- Distance from wall to position roost 12 to 18 inches out (protects tail feathers)
- Vertical space available (plan for 2 to 3 feet total height for heavy breeds)
For a 6-chicken flock of heavy breeds, plan for at least 6 feet of total roosting space.
Step 2: Cut the Side Rails
Cut two 2×4 boards to 3 to 4 feet in length for the side rails. These will support your roosting rungs. You can mount these vertically against the wall or at a 45-degree angle like a traditional ladder.
According to Life at Cobble Hill Farm, if you are going to make the roost much higher than 3 feet, staggering the roosts at different heights like stairs will make it easier for heavier breeds to get up and down without injuring themselves. Just make sure to not put the roost directly under one another or the chickens on the lower roosts will end up covered in droppings.
Step 3: Cut and Prepare the Roosting Rungs
Cut your 2×4 roosting bars to the width of your coop minus 4 inches (this allows for the side rail thickness and wall clearance).
Critical step: Sand all surfaces thoroughly. Start with 80-grit sandpaper to remove any rough spots, then finish with 120-grit for a smooth surface. Round all edges either with a router or by sanding at an angle. This step is essential for bumblefoot prevention.
Step 4: Attach the Roosting Rungs
Position the lowest rung at 12 inches from the floor. According to BackYard Chickens, a slightly lower perch of twelve inches is recommended for heavier chickens to prevent leg and foot injuries.
According to Dine-A-Chook, roosts should be 30 to 50 cm (12 to 20 inches) apart. This spacing allows hens to jump easily between levels while being far enough apart that a falling hen is unlikely to hit a lower roost on the way down.
Important: Ensure the 4-inch side of each rung faces UP. This is the surface your chickens will sleep on.
Attach each rung with two 3-inch screws per side, driving through the side rail into the end of the rung. Pre-drill holes to prevent splitting.
Step 5: Mount and Test
Mount the completed ladder roost to your coop wall using L-brackets. According to Chicken Coop Company, the ideal position is at least 1 foot from the ground and 6 inches from the wall.
Critical rule: According to Chicken Coop Company, if you are raising chickens for eggs it is super important that your roosting bars are higher than your nesting boxes, otherwise your hens will want to roost in your nesting boxes and will get them really dirty and potentially crush your eggs.
Test stability by pushing and pulling on each rung. The roost should feel solid with no wobbling. Add additional screws or support brackets if needed.
While our general guide on how high should roosting bars be in a coop covers standard recommendations, heavy breeds require the specialized lower heights detailed in this article.
Coop Placement and Installation Tips
Where you position your roost matters almost as much as how you build it.
Poop Management
According to BackYard Chickens, it is important to keep your chickens’ roosts inside the coop, but away from nest boxes and feeding stations. The ideal distance between them and the wall is about eighteen inches.
Place a poop board or tray underneath your roosts for easy cleaning. Never position roosts directly above nesting boxes, feeders, or waterers.
Draft Protection
According to Chicken Coop Company, place the roosting bar close enough to the walls that it blocks out most of the drafts but also make sure there is ample ventilation so your birds do not overheat during those summer months.
Easy Removal for Cleaning
According to BackYard Chickens, it is best if your perches are removable so that you can clean them periodically. It is important that you remove all the perches every month to give them a thorough cleaning as little nasty critters such as mites love to hide there.
Maintenance and Health Monitoring
Building the roost correctly is only half the job. Regular maintenance keeps your heavy breeds healthy.
Weekly Foot Checks
Inspect your chickens’ feet weekly, especially during the first few months after installing new roosts. Look for:
| Sign | Possible Issue |
|---|---|
| Swelling between toes | Early bumblefoot |
| Black scab on foot pad | Bumblefoot infection |
| Reluctance to roost | Foot pain or roost discomfort |
| Calluses on keel bone | Perch too narrow |
Catching problems early makes treatment much easier. If you notice any issues, our guide on how to spot and treat bumblefoot in chickens walks through treatment options.
Seasonal Considerations
The 4-inch wide roost surface provides natural frostbite protection in winter. When chickens settle down on a wide, flat surface, they can completely cover their toes with breast feathers.
No seasonal adjustments are needed if you build to the specifications in this guide. Simply ensure your coop has adequate ventilation to prevent moisture buildup. For winter-specific coop guidance, our winterizing chicken coop guide covers additional considerations.
Common Questions About Heavy Breed Roosts
How high should a roost be for a Brahma chicken?
According to BackYard Chickens, a slightly lower perch of twelve inches is recommended for heavier chickens like Brahmas to prevent leg and foot injuries. According to Dine-A-Chook, roosts should not be higher than 1 meter (about 3.3 feet) above the ground. For heavy breeds, the ideal range is 12 to 24 inches.
Can heavy chickens roost on 2x4s?
Yes, 2×4 lumber with the 4-inch side facing up is ideal for heavy breeds. According to BackYard Chickens, birds as large as the Jersey Giant can sit upright without wobbling on a properly positioned 2×4.
What is the best material for heavy chicken perches?
According to Dine-A-Chook, wood is best. Metal and plastic perches contribute to bumblefoot and keel bone issues. Untreated softwood like pine or naturally rot-resistant cedar are excellent choices.
Do heavy breeds need a ramp to reach their roost?
If your roost is higher than 18 to 24 inches, providing intermediate steps or a ladder configuration helps heavy breeds reach the roost without straining their joints. According to Life at Cobble Hill Farm, staggering the roosts at different heights like stairs will make it easier for heavier breeds to get up and down without injuring themselves.
I am Oladepo Babatunde, founder of ChickenStarter. After learning the hard way that my heavy Brahmas needed different accommodations than my lighter breeds, I have spent years refining roost designs that keep big birds healthy. The hardest part of this project is not the building, it is convincing yourself that lower really is better for heavy breeds. The specifications in this guide come from that experience combined with research into what actually works for keepers with heavy breeds.

Oladepo Babatunde is the founder of ChickenStarter.com. He is a backyard chicken keeper and educator who specializes in helping beginners raise healthy flocks, particularly in warm climates. His expertise comes from years of hands-on experience building coops, treating common chicken ailments, and solving flock management issues. His own happy hens are a testament to his methods, laying 25-30 eggs weekly.