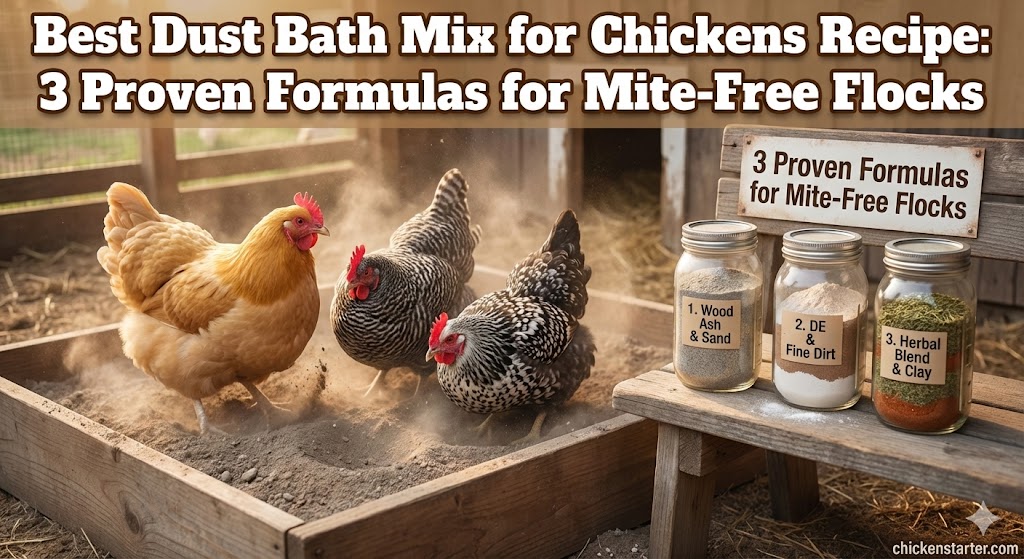
Every chicken keeper eventually discovers the same truth I learned during my second year raising backyard hens: watching your birds thrash around in a dirt patch is not just entertaining, it is essential healthcare. But here is what most guides get wrong. They tell you to throw together “equal parts” of whatever you have lying around and call it a day. After dealing with a stubborn mite outbreak that took three weeks to resolve, I can tell you that approach does not cut it when pest pressure is real.
This guide provides three tested recipes with exact ratios. A budget friendly starter mix for maintenance, an advanced pest defense formula for active infestations, and a winter safe blend for damp climates. If you need help with container selection and placement, see our guide on how to set up a dust bath for chickens. This article focuses specifically on ingredient formulations and ratios.
Why Ingredients Matter More Than You Think
The Science Behind Each Component
Most chicken keepers understand that dust bathing helps control parasites, but few realize that different ingredients serve entirely different functions. Get this wrong, and your mix becomes decoration rather than protection.
Abrasive particles like sand and soil physically dislodge parasites from feather shafts and skin. Think of them as the mechanical scrubbing action. According to poultry care experts at Grubblyfarms, sand helps with exfoliating and removing excess oils, but dirt works better at suffocating and killing external parasites.
Absorbent materials including peat moss and wood ash remove excess oils that accumulate on feathers. These oils can actually protect parasites by creating a barrier against desiccants. The charcoal component in wood ash specifically helps absorb toxins on feathers.
Active ingredients such as diatomaceous earth and wood ash work through desiccation. They absorb the waxy coating on external parasites, causing them to dehydrate and die.
Aromatics from dried herbs provide additional repellent properties, though these are supplementary rather than essential. According to Australian poultry supplier Dine A Chook, herbs such as lavender, mint, and rosemary contain natural insecticides that complement the physical action of the dust bath.
A mix without absorbents will not control oil buildup. A mix without abrasives will not physically remove parasites. Understanding these functions helped me design batches that actually work rather than just look good in the coop.
Essential Dust Bath Ingredients Explained
The Base Layer: Sand Selection
Is play sand or builder’s sand better for chickens? Builder’s sand, also called construction sand or all purpose sand, is generally better because it has varied particle sizes that provide superior abrasion. Play sand is often too fine and uniform, creating a less effective bathing medium. Avoid sand with added chemicals or colorants.
When using sand, make sure you only use construction grade sand. You want coarse sand that is not super fine since fine sand can lead to impacted crop when ingested. Many experienced keepers recommend avoiding play sand entirely because it is often treated with chemicals or contains excessive fine particles.
From personal experience, river sand works excellently if you can source it locally. I collected several buckets from a creek bed on my property, dried it thoroughly in the sun, and my hens preferred it over the commercial options. The irregular particle sizes seem to give them better coverage. Sand from creeks and beaches can actually be better as it often does not have as many small dust particles that can irritate lungs.
Soil and Peat Moss: The Absorbent Foundation
Native dry soil comes free and contains natural microorganisms that some keepers believe contribute to flock health. Peat moss offers excellent absorption with a slightly acidic pH that may help with pest control. It is particularly useful for clay based soil since it helps keep the dust bath dirt light and aerated. Coconut coir provides a sustainable alternative for those concerned about peat harvesting.
I rotate between soil from my garden during dry months and peat moss during our wet season. The soil works brilliantly when conditions cooperate, but peat moss resists moisture far better when humidity spikes.
Diatomaceous Earth: The Controversial Ingredient
This is where many guides fail their readers. Diatomaceous earth can be effective against poultry mites and lice through desiccation, but safety considerations are critical and opinions among experienced chicken keepers are genuinely divided.
Food grade only. Never use pool grade or filter grade DE. The calcination process used for pool grade products creates crystalline silica, which poses serious respiratory hazards. Food grade freshwater DE contains little to no crystalline silica, and the content is monitored by OSHA in the United States. A product is considered safe if it contains less than 2% crystalline silica.
Respiratory precautions matter. Wear an N95 mask when mixing. Allow the dust to settle for at least 30 minutes before chickens access the bath. Fine particles can irritate both human and chicken respiratory systems. Too much DE dust creates an unhealthy environment for respiratory systems, especially the fragile and complex respiratory system of chickens.
Foot health consideration. The drying effect of DE can cause cracking on the bottom of chicken foot pads if birds have prolonged direct contact with concentrated amounts. This can lead to wounds and potentially bumblefoot infections, also known as pododermatitis. Limiting DE to 5 to 10 percent of your mix and ensuring thorough mixing reduces this risk significantly.
Use sparingly. Keep DE to 5 to 10 percent of your total mix maximum. More is genuinely not better. The mechanism works through physical desiccation rather than chemical action, so complete coverage matters more than concentration. Just a sprinkle or two will do.
Alternative viewpoint worth considering. Some experienced chicken keepers, including well known poultry educators like The Chicken Chick, recommend avoiding DE entirely. They argue that plain dirt or sand performs all necessary dust bath functions without respiratory risks. According to this perspective, dirt or sand alone can perform all of the functions chickens require of a dust bath without any additives. The Budget Friendly Starter Mix I provide below works perfectly well without DE for flocks without active pest problems.
I learned the hard way that dumping DE liberally creates a dust cloud that lingers. One of my hens developed mild respiratory irritation that took a week to resolve. Now I mix outdoors, let everything settle, then transport the finished batch to the coop.
For more information on identifying and treating mite problems, see our complete guide on mites and lice on chickens.
Wood Ash and Charcoal: pH Considerations
Can I use fireplace ash for chicken dust bath? Yes, but only hardwood ash from untreated wood. Avoid ash from treated lumber, painted wood, or charcoal briquettes with additives. Use untreated hardwood like oak, maple, or apple, as these are considered the safest options. Hardwood ash is highly alkaline with a pH between 10 and 12, which helps control parasites but can irritate skin if overused. Limit to 10 to 15 percent of your total mix.
Critical wet weather warning. Wood ash becomes caustic lye when wet. This is the same substance historically used to make soap, and it can cause burns to chicken skin. Never add fresh ash to a damp dust bath, and ensure your bath location has adequate rain protection. If your dust bath gets rained on, the ash mixture can become a hazardous lye substance. Once it dries out, the mixture often becomes very hard, almost like a rock, and needs to be broken up or completely removed.
I save ashes from our wood stove throughout winter, storing them in a metal bin until needed. The key is ensuring complete combustion. Ash with visible charcoal chunks is fine, but partially burned wood pieces should be removed.
Aromatic Herbs: Lavender, Mint, and Rosemary
Dried herbs only. Fresh herbs mold quickly and create exactly the conditions you want to avoid. Herbs such as lavender, mint, and rosemary not only make your chickens smell lovely but also contain natural insecticides.
Good herbs for the chicken dust bath include catnip, borage, cinnamon, ginger, lavender, mint, nasturtium, sage, thyme, and yarrow. The natural oils from the herbs can provide health benefits, and chickens may nibble on them while bathing.
These are enhancement ingredients rather than essential components. I add them when available from my garden, but I would not purchase them specifically for dust bath purposes.
The Ultimate Dust Bath Recipes: 3 Formulas for Every Situation
Recipe 1: Budget Friendly Starter Mix
Best for: Beginners, low pest pressure, tight budgets
| Ingredient | Ratio | Amount for 5 Gallon Batch |
|---|---|---|
| Builder’s sand | 50% | 2.5 gallons |
| Native dry soil | 30% | 1.5 gallons |
| Wood ash (hardwood) | 15% | 0.75 gallons |
| Dried herbs (optional) | 5% | 0.25 gallons |
Cost estimate: Under $10, mostly free if you have soil and ash available
This recipe served my flock well for the first eighteen months. It provides solid maintenance protection without the complexity or expense of advanced formulations. If your birds show no signs of mites or lice and you want prevention rather than treatment, start here. Many experienced keepers use nothing more than construction grade sand or clean dry dirt and achieve excellent results.
Recipe 2: Advanced Pest Defense Formula
Best for: Active mite or lice infestations, high pest pressure areas
| Ingredient | Ratio | Amount for 5 Gallon Batch |
|---|---|---|
| Builder’s sand | 40% | 2 gallons |
| Peat moss or dry soil | 25% | 1.25 gallons |
| Diatomaceous earth (food grade) | 10% | 0.5 gallons |
| Wood ash (hardwood) | 15% | 0.75 gallons |
| Dried herbs (lavender/mint) | 10% | 0.5 gallons |
Safety note: Wear a dust mask when mixing DE. Allow the mix to settle before letting chickens access. Monitor for any signs of foot pad cracking or respiratory distress.
I switched to this formula after noticing increased scratching and finding mites during a routine health check. Within two weeks of consistent use, combined with coop treatment, the infestation resolved. For comprehensive mite prevention strategies beyond dust bathing, see our guide on dust bath area for natural mite prevention.
Recipe 3: Winter Survival Mix (Damp Climate Formula)
Best for: Humid climates, covered but outdoor dust baths, winter months
| Ingredient | Ratio | Amount for 5 Gallon Batch |
|---|---|---|
| Builder’s sand | 45% | 2.25 gallons |
| Peat moss (not soil) | 30% | 1.5 gallons |
| Wood ash (extra for absorption) | 20% | 1 gallon |
| Diatomaceous earth | 5% | 0.25 gallons |
Why peat moss over soil: Peat moss resists moisture significantly better than native soil, which becomes muddy and unusable when damp.
Living in the Pacific Northwest taught me that standard recipes fail miserably during our wet season. The increased ash ratio in this formula provides superior absorption, keeping the bath usable even when ambient humidity runs high. Regional climate considerations should guide your dust bath management practices, and this formula addresses the specific challenges of damp environments.
For more cold weather strategies, check out our winterizing chicken coop guide.
Mixing and Storage Best Practices
How to Mix Your Dust Bath
- Start with sand base in your mixing container
- Add soil or peat moss and mix thoroughly
- Add wood ash and mix again
- Sprinkle DE last while wearing your mask
- Add dried herbs on top
- Final mix, then allow settling for 30 minutes before chicken access
I use a large plastic storage bin for mixing, then transfer to the permanent dust bath location. This keeps dust contained and allows proper settling time. When handling diatomaceous earth, wear gloves and a dust mask to avoid inhaling the fine particles, which can be drying to the skin.
Storage and Refreshing Schedule
Keep extra mix in sealed containers stored in a dry location. DE keeps indefinitely providing it is stored properly. If it becomes damp it will degrade and become ineffective for controlling infestations.
Refresh the top layer weekly with a light sprinkle of DE and herbs. Plan for full replacement every 2 to 3 months or when visibly soiled with droppings. How often the dirt should be replaced will vary depending on the number of chickens in the flock and how frequently they access the area.
A dust bath works best when the dust is bone dry and not clumping. Adding an umbrella, tent, or tarp over the dust bath during rain will ensure your hens can get dirty when they need to.
For additional parasite prevention strategies, our guide on natural ways to keep parasites out of your coop provides complementary approaches.
Safety Warnings: What Basic Guides Miss
Diatomaceous Earth Respiratory and Foot Precautions
Food grade DE only. Wear an N95 mask during handling and mixing. Mix outdoors or in well ventilated areas. When applying DE in confined areas such as the chicken coop, always wear a mask, move your chickens out to their run, and make sure there is proper ventilation prior to dusting.
Allow complete dust settling before chicken access. Monitor your birds for any signs of respiratory distress including wheezing, open mouth breathing, or discharge.
Foot pad health: The desiccating properties that make DE effective against parasites can also dry out chicken foot pads with prolonged concentrated exposure. Watch for signs of cracking, which can progress to bumblefoot (pododermatitis) if left untreated. If you notice foot issues, reduce or eliminate DE from your mix. Our guide on how to spot and treat bumblefoot in chickens covers treatment options.
Wood Ash pH and Moisture Concerns
Hardwood ash pH ranges from 10 to 12, making it highly alkaline. Excessive ash can irritate chicken skin and eyes. Never exceed 20 percent of your total mix. Source only from untreated, unpainted hardwood.
Wet ash creates lye. Wood ash becomes the same caustic lye used in soap making when exposed to water. If your dust bath gets wet, the ash component can cause skin burns. Remove wet ash immediately, allow the area to dry completely, and replace with fresh dry ash before allowing chicken access. The mixture often hardens like concrete after getting wet and drying, requiring complete removal.
If you notice skin irritation on your birds, reduce the ash ratio and increase the peat moss component.
Frequently Asked Questions
What is the best ratio for chicken dust bath?
A balanced 40/30/15/10/5 ratio of sand, soil, ash, DE, and herbs works for most situations. Adjust based on pest pressure (increase DE) or climate (increase ash for humidity). The most critical factor is keeping the mix completely dry regardless of ratio. Some keepers successfully use nothing more than sand and soil, so do not feel pressured to include every possible ingredient.
How much diatomaceous earth should I add?
Keep food grade diatomaceous earth between 5 and 10 percent of your total mix. More is not better. Excessive DE causes respiratory irritation in both chickens and humans and can dry out foot pads. The mechanism works through physical desiccation rather than chemical action, so coverage matters more than concentration. Having DE as only a small part of the dust bath means there is not enough of it for chickens to breathe in problematic amounts.
How often should I replace the dust bath mix?
Full replacement every 2 to 3 months under normal use. If you notice significant droppings contamination, odor, or clumping from moisture, replace sooner. Weekly top ups with fresh DE and herbs extend the effective life of your batch.
Do chickens need a dust bath year round?
Yes, chickens should have access to a dust bath year round, especially in enclosed coops or during rainy seasons when natural dust spots are not available. When given the option, chickens always prefer creating their own dust bathing area in loose dirt, but providing an artificial option becomes important in winter when the ground is frozen or covered in snow.
Should I put the dust bath inside or outside the coop?
Outdoors only when possible. Even in the most ventilated coops, airflow is still more restricted than in the run. Placing dust baths outside prevents the risk of dust or dirt particles accumulating in enclosed airways. If you must provide an indoor option during severe weather, ensure maximum ventilation. For related coop management tips, see our guide on how to keep a chicken coop from smelling.
Can I use sand from the beach?
Sand from beaches can work, but it may be too salty depending on your location. If you have access to river or creek sand, that is often preferable because it typically has varied particle sizes without salt content. If using beach sand, rinse it thoroughly and dry it completely before adding to your mix.
Creating an effective dust bath mix requires understanding that each ingredient serves a specific purpose. Generic recipes ignore climate differences, pest pressure levels, and safety considerations that make real differences in flock health. Start with the formula that matches your current situation, adjust based on results, and your birds will reward you with healthy feathers and pest free living.

Oladepo Babatunde is the founder of ChickenStarter.com. He is a backyard chicken keeper and educator who specializes in helping beginners raise healthy flocks, particularly in warm climates. His expertise comes from years of hands-on experience building coops, treating common chicken ailments, and solving flock management issues. His own happy hens are a testament to his methods, laying 25-30 eggs weekly.
I’m curious what type of peat moss to buy as there are lots of options out there. It is our monsoon season so lots of rain every day. I’m just overwhelmed with what to buy. Help please!
Hi Shannon! I completely understand the confusion because there are quite a few different types of peat moss available. For chicken use, I’d look for **plain, untreated sphagnum peat moss** with no added fertilizer, pesticides, or other chemicals.
Since you’re dealing with monsoon-season rain, I’d also avoid using it as the only bedding material outdoors because it can become very wet and compacted. If you’re using it in the coop, make sure the area has good ventilation and drainage, and replace wet material rather than letting it stay damp.
When shopping, the simplest choice is a bag labeled **100% sphagnum peat moss, with no additives**. You don’t need an expensive specialty product.