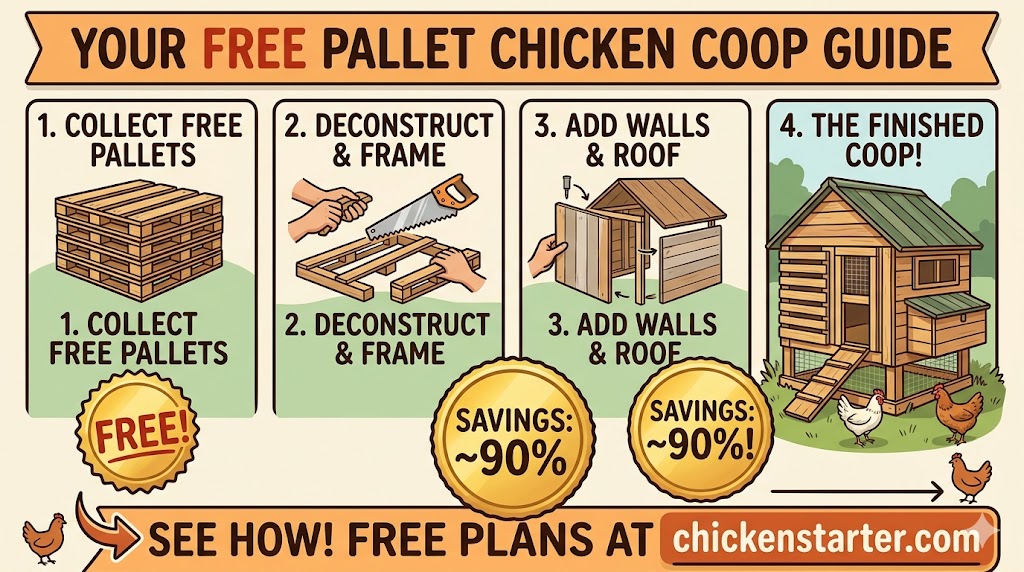
Building a pallet chicken coop is one of the most budget-friendly ways to house a backyard flock. Wooden pallets are free or nearly free in most areas, surprisingly sturdy, and already sized in panels that make framing a coop faster than building from scratch lumber. With a little sweat equity and some basic tools, you can build a functional, safe coop for your chickens without spending hundreds of dollars.
I built my very first chicken coop almost entirely from reclaimed pallets about four years ago. At the time I was just getting started with backyard chickens and did not want to invest a lot of money until I knew this hobby was for me. That pallet coop cost me less than $50 in total, mostly for hardware cloth, screws, and roofing material. It housed four hens for nearly two years before I upgraded to a larger setup.
Was it pretty? Not especially. Did it work? Absolutely. And the lessons I learned building it shaped every coop I have built since. This guide gives you everything you need to build your own DIY pallet chicken coop, including where to find safe pallets, how to prepare them, a complete step-by-step build process, and the honest pros and cons you will not find in most pallet coop tutorials.
Why Pallets Work for Chicken Coops
Wooden pallets are essentially pre-built wall frames. A standard pallet measures roughly 40 inches by 48 inches (though sizes vary), and the slat-and-stringer construction creates a rigid panel that can serve as a wall, floor section, or even a roof base with minimal modification.
The spaces between the slats can be filled with additional pallet wood, plywood, or scrap lumber to create solid walls. The stringers (the thick boards running across the back) provide natural framing that you can screw into, mount hardware to, and attach other pallets against.
For a backyard chicken keeper on a budget, pallets solve the most expensive part of coop building, which is the lumber. A single 2×4 stud costs $3 to $6 at most hardware stores. A pallet contains the equivalent of several boards and costs nothing.
Where to Find Free Pallets (and Which Ones Are Safe)
Pallets are everywhere, but not all of them are safe to use for a chicken coop. This is an important step that too many pallet builders skip.
Where to Look
- Local businesses and warehouses often have pallets stacked behind the building that they are happy to give away. Small hardware stores, garden centers, feed stores, and auto parts shops are great places to ask.
- Online classifieds like Craigslist, Facebook Marketplace, and local buy-nothing groups frequently list free pallets.
- Construction sites sometimes have pallets from material deliveries. Always ask the site foreman before taking anything.
How to Tell If a Pallet Is Safe
This is critical. Some pallets are chemically treated to meet international shipping standards, and those chemicals are not something you want anywhere near your flock.
According to information shared by the International Plant Protection Convention, wooden packaging materials used in international trade must be treated to prevent the spread of pests. The two approved treatments are heat treatment (HT) and methyl bromide fumigation (MB).
Every pallet that has gone through official treatment will have a stamp on the stringer that includes an abbreviation:
- HT means heat treated. This is safe to use. The wood was heated to a core temperature of 56°C (132.8°F) for at least 30 minutes to kill pests. No chemicals are involved.
- MB means methyl bromide fumigation. Do not use these. Methyl bromide is a toxic chemical pesticide that can leave residues in the wood.
- DB means debarked. This tells you the bark was removed but says nothing about chemical treatment. It is usually paired with HT or MB.
Only use pallets stamped HT. If a pallet has no stamp at all, it was likely used for domestic shipping only and was not treated with chemicals. Unstamped domestic pallets are generally considered safe, but inspect them carefully for signs of chemical spills, stains, or strong odors.
Pallets to Avoid
- Any pallet with an MB stamp
- Pallets that appear stained with chemicals, oils, or unknown liquids
- Pallets that smell strongly of chemicals
- Pallets that are visibly rotting, heavily warped, or infested with mold
- Colored or painted pallets (the dye or paint may contain harmful substances)
I spend a little extra time sorting through pallets before loading them into my truck. It is worth being picky. You want clean, dry, structurally sound wood that has not been exposed to anything toxic.
Tools and Additional Materials You Will Need
Pallets provide most of the lumber, but you will still need a few essential materials and tools to turn them into a proper coop.
Tools
- Pry bar or pallet breaker for disassembling pallets into individual boards
- Circular saw or reciprocating saw for cutting pallets and boards to size
- Drill/driver with a variety of screw bits
- Hammer
- Tape measure and speed square
- Level
- Heavy-duty staple gun with 1/2-inch galvanized staples
- Safety glasses, gloves, and ear protection
Additional Materials (the Part That Costs Money)
| Material | Estimated Cost |
|---|---|
| Hardware cloth, 1/2-inch, 50 ft roll | $40 to $70 |
| Exterior wood screws (2-inch and 3-inch, 1 lb each) | $15 to $25 |
| Corrugated metal or polycarbonate roofing panels | $20 to $40 |
| Galvanized hinges (3 to 4 pairs) | $10 to $15 |
| Two-step latches or carabiner clips (4 to 6) | $8 to $12 |
| Roofing screws with rubber washers | $5 to $8 |
| Exterior paint or wood stain (optional) | $15 to $30 |
| Pine shavings for bedding (1 bale) | $8 to $12 |
| Total additional cost | $120 to $210 |
The pallets themselves are free. Your total out-of-pocket cost for a complete pallet chicken coop with an attached run should land somewhere between $120 and $210 depending on what you already have in your shop and how many materials you can source secondhand.
If you are trying to minimize spending even further, our guide on how to build a chicken coop for under $200 covers additional strategies for cutting costs on every component.
How Many Pallets Do You Need?
The number of pallets depends on the size of coop you are building and whether you plan to use them whole or disassemble them into individual boards.
For a Small Coop (4 Chickens)
A coop for 4 hens needs at least 16 square feet of interior floor space. Using standard 40×48 inch pallets, plan on gathering 8 to 12 pallets. Four for the walls, one or two for the floor, two or three to disassemble for gap-filling lumber and trim, and one or two for nesting boxes and interior framing.
If you are building a coop specifically for a small starter flock, our article on chicken coop plans for 4 chickens covers dimensions, layouts, and construction details for that size.
For a Medium Coop (6 Chickens)
A 6-hen flock needs at least 24 square feet of coop space. Gather 12 to 18 pallets. The extra pallets give you more boards for filling gaps, building the run frame, and creating interior features like roost bar supports and nesting boxes.
For detailed plans and measurements at this size, our guide on chicken coop plans for 6 chickens walks through every step.
General Rule
Always collect more pallets than you think you need. You will break boards during disassembly, reject some for quality issues, and inevitably find uses for extra lumber during the build. I usually gather about 50% more pallets than my initial estimate.
Preparing Your Pallets
Before you start building, the pallets need some preparation.
Disassembly vs. Using Whole Pallets
You have two approaches, and most pallet coop builds use a combination of both.
Whole pallets as wall panels. Stand a pallet upright and it becomes an instant wall frame. The gaps between slats need to be filled with additional boards, plywood scraps, or slats pried from other pallets. This is the fastest approach and preserves the structural integrity of the pallet.
Disassembled pallet boards. Prying individual boards off pallets gives you a supply of free lumber in various widths and thicknesses. These boards are used for filling gaps, building nesting boxes, creating trim, and framing the roof. Disassembly takes time and patience. The nails used in pallets are ring-shank or spiral-shank, which grip aggressively and do not come out easily.
A pallet breaker tool (available for about $25 to $40) makes disassembly dramatically faster and reduces the number of boards you split in the process. Without one, you can use a pry bar and hammer, but expect to lose about 20 to 30 percent of your boards to splitting.
Sanding and Inspection
Once your pallets are sorted and disassembled (where needed), give every piece a quick inspection. Remove any protruding nails or staples. Sand down rough spots and splinters, especially on boards that will form interior surfaces where your chickens will roost or nest. You do not need to sand everything perfectly, but eliminating sharp edges and major splinters prevents foot injuries for your birds.
Optional: Weatherproofing
Untreated pallet wood will not last as long as pressure-treated lumber when exposed to rain and ground moisture. You can extend the life of your pallet coop significantly by applying an exterior wood stain or weather sealant to the outside surfaces before assembly. Use a product that is low-VOC and rated for exterior use.
I did not seal my first pallet coop and it showed significant weathering after two years. My second build got a coat of exterior stain before assembly and it held up noticeably better.
Do not apply any stain, paint, or sealant to the interior surfaces of the coop where chickens will be in direct contact with the wood. Stick to the exterior walls and roof framing only.
Step-by-Step Build Guide: Pallet Chicken Coop
This walkthrough is for a medium-sized coop suitable for 4 to 6 standard chickens, using whole pallets for the primary wall structure and disassembled pallet boards for infill and finishing.
Step 1: Prepare the Foundation
Choose a level, well-drained spot with partial shade. Avoid low areas where water pools. If the ground is uneven, level it with tamped gravel or sand.
For a pallet coop, I recommend an elevated foundation rather than setting the coop directly on the ground. Pallet wood in direct contact with soil will rot quickly, even with sealant.
The simplest elevated foundation is four concrete blocks or cinder blocks set at the corners, with the pallet floor resting on top. This lifts the coop 8 to 12 inches off the ground, improves airflow underneath, and dramatically extends the life of the wood.
For detailed site selection tips, our article on the best place to put your chicken coop covers drainage, sunlight, wind exposure, and proximity to your house.
Step 2: Build the Floor
Lay one or two pallets flat across your foundation blocks to create the floor. If a single standard pallet (roughly 40×48 inches) is too small, butt two pallets side by side and screw them together with 3-inch exterior screws through the stringers.
Fill any gaps between the floor slats with additional pallet boards cut to fit, then sheet the top with a piece of 1/2-inch or 3/4-inch plywood (salvaged or purchased) to create a solid, draft-free floor. Screw the plywood down every 8 to 10 inches along the pallet stringers underneath.
A solid floor is essential. Gaps in the floor allow drafts, moisture, and small predators like weasels and snakes to enter. If you cannot source plywood, fill every gap tightly with pallet boards and seal the seams with thin wooden strips.
Step 3: Raise the Walls
This is where pallets really shine. Stand four pallets upright, one on each side, to form the wall structure. Screw each pallet to the floor frame and to its neighboring pallet at the corners using 3-inch exterior screws. Use at least 4 to 6 screws at every connection point.
For the front and back walls: If you want a shed-style sloped roof (which I recommend for simplicity and water shedding), make the front wall taller than the back wall. You can achieve this by mounting the front pallet higher on the floor frame or by adding a horizontal extension board across the top of the front pallet.
A height difference of about 8 to 12 inches between front and back creates a good roof slope for rain and snow runoff. On my build, the front wall stood about 48 inches tall and the back wall about 38 inches tall.
Fill the gaps. The spaces between pallet slats on each wall need to be covered to create solid, draft-proof walls. Use pallet boards from your disassembled stock, scrap plywood, or even old fence boards. Screw or nail the infill pieces across the gaps on the exterior side. This does not have to be perfect or pretty. It needs to block wind, rain, and predators.
Step 4: Cut Openings
Before you sheet the exterior, cut openings for:
- The pop door (chicken entrance): approximately 12 x 14 inches, positioned on the wall facing the run
- The cleanout door (human access): at least 24 inches wide, as tall as the wall allows, on a side wall for easy interior access
- Ventilation openings: at least 1 to 2 square feet of open area near the roofline on at least two walls, covered with hardware cloth
- Nesting box access: if building exterior-access nesting boxes, cut an opening on the appropriate wall
Mark your cuts carefully and use a reciprocating saw or circular saw to remove the material. Pallet wood cuts easily but watch out for hidden nails.
Step 5: Frame and Install the Roof
Lay 2x4s or sturdy pallet stringers across the tops of the front and back walls as rafters, spaced about 16 to 24 inches apart. Extend them 3 to 4 inches beyond the walls on all sides for overhang.
Sheet the rafters with plywood scraps or additional pallet boards laid tightly together. Then install your roofing material on top. Corrugated metal panels are the best value for a pallet coop. They are inexpensive, waterproof, easy to install with roofing screws, and last for years.
If you are on an extremely tight budget, a heavy-duty tarp stretched over the roof frame works as a temporary solution, but plan to replace it with something permanent before the first winter. Tarps degrade in UV light and tear in wind.
Make sure the roof sheds water away from the coop entrance and run. Orient the low side of the slope toward the back or a side where water runoff will not pool near the birds.
Step 6: Secure Everything with Hardware Cloth
Cover every ventilation opening, window, and the pop door opening (when open) with 1/2-inch welded hardware cloth. Attach it using galvanized staples from your staple gun, then reinforce with screws and fender washers every 6 inches around the perimeter.
This is the one area where you absolutely cannot cut corners. Hardware cloth is the barrier between your flock and every predator in your area. Raccoons, weasels, and rats can all breach standard chicken wire. Our article on hardware cloth vs. chicken wire explains exactly why hardware cloth is the only reliable option.
Step 7: Install Doors and Latches
Hang the cleanout door and pop door using galvanized exterior hinges. For the cleanout door, a simple frame made from pallet boards covered with plywood works well.
Install two-step latches or carabiner clips on every door and access point. Raccoons can open hook-and-eye latches, slide simple bolts, and turn basic knobs. Every opening needs a latch that requires two distinct motions to release.
I use carabiner clips as backup latches on every door. They cost about $1 each and provide an extra layer of security that has never been breached.
Step 8: Build and Install Interior Features
Roosting bar: Mount a straight 2×4 (salvaged or purchased) with the wide face up at approximately 36 inches off the floor. For 4 to 6 chickens, the bar should be 48 to 60 inches long. Secure it to the side walls with L-brackets or notched supports.
Nesting boxes: Build 2 to 3 nesting boxes from pallet wood scraps. Each compartment should measure approximately 12 x 12 x 12 inches for standard breeds. Mount them on an interior wall at 18 to 24 inches off the floor, always lower than the roosting bar.
If you are considering a more advanced nesting box design that keeps eggs cleaner and prevents egg eating, our guide on roll-away nesting boxes and whether they are worth it covers the full range of options.
Bedding: Add 3 to 4 inches of pine shavings on the coop floor and a couple inches in each nesting box. Sprinkle dried herbs like lavender, peppermint, and oregano into the boxes for a natural pest deterrent. Our complete guide on the best herbs to put in chicken nesting boxes covers which herbs work and exactly how to use them.
Step 9: Build the Attached Run
Frame a run from additional pallet stringers or 2×4 lumber. A run measuring approximately 6 x 8 feet or 6 x 10 feet provides adequate outdoor space for 4 to 6 hens. Enclose all sides and the top with hardware cloth.
For the ground perimeter, either bury the bottom edge of the hardware cloth 6 inches into the soil or bend it outward in an L-shaped apron and cover with gravel or soil. This prevents predators from digging under the run wall.
Honest Pros and Cons of a Pallet Chicken Coop
I want to be straightforward about what works and what does not with pallet construction. Too many pallet coop tutorials make it sound like a flawless solution.
Advantages
Cost. This is the obvious one. Pallets are free. Your total build cost comes from hardware, roofing, and hardware cloth, which typically runs $120 to $210 versus $250 to $500+ for a comparable coop built from new lumber.
Availability. Pallets are everywhere. Most businesses are happy to have them taken away.
Environmental benefit. Reusing pallets keeps wood out of landfills and reduces demand for new lumber.
Structural strength. Pallets are built to carry heavy loads. The stringers are thick and durable. A pallet wall is surprisingly rigid once properly secured.
Character. There is a rustic, homestead aesthetic to a pallet coop that many keepers genuinely love. My pallet coop was not the prettiest thing in the yard, but it had personality.
Disadvantages
Time-intensive preparation. Disassembling pallets, pulling nails, filling gaps, and sanding rough spots takes significantly more time than building with new lumber. Budget an extra day or two of prep work compared to a standard build.
Inconsistent wood quality. Pallet boards vary in thickness, width, condition, and wood species. Some are hardwood, some are softwood. Some are bone-dry and others are damp. This inconsistency makes precise joinery difficult.
Shorter lifespan. Untreated pallet wood exposed to weather will deteriorate faster than pressure-treated or properly sealed lumber. Expect a pallet coop to last 3 to 5 years with basic maintenance, compared to 10+ years for a coop built from quality new materials. Sealing the exterior with stain extends this, but it will not match the longevity of purpose-built lumber.
Gap management. Pallets have gaps. Filling every gap to create draft-proof, predator-proof walls requires patience and extra material. If you leave gaps, you are inviting cold drafts, moisture, and small predators into the coop.
Potential chemical contamination. If you do not verify the pallet treatment stamps, you risk introducing chemically treated wood into your flock’s living space. Always check for the HT stamp.
Pallet Coop Design Ideas and Variations
A pallet coop does not have to be a basic box. Here are a few design variations that work well with pallet construction.
The Pallet A-Frame
Stand two pallets together in an inverted V shape, screw them at the peak, and you have the bones of an A-frame coop. Fill in the triangular end walls with pallet boards, add a small enclosed section at one end for roosting and nesting, and leave the other end as an open-air run covered with hardware cloth.
This is the fastest pallet coop build I have seen. It can be done in a single day. The downside is limited interior space and awkward nesting box placement due to the angled walls.
The Pallet Lean-To
Attach pallets to an existing structure like a garage wall, shed, or fence to create a lean-to style coop. One wall is already done for you, which reduces the number of pallets needed. This works especially well if you have a south-facing wall that gets good winter sun.
The Pallet Tractor
Build a lightweight pallet frame on skids or small wheels so the coop can be dragged to fresh ground every few days. Keep the structure small (one or two pallets wide) to maintain portability. This is best for flocks of 2 to 4 hens.
The Pallet Walk-In
If you gather enough pallets, you can build a full walk-in coop. Stand pallets on end (with the 48-inch dimension vertical) to create walls tall enough to walk through. You will need to reinforce the top edges with a horizontal beam or additional framing to support the roof, but the result is a spacious, accessible coop that costs almost nothing in lumber.
For a full comparison of coop styles and which one fits your situation best, our guide on popular chicken coop styles explained covers everything from A-frames to gambrel barns.
Tips from My Own Pallet Coop Build
After building with pallets, here are the things I wish someone had told me before I started.
Invest in a pallet breaker tool. It costs $25 to $40 and saves you hours of frustrating pry bar work. It also dramatically reduces the number of boards you split during disassembly.
Sort your boards by width and condition before you start building. Having organized stacks of similarly sized boards makes the construction process much smoother. I dumped all my disassembled boards in one pile and spent half my build time hunting for the right size.
Pre-drill before screwing near board ends. Pallet wood splits easily when you drive a screw close to the end of a board. A quick pilot hole prevents this.
Do not skip the exterior sealant. A coat of exterior stain or weather sealant on the outside walls and roof framing adds years to the lifespan of your pallet coop. It is worth the $15 to $30 investment.
Build the coop slightly larger than you think you need. Pallets are free. There is no reason to build to the bare minimum when extra pallets cost you nothing but a bit more time. A slightly oversized coop gives your birds more room and makes cleaning easier.
Accept imperfection. A pallet coop will never look as polished as a coop built from milled lumber. That is okay. Your chickens do not care about aesthetics. They care about being dry, safe, ventilated, and comfortable.
Frequently Asked Questions
Are pallet chicken coops safe for chickens?
Yes, as long as you use pallets stamped HT (heat treated) or unstamped domestic pallets that show no signs of chemical contamination. Avoid pallets stamped MB (methyl bromide) and any pallets with visible chemical stains or strong odors.
How long does a pallet chicken coop last?
With no exterior treatment, expect 2 to 4 years depending on your climate. With exterior stain or sealant, a well-built pallet coop can last 4 to 6 years or longer. Regular maintenance like replacing rotted boards and resealing exposed wood extends the lifespan further.
Can I build a pallet coop in a single weekend?
A small coop for 3 to 4 chickens using mostly whole pallets can be completed in a weekend if your pallets are already gathered and sorted. A larger build for 6+ chickens, or one that requires extensive pallet disassembly, will likely take two weekends.
Do I need a building permit for a pallet chicken coop?
This depends on your local jurisdiction. Some cities and counties require permits for any detached structure above a certain square footage. Check with your local planning department. And always verify your area allows backyard chickens before building. Our article on chicken laws by state is a good starting point.
Can I insulate a pallet coop for winter?
Yes. The gap between the pallet slats and the exterior sheathing creates a natural cavity that can be filled with rigid foam insulation, straw, or even crumpled newspaper for basic cold-weather insulation. Cover the insulation on the interior side with plywood or additional boards to prevent chickens from pecking at it.
Disclaimer: The information in this article is based on personal experience and commonly accepted backyard poultry keeping practices. Pallet wood varies in quality, treatment history, and structural integrity. Always inspect pallets carefully and verify treatment stamps before use. Building codes, setback requirements, and flock regulations vary by location. Consult your local planning department and municipal ordinances before constructing any outdoor structure. For flock health concerns, contact a qualified poultry veterinarian or your local agricultural extension service.

Oladepo Babatunde is the founder of ChickenStarter.com. He is a backyard chicken keeper and educator who specializes in helping beginners raise healthy flocks, particularly in warm climates. His expertise comes from years of hands-on experience building coops, treating common chicken ailments, and solving flock management issues. His own happy hens are a testament to his methods, laying 25-30 eggs weekly.