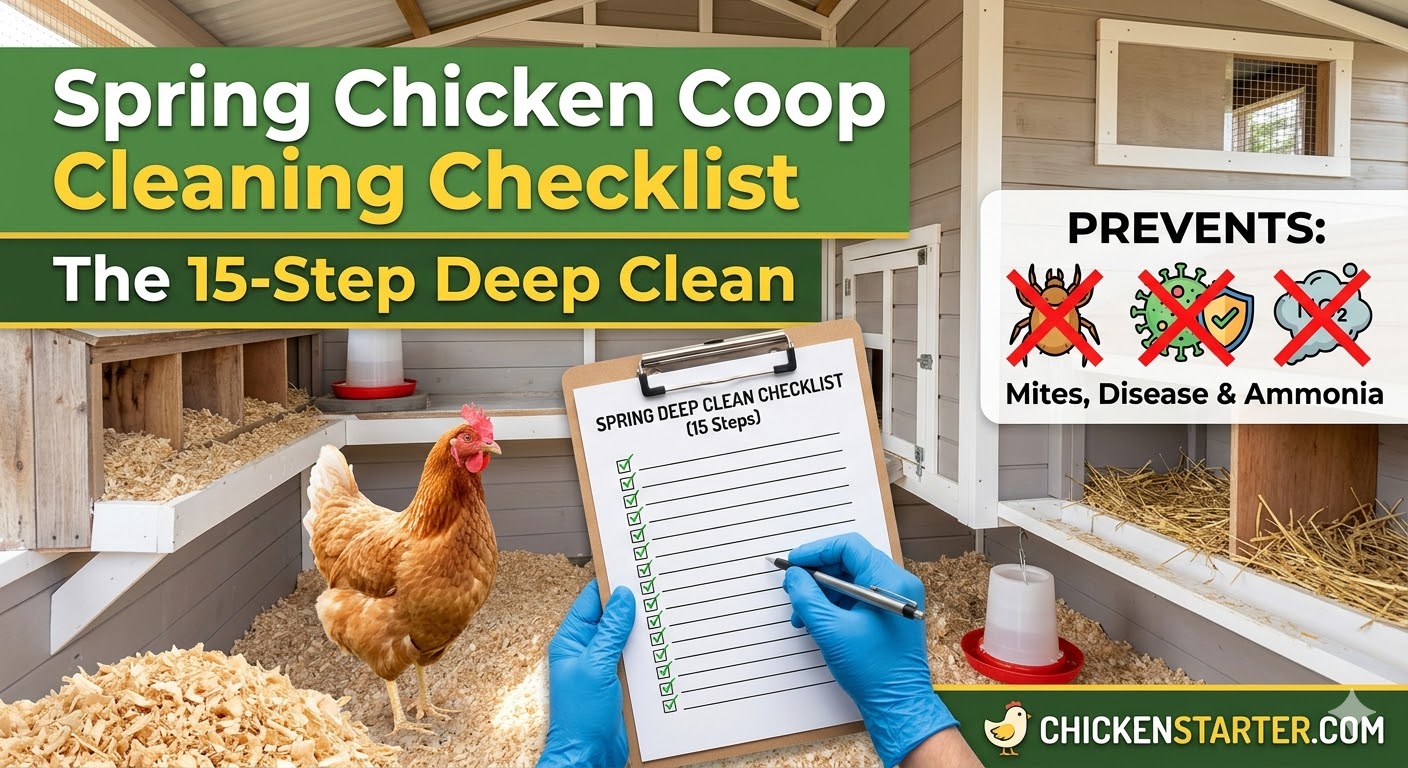
The first warm day of spring when I opened my coop after a long winter, the smell hit me like a wall. That unmistakable ammonia sharpness that told me everything I needed to know. The deep litter that carried us through January had turned into a warm, damp breeding ground for every parasite that had been quietly waiting out the cold.
That year I learned something most backyard chicken keepers figure out the hard way. Timing your spring deep clean is not about when the calendar says spring. It is about when temperatures consistently rise above 50°F (10°C) and the parasite lifecycle kicks into overdrive.
After three years of refining my spring cleaning protocol, including one brutal summer spent fighting a red mite infestation I could have prevented, I built this 15-step checklist. Every step has a specific reason behind it, rooted in actual parasite reproductive science, USDA biosecurity recommendations, and published ammonia research.
This is not a “wipe it down and toss in fresh shavings” kind of guide. This is a complete system that resets your coop at the most critical moment of the year.
The Complete Spring Cleaning Checklist at a Glance
Before we dig into the science and the step-by-step explanations, here is the full checklist you can reference, print, and tape to your coop wall. Every single item is explained in detail further down.
Preparation Phase: Before You Start
Choose a warm, dry, sunny day with temperatures above 55°F (13°C). Remove all chickens to a temporary secure area away from the coop. Gather your supplies: shovel, scrub brush, bucket, garden hose or pressure washer, rubber gloves, dust mask or respirator, eye protection, disinfectant, food-grade diatomaceous earth, and enough fresh bedding for a full replacement.
Phase 1: Strip and Remove
Step 1 is removing all bedding, nesting material, and deep litter down to the bare floor. Step 2 is pulling out every removable item: feeders, waterers, roost bars, nesting box inserts, and dust bath containers. Step 3 is clearing cobwebs, dust, and debris from walls, ceiling, and every corner.
Phase 2: Scrub and Wash
Step 4 is dry-scraping floors, walls, and roost bars to remove caked-on droppings. Step 5 is washing all surfaces with a hot water and white vinegar solution at a 1:1 ratio. Step 6 is deep-scrubbing roost bars, paying particular attention to cracks and joints where red mites hide. Step 7 is washing feeders and waterers with hot soapy water followed by a vinegar rinse. Step 8 is pressure washing or hosing down the entire coop interior if your construction allows it.
Phase 3: Disinfect and Treat
Step 9 is applying your chosen disinfectant to every surface. Step 10 is treating all cracks, crevices, joints, and screw holes with a mite-specific treatment. Step 11 is allowing the coop to air dry completely, with a minimum of four to six hours in direct sun. Overnight is ideal.
Phase 4: Inspect and Repair
Step 12 is inspecting hardware cloth, wire, and fencing for winter damage or predator weak points. Step 13 is checking the roof, walls, and floor for leaks, rot, or gaps. Step 14 is inspecting all ventilation openings, clearing blockages, and repairing screens.
Phase 5: Refresh and Restock
Step 15 is adding four to six inches of fresh bedding. Then dust nesting boxes with a light coating of food-grade diatomaceous earth. Reinstall clean feeders and waterers. Refill the dust bath with a fresh mix. Return your flock to their freshly cleaned home.
Why Spring Cleaning Matters Far More Than You Think
Most articles tell you to “check for mites” during your spring clean. That is like saying “check for fire” without explaining how combustion works. The real reason a spring coop deep clean is the single most important maintenance event of the year comes down to three overlapping biological systems, all of which activate as temperatures warm.
The Red Mite Lifecycle Explosion
The red mite (Dermanyssus gallinae), also known as the poultry red mite, is a blood-feeding ectoparasite of poultry. It is arguably the most devastating external parasite backyard chicken keepers face, and spring is exactly when it becomes a crisis.
Here is what happens inside your coop over winter. According to parasitology research, D. gallinae can survive for up to 10 months in an empty hen house. They spend the cold months hiding in cracks and crevices, metabolizing slowly, waiting. These mites are obligate blood feeders that normally attack their host at night. After feeding, they retreat into cracks and crevices away from light sources, where they mate and lay eggs.
Then spring arrives.
Based on published data in veterinary parasitology literature, temperatures between 25 and 30°C are optimal for survival and reproduction. Under favorable conditions, the entire life cycle can be completed within seven days, so populations can grow extremely rapidly.
Think about that for a moment. After mating, an adult female lays one to nine eggs every 12 to 24 hours following a blood meal. Females will feed and lay eggs several times during their lifetime, laying around 30 eggs in total over the course of their lives.
A small population of mites that quietly survived winter in your roost bar joints and wall crevices can become tens of thousands within three to four weeks of consistently warm weather. In established infestations, the number of mites rises progressively for four to six months until it reaches a plateau.
Your spring deep clean is a parasite lifecycle interruption strategy. You are catching these mites before the population explosion begins. That is why the timing and the crevice treatment matter so much.
Coccidiosis: The Invisible Spring Threat
Coccidiosis, caused by protozoa of the genus Eimeria, is one of the most common and economically devastating diseases in poultry worldwide. Most species affecting poultry belong to the genus Eimeria and infect various sites along the intestinal tract.
The connection to spring cleaning is direct. Oocysts can be transmitted via contaminated equipment and personnel as well as the presence of insects and rodents. Fresh oocysts are not infective until they sporulate, and under optimal conditions of 70 to 90°F (21 to 32°C) with adequate moisture and oxygen, sporulation requires only one to two days.
That temperature range is exactly what your coop reaches in spring. According to the MSD Veterinary Manual, sporulated oocysts are extremely environmentally resistant and can survive for long periods depending on conditions. They are also resistant to some disinfectants commonly used around livestock.
When you remove all the old bedding during a spring cleanout, you are physically removing the reservoir of coccidia oocysts that accumulated through winter. Reducing Eimeria infection in chickens can be achieved by limiting oocyst sporulation in the environment, primarily by maintaining dry litter and improving ventilation.
This is why “topping off” with fresh shavings instead of doing a full strip does not work. The oocysts survive at the bottom.
The Ammonia Science: Why “It Doesn’t Smell That Bad” Is Dangerous
Ammonia in your chicken coop is not just an unpleasant smell. It is a measurable, documented health hazard with specific thresholds that directly affect your flock’s productivity and wellbeing.
Ammonia gas is produced from microbial decomposition of nitrogen-containing substances like manure and litter.
Research from the University of Georgia’s Precision Poultry Farming program has shown that ammonia levels above 25 ppm result in lower production efficiency and poor welfare, including respiratory disorder, reduced feed intake, lower growth rates or egg production, poor feed use efficiency, increased susceptibility to infectious diseases, and higher mortality.
Here is the critical detail that should concern every backyard keeper. According to Dr. Pitesky from UC Davis, as featured on The Poultry Site, humans can smell ammonia at around 20 parts per million, but ammonia can actually cause respiratory damage at concentrations as low as 5 ppm. When ammonia concentrations reach 20 to 25 ppm in a poultry house, the birds become significantly more susceptible to respiratory diseases like airsacculitis and infectious bronchitis.
By the time you can smell it, your chickens have already been suffering.
A deep litter system that has compacted over winter accumulates ammonia at the floor level, right where your birds rest on their roosts. Research has also shown that egg quality, including albumen height, pH, and condensation, is reduced after laying hens are chronically exposed to high ammonia levels.
Your spring cleanout resets ammonia levels to near zero. That alone makes the three to five hours of work worthwhile.
When to Do Your Spring Deep Clean
The timing is not about the calendar. It is about temperature thresholds and what they trigger biologically.
The Temperature Trigger
Red mites are widespread even in winter, but they are far more common between May and late October when temperatures are ideal for development of the immature forms. Your goal is to clean before optimal mite reproduction temperatures are sustained.
For most regions, this means:
United States: Late February to mid-March in the South. March to early April in the Mid-Atlantic and Midwest. April to early May in the Northern states.
Canada: April to mid-May, depending on province. Watch for consistent daytime highs above 50°F (10°C).
Australia: Late August to September as winter ends and temperatures start rising.
United Kingdom: March to April.
The Ideal Cleaning Day
Pick a day forecast above 55°F (13°C) with sunshine and a light breeze. Sun dries the coop faster and provides natural UV disinfection. Wind creates airflow that speeds drying. Avoid cleaning on wet, overcast, or cold days. A damp coop with fresh bedding on top creates perfect conditions for mold growth and ammonia buildup.
How Long Does It Take?
For a standard backyard coop housing four to eight chickens, expect three to five hours total including drying time. A larger coop for 12 to 20 birds will take five to eight hours. Plan for your chickens to be out of the coop for six to 12 hours.
The 15 Steps Explained: Your Complete Deep Clean Guide
Phase 1: Strip and Remove Everything
Step 1: Remove All Bedding and Deep Litter
Remove everything down to bare floor. Do not leave a “base layer” of old bedding thinking it will help the new bedding get established. Parasite eggs, coccidia oocysts, and harmful bacteria survive at the bottom layers where moisture and warmth are highest.
Pile the old bedding in a designated compost area. The nitrogen-rich droppings make excellent garden compost after three to six months of hot composting. If you use the deep litter method, your annual spring cleanout is the recommended reset point.
Step 2: Remove All Removable Items
Pull out feeders, waterers, roost bars if they are removable, nesting box inserts, and dust bath containers. Every one of these items needs to be cleaned and inspected separately. Removing them also exposes the hidden crevices and corners where mites congregate during daylight hours.
Step 3: Clear Cobwebs, Dust, and Debris
Use a broom or shop vacuum to sweep cobwebs from ceiling corners, walls, and window frames. Dust and cobwebs harbor mites, lice, and their eggs.
Wear a dust mask or respirator during this step. Dried poultry dust contains bacteria, fungal spores, and fine particulate matter that is a known occupational respiratory hazard for humans. This is not optional.
Phase 2: Scrub and Wash
Step 4: Dry-Scrape All Surfaces
Use a putty knife, paint scraper, or flat-edged shovel to scrape caked droppings from floors, walls, and roost bars. Pay special attention to roost bars and the area directly beneath them. This step removes the bulk of organic material before you start wet-washing.
Step 5: Wash All Surfaces With Vinegar Solution
Mix equal parts white vinegar and hot water in a bucket. Alternatively, use a few drops of mild dish soap in hot water. Scrub all interior surfaces including the floor, walls up to at least three feet, and areas around windows and vents.
Vinegar is effective here because it kills many common bacteria, helps break down organic residue, and actively neutralizes ammonia. It is also completely safe for poultry once dry, leaving no toxic residue.
Why vinegar before bleach? This is the general wash step. Vinegar handles the organic matter and bacteria effectively without risk. The heavy-duty disinfection comes in Phase 3.
Step 6: Deep-Scrub the Roost Bars
This is the most important scrubbing step for mite prevention. During the daytime, red mites hide in cracks and crevices in the poultry house and then emerge to feed on chickens at night.
Scrub every surface of every roost bar, giving extra attention to joints, screw holes, and any cracks in the wood. If your roost bars have deep crevices that a brush cannot reach, strongly consider replacing them with smooth, rounded bars that eliminate hiding spots.
Dip your scrub brush in undiluted white vinegar for extra cleaning power on stubborn droppings.
Step 7: Wash Feeders and Waterers
Scrub inside and out with hot soapy water, then rinse with a vinegar solution (one part vinegar to four parts water). Let everything air dry completely in direct sunlight.
Check carefully for cracks, mold growth in seams, and algae buildup. Replace any equipment that cannot be thoroughly cleaned. A cracked waterer harboring biofilm is a disease vector you do not need.
Step 8: Rinse or Pressure Wash the Interior
If your coop construction allows it, meaning solid flooring and weatherproof walls, use a garden hose or pressure washer on a low to medium setting to rinse all surfaces. This removes soap and vinegar residue along with any remaining organic matter.
A pressure washer is the most efficient tool for this step by far.
If your coop has a dirt floor, skip the water and instead focus on thorough scraping and dry-brushing. You do not want to create a mud pit.
Phase 3: Disinfect and Treat
Step 9: Apply Disinfectant to All Surfaces
This is where you move from cleaning to actual pathogen elimination. Choosing the right disinfectant matters because different products work differently on different surfaces and against different organisms.
White vinegar (undiluted) offers moderate effectiveness against many bacteria and some viruses. It is very safe for chickens, costs very little, and works well for routine cleaning and ammonia neutralization. Best for general maintenance when no active disease is present.
Oxine AH (activated with citric acid) is widely regarded as the best all-purpose coop disinfectant for backyard flocks. It is a powerful, EPA-registered disinfectant trusted for its proven effectiveness against a broad spectrum of bacteria, fungi, and viruses. This chlorine dioxide-based solution is commonly used in animal care settings such as kennels, barns, stables, and poultry houses to control pathogens and eliminate odors. It is also OMRI Listed for organic use and completely water-soluble.
Virkon S is an excellent broad-spectrum veterinary disinfectant used by professionals for disease outbreak response. It is effective against bacteria, viruses, and fungi. Safe for chickens after surfaces have dried completely.
Bleach (10% solution: one part bleach to nine parts water) is effective on hard, non-porous surfaces. However, it penetrates porous wood poorly, must be rinsed thoroughly, and produces toxic fumes if used in confined spaces. Never mix bleach with vinegar. This creates toxic chlorine gas. Never.
F10SC Veterinary Disinfectant is a premium, veterinary-grade option that works against a wide spectrum of pathogens. Safe after drying. Commonly recommended by avian veterinarians.
Hydrogen peroxide (3%) provides moderate antibacterial action and breaks down into water and oxygen, making it inherently safe. Works well as a spot treatment and for mold removal.
Apply your chosen disinfectant to all surfaces using a pump sprayer for even coverage. Floor, walls, roost bars, nesting boxes, ceiling if reachable. Follow the product-specific dilution ratios exactly. More concentrated is not more effective with chemical disinfectants and may leave harmful residues.
Step 10: Treat Every Crack and Crevice for Mites
This is the step that 90% of chicken keepers skip. And it is the step that determines whether you will spend your entire summer fighting mites or enjoying your flock.
During the day, mites live concealed in all possible hiding spots: wall crevices, floor gaps, inside nesting boxes, under roosts, on dried litter, and in any crack or joint they can squeeze into.
You can disinfect every flat surface perfectly. But if you do not specifically target the crevices, joints, screw holes, and gaps, the mite population hiding in those spaces survives intact and rebounds within weeks.
Effective crevice treatment options include:
Permethrin spray is a synthetic pyrethroid that provides effective knockdown and residual activity. Available at most farm supply stores. Follow label directions precisely.
Elector PSP contains spinosad, which is an organic-approved insecticide. Research has shown it is effective against mites resistant to older acaricides and can even be used on premises in the presence of laying hens, making it one of the safest professional options available.
Undiluted neem oil applied directly into cracks and joints provides a natural insecticidal and fungicidal barrier.
Diatomaceous earth paste made by mixing food-grade DE with a small amount of water and painting it into cracks creates a physical barrier. As it dries, the microscopic particles damage the mites’ exoskeletons.
Step 11: Allow Complete Air Drying
Open every door, window, and vent. Your coop needs a minimum of four to six hours of direct sunlight and moving air. Overnight drying is ideal if the coop is predator-safe when open.
UV sunlight is a natural disinfectant. Every hour of direct sun exposure kills additional pathogens on surfaces. A fully dry coop is non-negotiable before you add fresh bedding. Damp surfaces under new shavings equal mold growth, ammonia buildup, and the exact conditions parasites thrive in.
Phase 4: Inspect and Repair
Step 12: Inspect Hardware Cloth, Wire, and Fencing
Winter weather, ice expansion, and persistent predator attempts can damage your hardware cloth and wire over the cold months. Walk every inch of your coop and run perimeter checking for holes, loose staples or screws, rust-weakened sections, and gaps at ground level.
A single gap large enough for a weasel, rat, or snake is a disaster waiting to happen. Repair everything immediately. Your predator-proofing is only as strong as its weakest point.
Step 13: Check Roof, Walls, and Floor for Damage
Look for water stains on the interior indicating leaks. Press wood surfaces to find soft spots that signal rot. Look for daylight visible from inside, which means gaps exist. Check for foundation settling or frost heaving.
Winter freeze-thaw cycles open cracks in wood and expand gaps that were barely noticeable in fall. Check the pop door operation too. Frozen or swollen doors from winter may need sanding or adjustment before they jam completely.
Step 14: Inspect and Clear Ventilation
Clear any blockages from vents, eaves, or soffit openings. Proper coop ventilation is critical because ammonia and excess moisture escape through upper vents.
Do not seal vents trying to retain warmth. Moisture buildup causes far more damage than cold air ever will. This is one of the most common ventilation mistakes backyard keepers make.
Repair or replace any damaged vent screens with hardware cloth to keep predators and wild birds out. Position ventilation high, above roost level, so your chickens are not sitting in a direct draft.
Phase 5: Refresh and Restock
Step 15: Add Fresh Bedding
Lay down four to six inches of fresh bedding across the entire floor. The best options for most backyard keepers include:
Pine shavings are the most popular choice. They are absorbent, readily available, and affordable. Use kiln-dried large flake shavings, not fine sawdust.
Hemp bedding is increasingly popular for its excellent absorbency, roughly four times that of pine shavings. It also composts faster. For a detailed comparison, see our hemp vs. straw vs. sand bedding guide.
Chopped straw works well in nesting boxes and as a floor covering, though it is less absorbent than pine or hemp.
Sand is an option if your coop construction supports the weight and drainage requirements. See our guide to the best coop flooring for considerations.
Do not use cedar shavings. The aromatic oils, specifically plicatic acid and thujone, cause respiratory irritation in poultry. This is well documented and consistent across veterinary literature.
In your nesting boxes, add three to four inches of clean bedding with a light dusting of food-grade diatomaceous earth at the base. This creates a passive barrier against mites that may try to establish in the nesting area.
Final Refreshes
Reinstall your clean feeders and waterers with fresh feed and clean water. Refill the dust bath area with a fresh mix of construction sand, food-grade DE, and wood ash.
Here is a trick I have used for three years that my avian vet endorsed. Apply a thin line of petroleum jelly or food-grade grease to roost bar ends and joints. This creates a physical barrier that mites struggle to cross when trying to reach their daytime hiding spots. It is cheap, safe, and remarkably effective as a supplemental measure.
Then open the pop door and let your flock back in. They will spend the first hour investigating everything, and you will have the satisfaction of watching them explore a clean, safe home.
The 5 Most Common Spring Cleaning Mistakes
Mistake 1: Cleaning on a Cold or Damp Day
If the coop does not dry completely after washing and disinfecting, moisture gets trapped under your fresh bedding. The result is rapid mold growth, accelerated ammonia buildup, and exactly the damp conditions that parasites thrive in. You have effectively made things worse.
Only deep clean on a day forecast to be above 55°F with sunshine. Check the forecast the night before and postpone if rain is expected.
Mistake 2: Adding Fresh Bedding on Top of Old
“Topping off” is fine for your weekly routine maintenance. But during the spring deep clean, a full strip is mandatory. Parasite eggs, coccidia oocysts, and pathogenic bacteria survive in the compacted lower layers of old bedding. Adding fresh shavings on top only covers the problem. It does not solve it.
Mistake 3: Not Removing the Chickens During Cleaning
Cleaning an occupied coop generates massive dust plumes containing bacteria, fungal spores, and fine dried fecal particles. Chickens exposed to this dust can develop respiratory infections. Their respiratory systems are more sensitive than ours.
Remove your entire flock to a temporary secure area before you start. A portable dog crate, a covered run section, or a temporary pen works fine. If you notice signs of respiratory illness later, our guide on treating chicken respiratory infections covers the symptoms and responses.
Mistake 4: Using Bleach Incorrectly
There are four ways bleach goes wrong in a chicken coop.
Too concentrated means toxic fumes that linger. Too dilute means ineffective disinfection. On porous wood means poor penetration, since bleach does not soak into wood fibers the way vinegar or chlorine dioxide does. Not rinsing thoroughly means corrosive residue your birds contact with their feet and feathers.
And the critical safety rule: Never mix bleach with vinegar. This chemical reaction produces toxic chlorine gas that can cause serious injury or death to both chickens and humans in an enclosed coop.
Mistake 5: Skipping the Crevice Treatment
I saved this for last because it is the mistake that costs the most. You can scrub every flat surface in your coop to spotless perfection. If you do not specifically treat the cracks, joints, screw holes, and gaps, the mite population hiding in those spaces is completely untouched.
Field studies have consistently shown that standard cleaning methods alone have limited effect on mite populations because infestations often rebound after only temporary suppression. D. gallinae is difficult to fully eradicate from infested housing due to its short lifecycle, high reproduction rate, and increasing resistance to commonly used acaricides.
Step 10 is the step that matters most. Do not skip it.
Spring Coop Inspection Checklist: Beyond Cleaning
While you have the coop stripped and empty, take 30 minutes to do a structural assessment. Winter takes a toll on any outdoor structure.
Structural Items
Check the roof for leaks, loose panels, and ice damage. Inspect walls for rot, gaps, and pest damage. Examine the floor for moisture penetration, rot, and settling. Look at the foundation and predator skirt for evidence of digging. Test the pop door and run door for smooth operation and secure closure.
Hardware and Security
Verify all hardware cloth connections are tight with no rust holes. Test every latch and lock to confirm they are predator-proof and functional. Oil or grease any stiff hinges. If you use an automatic coop door, test the sensor, battery, and mechanism.
Systems Check
Confirm all ventilation pathways are clear and screened. If you use supplemental lighting, test bulbs and timers. Inspect any wiring for rodent damage, which is a genuine fire hazard that many keepers overlook. Flush water lines if you have an automatic watering system and check for winter cracks in pipes. Confirm nesting boxes are in good repair, at the correct height, and accessible.
Biosecurity: The Spring Reset Your Flock Needs
Spring cleaning is the natural time to review and strengthen your biosecurity protocols. This is especially critical given the ongoing Highly Pathogenic Avian Influenza (HPAI) situation.
Why Spring Biosecurity Is Urgent
According to USDA wildlife monitoring data, detections of avian influenza are consistently higher in the fall and spring because wild birds continue spreading the virus as they migrate to their seasonal homes. Information from Clemson University’s Cooperative Extension confirms that significant detections of the H5N1 strain have continued into early 2026, with thousands of wild birds affected nationwide.
Because of the ongoing HPAI outbreak, which has become the largest animal health emergency in U.S. history to date, it is critical that bird owners continue to follow strict biosecurity practices.
The USDA’s Defend the Flock program provides free tools and resources for poultry owners at every scale. The program is designed to help everyone who works with or handles poultry follow proper biosecurity practices that will help keep birds healthy and reduce the risk of avian influenza and other infectious diseases.
Your Spring Biosecurity Checklist
Ensure wild birds cannot access your flock’s feed or water sources. Check that the run is covered or netted to prevent direct wild bird contact. Set up a designated pair of “coop shoes” worn only in the flock area. Place a foot bath or boot dip with diluted disinfectant at the coop entrance.
Review your flock health monitoring routine. Know the signs of avian influenza: sudden unexplained deaths, respiratory distress across multiple birds, swollen head, sharp drop in egg production, and purple discoloration of combs and wattles.
Keep visitors to a minimum. As the USDA recommends, only allow those people who take care of your poultry to come in contact with your birds. Wash your hands thoroughly before and after handling live poultry.
Have your veterinarian’s contact information posted near the coop. For a comprehensive plan, see our poultry farm biosecurity guide.
If you suspect avian influenza in your flock, meaning sudden unexplained deaths or severe respiratory distress across multiple birds, contact your state veterinarian or USDA APHIS immediately at 1-866-536-7593. Do not attempt to treat suspected HPAI yourself. There is no treatment for HPAI.
Spring Health Check: Examine Your Flock While the Coop Is Clean
While your chickens are out of the coop during cleaning, seize the opportunity to do individual health assessments. You are already handling them to move them. Add five minutes per bird for a quick once-over.
Individual Bird Inspection
Check around the vent area for mites, lice, or dirty matted feathers. Part the feathers on the breast and abdomen and examine the skin directly. You are looking for straw-colored lice moving on the skin, or reddish-brown scabbing and irritation that signals mite damage.
Inspect feet and legs for bumblefoot, which presents as a dark scab on the foot pad with swelling. Check legs for raised, crusty scales that indicate scaly leg mites.
Examine the comb and wattles for discoloration, swelling, or frostbite damage from winter. Feel the keel bone (breastbone) to assess body condition. A bird in good condition will have a slight covering of flesh over the bone. A prominent, sharp keel indicates the bird is underweight.
Check for overgrown nails or beak. Listen carefully for any respiratory sounds such as wheezing, rattling, or sneezing. Our chicken health check guide provides a detailed walkthrough.
Flock-Wide Spring Actions
Consider a fecal float test for intestinal parasites. Spring is when worm burdens tend to increase as soil temperatures rise. Review your deworming protocol.
Assess egg production trends. Are your hens ramping back up as daylight hours increase? If not, investigate potential causes. Our guide on why chickens stop laying covers the most common reasons.
If you are planning to add new birds this spring, quarantine them for a minimum of 30 days in a completely separate area before any contact with your existing flock. No exceptions.
Your Year-Round Coop Maintenance Calendar
Spring is your annual deep clean and the focus of this guide. But here is how it fits into the full seasonal cycle.
Spring is the annual deep clean. The focus is on parasite lifecycle interruption, full disinfection, structural repair after winter, and biosecurity reset for migratory bird season.
Summer shifts to routine maintenance. Weekly spot-cleaning, active mite monitoring, ventilation optimization for heat, shade provision, and fly control.
Fall is winterization prep. Insulation checks, draft sealing while maintaining ventilation, deep litter startup, and lighting schedule adjustments. See our winterizing your coop guide for the full protocol.
Winter requires minimal intervention. Deep litter management, moisture and ventilation monitoring, frostbite prevention, and making sure water does not freeze.
Frequently Asked Questions on Spring Chicken Coop Cleaning Checklist
How often should I deep clean my chicken coop?
A full deep clean should happen at least once per year, ideally in early spring before parasite populations explode. Many experienced keepers do a lighter second deep clean in fall before winterization. Routine spot-cleaning, meaning removing wet or soiled bedding and scraping droppings boards, should happen weekly.
Can I use bleach to clean my chicken coop?
Yes, but carefully. Use a 10% solution, which is one part bleach to nine parts water. Apply only to non-porous surfaces. Rinse thoroughly with clean water. Allow to dry completely before returning chickens. Never mix bleach with vinegar or ammonia. For porous wood surfaces, white vinegar or Oxine AH provides better penetration and safety.
What is the best disinfectant for a chicken coop?
For routine annual cleaning, Oxine AH is widely considered the top choice. It is EPA-registered, effective against bacteria, fungi, and viruses, and commonly used in poultry houses to control pathogens and eliminate odors. For budget cleaning, undiluted white vinegar is effective and safe. For disease outbreak situations, Virkon S or F10SC are veterinary-grade options.
How long should chickens be out of the coop during cleaning?
Keep them out for the entire cleaning process plus complete drying time, typically six to 12 hours total. The coop must be bone dry before chickens return. Damp conditions combined with chemical residues can cause respiratory damage. Clean in the morning so the coop has a full day of sun and air.
Can I use a pressure washer on my chicken coop?
Yes, if your coop has solid floors and well-sealed walls that can handle the water. Use a low to medium pressure setting. A pressure washer is the most efficient tool for removing caked-on droppings and rinsing disinfectant. Avoid high-pressure spray on fragile areas like windows, thin panels, or any electrical connections.
What should I do with the old bedding?
Compost it. Chicken litter is excellent compost material due to its high nitrogen content. Pile it in a designated compost area and allow three to six months to break down fully before using it on gardens. Do not apply fresh chicken manure directly to food crops. The high ammonia content and potential pathogens need time and heat to decompose safely.
Should I clean the run as well?
Yes. Rake out accumulated debris and any standing water, which is a mosquito breeding ground. Check for and fill any holes predators have been digging. Add fresh ground material like sand, gravel, or wood chips if the run surface has become muddy or compacted.
Is the deep litter method compatible with an annual spring clean?
Absolutely. An annual spring cleanout is the recommended reset point for the deep litter method. Remove all accumulated deep litter, clean and disinfect the bare floor, then start fresh with a new base layer. The removed deep litter, now rich with beneficial composting organisms and nutrients, goes straight to your compost pile. For our temperature data on deep litter effectiveness, see our deep litter method study.
Making It All Count
A thorough spring chicken coop cleaning is not a chore you do because the coop looks dirty. It is a parasite lifecycle interruption strategy backed by real reproductive biology. It is an ammonia reset supported by published research from institutions like the University of Georgia and UC Davis. And it is a biosecurity measure directly aligned with USDA recommendations during the most significant avian health emergency in U.S. history.
Four things matter more than anything else.
First, time your clean based on temperature, not the calendar. Get ahead of the 50°F threshold before mite populations activate.
Second, strip to bare surfaces. No shortcuts, no topping off.
Third, treat the crevices. Step 10 is the step that separates keepers who fight mites all summer from keepers who do not.
Fourth, let the coop dry completely. Patience at this stage prevents problems for months.
The whole process takes three to five hours once a year. The year I skipped it, fighting the resulting mite infestation cost me over 50 hours and dozens of eggs from stressed, anemic hens across an entire summer. The math could not be more clear.
Now that your coop is clean, keep your flock healthy with our guides to mite and lice prevention, natural parasite control, or keeping your coop from smelling through the warmer months ahead.
This article is for educational purposes only. For veterinary emergencies or suspected avian influenza, contact a licensed avian veterinarian or your state veterinarian immediately.

Oladepo Babatunde is the founder of ChickenStarter.com. He is a backyard chicken keeper and educator who specializes in helping beginners raise healthy flocks, particularly in warm climates. His expertise comes from years of hands-on experience building coops, treating common chicken ailments, and solving flock management issues. His own happy hens are a testament to his methods, laying 25-30 eggs weekly.