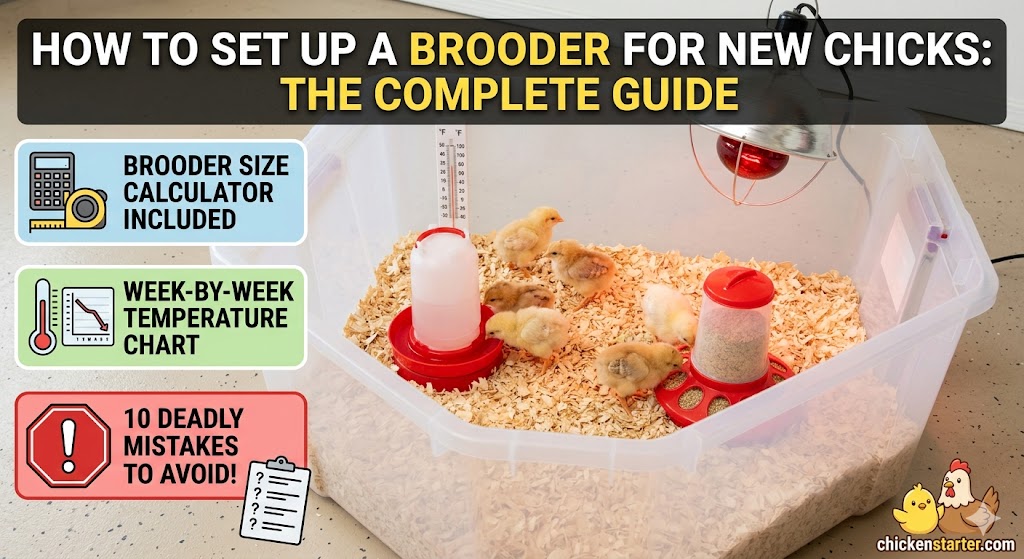
Setting up a brooder for new chicks requires seven things done right: a draft-free enclosure, a safe heat source starting at 95°F, absorbent bedding like pine shavings (never newspaper), a chick waterer with drowning prevention, starter feed with 18 to 20 percent protein, a thermometer at chick level, and a secure lid. Get any one of these wrong and you risk losing chicks in the first 48 hours, which is the most critical window in a baby chick’s entire life.
The good news? Brooding is not complicated. Thousands of first-time chicken keepers successfully raise healthy chicks every spring. But the details matter, and the contradictions across online sources can leave you confused about space requirements, temperature targets, and which heat source to buy.
This guide resolves those contradictions with specific numbers, a chick-count size calculator, a week-by-week temperature chart with behavioral cues, and the honest truth about the heat plate vs. heat lamp debate.
The 7 Requirements for Successful Brooding
1. Enclosure: Draft-free, sturdy, easy to clean, 0.5 to 1 sq ft per chick 2. Heat source: 95°F Week 1, reduce 5°F per week (heat plate recommended over heat lamp for most setups) 3. Bedding: Pine shavings or paper towels; NEVER newspaper or cedar 4. Feed: 18 to 20% protein chick starter crumble, available 24/7 5. Water: Clean, fresh, accessible, with drowning prevention for tiny chicks 6. Thermometer: At chick level, checked multiple times daily 7. Security: Lid or cover to keep chicks in and predators or pets out
Every section below walks you through each requirement in detail, with the specific products, measurements, and timelines you need. For a complete supply checklist, see our guide on bringing chicks home: 15 must-haves.
Step 1: Choose Your Brooder Box (7 Options Compared)
Your brooder enclosure needs to be draft-free, tall enough to prevent escapes, and sized appropriately for the number of chicks you are raising. There is no single “best” brooder. The right choice depends on how many chicks you have, where you are brooding, and your budget.
According to Homestead and Chill, you can make a DIY brooder out of a variety of materials such as a large plastic storage tote, metal tub or stock tank, thick cardboard, or a homemade plywood box. According to The Chicken Chick, having brooded countless batches of baby chicks, her strong preference is a puppy playpen followed by the humble cardboard box.
Here is how the most common brooder types compare:
| Brooder Type | Best For | Capacity | Cost | Pros | Cons |
|---|---|---|---|---|---|
| Plastic storage tote | Small batches (3 to 8 chicks) | 5 to 8 | $10 to $20 | Cheap, portable, easy to clean | Outgrown quickly, poor ventilation |
| Galvanized stock tank | Medium batches (10 to 25) | 10 to 25 | $50 to $100 | Sturdy, tall sides, fireproof | Heavy, no door access |
| Plywood DIY box | Custom sizes | 10 to 50+ | $20 to $50 | Customizable, reusable, add doors | Absorbs moisture, needs sealing |
| Kiddie pool | Medium indoor batches | 10 to 20 | $15 to $25 | Roomy, cheap, easy access | Low sides (chicks escape quickly), no lid |
| Wire brooder panels | Flexible, expandable | 10 to 30+ | $40 to $80 | Tall, expandable, visible | Not predator-proof alone |
| Puppy playpen | Indoor, small to medium flocks | 5 to 15 | $30 to $60 | Portable, zippered lid options, waterproof bottom | Fabric floor needs liner |
| Cardboard box | Emergency or temporary ONLY | 3 to 6 (1 to 2 weeks max) | Free | Immediate, disposable | Absorbs water, collapses, fire risk with heat lamps |
According to Mother Earth News, ideal brooders should have sides around two feet high. Chicks grow fast and will attempt to fly out much sooner than you expect.
The Brooder Size Calculator: How Many Chicks Can Fit?
This is the section most brooder guides get wrong. Space requirements vary wildly across sources, from 0.25 square feet to 2 square feet per chick. The reason? Different sources are quoting space for different ages.
According to Murray McMurray Hatchery, you should plan for 0.5 square feet per bird at the start, increasing to 0.75 square feet per bird at 4 weeks. According to Penn State Extension, you should start with 0.25 square feet per chick for the first two weeks and increase by at least 0.25 square feet per bird every two weeks. According to BackYard Chickens, you need at least 1 square foot per bird if keeping chicks in the brooder until 6 weeks.
Here is a practical calculator that accounts for growth over time:
| Number of Chicks | Week 1 to 2 (0.5 sq ft each) | Week 3 to 4 (0.75 sq ft each) | Week 5 to 6 (1 sq ft each) | Week 7 to 8 (1.5 sq ft each) | Example Container |
|---|---|---|---|---|---|
| 5 chicks | 2.5 sq ft | 3.75 sq ft | 5 sq ft | 7.5 sq ft | Large plastic tote (18 x 36 inches) |
| 10 chicks | 5 sq ft | 7.5 sq ft | 10 sq ft | 15 sq ft | 50-gallon stock tank or 2.5 x 4 ft box |
| 15 chicks | 7.5 sq ft | 11.25 sq ft | 15 sq ft | 22.5 sq ft | Large stock tank or 3 x 5 ft box |
| 20 chicks | 10 sq ft | 15 sq ft | 20 sq ft | 30 sq ft | 4 x 5 ft plywood brooder or two stock tanks |
| 25 chicks | 12.5 sq ft | 18.75 sq ft | 25 sq ft | 37.5 sq ft | 5 x 5 ft or 4 x 6 ft brooder |
| 50 chicks | 25 sq ft | 37.5 sq ft | 50 sq ft | 75 sq ft | 5 x 10 ft floor section or dedicated brooder room |
The most important thing to understand: chicks grow at an astonishing rate. A plastic tote that feels spacious on Day 1 will be dangerously overcrowded by Week 3. According to The Chicken Chick, you should plan on 2 square feet per chick total to avoid problems from overcrowding. That may seem excessive for a day-old chick, but you will thank yourself later.
If you are buying a single container, buy it for the largest size your chicks will need, then use a cardboard divider to create a smaller space for the first week or two. Remove the divider as they grow.
For long-term housing once they outgrow the brooder, see our guide on how big should a chicken coop be.
Step 2: Heat Plate vs. Heat Lamp: The Most Important Brooder Decision You Will Make
For most backyard setups, a heat plate is safer, cheaper to operate, and better for your chicks’ health than a heat lamp. But this is not a universal truth, and understanding when each option is appropriate will help you make the right call for your specific situation.
Why Heat Plates Are Recommended for Most Keepers
According to The Chicken Chick, brooder heat lamps are terrifyingly dangerous. Every year, news stories recount tales of human and animal deaths and homes and chicken coops burning down as a result of a heat lamp fire. Whether from falling, being knocked over, swinging into contact with a flammable object, dust on the bulb igniting, or a bird or loose feather flying up into it, the traditional heat lamp is a fire hazard even when carefully used.
A brooder heat plate works on a completely different principle. According to The Chicken Chick, the heat plate uses radiant heat, just like a mama hen. Chicks snuggle underneath when they feel cold and venture out when they are warm enough. She notes that the EcoGlow operates at just 14 watts compared to 250 watts for a standard heat lamp, there is no fire hazard, no overheating of chicks, no disrupted sleep from constant light, and no risk of pasty butt from overheating.
| Factor | Heat Plate | Heat Lamp (250W) |
|---|---|---|
| Fire Risk | Virtually zero | Significant (the number one cause of coop and barn fires) |
| Wattage | 14 to 66W depending on model | 250W |
| Monthly Operating Cost (24/7) | Approximately $1 to $5 | Approximately $20 to $30 |
| Mimics Mother Hen? | Yes, chicks huddle underneath | No, heats from above with constant light |
| Natural Day/Night Cycle | Yes, allows normal sleep | No, constant bright light disrupts circadian rhythm |
| Temperature Control | Behavior-based (adjust leg height) | Thermometer-based (adjust lamp height) |
| Heats Entire Brooder? | No, warms only directly underneath | Yes, provides ambient heat |
| Purchase Price | $30 to $80 | $10 to $15 |
According to A Farmish Kind of Life, you do not need a thermometer under a heat plate. Your chicks’ behavior tells you everything. If they refuse to come out from under it and chirp unhappily, it is too cold, lower the plate. If they refuse to go underneath, it is too warm or too low for them to fit. If they are happily going in and out, eating and drinking, you have it right.
When a Heat Lamp May Still Be the Better Choice
According to research compiled by The Featherbrain, shipped chicks require more heat for comfort than non-shipped chicks because body temperature is markedly lower in food-deprived chicks. The research shows that the urge to warm up may be stronger than the urge to eat, meaning shipped chicks under a heat plate that does not sufficiently warm them may refuse to leave the plate to find food.
According to The Featherbrain, the solution is either using a heat lamp or cranking the ambient room temperature up while still using a brooder plate. She notes that a heat plate requires room ambient temperatures of at least 50°F to function properly. In cold barns, garages, or unheated spaces in winter, a heat plate alone may not provide enough warmth.
When to use a heat plate: Indoor brooding in a room above 50 to 60°F, small to medium batches of 3 to 25 chicks, families with children where fire safety is the top priority, and when you want natural circadian rhythms for your chicks.
When a heat lamp may be better: Very cold brooding environments below 50°F ambient, very large batches of 50+ chicks in barn settings, and shipped chicks that arrive cold and stressed and need ambient warmth to find food.
If You Must Use a Heat Lamp
According to Tractor Supply’s expert guide authored by Gail Damerow, heat lamp fixtures must have a porcelain socket that will not melt, a reflector to direct heat, and a wire guard safety cover to prevent contact with the hot bulb.
According to Myers Poultry, you should use at least two methods to secure your heat lamp, such as heavy-duty clamps, hooks, or chains. Never hang a heat lamp by its electrical cord. And never use a heat lamp with a plastic storage tote or cardboard box.
One critical safety warning from Tractor Supply’s guide: never use PTFE-coated “shatterproof” bulbs in a brooder. When heated, PTFE emits a gas that is lethally toxic to birds. Chicks in a brooder heated with a PTFE-coated shatterproof lamp will die quickly. Use only standard infrared heat lamp bulbs, not coated bulbs marketed as shatterproof.
For more heat source comparisons, see our guide on safe chicken coop heaters for winter.
Brooder Temperature Chart: Week-by-Week Guide With Behavioral Cues
Start at 95°F for Week 1, then reduce by 5°F each week. But the temperature chart is a starting point, not gospel. According to The Chicken Chick, the standard formula calls for far too much heat in a small space for far longer than chicks require. Watch your chicks, not just your thermometer.
According to UNH Extension, in the absence of a thermometer, monitoring chick behavior can help you determine if the temperature in the brooder is suitable. Comfortable birds will be evenly distributed within the brooder area, softly chirping and pecking around.
| Week | Age | Target Temperature | Too Cold (Signs) | Too Hot (Signs) | Just Right (Signs) | Development Milestones |
|---|---|---|---|---|---|---|
| 1 | 0 to 7 days | 90 to 95°F (32 to 35°C) | Huddled under heat, loud distress chirping, piling | Spread far from heat, panting, wings held away from body | Evenly distributed, soft peeping, active eating | Introduce to food and water, check vents for pasty butt daily |
| 2 | 7 to 14 days | 85 to 90°F (29 to 32°C) | Still clustering tightly | Still avoiding heat source | Active, eating well, exploring | Wing feathers emerging, can add chick grit |
| 3 | 14 to 21 days | 80 to 85°F (27 to 29°C) | Bunching near heat | Panting during day | Play-scratching, curious | Noticeable feathering on wings and back, short supervised outdoor trips on warm days |
| 4 | 21 to 28 days | 75 to 80°F (24 to 27°C) | Seeking warmth actively | Moving away consistently | Active, roosting attempts | Add small perches, increasing feather coverage |
| 5 | 28 to 35 days | 70 to 75°F (21 to 24°C) | Some huddling at night | Avoiding heat day and night | Mostly ignoring heat source | Can turn off heat during warm days |
| 6 | 35 to 42 days | 65 to 70°F (18 to 21°C) | Occasional huddling | No longer relevant | Fully active, barely using heat | Mostly feathered, begin coop transition planning |
| 7 to 8 | 42 to 56 days | Ambient or 60 to 65°F | Watch for huddling first nights in coop | N/A | Confidently active | Fully feathered, ready for outdoor coop if temps consistently above 50°F |
According to The Poultry Site, citing Manitoba Agriculture, the temperature should be reduced by 5°F per week until the room temperature of 70°F is reached. After six weeks of age, temperatures in the 65 to 70°F range are desirable.
Can Chicks Be Too Hot in a Brooder?
Yes, and overheating is one of the top causes of chick loss. According to Cluck It All Farms, overheating is one of the top causes of chick death. According to Penn State Extension, excessive heat causes dehydration, poor growth, and increased mortality.
If your chicks are pressed flat against the walls furthest from the heat, panting, holding their wings away from their bodies, or silent and lethargic, your brooder is too hot. Raise the heat lamp immediately, adjust the heat plate, or increase ventilation. Dehydration from overheating in the first 48 hours can kill chicks faster than cold.
For automated temperature management, see our guide on automated brooder weaning temperature controllers.
Step 3: Brooder Bedding: The Safe Options and the Ones That Cause Permanent Deformities
Pine shavings are the best all-around brooder bedding for most keepers. They are absorbent, affordable, widely available, and provide excellent traction for tiny chick feet.
Safe Bedding Options
Pine shavings (recommended). According to UNH Extension, wood shavings are the most common and effective bedding material. Lay down 3 to 4 inches for good absorption. Available at any farm store for $5 to $12 per bag.
Paper towels (first 48 hours only). Many experienced keepers, including The Chicken Chick, start chicks on paper towels for the first day or two. This prevents chicks from eating bedding before they learn what food is. Sprinkle starter feed directly on the paper towels so tiny chicks can find it immediately.
Hemp bedding. Excellent absorption, very low dust, and naturally antimicrobial. More expensive than pine shavings but increasingly popular. See our hemp vs. straw vs. sand chicken bedding comparison for details.
Chopped straw. Acceptable but less absorbent than shavings. Must be chopped short so chicks do not get tangled.
Aspen shavings. According to The Critter Depot, aspen shavings are safe, highly absorbent, and do not contain the aromatic oils found in cedar or even pine.
Bedding You Must NEVER Use
Newspaper. According to Meyer Hatchery, the most common cause of spraddle leg after a chick is more than a day old is when a brooder floor is too slippery and the baby chick’s legs slip, causing tendon injury. For this reason, they strongly advise against using newspaper or other slick flooring. According to The Chicken Chick, spraddle leg makes walking difficult, if not impossible, and can be permanent if left uncorrected.
Cedar shavings. According to Homestead and Chill, never use cedar products, as they are toxic to chickens. According to The Critter Depot, while cedar may smell nice, those same aromatic oils irritate the chick’s respiratory system, causing both acute and chronic problems.
Cat litter. Chicks will eat it, leading to impacted crops and intestinal blockage.
Flat cardboard or plastic sheeting. Too slippery, same spraddle leg risk as newspaper.
Step 4: Feed and Water Setup (And the Drowning Risk Nobody Mentions)
Chick Starter Feed
Offer non-medicated chick starter feed with 18 to 20 percent protein, available 24/7. According to UNH Extension, clean feed and water should be constantly available to your chicks. Provide enough space at the feed and water to allow all chicks to eat or drink at the same time.
You will see two types at the feed store: medicated and non-medicated chick starter. The medication is typically Amprolium, which helps prevent coccidiosis, a deadly parasitic disease and the number one killer of brooder chicks according to The Chicken Chick.
Here is the critical rule: if your chicks were vaccinated for coccidiosis at the hatchery, do NOT feed medicated starter. The Amprolium interferes with the vaccine. If your chicks were not vaccinated, medicated feed provides an extra layer of protection.
For the first 24 hours, sprinkle feed directly on paper towels or in a shallow dish so tiny chicks can find it easily. According to UNH Extension, make feed available in a shallow dish or egg carton so it is easy for them to find food. After Day 1 or 2, transition to a proper chick feeder.
For detailed feed recommendations, see our best organic chicken starter feed reviews and our guide on when to switch from starter to grower feed.
Water: The Drowning Prevention Detail
Day-old chicks can drown in a standard waterer. Their tiny size and unsteady legs put them at risk of falling into even shallow water troughs and being unable to get out.
For the first 3 to 5 days, add clean marbles or small pebbles to the water trough. This reduces the water depth while still allowing chicks to drink. Remove the marbles once chicks are steady on their feet.
According to UNH Extension, make sure your new chicks drink water immediately. This can be done by gently dipping beaks in the water source to teach them where the water is. This is especially important for shipped chicks that may be dehydrated from transit.
For shipped chicks, add poultry electrolytes to the water for the first 48 hours. Use warm (not cold) water for the first drink. Cold water can shock already-chilled chicks.
The Chicken Chick recommends using a poultry nipple drinker to prevent chicks from spilling water in the brooder, which can lead to wet bedding, bacterial growth, and coccidiosis.
Step 5: Where to Put Your Brooder (And Why You MUST Set It Up 24 Hours Early)
Set up and preheat your brooder at least 24 hours before your chicks arrive. This is not optional.
According to Penn State Extension, it is important to warm the brooding area to 92 degrees at least 24 hours prior to placing chicks to prevent chilling. The materials, including shavings, floor, and equipment, will take up to 24 hours to reach the desired temperature.
Even if your thermometer reads 95°F at air level, the bedding and floor beneath can be cold enough to chill chicks from below. According to The Poultry Site, the temperature 0.5 inches below the litter surface should be at least 80°F. Even if the air is the correct temperature, birds can be chilled by the cold floor under them.
Location Requirements
Draft-free but ventilated. According to Missouri Extension, do not close up the brooder house to keep it warm. Chicks need fresh air, and air also carries moisture out of the house. The floor will be drier and the chicks healthier when proper ventilation is provided.
Away from pets, children, and high-traffic areas. Dogs and cats are predators. Period. Even the gentlest family dog should never have unsupervised access to chicks.
On a surface that will not be damaged by heat or moisture. Garages, spare bathrooms, laundry rooms, and covered porches are popular choices. Wherever you brood, expect dust and odor.
The First 72 Hours: A Day-by-Day Checklist for New Chick Survival
The first 48 hours after arrival or hatch are the most critical period in a chick’s life. Here is exactly what to do, hour by hour and day by day.
Day 1 (Arrival Day)
Confirm your brooder has been preheated for at least 24 hours and reads 95°F at chick level. As you place each chick into the brooder, gently dip its beak into the water. Do not submerge the chick. Just touch the tip of the beak to the water surface so it learns where the water is.
Sprinkle starter feed on paper towels or a flat plate. Tap your finger on the feed to attract curious chicks, mimicking a mother hen’s pecking. Check the temperature at chick level every 2 to 3 hours for the rest of the day. Watch for huddling (too cold) or spreading (too hot) and adjust accordingly.
Before bed, check each chick’s vent for pasty butt. According to The Chicken Chick, all chicks should be checked for pasty butt upon arrival. Pasty butt occurs when droppings stick to the vent and harden, creating a blockage that prevents waste from passing. Left unchecked, it is fatal. According to Fresh Eggs Daily, pasty butt is most common in shipped chicks.
Day 2
Check every chick’s vent again. Pasty butt typically appears between days 2 and 5. If you find a blocked vent, gently soften the dried droppings with warm water and a soft cloth. Do not pull hard. Dry the chick thoroughly before returning it to the brooder.
Confirm all chicks are eating and drinking actively. If any chick is standing hunched with eyes closed while others are eating, that chick needs immediate attention, as it may be chilled, dehydrated, or sick.
If you started on paper towels, you can begin transitioning to pine shavings today. Adjust heat if behavioral cues suggest the temperature is off.
Day 3
Continue vent checks. Start observing individual chick behavior. A lethargic chick that does not eat, drink, or interact with others is a red flag. Ensure waterers are clean and functioning, as chicks will kick bedding into water constantly.
By Day 3, you should see chicks actively running, pecking, play-scratching at the bedding, taking short naps scattered across the brooder, and making soft, contented peeping sounds. If you see all of this, your brooder setup is working.
For detailed guidance on the most common Day 1 to 5 issue, see our complete guide on how to treat pasty butt in chicks. For a full preparedness kit, see how to set up a chicken first aid kit at home.
10 Brooder Mistakes That Kill Chicks (And How to Avoid Every One)
Mistake 1: Using Newspaper as Bedding
According to Meyer Hatchery, the most common cause of spraddle leg after a chick is more than a day old is when a brooder floor is too slippery. They strongly advise against using newspaper and recommend paper towels or pine shavings instead. Spraddle leg can be treated with hobbles if caught early, but prevention is always better. Use pine shavings from Day 1 (with paper towels over them for the first 48 hours if desired).
Mistake 2: Not Securing the Heat Lamp Properly
According to The Chicken Chick, the simple truth is that heat lamps cannot be made fool-proof with flying animals. If you must use one, secure it with at least two independent methods: a heavy-duty clamp plus a chain, or a chain plus a hook into a stud. Never hang by the electrical cord. Never clip to the edge of a plastic tote.
Mistake 3: Not Preheating the Brooder
Cold bedding and equipment absorb heat for hours. A brooder that reads 95°F at air level can have 60°F bedding underneath, chilling chicks from below. According to Penn State Extension, preheat for a full 24 hours before chicks arrive.
Mistake 4: Overcrowding
Overcrowding leads to smothering, pecking, cannibalism, and rapid disease spread. According to Freedom Ranger Hatchery, if chickens do not have enough space, they will peck each other, which can lead to infections, aggression, and eventually cannibalism. Use the size calculator above. When in doubt, go bigger.
Mistake 5: Not Checking for Pasty Butt Daily
According to The Chicken Chick, when droppings build up and form a blockage around a chick’s vent, chicks can die if it is not removed. According to The Greenest Acre, pasty butt is less of a risk once chicks are 10 days old, but you should check daily until they reach this age. This takes 30 seconds per chick. It can save lives.
Mistake 6: No Lid or Cover on the Brooder
According to Homestead and Chill, chicks will be able to jump out of the brooder or on top of the walls within a couple of weeks. In homes with cats, dogs, or young children, a secure cover is critical from Day 1. Use hardware cloth for ventilation and security. Regular chicken wire may have gaps large enough for a cat’s paw.
Mistake 7: Using Cedar Shavings
The aromatic oils in cedar (plicatic acid) cause respiratory distress, liver damage, and chronic health problems in chicks. According to Fresh Eggs Daily, do not use cedar shavings, which can lead to respiratory problems. Pine shavings are safe. Cedar is not.
Mistake 8: Not Teaching Shipped Chicks Where Water Is
According to UNH Extension, you should physically dip chicks’ beaks in the water source when they arrive. Shipped chicks may be dehydrated from 1 to 2 days in transit. They may not find water on their own. According to The Featherbrain’s research, the urge to stay warm can override the urge to eat or drink, meaning stressed shipped chicks may huddle under the heat and never seek food or water without intervention.
Mistake 9: Keeping the Brooder Too Hot for Too Long
According to one keeper’s experience shared on Kianao, if you keep chicks at 95 degrees for a month, they will never develop the necessary thermal tolerance, and moving them to the outdoor coop will shock their systems. Reduce the temperature by 5°F per week as outlined in the chart above. By Week 5 or 6, many chicks barely use the heat source at all.
Mistake 10: No Ventilation
Ammonia from chick droppings builds up fast in an enclosed brooder. According to Missouri Extension, chicks need fresh air, and air also carries moisture out of the house. A sealed, unventilated brooder creates toxic air quality. Ensure airflow without creating drafts, as a hardware cloth lid provides both security and ventilation.
How Many Days Should Chicks Stay in a Brooder?
Chicks typically stay in the brooder for 6 to 8 weeks, until they are fully feathered and able to regulate their own body temperature. The exact timing depends on your climate and outdoor temperatures.
According to The Chicken Chick, in general, most chicks are fully feathered by 6 weeks of age. That means their chick down is gone and they have grown real feathers, which allow them to regulate their body temperatures. She notes that if temperatures outside remain above 65°F and the chicks are at least 6 weeks old, they can move into the coop without supplemental heat.
According to Purina Mills, 6-week-old chickens should be ready to move from the brooder to the chicken coop if the outdoor temperature is at least 50°F. Cold-tolerant breeds can tolerate temperatures into the 40s at this age.
For Australian keepers, according to Dine-A-Chook, outdoor temperatures should consistently be above 15.5°C (60°F) before chicks can go outside without supplemental heat.
Do Chicks Need Heat at 4 Weeks?
Yes. At 4 weeks old, most chicks still need a brooder temperature of approximately 75 to 80°F. According to data compiled by Home in the Finger Lakes, chicks will need supplemental heat until their feathers grow in, which is around 6 weeks of age. Bantams and smaller breeds may benefit from the controlled environment of the brooder even longer.
The exception: if you are brooding in a warm room during summer and the ambient temperature already exceeds 75°F, you may find your 4-week-old chicks no longer seek the heat source. Let their behavior guide you.
For transitioning to the coop during winter, see our guide on winter care for young chicks and chickens.
How to Brood Day-Old Broiler Chicks: What Is Different From Layers
Broiler chicks like Cornish Cross grow dramatically faster than layer breeds, and this changes your brooding strategy in several important ways.
Space. Plan for 1 square foot per broiler chick by Week 2, not Week 5 or 6 like layers. They are significantly larger by the second week and will outgrow standard brooders faster than you expect.
Feed. Broiler starter feed typically has 20 to 22 percent protein, compared to 18 to 20 percent for layer starters. This supports their accelerated growth rate.
Activity level. Broiler chicks are less active than layer chicks and spend more time sitting. This means they need excellent bedding traction because their heavier bodies put more pressure on developing legs. Pine shavings must be kept dry and clean.
Water consumption. Broilers drink substantially more water than layers of the same age. Provide larger waterers or multiple waterers, and check them more frequently.
Transition timeline. Broilers can often move to the coop or a grow-out area at 3 to 4 weeks in warm weather, earlier than layers, because their rapid feathering and larger body mass help them regulate temperature sooner.
For detailed broiler-specific guidance, see our guide on how many bags of feed for broilers.
Complete Brooder Shopping List: Budget ($45) vs. Premium ($150) Setup
Budget Setup (Approximately $45 to $60)
| Item | Estimated Cost | Where to Buy |
|---|---|---|
| Large plastic storage tote (50+ quart) | $10 to $15 | Walmart, Target |
| Pine shavings (small bag) | $5 to $8 | Any farm store |
| Heat lamp + 250W red infrared bulb + clamp + chain | $15 to $20 | Hardware store or farm store |
| Chick waterer (1 quart) | $5 to $7 | Farm store |
| Chick feeder (trough style) | $5 to $7 | Farm store |
| Basic thermometer | $5 | Hardware store |
| Total | $45 to $62 |
Premium Setup (Approximately $125 to $230)
| Item | Estimated Cost | Where to Buy |
|---|---|---|
| Galvanized stock tank (50 to 100 gallon) | $40 to $80 | Farm store |
| Brooder heat plate (Brinsea EcoGlow or Rent-a-Coop) | $40 to $80 | Online or farm store |
| Pine shavings (large bag) | $8 to $12 | Farm store |
| Poultry nipple waterer system | $10 to $15 | Online |
| Chick feeder | $5 to $7 | Farm store |
| Digital thermometer with hygrometer | $10 to $15 | Online |
| Hardware cloth lid (custom or premade) | $10 to $20 | Hardware store |
| Total | $123 to $229 |
The premium setup pays for itself in lower electricity costs (the heat plate alone saves $15 to $25 per month), reduced fire risk, and a more durable brooder you can reuse for years. For a full first-year cost breakdown, see our guide on the cost to raise chickens for the first year.
8 Creative Chick Brooder Ideas
Bookshelf brooder. Lay an old bookshelf on its back and add a hardware cloth top. The shelf dividers create natural sections for heat zone, feeding area, and cool zone.
Stock tank with cardboard divider. Buy one large tank and use a removable cardboard divider to create a smaller space for Week 1 to 2. Remove the divider as chicks grow.
Wire dog crate. Line the inside with cardboard for draft protection and cover gaps with hardware cloth. The Chicken Chick notes this works well with a heat plate.
Watermelon bin corral. According to an experienced keeper on BackYard Chickens, triple-thick watermelon corrals from grocery stores are free, provide about 15 square feet each, and hold up surprisingly well for several weeks.
Repurposed small chicken coop. Perfect for outdoor brooding with a heat plate in a protected area.
Puppy playpen with zippered top. The Chicken Chick’s top recommendation. Portable, washable, enclosed, and the zippered top keeps chicks in and pets out.
Spare bathtub. Heavy, tall sides, built-in drain for easy cleaning. Just add bedding, heat source, and a hardware cloth cover.
Garage floor section. Use brooder panels or hay bales to create a circular corral on the garage floor. According to Missouri Extension, a chick guard ring 12 inches high arranged in a circle works for flocks of any size. Start with a 6-foot diameter for 50 chicks.
Frequently Asked Questions About Setting Up a Brooder for Chicks
How do you set up a brooder for chicks?
Set up a draft-free enclosure at least 24 hours before chicks arrive. Add 3 to 4 inches of pine shavings, install your heat source (heat plate preferred) set to 95°F, place a waterer and feeder on opposite ends from the heat, add a secure lid, and verify the temperature at chick level with a thermometer. Dip each chick’s beak in water on arrival.
How big of a brooder do you need for 10 chicks?
For 10 chicks, you need a minimum of 5 square feet for the first two weeks (0.5 sq ft per chick), increasing to 10 square feet by Week 5 to 6 (1 sq ft per chick). A 50-gallon stock tank (approximately 2 x 4 feet = 8 square feet) works for the first 2 to 3 weeks. Plan to expand by Week 4.
How many days should chicks stay in a brooder?
Chicks typically stay in the brooder for 6 to 8 weeks until they are fully feathered and can regulate their own body temperature. The exact timing depends on the season and outdoor temperatures. Chicks can move outside when overnight lows are consistently above 50 to 55°F.
Can chicks be too hot in a brooder?
Yes. Overheating is one of the top causes of chick death. Signs include panting, wings held away from the body, lethargy, and crowding at the point furthest from the heat source. Raise the heat lamp or adjust the heat plate height immediately if you see these signs.
What are the 7 requirements for successful brooding?
A safe enclosure (draft-free, adequate size), a heat source (95°F Week 1, reduce 5°F per week), bedding (pine shavings, never newspaper or cedar), feed (18 to 20% protein starter crumble), water (fresh, accessible, drowning-safe), a thermometer (at chick level), and security (lid to keep chicks in and predators out).
Do chicks need heat at 4 weeks?
Yes. At 4 weeks, chicks still need a brooder temperature of approximately 75 to 80°F. Most chicks are only partially feathered at this age and cannot fully regulate their body temperature. Supplemental heat is generally needed until chicks are fully feathered at 6 to 8 weeks.
What are common brooder mistakes?
The most dangerous mistakes are using newspaper as bedding (causes spraddle leg), improperly secured heat lamps (fire risk), overcrowding, not checking for pasty butt daily, not preheating the brooder for 24 hours before chicks arrive, using cedar shavings (respiratory damage), no ventilation (ammonia buildup), and keeping the brooder too hot for too long (prevents thermal tolerance development).
How many chicks can fit in one brooder?
It depends on brooder size and chick age. Allow 0.5 sq ft per chick for Week 1 to 2, 0.75 sq ft for Week 3 to 4, and 1+ sq ft for Week 5 to 6. A standard 50-gallon stock tank (approximately 8 square feet) can hold 8 to 16 chicks for the first 2 to 3 weeks but will need expansion by Week 4.
Key Takeaways
Preheat your brooder 24 hours before chicks arrive. Bedding and equipment need time to reach temperature. Cold materials underneath chicks can cause chilling even when air temperature reads correctly.
Start at 95°F, decrease 5°F per week, but watch your chicks, not just your thermometer. Evenly distributed, softly peeping chicks are comfortable. Huddling means cold. Panting and spreading means hot. Their behavior is more reliable than any chart.
Heat plates are safer than heat lamps for most backyard setups. At 14 watts versus 250 watts, with zero fire risk and a natural day/night cycle, the heat plate is the better choice for indoor brooding. Heat lamps may still be appropriate for cold barns and very large broods.
Pine shavings for bedding. Never newspaper, never cedar. Newspaper causes spraddle leg. Cedar causes respiratory damage. Pine shavings are the proven, affordable, effective standard.
Check for pasty butt every single day for the first week. It takes 30 seconds per chick and can mean the difference between life and death. Warm water, gentle removal, dry the chick, and return to the brooder.
The first 48 hours are the most critical. Get the setup right, teach chicks where food and water are, keep the temperature stable, and monitor closely. After those first two days, you are through the hardest part.
Ready to build your complete chick care plan? See our guides on bringing chicks home: 15 must-haves, when to switch from starter to grower feed, and mistakes every first-time chicken keeper makes. Still deciding whether to start with chicks or adult hens? Our guide on chicks vs. adult hens for beginners covers the full comparison.
Note: This guide is for educational purposes. Always follow the specific recommendations provided by your hatchery, feed manufacturer, and veterinarian for your particular chick breed and local conditions.

Oladepo Babatunde is the founder of ChickenStarter.com. He is a backyard chicken keeper and educator who specializes in helping beginners raise healthy flocks, particularly in warm climates. His expertise comes from years of hands-on experience building coops, treating common chicken ailments, and solving flock management issues. His own happy hens are a testament to his methods, laying 25-30 eggs weekly.