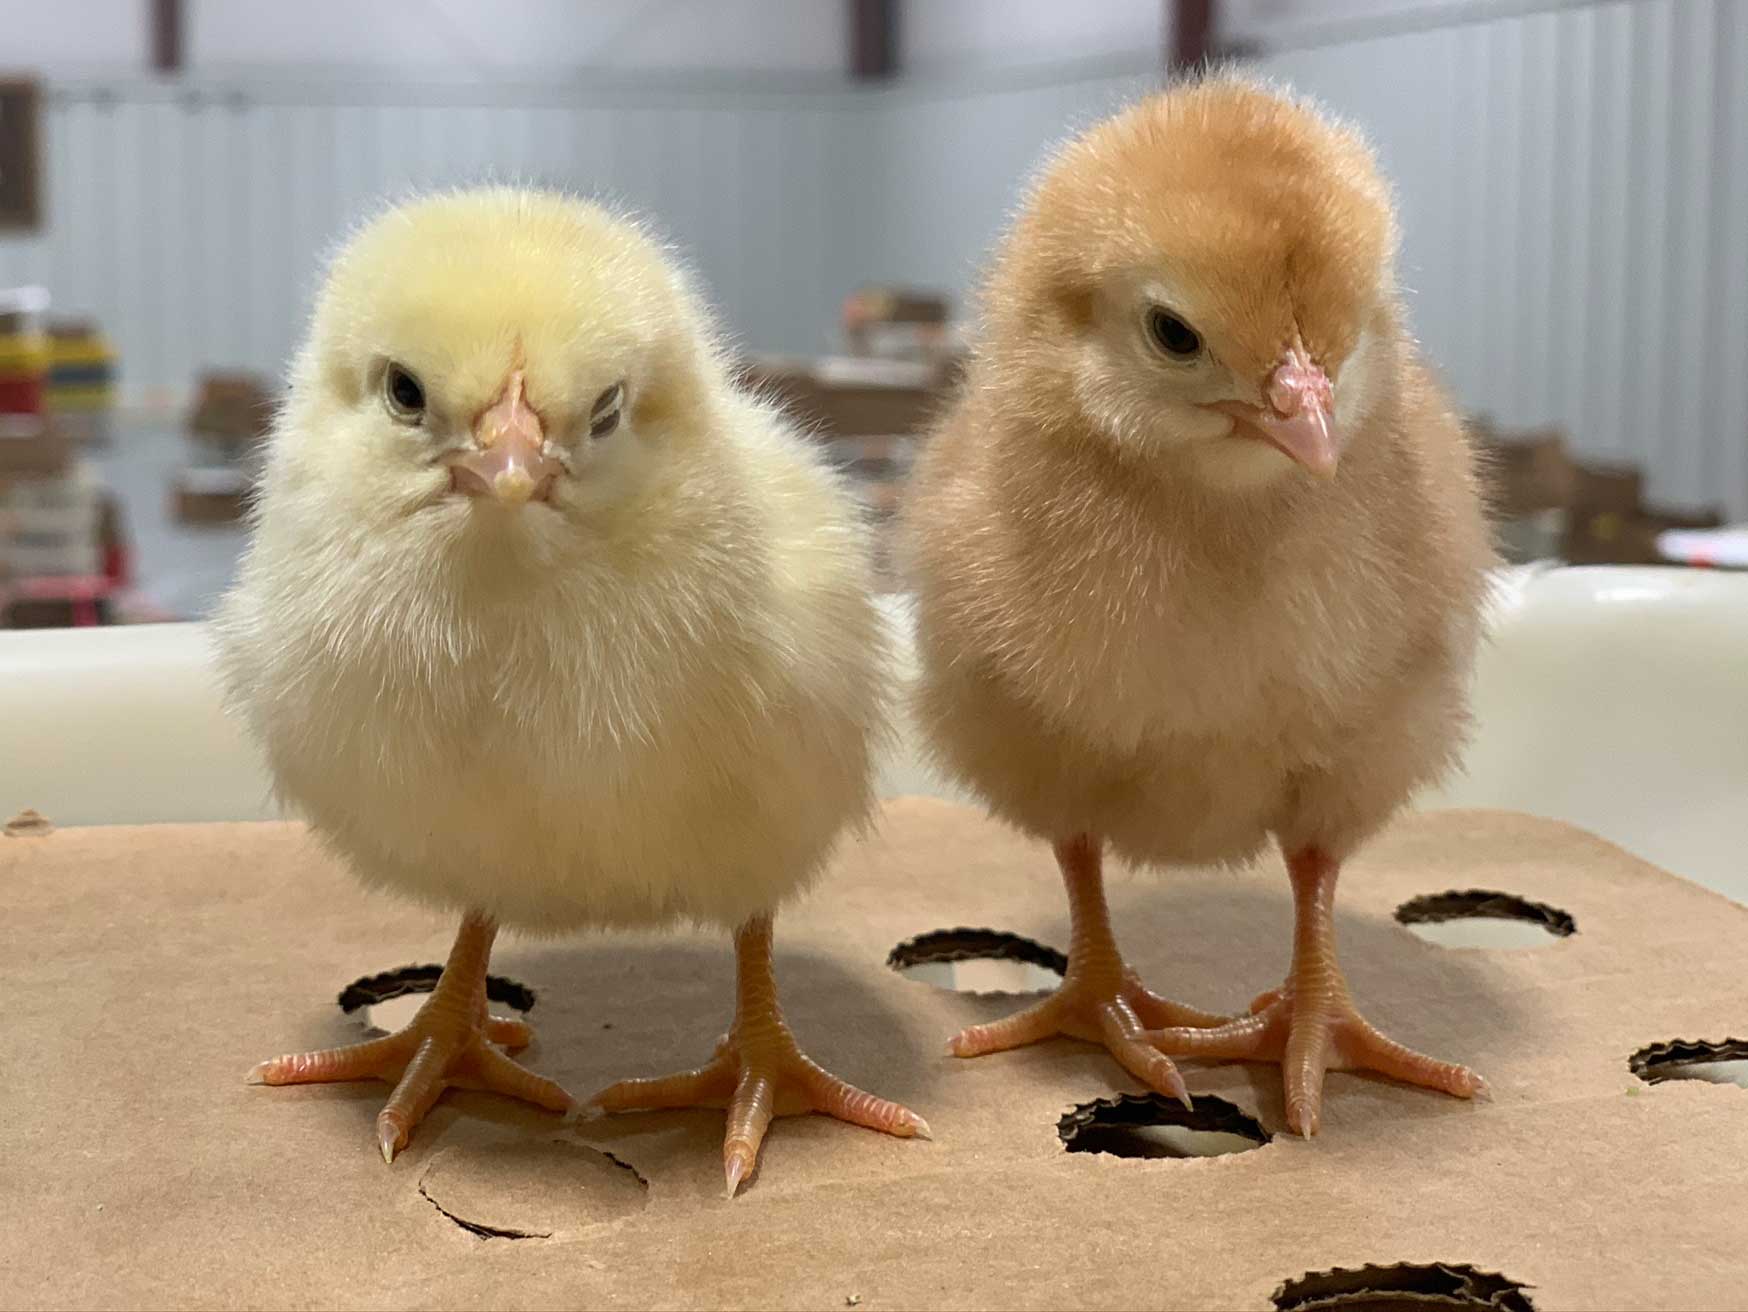
Bringing home new day-old chicks is an exciting time, but the first 24 hours are critical for their survival and long-term productivity. I have learned through years of raising chicks that knowing how to spot the difference between a healthy, vigorous chick and a poor-quality one can save your entire flock from a disastrous start. This guide gives you the exact checklist commercial hatcheries use, covering everything from the ideal brooder temperature for day-old chicks to the best feed for day-old chicks, providing in-depth advice to ensure your flock gets the best possible foundation.
Whether you are a backyard chicken keeper in North America, a smallholder farmer in Nigeria, or starting your first flock in Australia, these principles apply universally to all poultry operations.
Key Things to Know Before You Start
Understanding the fundamentals before your chicks arrive prevents costly mistakes and unnecessary losses. Here is what experienced poultry keepers consider non-negotiable knowledge.
- Healthy Signs: A healthy day-old chick has bright, open eyes, a closed and clean navel, dry and fluffy down, and stands on straight toes. They should be active and alert. Use a chicken health check as your baseline exam.
- Brooder Temperature: The ideal temperature for the first week is 92 to 95°F (33 to 35°C), measured at chick height. Watch their behavior carefully because huddling means they are cold, while panting and spreading away from the heat source means they are too hot.
- Normal Weight: A chick’s weight should be approximately 67 to 68% of the egg it hatched from, with 40 grams being the typical target for standard breeds. A key performance goal is for them to multiply their hatch weight by at least 4 times within the first 7 days.
- Best Starter Feed: Layer chicks need an 18 to 20% protein starter feed. Broiler (meat) chicks need a higher protein starter, around 22 to 23%. You must match the feed’s medication status to the chicks’ vaccination history. Refer to our bringing chicks home checklist for a full list of must-haves.
- Pre-Hatchery Factors Matter: Chick quality begins before incubation ever starts. According to Petersime’s hatchery quality control protocols, factors at the breeding farm, including parent flock health and age, egg storage temperature (ideally 16 to 18°C at 50 to 75% humidity), and storage duration (no more than 7 to 14 days), significantly impact the chicks you receive. While you cannot control these factors directly, understanding them helps you evaluate hatchery quality and choose reputable suppliers.
These fundamentals form the foundation of successful chick rearing. Now let us examine exactly how to prepare your brooder before your chicks arrive.
Before Your Chicks Arrive: The Pre-Launch Checklist
A successful start begins before the chicks even arrive at your door. Having the brooder completely ready creates a stress-free transition that dramatically improves first-week survival rates. Your goal is to have their new home warm, safe, and fully stocked at least 24 hours before you bring them home.
Set Up and Test Your Brooder
Assemble the Brooder: Choose a draft-free location and decide on the best place to put your chicken coop for the long term. Use a stock tank, a large plastic tote, or a sturdy cardboard ring (often called a brooder guard) to create an enclosure. Ensure it is large enough to prevent overcrowding and has rounded corners to stop chicks from piling up and suffocating in corners.
Add Bedding: Lay down a 3 to 4 inch layer of absorbent bedding. Pine shavings are an excellent choice for most climates. For the first day or two, cover the shavings with paper towels to prevent chicks from eating the bedding and to make it easy for them to find their food. This simple step also helps you monitor their droppings more easily.
Install the Heat Source: Securely set up your heat source. Brooder plates are the safest option and mimic natural hen behavior. If you must use a heat lamp, ensure it has a protective cage and is double-secured with chains, not just the clamp, to eliminate fire risk. Check out our poultry equipment price list to compare costs across different options.
Preheat and Monitor: Pre-heat the brooder 24 to 48 hours before arrival. Place a thermometer at chick height on the bedding to verify 92 to 95°F (33 to 35°C) under the heat source. This temperature can be reduced to 86°F (30°C) within 7 days, and by the age of 4 weeks the temperature should sit between 64 to 68°F (18 to 20°C).
Prepare Food and Water: Fill the waterers with fresh, room-temperature water and set them up away from the direct heat to keep the water cool. Fill the feeders with starter crumble and place them, along with the waterers, where they are easily accessible from multiple directions.
Verify Shipping Conditions: If your chicks are being shipped, note that the ideal transport temperature should be maintained between 70 to 75°F (21 to 24°C) with 60 to 63% humidity in the vehicle. Chicks that arrive from trucks with temperatures outside this range may show signs of stress that require extra attention during their first hours in your brooder.
With your brooder perfectly prepared, you will be ready to welcome your new arrivals and give them the immediate warmth and care they need. This preparation allows you to focus entirely on assessing their quality the moment they arrive.
Quick Checklist: Signs of a Healthy Day-Old Chick
When you first open the shipping box or bring chicks home from a hatchery, quickly scan the entire group. A healthy chick is a busy chick, curious about its surroundings and eager to explore. According to industry quality control standards from Petersime, day-old chicks of good quality are in general clean, dry, lively, alert and free from deformities. Here is a quick reference for what to look for:
- Bright, open, and clear eyes. They should be free of any discharge or swelling and appear shiny.
- A closed, clean, and dry navel (belly button). A properly closed navel is a small, neat slit that is hard to find under their fluff.
- Dry, fluffy down feathers. The feathers should be clean and not matted or sticky, indicating a clean hatch. Flat feathers on the head and neck indicate either too high or too low temperatures during the last days of incubation.
- Straight toes and strong legs. They should stand squarely and walk without difficulty or wobbling.
- An active and alert demeanor. Healthy chicks will move around, peep contentedly, and respond to sounds.
- A clean vent area. The area below the tail should be clean and fluffy, with no droppings stuck to it (a condition known as pasty vent). Learn how to treat pasty butt in chicks if you see this condition.
- Normal, quiet breathing. Listen for clear, steady peeps, not labored gasping or clicking sounds.
- No deformities. The beak should be properly aligned, and the neck and legs should be straight.
This initial scan gives you a great first impression of flock quality. A first indicator for chick quality used by commercial hatcheries is the percentage of second-grade chicks in a batch. If you notice many chicks with issues, this suggests problems at the hatchery level. Next, you will want to perform a more detailed, hands-on check to confirm the health and vigor of your new arrivals.
How to Check Day-Old Chick Quality (Step-by-Step)
A thorough check upon arrival is crucial for identifying problems early. Sample at least 5% of the chicks, pulling from multiple trays or different parts of the shipping box to get an accurate assessment of the whole batch. Commercial hatcheries typically assess quality between 16 to 20 hours after the hatch peak in the take-off room, and sampling 15 chicks per basket from at least 3 baskets per flock is recommended for statistically valid results.
The following checks are standard practice in commercial hatcheries and align with quality control guides from top poultry genetics companies like Aviagen and Cobb. For beginners, choosing between layers, broilers and noilers is a key first step before purchasing chicks.
The Righting Reflex Test
Gently place a chick on its back on a flat, non-slip surface. This is known as the righting reflex test or vitality assessment. A vigorous, healthy chick will immediately kick its legs and flip itself back onto its feet in under 3 seconds. This is confirmed by industry protocols which state that examining vitality involves “gently placing a chick on its back to check if it turns itself back within three seconds.” A slow or weak response is a primary indicator of lethargy, stress from transport, or other underlying health issues.
The Navel and Abdomen Check
Carefully part the fluff on the chick’s belly. The navel (omphalos) is the single most important indicator of a good hatch. According to Poultry Site industry standards, a good-quality navel is closed, dry and free of eggshell and membrane residues. An unhealed navel is a direct entry point for harmful bacteria, which can cause a fatal infection called omphalitis.
While checking the navel, gently feel the abdomen. The belly must be soft, smooth and non-bloated. A hard, swollen, or bloated belly indicates the yolk sac was not absorbed properly, which significantly increases mortality risk in the first week. An acceptable yolk sac to body weight ratio is 10% or less, indicating optimal environmental conditions during incubation and effective yolk utilization by the embryo.
Body Temperature Assessment
You can assess chick health by measuring their temperatures at the cloaca (vent) with a child ear thermometer. According to Cobb’s quality control protocols, their cloaca temperature should be controlled and consistent at 40.0 to 40.6°C (104 to 105°F). Temperatures outside this range indicate stress, illness, or improper brooding conditions. Chicks should not be panting or huddling when measured.
Legs, Toes, and Hocks Inspection
Examine the chick’s legs and feet carefully. According to hatchery quality standards, good-quality chicks have well-developed, hydrated legs that are free from injuries. The shanks should look bright, waxy, and feel hydrated, not dry or wrinkled. Toes should be straight and pliable. Check the hock joints (the “knee”); they should be the same color as the rest of the leg and not feel hot or swollen. Red hocks can indicate that the temperature during the incubation process was too high or weight loss was poor. Swollen feet can also result from high hatching temperatures at the hatchery.
Chick Length Measurement
In addition to weight, measuring chick length provides another quality indicator used by commercial operations. Measure from the tip of the beak to the end of the middle toe with the leg extended. According to industry standards:
| Breed Type | Good Quality Length | Concerning Length |
|---|---|---|
| Layer chicks | 20 to 22 cm | Below 18.5 cm |
| Broiler chicks | 19 to 21 cm | Below 17.5 cm |
Chicks significantly shorter than these targets may have experienced suboptimal incubation conditions.
Uniformity Assessment
Look at the chicks as a group to assess their uniformity. A high-quality batch will be uniform in size and color, with uniformity above 90% in a well-managed hatch. While slight variations are normal, having many very small or very large chicks compared to the average suggests inconsistent incubation conditions or issues with the parent flock’s health. For farmers in Nigeria, it is vital to know where to buy high-quality day-old chicks to ensure a good start.
Understanding Shipping and Hatchery Stress
Remember that your chicks have had a long journey. They may have been in a box for 24 to 72 hours without food or water, relying solely on their absorbed yolk sac for nutrition. This process is stressful and can lead to dehydration and exhaustion. This is why a quick, gentle check followed by immediate placement in the prepared brooder with easy access to water is so important.
Completing these quality checks gives you confidence in your flock’s starting point. Let me share a real-world example from my own experience that illustrates how these checks work in practice.
From My Brooder Log: A Real-World Example
Last spring, when my batch of 25 Barred Rock chicks arrived, I went through this exact checklist. I had pre-heated the brooder to a steady 94°F at chick level. Most of the chicks were zippy and passed the righting reflex test instantly, flipping onto their feet in under two seconds.
However, one little chick seemed sluggish, taking nearly five seconds to right itself. A quick navel check revealed a tiny, hard “black button” navel that was not perfectly closed. I knew this could be a trouble spot for bacterial infection, so I gave its vent a quick check (it was clear), gently dipped its beak in the electrolyte water, and placed it right under the warmest part of the brooder plate.
I watched that chick closely for the next 48 hours, ensuring it was eating and drinking. Giving it that extra bit of care and a prime spot near the heat source helped it catch up with the rest of the flock. By day five, you could not tell it apart from the others. This experience taught me that early intervention makes all the difference.
Once you have performed these essential checks and settled the chicks into their new home, you can more closely observe the positive traits that define a truly high-quality chick.
Characteristics of Quality Day-Old Chicks (What “Good” Looks Like)
High-quality chicks are not just free of defects; they exhibit clear signs of vigor and health that set them up for a productive life. Understanding these positive indicators helps you appreciate the difference between average and exceptional stock.
Industry Scoring Systems: Pasgar and Tona Methods
Commercial hatcheries often use standardized scoring systems to objectively evaluate chick quality. According to poultry industry research, the two most widely used methods are:
Pasgar Score: Developed by hatchery technology experts, this system evaluates activity (using the 2-second righting reflex standard), navel condition (size, color, closure), leg quality (ability to stand, redness, anatomical anomalies), and beak condition (deformities, red spots, nostril blockage).
Tona Score: An alternative scoring method that assigns numerical values to activity (0 to 6 points), down and appearance (0 to 10 points), retracted yolk (0 to 16 points), eyes (0 to 16 points), legs (0 to 16 points), remaining membrane (0 to 12 points), navel area (0 to 12 points), and remaining yolk assessed by touch (0 to 12 points).
While you may not calculate formal scores at home, understanding these parameters helps you evaluate chicks using the same criteria professionals use.
The Importance of a Well-Healed Navel
The navel is where the chick was attached to the yolk sac inside the egg. Before hatching, the chick absorbs the remaining yolk, which provides its first few days of nutrition and maternal antibodies. A perfectly healed navel means this process was completed successfully, giving the chick a passive immune boost and the energy needed to find food and water quickly.
A Soft Abdomen and Absorbed Yolk
A soft, supple belly confirms the yolk has been fully absorbed. This is critical because that yolk is the chick’s first meal. If it remains unabsorbed (measured as residual yolk weight or YFBM in commercial settings), it can begin to decay inside the chick, leading to a fatal infection known as omphalitis (yolk sac infection). According to Backyard Poultry magazine, omphalitis may be caused by poor sanitation in the incubator or brooder, by a chick pecking at another’s navel, or even by a handler confusing the navel scab for pasty butt and attempting to clean it off.
Signs of Good Hydration
Hydrated legs and feet are a sign of a healthy, well-managed chick. A common test used in hatchery quality control is to gently touch the chick’s feet to your cheek; they should feel warm, not cold. According to industry quality standards, the legs should be yellowish in color (though some strains vary), plump suggesting good hydration, and without prominent medial veins which would suggest dehydration. Dehydration is a major risk during shipping, and well-hydrated chicks will be more active and start eating and drinking faster.
Active and Curious Behavior
Healthy chicks exhibit specific behaviors that indicate good development. Normal activities include going to eat food from the feeder and drink from the waterer, foraging for spilled food on the brooder floor, going to and from the heat source freely, resting periodically, interacting with each other, and making low cheeping sounds for communication purposes. As the chicks get older, the list of normal activities will grow as they exhibit even more instinctual behaviors like perching, dust bathing, and testing out their wings.
Recognizing these positive signs is half the battle. Just as important is knowing how to spot the red flags that signal a poor-quality chick.
How to Identify Poor-Quality Day-Old Chicks (What to Avoid)
Knowing the red flags can help you prevent bringing disease into your flock or raising birds that will fail to thrive. Some issues are immediately apparent, while others require careful observation over the first few days.
Common Chick Navel Problems
Open or Wet Navels: An open navel that is still wet or leaking is a major sign of a late hatch and a high risk for infection. According to hatchery quality control experts, a poor-quality navel is a potential entry point for bacteria into the most sensitive part of the body cavity, which drastically increases susceptibility to disease and the risk of post-hatch mortality. These chicks often develop yolk sac infections within the first 3 to 4 days.
“Black Button” Navel: This refers to a hard, dark-colored scab over the navel. A “black button” navel indicates poor healing and is often associated with high mortality rates in the first week. This condition is specifically assessed in the Pasgar scoring system.
String Navel: This is where a small piece of dried membrane is left attached to the navel. A string navel can also be an entry point for bacteria and should be monitored closely.
Deformities and Red/Swollen Hocks
Crossed Beak or Scissor Beak: The top and bottom parts of the beak do not align, making it difficult for the chick to eat and drink. According to industry standards, crossed beaks are often hereditary or caused by a viral infection. This condition often leads to malnutrition over time.
Splayed Leg: The legs stick out to the sides, preventing the chick from standing properly. According to quality control protocols, chicks with spread legs have posture problems because they lack sufficient strength in their legs. This is often caused by slippery surfaces during hatching or in the brooder.
Red Hocks: Swollen, red, or bruised hock joints are a sign of stress or injury. Industry experts note this can indicate that the temperature during incubation was too high or humidity conditions resulted in poor weight loss during the hatch process.
Wry Neck: An abnormal head position where the chick appears to be looking upward constantly. This can indicate meningitis or other neurological issues.
Red or Dark Spots on Beak: According to hatchery assessment protocols, the presence of red or dark spots on the beak can indicate either that the temperature in the hatcher was too high or that the chick struggled to emerge from the eggshell due to insufficient weight loss, possibly caused by incorrect humidity conditions.
Signs of Stress, Dehydration, and Sickness
According to Grubbly Farms, dehydration in chicks presents specific symptoms that require immediate attention:
Dehydration Signs:
- Sunken eyes and prominent tendons on the back of legs
- Lethargy, weakness, inactivity, and reduced peeping
- Dry or pale beak, shrunken and bluish comb and wattles
- Reduced fecal output, loose or off-color droppings
- Rapid weight loss leading to shriveled appearance
Other Warning Signs:
- Pasty Vent: Droppings stuck to the down feathers around the vent can block the passage of waste. This condition, called pasty vent, is a sign of digestive upset or stress.
- Lethargy and Weakness: A chick that sits hunched, does not move, and has its eyes closed is a very sick chick that needs immediate intervention.
- Wet or Tacky Down: This can be from a messy hatch, being chilled during transport, or an early sign of sickness.
Identifying these issues is key, but providing the right environment is the most powerful tool for prevention and recovery. The single most important environmental factor you control is heat.
Brooder Temperature: How to Tell if Day-Old Chicks Are Warm Enough
Consistent and appropriate heat is non-negotiable for the first few weeks of a chick’s life. Chicks cannot regulate their own body temperature until they are fully feathered, which typically occurs around 5 to 6 weeks of age for layer breeds and as early as 3 weeks for fast-growing broiler breeds. Reduce the temperature by about 5°F each week until you reach the ambient room temperature (around 70°F or 21°C). For those in colder climates, proper winterizing the coop later on is essential.
Setting Up Your Brooder Heat Source
Your goal is a floor temperature of 92 to 95°F (33 to 35°C) directly under the heat source during the first week. Understanding how much space do chickens really need is key to preventing overheating and ensuring all chicks can access comfortable zones.
Heat Lamps: Securely fasten the lamp with multiple chains or wires to prevent it from falling and causing a fire. Regardless of bulb color, always prioritize safety and use the chicks’ behavior as your main guide for temperature.
Brooder Plates: These are a safer, more natural alternative. They radiate heat downwards, and chicks huddle underneath them, similar to how they would with a mother hen. This mimics natural behavior and often results in calmer chicks.
Measuring Temperature: Place a thermometer at the chicks’ level on the bedding to get an accurate reading, not at eye level or above the heat source.
The Gold Standard: Chick Behavior
A thermometer tells you the temperature, but the chicks tell you if they are comfortable. Using their behavior as your primary guide is the most reliable method for maintaining proper brooding conditions.
| Chick Behavior | What It Means | How to Fix It |
|---|---|---|
| Huddled together under heat, chirping loudly | Too Cold | Lower the heat lamp or add a second heat source |
| Spread far apart from heat, panting | Too Hot | Raise the heat lamp or use a lower-wattage bulb |
| Evenly spread out, moving freely to and from heat | Just Right | No changes needed. Keep monitoring daily |
| Huddled in one corner away from heat | Draft present | Check for air leaks and block with cardboard |
Temperature Reduction Schedule by Breed Type
The timeline for reducing brooder temperature varies depending on your breed type:
Layer Breeds (Rhode Island Red, Leghorn, Australorp):
- Week 1: 92 to 95°F (33 to 35°C)
- Week 2: 87 to 90°F (31 to 32°C)
- Week 3: 82 to 85°F (28 to 29°C)
- Week 4: 77 to 80°F (25 to 27°C)
- Week 5: 72 to 75°F (22 to 24°C)
- Week 6: Ambient temperature (fully feathered)
Broiler Breeds (Cornish Cross, Ranger):
- Week 1: 92 to 95°F (33 to 35°C)
- Week 2: 87 to 90°F (31 to 32°C)
- Week 3: 75 to 80°F (24 to 27°C) (feathering complete for most broilers)
Avoiding Drafts
A cold draft can chill chicks even in a warm brooder. Be aware of the 17 coop ventilation mistakes that overheat your flock. Use a solid brooder guard (a cardboard or plastic ring) to block drafts and keep the chicks near the heat, food, and water.
Perfecting the brooder temperature gives every chick the best chance to thrive. However, even with ideal conditions, you may still encounter a chick that needs a little extra help.
How to Help a Weak Day-Old Chick: First-Week Care
Even in a good batch from a reputable hatchery, you may find a chick that is struggling. Quick intervention can often save it. It is wise to set up a chicken first-aid kit before you even need one.
Creating a Hospital Box
Isolate the weak chick in a separate, smaller box with its own heat source, food, and water. This prevents stronger chicks from trampling it and allows it to eat and drink without competition. Baby chicks do not like to be alone, so ideally locate the hospital box near the main brooder where the sick chick can hear the other chicks for comfort.
Hydration and Nutrition Boost
For a chick that will not drink on its own, gently dip its beak into clean water. Do not squirt water into its mouth, as it can aspirate fluid into its lungs.
Electrolytes: Add poultry-specific electrolytes to the water for an extra boost of energy and minerals. According to industry protocols, electrolytes should be provided in the first 4 hours after arrival, followed by electrolytes and multivitamins during days 1 through 7.
Sugar Water (Optional, Short-Term): For shipping-stressed chicks only, offer a small batch of sugar water (one tablespoon sugar per quart of water) for 2 to 3 hours, then switch to plain water or electrolytes for no more than 24 to 48 hours.
Easy-Access Feed: Sprinkle some starter crumble on a paper towel or paper plate to make it easy for the chick to find food without competing with stronger flock mates.
Troubleshooting Common First-Week Ailments
Fixing Pasty Vent (Pasty Butt)
This common condition occurs when droppings stick to and seal the vent, which can be fatal if not addressed. It is one of the most common chicken diarrhea and health problems.
- Gently clean the area with a soft cloth or paper towel dipped in warm water.
- Carefully loosen and remove the dried poop. Be patient and do not pull, as you can tear the chick’s delicate skin.
- Once clean, dry the chick thoroughly with a clean towel to prevent chilling, then apply a small dab of petroleum jelly to prevent sticking.
- Check the brooder temperature; pasty vent is often caused by stress from being too hot or too cold.
Treating Splayed Leg (Spraddle Leg)
This condition, where a chick’s legs slip out to the sides, must be treated quickly for the best chance of recovery.
- Create a small “hobble” using a rubber band, a strip of vet wrap, or a band-aid.
- Gently position the chick’s legs into a natural stance underneath its body.
- Wrap the hobble around its legs in a figure-eight pattern, ensuring it is loose enough to allow movement but firm enough to keep the legs positioned correctly.
- Leave the hobble on for 2 to 3 days, ensuring the chick can still reach food and water. It is important to know when to call the vet for a backyard chicken if the condition does not improve.
While individual care is important, the foundation of a healthy flock is always proper nutrition for everyone.
Which Feed Is Best for Day-Old Chicks?
Proper nutrition in the first few weeks is essential for organ development and skeletal growth. You can estimate your feed costs to budget effectively for your operation.
Understanding Protein Content
Layer Chicks: An 18 to 20% protein starter feed provides the right balance for steady, healthy growth without pushing development too fast.
Broiler (Meat) Chicks: These birds are bred for rapid growth and require a higher-protein starter feed of 22 to 23% to support muscle development.
Dual-Purpose Breeds: Most heritage and dual-purpose breeds do well on the standard 18 to 20% protein starter.
The Medicated vs. Non-Medicated Decision
Coccidiosis is a common intestinal parasite that can be deadly to young chicks. Your feed choice depends on your chicks’ vaccination status.
Medicated Feed: Contains a coccidiostat (like Amprolium) that prevents the parasite from multiplying. It is a good option if your chicks were not vaccinated against coccidiosis.
Non-Medicated Feed: If your invoice shows a live coccidiosis vaccine, use non-medicated starter while immunity develops. Avoid starter feeds containing a coccidiostat during this period as it can interfere with vaccine effectiveness.
Feed Form: Crumble vs. Mash
For the first few weeks, a “starter crumble” is the ideal form. It consists of small, easy-to-pick-up particles that young chicks can handle. Mash is a finer powder that can sometimes be harder for very young chicks to eat efficiently. Following the best feeding schedule for backyard chickens will ensure they get the right amount at the right times.
Providing the right food is how you fuel growth. The best way to know if your management is working is to track that growth by monitoring their weight.
What Is the Normal Day-Old Chick Weight Range?
Tracking weight is a professional way to measure your flock’s health and your management success. This is one way to avoid the common mistakes every first-time chicken keeper makes.
How to Weigh Your Chicks
Use a small digital kitchen scale that can measure in grams for accuracy. Place a small container on the scale, tare it (zero it out), and then gently place the chick in the container. For small flocks, weigh a sample of 5 to 10 chicks to get an average. For larger commercial flocks, sample at least 1% of the birds (or a minimum of 100 chicks) once a week to accurately track growth and uniformity.
Understanding Chick Yield Percentage
Chick yield percentage is a key quality metric used by commercial hatcheries. According to Cobb’s quality standards, when the incubation process is carried out properly, the chick weight at take-off typically represents around 67 to 68% of the initial fresh egg weight. This is calculated by dividing average chick weight by average fresh egg weight and multiplying by 100.
For example, if a 60-gram egg produces a 40-gram chick: (40 ÷ 60) × 100 = 66.7% chick yield
Chick yields significantly above 68% may indicate late-hatching chicks with excess residual yolk, which correlates with higher 7-day mortality according to industry research.
Tracking Growth: The First 7 Days
The 67 to 68% Rule: A good quality chick should weigh approximately 67 to 68% of the weight of the egg it hatched from. The typical target weight at hatch is around 40 grams for standard breeds, though this varies by strain.
The 7-Day Target: Aim for a 7-day body weight approximately 4 times the hatch weight. Higher multiples depend on strain and management. Top breeders emphasize that accurate weighing is critical for tracking flock development. Knowing the cost to raise chickens for the first year can help you plan your budget around these growth targets.
| Age | Target Weight (Layer Breeds) | Target Weight (Broiler Breeds) |
|---|---|---|
| Day 1 | 35 to 45 grams | 40 to 50 grams |
| Day 7 | 140 to 180 grams (4x hatch weight) | 180 to 220 grams (4x+ hatch weight) |
| Day 14 | 250 to 320 grams | 450 to 550 grams |
Weight gain tells a story of successful care. For a final confirmation, you can always rely on a quick visual comparison between what a high-quality and low-quality chick looks like.
Appearance of High-Quality Poultry Chicks vs Low-Quality
A quick visual inspection can tell you almost everything you need to know about the quality of your chicks. A healthy chick looks and acts the part: bright, fluffy, and busy. A low-quality chick often shows clear signs of stress or poor development. Use this table as a quick reference guide.
| Feature | High-Quality Chick | Low-Quality Chick |
|---|---|---|
| Navel | Closed, dry, clean | Open, wet, dirty, or “black button” |
| Down | Dry and fluffy | Wet, sticky, matted, or flat on head/neck |
| Legs/Hocks | Straight, hydrated, normal color | Crooked, swollen, red hocks |
| Eyes | Bright, round, open | Dull, closed, swollen |
| Behavior | Active, alert, strong reflex (under 3 seconds) | Lethargic, sleepy, weak reflex |
| Breathing | Clear, quiet | Labored, gasping, clicking |
| Vent | Clean and fluffy | Pasty or soiled |
| Beak | Clean, properly aligned | Red spots, crossed, blocked nostrils |
| Length | 20 to 22 cm (layers) | Below 18.5 cm |
Of course, the best chicks in the world cannot thrive without high-quality nutrition. Ensuring their feed is fresh and safe is a non-negotiable part of good flock management.
How to Check Poultry Feed Quality (Freshness, Storage, Safety)
High-quality chicks need high-quality feed. Never compromise on poultry feed quality, as contaminated or stale feed can undo all your careful chick selection and brooding work.
Reading the Feed Bag Label
Look for the “milled on” or manufacturing date. You should ideally use feed within 30 to 45 days of this date, as vitamins can degrade over time. The label will also list the protein percentage and confirm if it is medicated.
Proper Feed Storage Techniques
Store feed in a sealed, rodent-proof container in a cool, dry place. Do not store it in direct sunlight or in a damp environment, as this encourages mold growth. Keep the container off the concrete floor to prevent moisture wicking up into the feed.
Understanding Mycotoxin Risks
Mycotoxins are poisons produced by molds that can grow in feed. They are invisible and can cause poor growth, a suppressed immune system, or death. Common types include aflatoxin, DON (vomitoxin), and fumonisin. If feed smells musty, looks caked together, or has any visible mold, do not use it. Discard it immediately. If a large batch of feed is suspect, you can contact an agricultural lab for testing.
Securing fresh feed lays the groundwork for future health. As your chicks rapidly grow past their first week, their needs for space and care will continue to evolve.
Your 7-Day Audit: A Critical Check-In
The end of the first week is your first major milestone. This is the perfect time to audit your setup and your chicks’ progress to catch any small issues before they become big problems.
Weigh a Sample: Get your scale out. Have the chicks met their goal of being at least 4 times their hatch weight? This is the clearest sign that your feeding and heating strategy is working.
Check for Uniformity: Look at the flock as a whole. Do they all appear to be about the same size? Good uniformity (above 90%) indicates low stress and that all birds are getting easy access to feed and water.
Evaluate Litter Moisture: Scoop a handful of the bedding. Is it dry and crumbly? Or is it starting to feel damp or clump together? Remove any wet spots immediately and add fresh shavings to prevent ammonia buildup.
Confirm Temperature Reduction: It is time for the first step-down. Lower the brooder temperature by about 5°F (to roughly 87 to 90°F or 31 to 32°C).
Verify Waterer and Feeder Height: Your chicks have grown significantly. Raise your feeders and waterers so the lip is level with the chicks’ backs. This keeps the contents clean and ensures easy access.
This weekly audit becomes a habit that will serve you throughout your poultry-keeping journey. Now let us look at the ongoing care requirements beyond week one.
Care Basics Beyond Week 1 (Ventilation, Space, Litter, Water)
As your chicks grow, their needs evolve. Adjust their environment to support their rapid growth and prevent the health problems that come from overcrowding or poor conditions.
Space Requirements
Overcrowding leads to stress, pecking, and disease transmission. Provide adequate space as they grow, following established guidelines from poultry extension services. Knowing how big should a chicken coop be from the start is helpful for planning.
| Age | Space Per Chick |
|---|---|
| 0 to 4 weeks | 0.5 square feet per chick |
| 4 to 8 weeks | 1.0 square foot per chick |
| 8 to 12 weeks | 2.0 square feet per chick |
Ventilation without Drafts
Good ventilation is vital to remove ammonia and moisture, but you must avoid direct drafts on young birds. Air should feel fresh, not stuffy or smelling of ammonia. If you can smell ammonia at chick level, your ventilation is not adequate and needs immediate improvement.
Litter Management
Start with about 3 to 4 inches of dry, absorbent litter like pine shavings. Keep it clean and dry. Choosing the best flooring for a chicken coop can make this easier. High litter moisture must be avoided, as “cakey” or wet litter is a breeding ground for harmful bacteria and can cause foot problems like bumblefoot.
Water and Feeder Space
Ensure there is enough space for multiple chicks to eat and drink at the same time. This prevents smaller chicks from being pushed out and going hungry. Raise the feeders and waterers as the chicks grow to keep them clean and at chest height for easy access.
Managing the physical environment is key, but protecting your flock from invisible threats is just as important. This is where good biosecurity practices come into play.
Biosecurity: Protecting Your Flock from Day One
Biosecurity simply means taking steps to protect your birds from diseases. A few simple habits can prevent devastating illness from entering your flock, regardless of whether you keep chickens in your backyard or manage a commercial operation.
Quarantine New Arrivals
Even healthy-looking chicks can carry diseases. If you have an existing flock, you must always keep new birds in a separate area for at least 30 days. This gives you time to observe them for any signs of illness, like mites and lice on chickens or respiratory symptoms.
Practice Good Hygiene
Dedicated Footwear: Have a pair of boots or shoes that you only wear in your coop or brooder area. This prevents you from tracking in bacteria and viruses from the outside world.
Wash Your Hands: Always wash your hands with soap and water before and after handling your chicks or cleaning their environment.
Clean and Disinfect Equipment: First clean away all organic matter, then disinfect with an appropriate product such as household bleach at label dilution. Allow proper contact time, rinse, and let everything dry completely before placing chicks. This helps prevent the spread of issues requiring you to treat internal parasites and worms in chickens.
Limit Traffic
Do not let visitors who have their own birds near your flock without proper biosecurity measures. People can easily carry disease-causing organisms on their shoes, clothes, and hands. Keep your flock’s environment a restricted zone to keep them safe. Using predator deterrents can also limit wildlife vectors that spread disease.
These practices will serve you well for the entire life of your flock. Let us finish by answering a few of the most common questions people have about day-old chicks.
Frequently Asked Questions
What are the signs of a healthy day-old chick?
A healthy chick is active, with bright eyes, a closed and clean navel, dry fluffy down, and straight, strong legs. They should be curious and moving around their brooder, making content peeping sounds. According to industry standards, healthy chicks should pass the righting reflex test in under 3 seconds, have body temperatures of 40 to 41°C (104 to 105°F), and display uniformity above 90% within their batch. Perform a regular chicken health check to monitor them throughout their development.
How can you tell if a baby chick is unhealthy?
Look for signs of poor quality, such as an open or dirty navel (especially “black button” navels), red or swollen hock joints, a pasty vent, lethargy, wet or flat feathers on the head and neck, or deformities like a crooked beak. Unhealthy chicks may also fail the righting reflex test, taking more than 3 seconds to stand when placed on their backs, or have red spots on their beaks indicating hatching stress.
How to care for a 1-day-old chick?
Provide a brooder with a heat source set to 92 to 95°F (33 to 35°C), constant access to fresh water, and a proper starter feed with 18 to 20% protein for layers or 22 to 23% for broilers. Gently dip each chick’s beak in water upon arrival to encourage drinking. Provide electrolytes in the water for the first 4 hours and continue with electrolytes and multivitamins through the first week. A day-old chick setup checklist is essential for first-time keepers.
What is the normal weight of a day-old chick?
It varies by breed, but a chick should weigh around 67 to 68% of the egg it came from, with 40 grams being the typical target for standard breeds. The goal is for it to grow to at least 4 times its hatch weight in the first 7 days, which indicates proper nutrition and management.
What temperature should the brooder be for day-old chicks?
Start at 92 to 95°F (33 to 35°C) measured at chick level on the bedding. Reduce the temperature by about 5°F each week. Layer breeds are typically fully feathered around 5 to 6 weeks old, while fast-growing broiler breeds may be fully feathered by 3 weeks. Always use chick behavior as your primary guide, as huddling means too cold and spreading away with panting means too hot.
How long is the “hatch window” and why does it matter?
The hatch window refers to the time period during which chicks emerge from their eggs in an incubator. A tight hatch window (most chicks hatching within 24 hours) indicates good incubation conditions. According to industry research, late-hatching chicks (those hatching in the last 12 hours before take-off) have higher chick yield percentages but also higher 7-day mortality rates because they have not had time to fully absorb their yolk sacs.
Raising healthy chicks comes down to a simple formula: start with high-quality birds and provide them with an excellent environment. By carefully inspecting your chicks upon arrival using professional assessment criteria like the righting reflex test, navel quality check, and uniformity assessment, and ensuring their brooder is warm, clean, and stocked with fresh food and water, you give them the best possible foundation. Diligent care during the first week, including monitoring their behavior, troubleshooting minor issues, and practicing good biosecurity, will pay dividends for the entire life of your flock.
The habits you build now will serve you whether you are raising 6 backyard hens or managing a commercial operation with thousands of birds. Enjoy watching your vigorous, well-cared-for chicks grow into a healthy and productive flock.

Oladepo Babatunde is the founder of ChickenStarter.com. He is a backyard chicken keeper and educator who specializes in helping beginners raise healthy flocks, particularly in warm climates. His expertise comes from years of hands-on experience building coops, treating common chicken ailments, and solving flock management issues. His own happy hens are a testament to his methods, laying 25-30 eggs weekly.