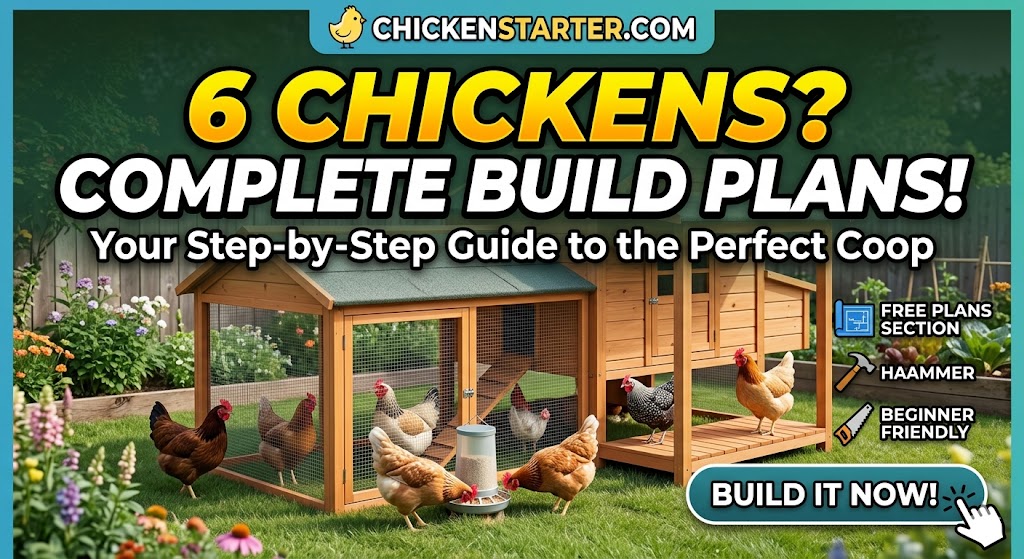
A flock of six chickens is the sweet spot for most backyard keepers. It is large enough to produce a steady supply of eggs for a family, small enough to manage without feeling overwhelmed, and perfectly sized for a coop that one person can build over a weekend or two with basic tools and materials.
I have built three coops over the years, and the 4×6 foot coop I constructed for my original flock of six hens remains one of the most satisfying DIY projects I have ever completed. It cost me under $300 in materials, took two weekends to finish, and housed my birds comfortably for more than three years before I expanded. This guide walks you through everything I learned from that build, along with proven design principles from experienced builders, so you can create a safe, functional, and easy-to-maintain home for your six-chicken flock.
Whether you are looking for free chicken coop plans, a detailed materials list, or step-by-step construction guidance, this article covers it all without holding anything back.
How Much Space Do 6 Chickens Need?
Getting the space right is the foundation of every good coop. Build too small and you will deal with stress, pecking, disease, and reduced egg production. Build to the correct dimensions and your flock will thrive with minimal problems.
Indoor Coop Space
The standard guideline is 4 square feet of interior floor space per standard-sized chicken. For 6 hens, that means a minimum of 24 square feet of enclosed coop area. A coop measuring 4 feet wide by 6 feet long hits this number exactly and is the most practical rectangular layout for a small flock.
According to the build walkthrough shared on Instructables, a 4×6 coop provides the recommended 4 square feet per bird for six chickens while using materials efficiently, since a standard sheet of OSB or plywood measures 4×8 feet and requires only a simple cut to fit.
If your budget and property allow, a slightly larger footprint like 4×8 feet gives your flock extra breathing room and makes cleaning noticeably easier. I wish I had gone with the larger option from the start, because six hens plus feeders, waterers, nesting boxes, and a roost bar fill a 4×6 space more quickly than you expect.
Outdoor Run Space
Plan for 8 to 10 square feet of outdoor run per chicken. For 6 hens, that means at least 48 to 60 square feet of attached run area. A run measuring 6 feet wide by 10 feet long provides 60 square feet and attaches neatly to a 4×6 coop.
If you plan to let your flock free-range in a fenced yard for part of the day, you can get away with a slightly smaller run. But if the run is their only outdoor space, err on the generous side.
Quick Space Reference for 6 Chickens
| Feature | Minimum | Recommended |
|---|---|---|
| Indoor coop floor | 24 sq ft (4×6 ft) | 28 to 32 sq ft (4×7 or 4×8 ft) |
| Outdoor run | 48 sq ft | 60+ sq ft |
| Roosting bar length | 48 inches | 60 to 72 inches |
| Nesting boxes | 2 | 2 to 3 |
| Pop door size | 10 x 12 inches | 12 x 14 inches |
| Ventilation openings | 2+ sq ft total | 3+ sq ft in hot climates |
For a broader look at coop sizing principles, including how space requirements change with flock size, our guide on how big should a chicken coop be covers everything in detail.
Choosing the Right Coop Style for 6 Chickens
The style of coop you build affects how easy it is to maintain, how well it handles your climate, and how much it costs. For a 6-chicken flock, three styles work particularly well.
The Elevated Coop
This is the design I recommend for most builders. The coop box sits 2 to 3 feet off the ground on sturdy legs, with the space underneath serving as additional shaded run area. Elevating the coop protects the floor from ground moisture and rot, improves airflow, and gives your birds a sheltered outdoor spot during rain or intense sun.
The Walk-In Coop
If you have the space and budget, a walk-in design with 6-foot-tall walls lets you step inside and stand upright. Cleaning, health checks, and interior maintenance become dramatically easier. This is the style I eventually upgraded to, and I will never go back to a coop I have to crouch into.
The Shed-Style (Quaker) Coop
A shed-style coop with a single-slope roof (taller at the front, shorter at the back) is one of the simplest designs to frame and waterproof. It provides good headroom at the entry point and sheds rain efficiently. According to design information from The Hen House Collection, prefab coops using this classic overhang design are among the most attractive and practical options for backyard flocks.
For a full comparison of all major coop styles, including A-frames, gambrel barns, chicken tractors, and greenhouse hybrids, our guide on popular chicken coop styles explained breaks down the pros and cons of each.
Complete Materials List for a 4×6 Chicken Coop
This list is based on the elevated coop design with an attached 6×10 run, which is the most versatile and practical option for six hens. Adjust quantities if you choose a different style or size.
Framing and Structure
- 2×4 lumber, 8-foot lengths (12 to 16 pieces) for floor frame, wall studs, roof rafters, and run framing
- 4×4 posts, 4-foot lengths (4 pieces) for elevated coop legs
- 3/4-inch exterior-grade plywood (2 full sheets at 4×8 feet) for floor, walls, and nesting box construction
- 1×4 boards (4 to 6 pieces at 8 feet) for trim and finishing details
Roofing
- Corrugated metal roofing panels or asphalt shingles (enough to cover a 4×6 area plus 4 inches of overhang on all sides)
- Roofing screws with rubber washers if using metal
- Tar paper or synthetic roofing underlayment (one roll)
Hardware and Predator Protection
- 1/2-inch hardware cloth (one 50-foot roll at 36 inches wide, plus one 25-foot roll for the run top and apron)
- Exterior wood screws in 2-inch and 3-inch sizes (1 pound of each)
- Galvanized hinges (4 to 5 pairs for doors, nesting box lid, and pop door)
- Two-step latches or carabiner clips (5 to 6 total for every access point)
- Heavy-duty staple gun with 1/2-inch galvanized staples for securing hardware cloth
Interior
- 2×4 lumber for roost bars (one piece cut to 60 inches, mounted with the wide 4-inch face up)
- Plywood scraps for nesting box dividers
- Pine shavings (one compressed bale for initial bedding)
Optional but Recommended
- Automatic chicken coop door to open and close the pop door on a timer
- Exterior paint or wood stain rated for outdoor use
- Drip edge along the roof line
- Sand or pea gravel (2 to 4 bags) for run drainage
Estimated Cost
| Category | Cost Range |
|---|---|
| Lumber and plywood | $100 to $200 |
| Hardware cloth | $60 to $100 |
| Roofing materials | $30 to $60 |
| Hinges, latches, screws, staples | $25 to $50 |
| Paint or stain | $15 to $30 |
| Bedding (first fill) | $10 to $15 |
| Total | $240 to $455 |
You can bring costs down significantly by using reclaimed lumber, checking local buy-nothing groups, or visiting a building salvage yard. If budget is a major concern, our article on how to build a chicken coop for under $200 shares practical strategies for cutting costs without sacrificing the features that matter.
Step-by-Step Build Instructions
This walkthrough follows the elevated coop design with a 4×6 enclosed coop, exterior-access nesting boxes, and an attached 6×10 run. Each step builds on the last, so follow them in order.
Step 1: Prepare and Level the Site
Choose a spot that is well-drained, partially shaded, and accessible from your house. Avoid low-lying areas where water pools after rain. If your ground slopes, level the area with tamped gravel or build up the low side with compacted fill.
I made the mistake of placing my first coop on bare grass in a slightly low spot. Within three months, the area underneath was a mud pit. When I relocated, I laid down a 6-inch pad of pea gravel first, and the drainage difference was enormous.
For detailed guidance on picking the best location, our article on the best place to put your chicken coop covers sunlight, drainage, wind protection, and proximity to neighbors.
Step 2: Build the Floor Frame
Cut four pieces of 2×4 lumber to create a rectangle measuring 4 feet by 6 feet on the outside edges. Screw or bolt the corners together using 3-inch exterior screws or carriage bolts. Add one or two cross pieces (also 2×4) evenly spaced inside the frame for additional support.
If you are building an elevated coop, attach this frame to four 4×4 posts at your desired height. I recommend 24 to 30 inches off the ground. Use lag screws or carriage bolts at each post-to-frame connection for strength. Check that the frame is level using a spirit level before proceeding.
Sheet the top of the frame with 3/4-inch exterior plywood. Cut a single 4×8 sheet down to 4×6 and screw it to the frame with 2-inch screws every 8 to 10 inches along the joists. This creates a solid, draft-free floor.
Step 3: Frame the Walls
Build each wall panel flat on the ground, then raise it into position and secure it to the floor frame.
For a shed-style (single-slope) roof: Make the front wall 4 feet tall and the back wall 3 feet tall. The side walls will taper from 4 feet at the front to 3 feet at the back, creating the roof slope.
For a gable roof: Make all four walls the same height (3 to 3.5 feet at the eaves) and build separate triangular gable ends to support the peaked ridge.
Use 2×4 studs spaced approximately 24 inches on center. Frame openings for the pop door (12×14 inches on one end wall), one or two windows (roughly 12×18 inches each), ventilation ports near the roofline (covered with hardware cloth), and the main cleanout door (at least 24 inches wide by whatever height your wall allows).
Once all four walls are raised, plumb, and squared, sheath the exterior with plywood. I recommend 3/4-inch plywood for durability, but 1/2-inch works if you are watching costs. Screw the sheathing to every stud with 2-inch screws.
Step 4: Frame and Install the Roof
For a shed-style roof, the wall framing already creates your slope. Simply lay 2×4 rafters across the top of the front and back walls, spaced 24 inches apart, extending 3 to 4 inches beyond the walls on all sides for overhang.
Sheet the rafters with plywood, add roofing underlayment, and install your roofing material. I used corrugated metal panels on my coop because they are inexpensive, easy to install with roofing screws, and last for decades without maintenance. Asphalt shingles are another good option if you prefer a more traditional look.
Make sure the roof overhangs the walls by at least 3 to 4 inches. This directs rainwater away from the coop walls and keeps the interior drier. A drip edge along the lower roof line is a small addition that makes a big difference.
Step 5: Build the Nesting Boxes
For 6 hens, you need 2 to 3 nesting boxes. The Instructables coop build referenced earlier reserved the last 12 inches of the coop interior for a nesting area divided into individual compartments, each measuring 12 to 14 inches wide. This is a smart, space-efficient approach that I have used myself.
Build a box that spans the full width of one wall (4 feet across) and divide it into three compartments, each approximately 14 inches wide by 12 inches deep by 12 inches tall. Mount the boxes at 18 to 24 inches off the coop floor, always lower than the roosting bar.
Install a hinged lid on the exterior side of the nesting boxes so you can collect eggs from outside the coop without opening the main door. This single feature saves an enormous amount of time and hassle in daily coop management.
Add a sloped roof on top of the nesting boxes inside the coop (a piece of plywood angled at about 45 degrees). This prevents hens from roosting and leaving droppings on top of the boxes.
If you are interested in upgrading to roll-away nesting boxes that keep eggs cleaner and prevent egg eating, our detailed guide on roll-away nesting boxes and whether they are worth it covers designs, angles, DIY plans, and recommendations.
Step 6: Install the Roosting Bar
Mount a single 2×4 roost bar with the wide (4-inch) face up at approximately 36 to 40 inches off the coop floor. This height gives you room for a droppings board underneath (if you choose to add one) and ensures the roost is clearly higher than the nesting boxes.
For 6 chickens, the bar should be at least 60 inches long to provide 10 inches of space per bird. Secure it to the side walls with L-brackets or notched 2×4 supports.
Wood is the best material for roost bars. It stays temperature-stable in both heat and cold, unlike metal (which can freeze to feet in winter) or plastic (which can be too slippery). Natural tree branches with a diameter of 2 to 3 inches also work well and give the coop a rustic feel.
For more on roost placement, height, and spacing, our article on how high should roosting bars be in a coop covers the specifics for different breed sizes.
Step 7: Install Doors, Pop Door, and Latches
Hang the main cleanout door using heavy-duty exterior hinges. This door should be large enough for you to reach every corner of the coop interior. For a 4×6 coop, a door that is 24 to 30 inches wide and the full wall height works well.
Install the pop door on one end wall leading to the run. A standard pop door for six chickens should measure about 12 inches wide by 14 inches tall. You can use a simple sliding panel, a hinged flap, or an automatic chicken coop door that opens at dawn and closes at dusk.
Now, and I cannot emphasize this enough, install two-step latches on every single door, hatch, and access panel. Raccoons are incredibly dexterous. They can lift hook-and-eye latches, slide simple bolts, and turn basic knobs. A two-step latch (one that requires lifting and pulling, or pressing and sliding) stops them.
I lost a hen to a raccoon during my first year because I used a simple hook latch on the pop door. It was one of the worst experiences of my chicken keeping journey. Every door on my coops now has a carabiner clip as a backup latch.
Step 8: Secure All Openings with Hardware Cloth
Cover every ventilation opening, window, and mesh panel with 1/2-inch welded hardware cloth. Attach it using galvanized staples from a heavy-duty staple gun, then add screws and fender washers every 6 inches around the perimeter for extra security. Staples alone can be pulled out by a determined predator.
Do not use standard chicken wire for any opening. Chicken wire is designed to keep chickens in, not to keep predators out. A raccoon can reach through standard chicken wire, and weasels can squeeze through the larger openings. Our article on hardware cloth vs. chicken wire explains exactly why hardware cloth is the only reliable option for predator protection.
Step 9: Build and Attach the Run
Frame the run from 2×4 lumber. A 6-foot wide by 10-foot long run provides 60 square feet of outdoor space, which is ideal for 6 hens. Attach it directly to the coop at the pop door end.
Enclose all four sides and the top with hardware cloth. Covering the top prevents aerial predators like hawks from accessing your flock. If your area has minimal hawk pressure, you can use less expensive welded wire for the top, but hardware cloth on the sides is non-negotiable.
For the bottom, you have two options:
Buried apron method: Bend the bottom 12 inches of the side hardware cloth outward at ground level, creating an L-shaped apron. Cover it with soil or gravel. When a predator tries to dig at the base of the run, it hits the buried mesh and cannot get through. This is the method I use and it has stopped every digging attempt.
Buried mesh method: Dig a 6-inch trench around the perimeter and bury the bottom edge of the hardware cloth vertically. Backfill with soil.
Either method works. The apron method is faster and does not require digging a trench.
Step 10: Add Bedding and Interior Finishing Touches
Spread a 3 to 4 inch layer of pine shavings across the coop floor and in each nesting box. Pine shavings are absorbent, affordable, and easy to clean out during weekly maintenance. Avoid cedar shavings (the aromatic oils can irritate chicken respiratory systems) and hay (retains moisture and promotes mold).
Add dried herbs to your nesting boxes for a natural pest deterrent. Lavender, peppermint, oregano, and chamomile all help repel mites and lice while keeping things smelling fresh. Our complete guide on the best herbs to put in chicken nesting boxes covers which herbs work best and how to use them effectively.
Place your feeder and waterer inside the run, not inside the coop. This keeps the coop interior cleaner, reduces moisture buildup, and encourages hens to move outdoors during the day. If you must keep water inside during winter, use a spill-proof design and check for leaks daily.
5 Must-Have Features for a 6-Chicken Coop
Regardless of which plan or style you follow, these five features make the difference between a coop that works and one that creates constant headaches.
Proper Ventilation (Year-Round)
Ventilation is the most overlooked and most critical feature of any chicken coop. Your coop needs openings near the roofline that remain open even in winter. These openings allow moisture, ammonia from droppings, and excess heat to escape without creating a direct draft on roosting birds.
For a 24-square-foot coop, provide at least 2 to 3 square feet of ventilation opening positioned above roost height. In hot climates, double that amount or add operable windows lower on the walls for cross-ventilation during summer.
I added ventilation openings to both gable ends of my shed-style coop (covered with hardware cloth) and the air quality improvement was immediate. The ammonia smell that used to hit me when I opened the door disappeared completely.
Predator-Proof Construction
Hardware cloth on every opening. Two-step latches on every door. No gaps larger than 1 inch anywhere in the structure. A buried apron or mesh around the run perimeter. These are baseline requirements, not optional upgrades.
Easy Cleaning Access
Design at least one large door or removable panel that gives you full access to the coop interior. A coop you cannot easily reach into is a coop you will avoid cleaning, and that leads to health problems for your flock.
I built my cleanout door on the longest wall of my 4×6 coop. It swings open to nearly 180 degrees, which lets me reach every corner with a rake. On cleaning day, I can strip the entire floor in under 10 minutes.
Exterior Egg Collection
Building nesting boxes into the wall with a hinged exterior lid lets you collect eggs without entering the coop, disturbing the flock, or stepping into dirty bedding. It takes an extra 30 minutes during construction and saves you thousands of small annoyances over the life of the coop.
A Covered Run Section
Even if your run is mostly open-topped, cover at least a portion of it with roofing panels or a tarp. This gives your hens a dry outdoor area during rain and shade during intense sun. Chickens that are stuck inside a dark coop all day during bad weather are less active, less healthy, and more prone to behavioral problems like feather picking.
Common Mistakes to Avoid
Building to the bare minimum. 24 square feet is the minimum for 6 standard chickens. It works, but there is zero margin for error. If you add even one more bird, the coop is overcrowded. Build 4 to 8 square feet larger if you can.
Forgetting about summer heat. A coop that keeps birds warm in winter can cook them in summer if ventilation is inadequate. Add operable windows or extra ventilation panels that you can open during hot months and partially close in winter.
Placing nesting boxes above the roost. Chickens roost at the highest available point. If nesting boxes are higher than the roost bar, hens will sleep in the boxes and fill them with droppings every night. Always mount boxes lower than the roost.
Skipping the run floor. Bare dirt under a stationary run turns to mud within weeks in any climate with regular rainfall. Lay down 2 to 4 inches of coarse sand, pea gravel, or wood chips for drainage and comfort.
Ignoring local regulations. Many cities have setback requirements, maximum flock sizes, and coop construction standards. Always check your local chicken laws before you start building.
Scaling Up: What If You Want More Than 6 Chickens Later?
Most chicken keepers add birds within the first year. If you suspect you might expand your flock, here are two smart strategies.
Build a slightly larger coop now. A 4×8 coop (32 square feet) comfortably houses 8 standard chickens and costs only marginally more than a 4×6. The extra 8 square feet of space gives you room to grow without rebuilding.
Design your run for easy expansion. Build the initial run with one open end panel that can be unbolted and extended later. Adding length to a run is far easier than adding width, so orient the long axis in a direction where you have room to extend.
If you are just starting out and trying to decide on the right flock size, our guide on how many chickens you need for a family of 4 helps you match bird count to your actual egg consumption needs. And if you are interested in a smaller starter build first, our article on chicken coop plans for 4 chickens covers compact designs that work for smaller flocks.
My Honest Advice After Building a 4×6 Coop
Looking back on my first build, there are a few things I would tell anyone about to start this project.
The construction itself is not hard. If you can measure, cut a straight line, and drive a screw, you can build a perfectly functional chicken coop. Do not let a lack of carpentry experience stop you.
Spend your money where it matters most: hardware cloth, good latches, and solid roofing. Everything else can be built from budget materials. The security and weatherproofing components are where cutting corners costs you the most in the long run.
Take your time with the roof. A well-sealed roof with proper overhang will protect the entire structure for years. A poorly built roof will cause every other part of the coop to deteriorate faster.
And finally, enjoy the process. Building a coop for your flock is one of the most rewarding parts of keeping backyard chickens. Your hens will not care if it is crooked or if the paint is uneven. They care about being dry, safe, and comfortable. Hit those three marks and you have built a great coop.
Frequently Asked Questions
How long does it take to build a coop for 6 chickens?
A basic elevated or shed-style 4×6 coop with an attached run can be completed in 2 to 3 weekends by one person with basic tools. Having a helper for raising wall panels and holding materials in place speeds things up significantly.
Can I keep 6 chickens without a run?
You can if your birds have daily supervised access to a securely fenced yard for free-ranging. However, an attached run provides a safe outdoor space for times when you cannot supervise, and it protects your flock from aerial and ground predators when you are away.
Do I need a building permit for a chicken coop?
This varies by jurisdiction. Some cities and counties require permits for any detached outdoor structure above a certain size. Check with your local planning department before you break ground.
What is the best flooring for a 6-chicken coop?
Plywood covered with pine shavings is the most practical combination. The plywood provides a solid, easy-to-clean surface, and the shavings absorb moisture and droppings. Replace shavings weekly or as needed.
How many nesting boxes do 6 chickens need?
Six hens need 2 to 3 nesting boxes. Chickens naturally share boxes, and most flocks will pick one or two favorites regardless of how many you provide. You do not need one box per hen.
Can I convert an existing shed into a coop for 6 chickens?
Absolutely. Many keepers successfully repurpose garden sheds, playhouses, and storage buildings. The main modifications needed are adding ventilation near the roofline, covering all openings with hardware cloth, installing roost bars and nesting boxes at the correct heights, and securing all doors with predator-proof latches.
Disclaimer: The information in this article is based on personal experience and widely accepted backyard poultry keeping practices. Building codes, setback requirements, and flock limits vary by location. Always verify your local regulations before constructing a chicken coop. If you have questions about structural safety, consult a qualified contractor. For flock health concerns, contact a poultry veterinarian or your local agricultural extension service.

Oladepo Babatunde is the founder of ChickenStarter.com. He is a backyard chicken keeper and educator who specializes in helping beginners raise healthy flocks, particularly in warm climates. His expertise comes from years of hands-on experience building coops, treating common chicken ailments, and solving flock management issues. His own happy hens are a testament to his methods, laying 25-30 eggs weekly.