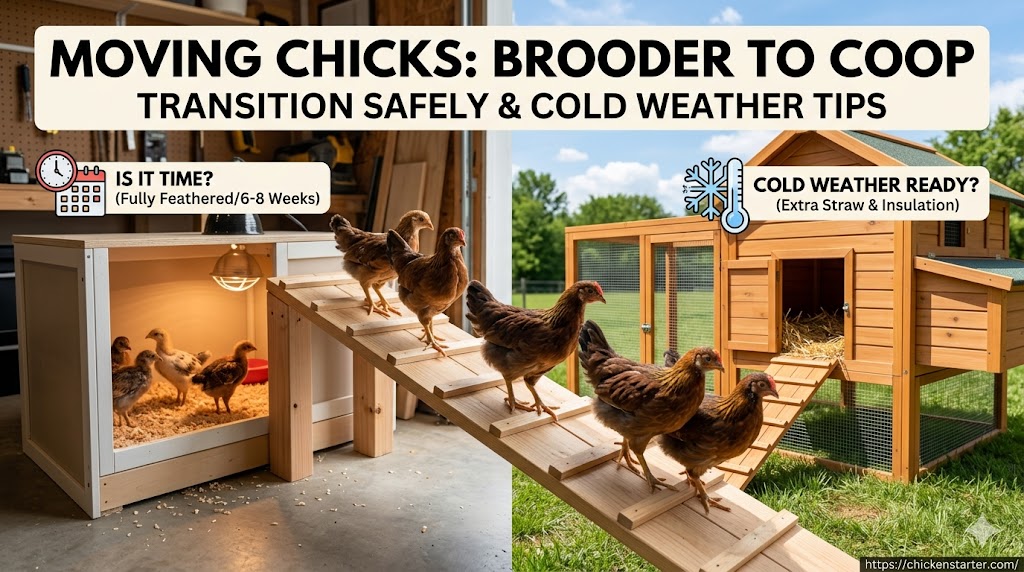
Moving chicks from brooder to coop is one of the most nerve-wracking milestones for any chicken keeper, but here is the honest truth: if your chicks are fully feathered and outdoor overnight temperatures are consistently above 50°F, they are ready. That typically happens at 6 to 8 weeks of age for most breeds. The actual feathering matters more than any number on a calendar, because not all breeds or individual chicks develop at the same pace.
I remember the first time I moved a batch of chicks to the coop. They were six weeks old, it was late April, and I checked on them approximately eleven times that first night. They were fine. They were better than fine, actually. They were happier in the coop than they had been in the brooder for the previous two weeks, and they made that obvious the moment they had room to stretch their wings and scratch at real bedding on a real floor.
The trick is not timing it perfectly. The trick is reading the signs your chicks are giving you, preparing the coop properly, and making the transition gradual enough that nobody panics. Not your chicks, and not you.
How to Know When Chicks Are Ready to Move to the Coop
There is no single magic age. Anyone who tells you “move them at exactly 6 weeks” is oversimplifying. According to Purina Mills, 6-week-old chickens should be fully feathered and can tolerate cooler temperatures, with birds easily tolerating temps in the 50s and cold-tolerant breeds handling the 40s. But the real answer depends on three things working together: feathering, behavior, and weather.
What Does a Fully Feathered Chick Look Like?
A fully feathered chick has replaced all of its fluffy down with real adult feathers. No more bald patches. No more fuzzy heads. The wings, back, chest, belly, and neck should all be covered with structured feathers that lie flat against the body.
In my experience, most standard breeds like Rhode Island Reds, Barred Rocks, and Orpingtons are fully feathered between 5 and 7 weeks. Some fast-developing breeds finish as early as 4 weeks. Silkies and heavily feathered breeds can take 8 to 9 weeks or even longer because their unique plumage develops differently than standard feathering.
The best way to check is simple. Look at your chick’s neck and the area between the wings on the back. These are usually the last spots to feather in. If you still see downy fluff there, wait another week.
Behavioral Signs They Are Ready
Your chicks will tell you when they have outgrown the brooder. I have found these signs to be the most reliable indicators:
They are spending almost no time near the heat source. If your chicks actively avoid the brooder plate or stay at the far end from the heat lamp all day and night, they do not need supplemental heat anymore. According to experienced breeders, when chicks spend very little time near the heat source, it can ordinarily be eliminated.
They are constantly perching on everything. The urge to roost is a strong developmental signal. Chicks in the wild begin roosting at night at about 6 weeks of age. If your brooder chicks are perching on the feeder, the waterer rim, and each other’s backs, they are telling you they need vertical space and real roost bars.
The brooder is a disaster zone. By week 5, the poop volume and frequency seem to quadruple. Your chicks go through feed and water at an alarming rate. The brooder that felt spacious three weeks ago is now absurdly cramped. This is normal and it means they need more space.
They are getting cranky with each other. Pecking, chasing, feather-pulling, and general teenage chicken drama increase rapidly in an overcrowded brooder. Moving them to the coop solves this almost immediately.
How Long Do Chicks Need a Brooder Plate or Heat Lamp?
Most chicks need supplemental heat for approximately 4 to 6 weeks, though this varies based on your brooding setup, ambient temperatures, and breed. According to information from the NSW Department of Primary Industries (cited by The Chicken Coop Company), the timeline chicks will need a heat source depends on seasonal temperatures and housing type, typically falling within 3 to 6 weeks.
Here is a practical breakdown of what I have found works:
If you are brooding indoors in a warm room (above 70°F), many chicks can be off heat entirely by week 4. The ambient warmth of your house provides enough background temperature that once feathering begins, the heat plate becomes unnecessary.
If you are brooding in a garage or barn (50 to 65°F ambient), plan on needing the heat source through week 5 or 6. The cooler ambient temps mean chicks rely on the plate or lamp longer.
If you are brooding in winter in an unheated space, you may need supplemental heat through week 7 or 8. In this scenario, a gradual weaning process is essential.
The best indicator is always behavior. If your chicks sleep scattered throughout the brooder instead of huddled under the heat source, they are telling you the heat is no longer needed. Trust them.
For a complete brooder setup guide, including heat source comparisons and size calculators, see our guide on how to set up a brooder for new chicks.
The Week Before the Move: How to Prepare Your Chicks and Your Coop
Do not just grab your chicks one afternoon and dump them into the coop. A little preparation during the week before the move makes the transition dramatically smoother for everyone involved.
Preparing Your Chicks
Start reducing heat 5 to 7 days before the planned move. If you are still running a heat plate, begin raising it higher each day so the temperature underneath decreases gradually. If you are using a heat lamp, raise it or switch to a lower-wattage bulb. The goal is to close the gap between brooder temperature and coop temperature before the move happens. According to information from This Unbound Life, you should remove supplemental heat several days before your planned move to prepare them for cooler outdoor temps.
Take your chicks on outdoor field trips. Once they are 3 to 4 weeks old, you can begin supervised outdoor visits on warm days. According to Meyer Hatchery, at this age they are ready for field trips outside using something like a dog playpen to keep them together safely while they explore. Start with 30 minutes and gradually increase to several hours. This gets them accustomed to wind, sunlight, ambient sounds, and temperature fluctuations before the permanent move.
I started outdoor trips with my last batch at 4 weeks. At first they huddled together looking bewildered. By the third trip, they were scratching in the dirt and chasing bugs like they owned the place.
Preparing the Coop
Deep clean the coop before bringing new chicks in. Scrub waterers and feeders, replace all bedding, and check for any gaps where tiny chicks could squeeze through or predators could reach in. For a thorough process, see our spring chicken coop cleaning checklist.
Inspect for predator vulnerabilities. Young chicks are small enough to fit through openings that adult chickens cannot. Use quarter-inch hardware cloth along the bottom two feet of any run fencing. Check all latches, door closures, and ventilation openings. Our predator-proofing guide covers this in detail.
Block the nesting boxes. This is something most guides skip and it matters enormously. According to The Chicken Chick, blocking physical access to the nest boxes prior to the move prevents chicks from developing the habit of sleeping in them. Sleeping chickens are pooping chickens, and soiled nesting boxes lead to dirty eggs and increased disease risk later. Use cardboard or plywood to block nest boxes and reopen them at 17 to 18 weeks when laying begins.
Set up low roost bars. Young chicks cannot fly to adult-height roosts. Install a temporary low perch 6 to 12 inches off the ground so they can practice roosting behavior. A simple 2×4 supported by bricks works perfectly.
Position feed and water where chicks can find them easily. Place them at the chicks’ current height level, not at adult chicken height. You can raise them gradually as the birds grow.
Moving Day: Step by Step
Choose the Right Day
Move your chicks on a mild, calm day in the late afternoon or early evening. Late afternoon means they have a few hours of daylight to explore and orient themselves before their first night in the new space. Avoid moving on rainy, windy, or extremely cold days.
The Transfer Process
I have found the simplest method is also the best. Carry the brooder itself into the coop if it is portable. According to Purina Mills, maintaining consistency by carrying the brooder outside and placing it inside the coop helps ease the transition. Open it and let the chicks explore on their own terms.
If the brooder is too large to move, use a pet carrier or a large cardboard box. Transport the chicks gently, place the carrier in the coop, open the door, and step back. Let them come out when they are ready. Some will bolt out immediately. Others will take 20 minutes to build up the courage. Both responses are normal.
Show them the water immediately. Gently dip a couple of beaks just like you did on arrival day. The stress of a new environment can cause chicks to forget where essentials are.
Stay nearby but do not hover. Your presence is reassuring, but constant handling adds stress. Sit quietly near the coop for the first hour. Let them discover the space.
The First Night
This is the part that keeps new chicken keepers awake. Here is what to expect:
Your chicks will probably not sleep on the roost bars the first night. They will likely huddle together in a corner on the floor, possibly peeping loudly. This is completely normal. They are confused and nervous, not cold or sick.
According to The Chicken Chick, noisy birds are unhappy, but there is a difference between the sounds of a cold chick and a chick frightened by a new environment. Once teenage chickens become familiar with their new home, they should be actively exploring, busily eating and scratching, and contentedly quiet. If they are huddled together and noisy after the first night or two, they may actually be cold and need a temporary heat source.
Check on them several times that first night. Look for signs of distress versus normal adjustment behavior. By night two or three, most chicks settle in completely.
Moving Chicks to the Coop at 3 Weeks: Is It Too Early?
Three weeks is earlier than most guides recommend, but it is not impossible if conditions are right. Several experienced keepers successfully brood chicks in the coop from day one using proper heat sources.
The key factors for an early move are warm ambient temperatures (above 70°F day and night), a secure and draft-free coop, and continued supplemental heat inside the coop via a brooder plate or heat lamp. You are essentially moving the brooder into the coop, not ending the brooding period.
At 3 weeks, chicks are only partially feathered. They absolutely still need a heat source. The coop simply becomes a larger, better-ventilated brooder. This approach works especially well in southern climates during spring and summer, where nighttime temperatures rarely dip below 60°F.
In my own experience, I moved a batch of 12 chicks to a protected section of the coop at just under 4 weeks during a warm May. The brooder plate went with them. Nighttime lows were around 65°F. They transitioned beautifully and feathered out faster than any batch I had brooded entirely indoors, which aligns with what multiple experienced keepers report: chicks brooded in cooler conditions feather out more quickly.
Moving Chicks Outside in Winter: The Cold Weather Strategy
Moving chicks from brooder to coop in winter is the scenario that causes the most anxiety, and rightly so. A chick going from a 68°F living room to a 25°F coop can experience temperature shock that is genuinely dangerous. According to My Pet Chicken, just because you have adjusted the heat gradually down to the ambient temperature of your home does not mean they can go from 68°F inside to 15°F outside in the dead of winter. Sudden temperature changes are a real danger.
Here is the winter transition strategy that has worked for me and aligns with what experienced cold-climate keepers recommend:
Week 5 to 6: Begin Temperature Acclimation Indoors
Open windows in the brooding room during the day to lower ambient temperature. Turn off the heat source during the warmest part of the day and observe behavior. If chicks are active and eating normally without huddling, they are handling the cooler temps.
Week 6 to 7: Move to a Transitional Space
If possible, move the chicks to an intermediate location like a garage or enclosed porch that is cooler than the house but warmer than the outdoor coop. According to Meyer Hatchery’s winter brooding guide, they keep chicks in the garage until about 5 to 6 weeks old in winter. Bring the brooder plate along. Begin turning the plate off during the day while keeping it available at night.
Week 7 to 8: Move to the Coop with Heat
Transfer chicks to the coop with the brooder plate or a safe heat source like a Sweeter Heater panel. Keep the heat running at night only. By Week 8, begin leaving the heat off entirely unless nighttime temperatures drop below 30°F.
Week 9 to 10: Full Transition
By this point, fully feathered chicks should be handling cold nights without any supplemental heat, provided the coop is dry, draft-free, and properly ventilated. According to experienced keepers in cold climates, chicks as young as 5.5 weeks old have survived nights in the mid-20s with no additional heat after being acclimated in a coop-based brooder.
The critical principle: chicks can handle cold if they are acclimated gradually. What kills chicks is sudden temperature shock, not cold itself.
For comprehensive cold-weather housing guidance, see our winterizing chicken coop guide and our guide on raising chickens in cold climates.
How to Teach Chicks to Go Into the Coop at Night
This is the part nobody warns you about. Your chicks may refuse to go inside the coop at dusk for the first few nights. They will huddle in a corner of the run, sit on top of the coop, or simply look confused while you stand there in the fading light wondering why you got into this hobby.
According to The Chicken Chick, she recommends keeping chicks inside the coop with the pop door closed for several days before allowing access to the run. This teaches them that the coop is home and the safe place they should return to at night. Chicks that skip this step often fail to return to the coop at dusk independently.
Here is the process that has consistently worked for me:
Days 1 to 3: Keep them locked inside the coop. No run access. This establishes the coop as home base. Make sure feed and water are inside.
Days 4 to 5: Open the pop door for a few hours in the afternoon. Let them explore the run with supervision. Close the door before dusk and ensure all chicks are inside.
Days 6 to 7: Leave the pop door open for the full day. Most chicks will naturally return to the coop as it gets dark. If stragglers remain outside, gently herd or carry them in.
Week 2: They should be returning on their own. If a chick consistently refuses to go in, physically place it inside at dusk for a few more nights. It will learn.
For more strategies, see our full guide on how to get chickens back in the coop at night.
Introducing New Chicks to an Existing Flock
If you already have adult chickens in the coop, the transition becomes more complicated. Adult hens will enforce the pecking order on newcomers, and the size difference between a 6-week-old chick and a mature hen is significant enough that injuries can occur.
According to The Chicken Chick, if older flock members are already living in the coop, it is best to wait until the chicks are closer in size to the mature birds before beginning integration. She recommends the “playpen method” where chicks are placed in a protected enclosure within the coop or run so both groups can see and hear each other without physical contact.
A wire dog kennel inside the run works perfectly. Keep the chicks protected inside the kennel for 7 to 14 days. The adult hens will investigate, posture, and eventually lose interest. After the separation period, begin supervised free-mixing during the day, starting with short sessions. Multiple feeding stations prevent resource guarding by dominant hens.
For detailed integration strategies, see our guide on pecking order problems and how to stop bully hens.
Feeding After the Move: What Changes and What Stays the Same
Nothing changes about the feed when you move chicks from the brooder to the coop. According to Purina Mills, you should continue feeding the same complete starter-grower feed from day 1 until chicks reach 18 weeks of age. Do not switch to layer feed early. The calcium levels in layer feed are too high for developing birds and can cause kidney damage.
At 18 weeks, when your pullets approach point of lay, transition to a complete layer feed and begin offering free-choice oyster shell for supplemental calcium.
For more on the right time to change feeds, see our guide on when to switch from starter to grower feed.
Week-by-Week Transition Timeline at a Glance
| Week | What to Do | Temperature Tolerance |
|---|---|---|
| Week 3 to 4 | Begin supervised outdoor field trips on warm afternoons | Still needs heat; tolerates 75 to 80°F |
| Week 5 | Start reducing brooder heat; longer outdoor visits | Tolerates 70 to 75°F |
| Week 6 | Assess feathering; prepare coop; move if fully feathered and temps above 50°F | Fully feathered chicks tolerate 50°F+ |
| Week 7 | Standard move window; most chicks fully feathered | Tolerates 45 to 50°F (cold-hardy breeds tolerate 40s) |
| Week 8 | Latest move for spring/summer chicks; winter chicks may still need transitional heat | Tolerates 40°F+ without heat |
| Week 9 to 10 | Winter chicks: remove final heat source | Acclimated chicks handle freezing temps in a dry, draft-free coop |
Frequently Asked Questions
When should I move my chicks from the brooder to the coop?
Move chicks from the brooder to the coop when they are fully feathered, typically at 6 to 8 weeks of age, and outdoor overnight temperatures are consistently above 50°F. The actual feathering matters more than age alone. Some breeds feather as early as 4 to 5 weeks; others take 8 to 9 weeks.
Can I move chicks to the coop at 3 weeks?
You can move chicks to the coop at 3 weeks only if you bring the heat source with you and the coop is secure and draft-free. At 3 weeks, chicks are partially feathered and still require supplemental heat of approximately 80 to 85°F. You are essentially relocating the brooder, not ending the brooding period.
How long do chicks need a brooder plate?
Most chicks need a brooder plate for 4 to 6 weeks, depending on ambient temperature and breed. If your brooding space stays above 70°F, you may be able to stop as early as week 4. In cooler environments (50 to 60°F ambient), plan on week 6. Always let chick behavior guide your decision over calendar dates.
What does a fully feathered chick look like?
A fully feathered chick has no remaining fluffy down visible anywhere on its body. The wings, chest, back, belly, and neck are all covered with structured adult feathers that lie flat. The last areas to feather are typically the neck and the area between the wings on the back.
How do I move chicks to the coop in winter?
Acclimate gradually over 2 to 3 weeks. Reduce indoor heat, move to a transitional space like a garage at week 6 to 7, then transfer to the coop at week 8 to 10 with a safe heat source for nighttime. Never move chicks directly from a warm house to a freezing coop. The temperature shock, not the cold itself, is what causes problems.
When should I put young chickens in the coop at night?
Keep new chicks locked inside the coop (door closed, no run access) for the first 3 to 5 days. This teaches them that the coop is home. After that, open the pop door during the day and close it at dusk. Most chicks learn to return on their own within one to two weeks.
The Bottom Line
Moving chicks from brooder to coop is simpler than it feels. Fully feathered chicks at 6 to 8 weeks old are tougher than you think. The biggest mistakes I see are waiting too long out of anxiety (leading to overcrowded, stressed brooder chicks) or moving too fast without proper temperature acclimation (leading to chilled, sick coop chicks).
Watch your birds, not your calendar. Prepare the coop like it is the most important room in your house, because for your chickens, it is. And check on them that first night. Not because you need to. Because you will not be able to sleep if you do not.
For the complete chick supply checklist, see our bringing chicks home: 15 must-haves guide. And if you are still deciding whether to start with chicks or buy adult hens, our chicks vs. adult hens for beginners guide covers the full comparison.
Note: This guide is for educational purposes. Conditions vary by climate, breed, and individual flock. Always prioritize the safety and comfort of your birds and consult a poultry veterinarian for health concerns.

Oladepo Babatunde is the founder of ChickenStarter.com. He is a backyard chicken keeper and educator who specializes in helping beginners raise healthy flocks, particularly in warm climates. His expertise comes from years of hands-on experience building coops, treating common chicken ailments, and solving flock management issues. His own happy hens are a testament to his methods, laying 25-30 eggs weekly.