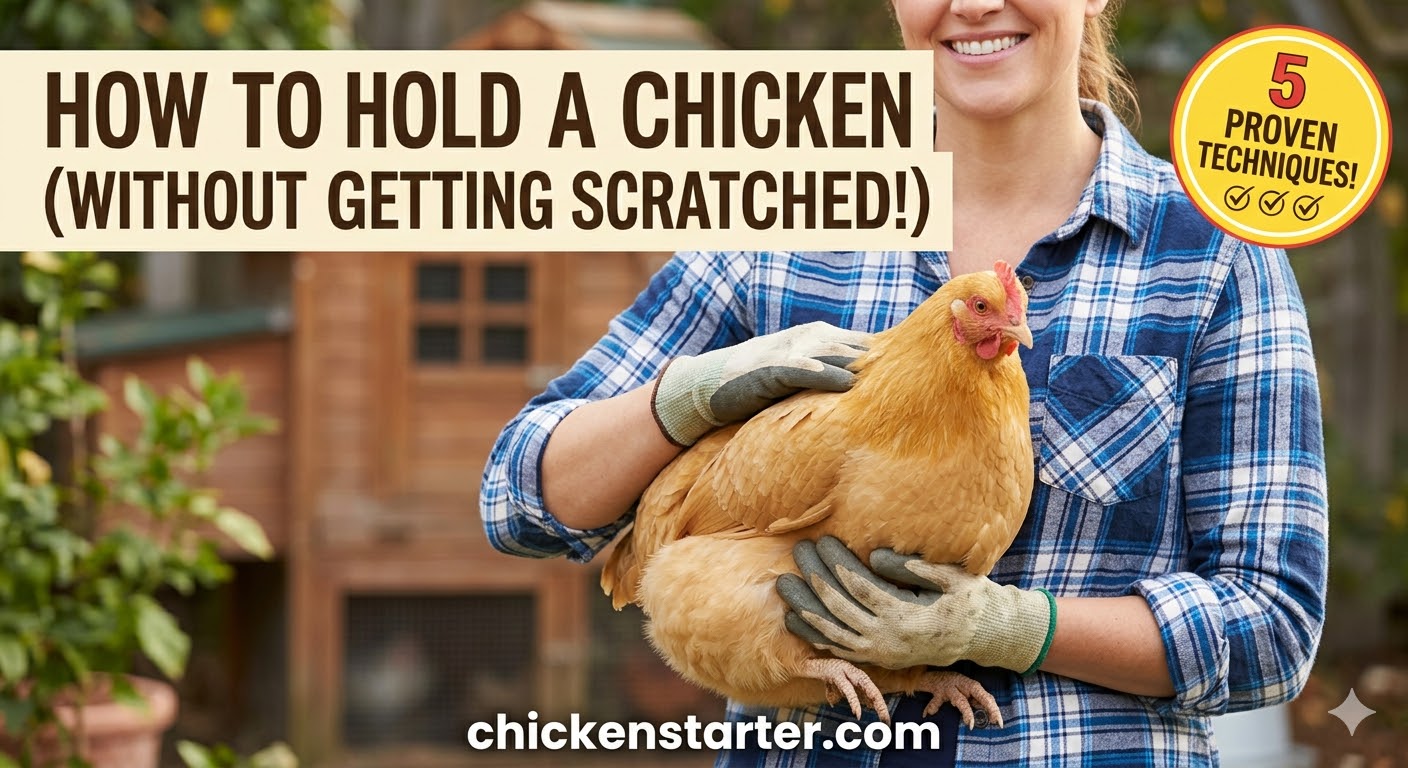
The key to holding a chicken without getting scratched is to control three things at once: pin the wings against the body so they cannot flap, support the feet so the chicken feels secure and stops kicking, and keep the bird close to your body so it stays calm.
I still remember the deep claw marks down both forearms from my first attempt at picking up a panicked Leghorn. She raked me so hard it looked like I had lost a fight with a rosebush. But she was not angry. She was terrified. Once I learned the football hold and the two-hand scoop technique, scratches dropped to nearly zero.
But holding technique is only half the equation. There is a real health reason to avoid scratches that most chicken keepers never think about. According to the CDC, poultry can sometimes carry harmful germs that make people sick, and those germs can cause illnesses ranging from minor skin infections to serious conditions that could cause death.
This guide covers five tested holding methods, the science behind why chickens scratch, calming techniques, how to safely handle roosters, the dangerous truth about flipping chickens upside down, and what the CDC recommends if you do get scratched.
Whether you are a brand-new backyard chicken owner in Texas, a hobby farmer in Ontario, or raising a small flock in rural Australia, these techniques work on every breed and every temperament.
Why Do Chickens Scratch When You Pick Them Up? It Is Not What You Think
Most people assume a chicken that scratches is being aggressive. That is almost never the case.
Understanding why scratches happen makes every technique in this guide make sense. There are three reasons your chickens scratch you, and none of them involve malice.
Panic Kicking Is the Number One Cause
Chickens are prey animals. Every instinct in their body screams “escape” when something large grabs them from above. When you lift a chicken off the ground, its natural response is to flap its wings and kick its legs wildly. Those claws rake whatever they contact, which is usually your arms, chest, or neck.
Your hen is not trying to hurt you. She is trying to get away from what her brain tells her is a hawk or a fox.
This is why a calm, confident approach matters so much. A slow, steady pickup gives the chicken less reason to panic. A sudden grab from above triggers a full fight-or-flight explosion.
Quick actionable tip: Count to three before you lift. Slow yourself down deliberately. Your calm energy transfers directly to the bird.
Loss of Footing Triggers Instant Panic
Here is something experienced chicken keepers learn quickly. A chicken whose feet are dangling in the air will panic every single time. The moment those feet lose contact with a solid surface, the bird kicks frantically.
The fix is beautifully simple. Support the feet. Place your hand or forearm under the bird so it has something to grip. The moment a chicken feels “grounded,” the kicking stops almost immediately.
Try this right now with your flock: Next time you pick up a hen, deliberately slide your hand under her feet the instant you lift. You will feel the difference in her body tension within two seconds.
This one adjustment alone prevents more scratches than any other tip in this entire guide.
Half of All Scratches Happen When You Put the Chicken Down
This is the part nobody talks about. You have the bird. She is calm. You are done checking her over. And then you let go from chest height, and she flaps wildly as she drops, raking your arms on the way down.
The solution is to always crouch or bend to ground level before releasing. Let the chicken feel the ground beneath her feet before you let go of the wings. I cover this in full detail later in the guide.
If you want to understand more about how chickens perceive you and why their reactions vary so much, our guide on do chickens recognize their owners explains the science behind chicken memory and bonding.
5 Safe Ways to Hold a Chicken Without Getting Scratched Step by Step
These five techniques range from everyday carries to medical restraint methods. Every single one is designed to control the wings, secure the feet, and keep the bird calm. Practice each one, find your favorite, and use it consistently.
Technique 1: The Football Hold (Most Versatile, Best for Beginners)
The football hold is the single most useful chicken-handling technique you will ever learn. It works for daily health checks, carrying birds between the coop and run, and one-handed tasks like opening gates or scooping feed.
Here is exactly how to do it:
Step 1. Approach the chicken slowly from the side. Never come directly from above or rush in from behind. Both of those angles trigger the predator alarm hard.
Step 2. Place your dominant hand firmly over both wings, pressing them gently but confidently against the body. Do not hesitate here. A tentative touch gives the bird time to flap.
Step 3. Slide your other hand underneath the body, between the legs. Your fingers should wrap so the legs sit between your fingers, giving you full control over any kicking.
Step 4. Lift smoothly in one continuous motion and tuck the bird between your arm and your rib cage, with the chicken facing backward, away from you.
Step 5. Your arm pins the wings against your body. Your hand wraps around to secure the legs. The bird is snug, warm, and unable to flap or kick.
Why it prevents scratches: Wings are pinned by your arm, so there is no flapping. Legs are controlled by your hand, so there is no kicking. The bird faces away from you, which means claws point in the opposite direction of your body. And because the chicken is held close to your warm torso, it feels secure and calms down quickly.
The football hold is my go-to for 90% of handling situations. I can carry a hen, open a gate, check a vent, and even scoop feed one-handed. The biggest secret is confidence. If you hesitate, the bird feels your uncertainty and panics. Commit to the pickup.
Technique 2: The Poultry Judge’s Hold (Best for Health Examinations)
If you have ever watched a poultry show, you have seen this hold. It is the technique professional judges use to examine every part of a bird’s body without getting scratched. It takes a bit more practice, but once you master it, you will wonder how you ever managed without it.
Here is exactly how to do it:
Step 1. Slide your dominant hand under the chicken’s body, palm facing up.
Step 2. Position the legs between your fingers. One leg goes between your pinky and ring finger. The other leg goes between your index and middle finger. This locks both legs in place with zero wiggle room.
Step 3. The bird’s keel bone (the prominent breastbone running along the center of the chest) rests on your palm and wrist. This distributes the bird’s weight comfortably.
Step 4. Your thumb and pinky press gently against the wing tips, keeping them folded flat against the body.
Step 5. Use your free hand to examine the bird, check feathers, inspect the crop, or look at the feet and toes.
Why it prevents scratches: Both legs are locked between your fingers with absolutely zero kicking range. The wings are simultaneously pinned by your thumb and pinky. The bird is fully supported and cannot escape or scratch. Chickens get used to this hold remarkably fast, and experienced birds will barely fuss after the second or third time.
Pro tip: Practice this hold on your calmest hen first. Once your muscle memory is solid, try it on more energetic birds.
This technique is indispensable for routine health checks and mite and lice inspections.
Technique 3: The Two-Hand Scoop (Safest Initial Pickup)
The two-hand scoop is the safest way to get a chicken off the ground and into a controlled hold. It is quick, gentle, and controls the wings before the bird has time to panic. I recommend this as your default pickup method until you are comfortable with faster single-hand approaches.
Here is exactly how to do it:
Step 1. Approach from behind or beside the chicken. Bend down low so you are not looming overhead like a predator.
Step 2. With both hands open wide, slide them around the chicken’s body from both sides simultaneously. Speed matters here but keep it smooth, not jerky.
Step 3. Your thumbs go over the tops of the wings. Your fingers wrap under the breast and belly.
Step 4. Lift smoothly and immediately transition into either the football hold or the judge’s hold.
Why it prevents scratches: Both wings are instantly controlled by your thumbs before the bird even registers what happened. The simultaneous two-sided approach leaves no gap for a wing to escape and flap. The bird is secured before it has time to mount a full panic response.
When to use this: Any time you are approaching a new bird, an untamed bird, or any chicken you are not 100% confident will cooperate.
Technique 4: The Towel Wrap or Chicken Burrito (Best for Medical Situations)
When you need to give oral medication, treat bumblefoot, administer a shot, or inspect an injury on an extremely stressed bird, the towel wrap is your best friend. It creates a complete barrier between you and those claws.
Here is exactly how to do it:
Step 1. Have a large towel, old pillowcase, or small blanket ready before you approach the bird. Lay it out and have it within arm’s reach.
Step 2. Drape the towel completely over the chicken, covering its head and body entirely. The sudden darkness triggers an immediate calming response.
Step 3. Scoop the chicken up through the towel, keeping the fabric between your hands and the bird’s claws at all times.
Step 4. Wrap firmly but not tightly. Pin the wings to the body and the legs together inside the towel. Think of wrapping a burrito. Snug enough that nothing escapes, but loose enough that the bird can breathe comfortably. You should be able to fit a finger between the towel and the bird’s body.
Step 5. Leave only the head exposed, or the specific body part you need to examine or treat.
Why it prevents scratches: The towel creates a complete physical barrier between the chicken’s claws and your skin. The darkness calms the bird. The wrapping immobilizes the wings and legs without you needing to grip them directly.
Use this for: Giving oral medication or injections. Treating bumblefoot or other foot injuries. Applying topical treatments to wounds. Inspecting crops, vents, or injuries. Handling extremely stressed, injured, or aggressive birds.
Pro tip: Keep a dedicated “chicken towel” in your first aid kit. An old bath towel works perfectly. Having it ready means you are never scrambling when you need it.
Technique 5: The Nighttime Lift (Easiest of All, Nearly Zero Scratch Risk)
If you have a bird that refuses to be caught during the day, the nighttime lift solves the problem entirely. This is the technique I recommend to every new chicken keeper who is nervous about handling for the first time.
Chickens are nearly blind in the dark. Once the sun sets and they settle onto their roost, they enter a sleep state where they barely react to being handled. This is not a trick or a stressor. It is simply how chicken biology works. Their eyes lack the rod cells needed for night vision.
Here is exactly how to do it:
Step 1. Wait until at least 30 minutes after dark, when your birds are fully settled on their roosts.
Step 2. Use a dim red headlamp. This is important. White light startles chickens awake instantly. Red light does not disrupt their vision nearly as much, so they stay calm and drowsy.
Step 3. Gently slide both hands around the bird on the roost. Approach slowly from the front or side.
Step 4. Lift slowly. The chicken will barely react. Some will not even open their eyes.
Step 5. Transition to the football hold and carry the bird wherever needed.
Use this for: Coop inspections for mites and lice. Administering medication to difficult birds. Moving chickens to new housing. Catching any bird you cannot catch during the day. Nail trimming. Spur maintenance on roosters.
Pro tip: This is the easiest time to do a full flock health check. Go through each bird on the roost, one by one, checking vents, feet, keel condition, and feather quality. You can examine your entire flock in one calm, quiet session.
I use the nighttime lift whenever I need to check a bird that is too flighty to handle during daylight hours. It is completely stress-free for both of you. Learn more about nighttime chicken behavior in our guide on getting chickens back in the coop at night.
How to Hold a Chicken to Calm It Down: 5 Methods That Work Every Time
Picking up a chicken is step one. Calming it so it relaxes in your arms is step two. Here are five methods that work consistently, whether your bird is mildly nervous or full-on panicking.
Cover the Eyes or Darken the Environment
Covering a chicken’s head with a towel or even gently cupping your hand over its eyes dramatically reduces stress. Chickens calm in darkness because their visual system drives most of their fear responses. Remove the visual input and the fear response drops immediately.
Important distinction: This is not the same as the dangerous tonic immobility response I discuss in the next section. Simply reducing light is a natural calming effect. Tonic immobility is a fear-induced paralysis caused by physical restraint in an inverted position. They are completely different things.
Try this: If a chicken is panicking in your arms, gently tuck its head under your arm or against your chest so its eyes are in shadow. You will feel the body tension release within seconds.
Support the Feet Immediately
I have said it before and I will keep saying it because it is the most important single tip in this entire guide. Give the chicken something to grip. Your forearm, your hand, a perch, anything solid.
An unsupported bird panics. A bird with footing calms within seconds.
Actionable test: Next time you are holding a chicken and it starts kicking, press your forearm firmly against its feet so it can wrap its toes around your arm. Count how many seconds it takes to calm down. In my experience, it is almost always under five seconds.
Hold Close to Your Body
Body warmth and the rhythm of your heartbeat are naturally calming to chickens. The closer the bird is to your torso, the more secure it feels. Keep the bird at chest or stomach height.
Holding a chicken at arm’s length or above your shoulders increases stress for the bird and scratch risk for you. The bird feels exposed and unsupported at those distances.
Talk Softly and Continuously
Chickens respond strongly to vocal tone. A calm, low, continuous voice tells the bird that there is no threat. Keep talking gently while you hold, carry, and examine the chicken.
It does not matter what you say. Read a grocery list. Narrate what you are doing. Describe the weather. The consistent, soothing sound is what matters. Abrupt silence or sudden loud noises trigger alertness and tension.
If you are curious about how much chickens actually understand, our piece on chicken noises and what they mean breaks down their surprisingly complex vocal communication system.
Stroke With the Feather Grain, Never Against It
Gently stroking a chicken from head to tail, always with the grain of the feathers, mimics natural preening and triggers a calming response. This works especially well on the back and sides of the neck.
Never stroke against the grain. Ruffling feathers backward is uncomfortable and stressful. It is like someone rubbing your hair the wrong way.
Avoid the belly too. Most chickens do not enjoy belly touches, and reaching under the bird puts your hands right in the kicking zone.
Should You Ever Hold a Chicken Upside Down? The Dangerous Truth
This is the most critical safety section in this entire article. I have seen this advice repeated in blog posts, Facebook groups, and YouTube comments hundreds of times: “Just flip the chicken upside down. It calms right down.”
This advice is wrong. It is dangerous. And it can kill your bird.
What Actually Happens When You Flip a Chicken Upside Down
According to RSPCA Australia, you should never restrain your chicken upside down. It is very stressful, and if the bird has a full crop, it can regurgitate the crop contents. If the chicken inhales this material, it can die or develop aspiration pneumonia.
As explained by avian veterinary experts, birds’ respiratory systems are completely different from ours. A bird’s lungs are positioned right next to the spine and upper ribcage. When a bird is upside down, the weight of all its internal organs presses directly on its lungs and air sacs, making it extremely difficult to breathe.
The bird that appears to “calm down” when flipped is not calm at all. It is entering a state called tonic immobility, and that state is pure terror.
The Science of Tonic Immobility: It Is Fear, Not Calm
Tonic immobility is a natural defense mechanism observed in chickens and many other prey animals. It is a reversible state of profound motor inhibition, essentially a full-body freeze.
Research published in behavioral science journals confirms that tonic immobility is a fear-potentiated response. The behavior appears when a prey animal has exhausted all other possible means of escape. It is sometimes described as “paralysis through fear” or “playing dead.”
In plain language, the chicken is so terrified that it believes it is about to die, and it freezes completely.
Chickens in tonic immobility appear to be paralyzed. They do not move at all. Some people mistake this for relaxation or compliance. It is neither. Although most chickens will not die from a single episode of tonic immobility, repeated episodes may cause long-term psychological stress and increased fearfulness.
If you have ever “hypnotized” a chicken by laying it on its back, now you know what was actually happening. The bird was not entertained. It was experiencing what it believed were its final moments.
Chickens Cannot Breathe Properly Upside Down
Here is the anatomy that makes upside-down holding genuinely dangerous.
Chickens do not have a working diaphragm like humans do. Humans breathe using a dome-shaped muscle between the chest and abdomen that contracts and relaxes. Birds lack this muscle entirely.
Instead, chickens use their abdominal muscles to control breathing at rest. When they are active, the entire body cavity expands and contracts to move air through nine air sacs distributed throughout their bodies. These air sacs work in concert with relatively rigid lungs to create a one-directional airflow system that is highly efficient but also highly dependent on the bird being in an upright position.
When a bird is inverted, gravity compresses these air sacs and lungs under the weight of the internal organs. The system that works beautifully upright fails dangerously upside down.
This is also why holding a chicken too tightly around the midsection, not allowing the keel and rib bones to move freely, can restrict breathing and in extreme cases cause death from lack of oxygen. Always hold firmly but never squeeze.
Aspiration Risk Is Real and Can Be Fatal
If a chicken’s crop is full of food or water and you flip it upside down, that material can flow backward into the throat and airway. Inhalation of crop contents leads to aspiration pneumonia, which can kill a chicken within days even if it survives the initial event.
This risk is highest immediately after a chicken has eaten or had a long drink of water. But since you often cannot tell how full a crop is from the outside, the safest approach is to never invert a bird at all.
Brittle Bones Can Break When Held by the Legs Upside Down
Laying hens that do not get enough calcium in their diets end up drawing calcium out of their own bones to manufacture eggshells. Over time, this can cause many hens to develop very brittle bones. When these hens are held upside down by their legs, their legs can actually break under the weight of their own bodies.
If you want to make sure your hens have strong bones and are producing thick, solid eggshells, read our complete calcium guide for chickens.
What to Do Instead
There is no safe reason to hold a healthy chicken upside down. Not for calming. Not for transport. Not for examination.
The football hold calms a bird just as effectively. The towel wrap immobilizes a bird more completely. The nighttime lift avoids the struggle entirely. All three accomplish everything that upside-down holding claims to do, without risking your bird’s life.
If a fellow chicken keeper recommends flipping a bird upside down, share this guide with them. This myth persists because the tonic immobility freeze looks like compliance. But what looks like calm cooperation is actually a terrified animal that has given up hope of survival.
Is It Safe to Hold a Chicken by Its Legs?
This is a related question that comes up constantly in chicken keeping communities, and the answer has important nuances.
Briefly grasping both legs to catch a flighty bird, then immediately transitioning to a supported hold, is acceptable in emergencies. Experienced poultry farmers sometimes need to make a quick leg catch when a bird is running and there is no other option. In that situation, the key word is immediately. Catch, then transition to a full body hold within two to three seconds.
However, carrying a chicken dangling by its legs is dangerous and should never be done as a standard practice. The weight of the body hanging from the leg joints puts tremendous stress on hips, joints, and tendons. In laying hens with calcium-depleted bones, it can cause fractures.
The poultry judge’s hold described in Technique 2 is the correct way to incorporate leg control. The legs are secured between your fingers while your palm supports the bird’s entire body weight underneath. The bird hangs from nothing. Everything is supported.
Never pick up a chicken by its wings, feathers, single foot, or neck. Each of these practices causes pain, stress, and potential injury including dislocated joints and torn feathers.
What to Wear When Handling Chickens: Protecting Yourself from Scratches and Germs
Even with perfect technique, protective clothing gives you a reliable backup layer of security. This matters most when handling untamed birds, aggressive roosters, or during medical procedures where you need to focus on the task rather than worrying about claws.
Your Handling Gear Checklist
Long sleeves are the absolute minimum. A thick flannel shirt, denim jacket, or canvas work coat is ideal. Thin fabrics like cotton T-shirts offer zero protection against chicken claws. If you feel the claw tips through the fabric, it is not thick enough.
Leather gloves or welding gloves are excellent for aggressive roosters or completely untamed birds. They give you the confidence to grip firmly without fear of spurs or scratches. However, skip the gloves for handling tame hens. Gloves reduce your dexterity and ability to feel the bird’s body, which makes it harder to hold gently and gauge how tightly you are gripping.
Sturdy jeans or work trousers are important if you plan to rest the bird on your lap during examinations. Chickens can scratch through yoga pants, leggings, and thin athletic wear without any trouble.
Closed-toe shoes or boots should be dedicated “coop shoes.” Keep them outside. Do not wear them into your house. This is basic biosecurity that also prevents you from tracking Salmonella, E. coli, and other poultry-associated bacteria into your living space.
Falconry-style leather arm guards are a surprisingly effective and affordable tool for handling aggressive roosters. They protect the entire forearm with thick, spur-proof leather and cost between $15 and $30 online. If you have a rooster with attitude, these are worth every penny.
Post-Handling Hygiene: What the CDC Recommends
According to the CDC’s backyard poultry guidance, you should always wash your hands with soap and water for at least 20 seconds after touching birds, their eggs, their supplies, or anything in their living area.
Germs can spread from poultry scratches and pecks, even when the wound does not seem deep or serious. The bacteria of primary concern include Salmonella, Campylobacter, and E. coli, all of which can be present on a chicken’s skin, feathers, and feet even when the bird appears perfectly healthy.
Make this a non-negotiable habit. Wash every single time, even if you only touched one bird for five seconds.
How to Teach Kids to Hold a Chicken Without Getting Scratched
Children and chickens can be a wonderful combination that teaches responsibility, empathy, and connection to where food comes from. But there are real safety considerations that every parent needs to know before handing a fluffy hen to an excited child.
Age-Appropriate Handling Guidelines
The CDC states clearly that children younger than 5 years should not touch chicks, ducklings, or other backyard poultry. Young children are more likely to get seriously sick from germs like Salmonella because their immune systems are still developing, and they are more likely to put their hands in their mouths after touching animals.
Here is a practical age guide based on CDC recommendations combined with real-world chicken keeping experience:
Children under 5 should not handle chickens or chicks at all. Let them watch from a safe distance and enjoy the experience visually. Wash their hands thoroughly even after being near the birds or touching any coop surfaces.
Children ages 5 to 8 can pet a chicken that is being held securely by an adult. The adult maintains full control of the bird at all times. Supervise thorough handwashing with soap and water immediately after every contact.
Children ages 8 to 12 can learn to hold calm, docile breeds like Silkies, Buff Orpingtons, or Cochins with hands-on adult guidance. Have them sit on the ground first. If the chicken falls or jumps, the drop is only a few inches, reducing injury risk for both child and bird. Start with the football hold, which is the easiest to learn.
Children 12 and older can learn all five techniques with supervision and practice. Start with the calmest bird in your flock and gradually work up to more challenging birds as confidence builds.
Essential Safety Rules for Kids
Always sit down first. Never allow a young child to hold a chicken while standing until they have weeks of confident practice. A panicking chicken at chest height on a standing child means claws at face level.
Start with the calmest bird in the flock. Every flock has one hen that is basically a feathered lap dog. That is your training bird.
Teach the difference between firm and squeezing. This is critical. Children instinctively hug tighter when a chicken struggles, which is exactly the wrong response. Remember, chickens lack a functional diaphragm and rely on body cavity expansion to breathe. Squeezing restricts breathing quickly. Teach kids to hold like they are cradling a loaf of bread: secure but not compressed.
The adult catches and hands the bird to the seated child. Children should not be chasing chickens around the yard trying to catch them. The adult does the pickup, settles the bird, and places it gently in the child’s ready arms.
Handwashing is immediate and mandatory. Every single time, no exceptions, no “I’ll wash in a minute.”
If your family is still in the decision-making phase, our guide on how to convince your spouse to get chickens covers the practical family considerations. And our easiest chicken breeds for beginners page lists the most child-friendly breeds with temperament ratings.
How to Restrain a Rooster Without Getting Scratched or Spurred
Roosters present a completely different challenge from hens. Their spurs, the sharp bony growths on the back of their legs, can cause deep puncture wounds that bleed heavily and carry a real infection risk. Standard scratches from hens are annoying. A spur strike to the forearm or leg can send you to urgent care.
Here is how to handle roosters safely.
Rooster-Specific Safety Rules
Always wear leather gloves, long sleeves, and sturdy boots when handling a rooster you do not fully trust. This is non-negotiable, even if the rooster has never shown aggression before. Roosters can be unpredictable, especially during breeding season when hormones are running high.
Nighttime catching is the safest approach by far. Roosters are just as blind at night as hens. Wait until dark, use a dim red headlamp, and lift the rooster off the roost using the two-hand scoop. He will barely react. I do 90% of my rooster handling this way.
The towel wrap is the safest daytime method for roosters. Drape the towel over the bird first, covering the head and body completely, then scoop. This eliminates the spur risk entirely because the towel covers the legs and prevents the bird from seeing you and becoming agitated.
When using the football hold on a rooster, ensure the spurred legs are firmly secured between your fingers. A loose leg on a rooster is a loaded weapon. Keep those spurs locked down and pointing away from your body at all times.
Never turn your back on an aggressive rooster in an open space. Some roosters interpret a turned back as an invitation to charge and spur you from behind. Always back away facing the bird if you need to create distance.
Carry a rooster facing backward to prevent beak pecking to your face and neck. Roosters have stronger beaks than hens and are more likely to use them when stressed.
For breed-specific temperament information, check our guides on Ameraucana rooster temperament, Brahma roosters, and Dark Brahma roosters. Our guide on pecking order problems and stopping bully hens also covers strategies for managing aggressive flock dynamics.
How to Tame Chickens So They Do Not Scratch: Prevention Is Better Than Technique
The best long-term solution to getting scratched is having chickens that genuinely enjoy being handled. A well-tamed chicken that trusts you will squat submissively when you approach, step onto your hand willingly, and sit calmly on your lap for minutes at a time.
No chasing. No panic. No scratches.
Here is how to build that trust at every life stage.
Start Young During the Chick Taming Window
Research from poultry behavioral studies confirms that repeated gentle handling in the first weeks after hatching significantly reduces fear of humans in adulthood. Chicks that are handled regularly show shorter tonic immobility duration as adults and voluntarily approach humans more readily.
In practical terms, this means brief daily handling sessions starting from day three of life pay enormous dividends months later.
Do not handle chicks excessively during the first 48 hours. They need that time to stabilize body temperature, learn to eat and drink, and adjust to their brooder environment. But from day three onward, pick up each chick for two to three minutes daily. Let it sit in your cupped hands. Talk softly. Let it explore your fingers.
If you are raising chicks right now, our bringing chicks home checklist covers everything you need for those first critical days.
The Teenager Phase: Do Not Give Up
Between roughly 6 and 16 weeks of age, chickens go through an awkward adolescent phase that frustrates many new chicken keepers. Previously cuddly chicks suddenly become skittish and flighty. They run when you reach for them. They act like they have never seen you before in their lives.
This is temporary. It is a completely normal developmental phase driven by hormonal changes and increasing awareness of their environment as potential prey animals.
The worst thing you can do is stop handling them entirely during this period. Continue daily contact, even if it is just sitting quietly in their space and offering treats from your hand. They will come around. Usually by 18 to 20 weeks, you will see the friendly personality return.
Taming Adult Chickens Is Harder but Absolutely Possible
If you have acquired adult chickens that were not handled as chicks, you can still build trust. It just takes longer and requires more patience. Plan on 4 to 8 weeks of daily effort before you see significant results.
Mealworms are the number one training tool. Nothing motivates a chicken faster than dried mealworms. Start by tossing them on the ground near the birds from several feet away. Over days, gradually reduce the distance until they are eating from your hand. Progress to having them step onto your lap for treats. Then practice gentle touches on the back while they eat.
Sitting quietly in the run works wonders. Spend 15 to 20 minutes daily just sitting in the run without chasing, grabbing, or even reaching for anyone. Read a book. Scroll your phone. Let them approach you on their own terms. Curiosity is a powerful force in chickens, and within a week most birds will be pecking at your shoelaces and hopping on your lap.
Use the nighttime roost visit as a taming accelerator. Go out every evening after dark, gently stroke each bird on the roost, and talk softly. This gets them used to your voice, your scent, and your touch in a zero-stress setting. After two weeks of nightly visits, you will notice a marked difference in daytime behavior.
Breed Matters: Some Chickens Are Naturally Easier to Handle
Not all breeds respond to handling the same way. Research from the University of Saskatchewan found that tonic immobility responses, which serve as a reliable measure of baseline fearfulness, differ significantly among chicken breeds. The variation is strongly linked to the breed’s history and intended use.
Breeds that have historically been exposed to intensive human contact, such as bantam or show breeds, tend to be significantly less fearful than breeds traditionally kept in free-range systems with minimal human interaction.
Easy to handle (low fear, calm temperament): Silkies, Buff Orpingtons, Cochins, Brahmas, Australorps, Sussex
Moderate handling difficulty: Plymouth Rocks, Wyandottes, Easter Eggers
Difficult or flighty (high fear responses): Leghorns, Fayoumis, Gamefowl, Hamburgs
Actionable advice: If you are choosing your first flock and want birds your whole family can handle comfortably, start with Buff Orpingtons or Silkies. Both breeds are known for tolerating and even seeking out human contact from a young age.
What About Baby Chicks That Want to Be Held All the Time?
Some chicks imprint strongly on their human handlers and demand to be held constantly. They peep loudly and insistently when put back in the brooder and settle immediately when scooped up. Some will even fall asleep in your cupped hands.
This is normal and actually a very good sign. It means the chick has bonded with you as a source of warmth and security, similar to how it would nestle under a mother hen. These imprinted chicks typically grow into the easiest, most personable, most handleable adult birds in your entire flock.
Allow it in moderation. Just make sure the chick returns to its heat source regularly to maintain proper body temperature. A chilled chick is a sick chick, no matter how adorable the snuggling is. Monitor that the chick is eating and drinking normally and not spending so much time in your hands that it misses meals.
Learn the full details about managing chick nutrition in our when to switch from starter to grower feed guide.
What to Do If a Chicken Scratches You: Wound Care That Protects Your Health
Even experienced chicken keepers get scratched occasionally. When it happens, take it seriously. This is not a minor inconvenience. There is a real infection risk that you need to address immediately.
Why Chicken Scratches Deserve Immediate Attention
According to the CDC, outbreaks of Salmonella linked to backyard poultry are reported every single year. This is not a rare occurrence.
The data from recent CDC investigation reports paints a clear picture. In 2025, a total of 559 people across 48 states were infected with outbreak strains of Salmonella linked to backyard poultry. Of the 413 people with available information, 125 (that is 30%) were hospitalized. Two deaths were reported.
Over the past decade, the CDC has tracked a total of 9,923 cases of human salmonellosis across multiple states linked to backyard poultry, and most of these involved multidrug-resistant strains of bacteria that are harder to treat with standard antibiotics.
These infections are not just from eating undercooked eggs. They come from direct contact with the birds, their feathers, their feet, their environment, and yes, from scratches and pecks that break the skin. A scratch creates an open wound and a direct entry point for bacteria that may be present on the chicken’s claws.
Step-by-Step Wound Care After a Chicken Scratch
Step 1: Wash immediately. Stop what you are doing. Go to a sink. Wash the scratch with soap and warm running water for at least 20 seconds. Do not wait until you are done with your chores. Do not tell yourself you will wash it later. Do it now.
Step 2: Apply antiseptic. Povidone-iodine (sold as Betadine) or chlorhexidine are both effective choices. According to clinical wound care guidance, gentle irrigation with water or a dilute povidone-iodine solution has been shown to significantly decrease the risk of bacterial infection from animal-related wounds.
Step 3: Apply antibiotic ointment and cover. Use a triple antibiotic ointment (such as Neosporin or a store-brand equivalent) and cover the scratch with a clean adhesive bandage or sterile gauze. Change the bandage daily and reapply ointment until the wound is fully closed.
Step 4: Monitor for 48 to 72 hours. Watch for these signs of infection: increasing redness around the wound, swelling, warmth to the touch, pus or cloudy drainage, red streaks extending from the wound, or fever.
Step 5: Seek medical attention when needed. According to CDC guidance, you should see a doctor and specifically tell them you were scratched by poultry if the bird appears sick or is acting unusually, if the wound is deep or serious, or if the wound shows any sign of infection. This matters because your doctor may need to test for specific poultry-associated bacteria and choose antibiotics accordingly.
Step 6: High-risk individuals should seek care for any scratch. If you are immunocompromised, over 65, pregnant, or a child under 5, get medical attention for any poultry scratch regardless of how minor it appears. These groups are significantly more vulnerable to serious Salmonella infection.
⚠️ Medical Disclaimer: This information is educational and does not replace professional medical advice. If a chicken scratch shows signs of infection, consult a healthcare provider immediately and inform them of the poultry exposure.
How to Set a Chicken Down Safely: The Step Everyone Forgets
I said it at the beginning and it is worth its own section: half of all scratches happen when putting the chicken down, not picking it up. This is the step that every other article on the internet ignores.
Here is exactly how to release a chicken without getting raked by those claws on the way down.
Step 1. Always crouch or bend all the way down to ground level. Your hands should be within a few inches of the ground before you begin releasing.
Step 2. Maintain wing control the entire way down. Keep your arm pinning the wings until the bird’s feet are solidly on the ground. Do not let go of the wings at chest height. That is exactly when the wild flapping and scratching happens.
Step 3. Let the bird feel the ground beneath its feet. Give it a second to register that it is on solid footing.
Step 4. Release the legs first, then the wings. This order is important. If you release the wings first, the bird flaps wildly before its feet are free, and those flapping wings drive the claws right into your hands and arms.
Step 5. Step back calmly. No sudden movements. Let the bird walk away at its own pace.
What you should never do: Never drop, toss, or simply open your arms and let a chicken fall from any height. A chicken that jumps or falls from chest height can suffer broken legs, damaged joints, or a bruised keel bone. And it will absolutely rake you with its claws on the way down.
Actionable tip: Practice the “ground-level release” every single time until it becomes automatic. After a week, you will not even think about it anymore. It becomes as natural as the pickup itself.
Frequently Asked Questions About Holding Chickens
How do you comfortably hold a chicken?
The football hold is the most comfortable position for both you and the chicken. Tuck the bird between your arm and rib cage, facing backward, with one hand supporting and controlling the legs. The bird feels secure against your warm body, wings cannot flap, and feet are controlled. This prevents scratches while keeping the chicken calm and relaxed. Most birds settle into this hold within 10 to 15 seconds.
Can you hold a chicken upside down?
No. You should never hold a chicken upside down. Chickens do not have a working diaphragm and rely on abdominal muscles and nine air sacs throughout their body for breathing. Inversion causes organs to press against the lungs, leading to respiratory distress. If the crop is full, the contents can be aspirated, causing pneumonia or death. What appears to be “calming” is actually tonic immobility, a fear-induced paralysis triggered when the bird believes it is about to die.
Is it okay to hold a chicken by its legs?
Briefly grasping both legs to catch a flighty bird, then immediately transitioning to a full supported hold within two to three seconds, is acceptable in emergencies. However, carrying a chicken dangling by its legs is dangerous and should be avoided. The poultry judge’s hold, where legs are secured between your fingers while your palm fully supports the body weight from below, is the correct way to control the legs safely.
How do you properly restrain a chicken for medical purposes?
For veterinary or medical situations, the towel wrap (the “chicken burrito”) is the safest restraint method. Wrap a towel around the bird’s body, pinning wings and legs, and cover the head to reduce visual stress. This prevents scratching, pecking, and flapping while allowing access to whatever body part needs examination or treatment. For brief routine restraint, the football hold or judge’s hold are both effective and faster to set up.
Why does my baby chick want to be held all the time?
Some chicks imprint on their human handlers and seek warmth, comfort, and security from being held, similar to how they would nestle under a mother hen in nature. This is completely normal and generally a sign of strong bonding. Allow it in moderation but always ensure the chick returns to its heat source regularly to maintain proper body temperature. These imprinted chicks usually grow into the friendliest, easiest-to-handle adult birds in your flock.
How do I stop a chicken from scratching me?
Control three things simultaneously: pin the wings to prevent flapping, support and secure the feet so they cannot kick, and keep the bird pressed close to your body. The vast majority of scratches come from panicked kicking, not aggression. The single fastest fix is supporting the feet. The moment you give a chicken’s feet something to grip, the scratching stops almost instantly. Wearing long sleeves or a thick jacket provides a reliable backup layer of protection for the occasional slip.
What breeds are easiest to hold?
Silkies are widely considered the most handleable breed in the world, followed closely by Buff Orpingtons, Cochins, Brahmas, and Australorps. These breeds have been selectively bred for calm temperaments over many generations and tolerate human contact exceptionally well. Avoid Leghorns, Fayoumis, and Gamefowl if easy handling is a priority, as they tend to be flighty, reactive, and resistant to being held.
Do chickens like being petted?
Many tame chickens genuinely enjoy being stroked, particularly along the back and sides of the neck, always with the feather grain. Chickens that crouch or squat when you approach are showing a submissive posture that often indicates comfort with your presence. However, not every chicken enjoys physical contact. Respect individual personalities. If a bird consistently struggles and tries to escape when held, it may simply not be a “lap chicken,” and that is perfectly fine. Our guide on why chickens squat when you pet them explains this behavior in detail.
Key Takeaways: Your Quick-Reference Summary
Always do this:
- Control wings, feet, and body position simultaneously and you will eliminate virtually all scratches
- Use the football hold as your default technique for everyday handling
- Support the feet immediately because an unsupported bird panics and kicks every time
- Set birds down at ground level because half of all scratches happen during release
- Start taming early and handle your birds often because prevention always beats technique
- Wash your hands and any scratches immediately with soap and water for at least 20 seconds after handling any poultry
Never do this:
- Never hold a chicken upside down because it causes respiratory distress and terror, not calm
- Never squeeze a chicken because birds lack a functional diaphragm and can suffocate
- Never grab by the wings, neck, or a single leg because all of these cause pain and injury
Gear up properly:
- Long sleeves and sturdy trousers at minimum
- Leather gloves for roosters and untamed birds
- Dedicated coop shoes that never come inside
- A towel always ready for medical situations
Want to know which chicken breeds are easiest to handle and best for families? Check out our easiest chicken breeds for beginners and our comprehensive Buff Orpington guide.
If you are just starting out and want to avoid the biggest rookie errors, our article on mistakes every first-time chicken keeper makes covers the lessons I wish someone had told me on day one.
This article draws on guidance from the CDC’s Backyard Poultry safety resources, RSPCA Australia’s chicken handling guidelines, peer-reviewed research on tonic immobility and chicken fear responses, and hands-on experience raising backyard chickens. All health and safety information was verified against current published guidance as of March 2026.

Oladepo Babatunde is the founder of ChickenStarter.com. He is a backyard chicken keeper and educator who specializes in helping beginners raise healthy flocks, particularly in warm climates. His expertise comes from years of hands-on experience building coops, treating common chicken ailments, and solving flock management issues. His own happy hens are a testament to his methods, laying 25-30 eggs weekly.